Table of Contents
Advertisement
Available languages
Available languages
Advertisement
Chapters
Table of Contents

Related Manuals for Beko WMB 60811 PL FM


Summary of Contents for Beko WMB 60811 PL FM
- Page 1 Washing Machine WMB 60811 PL FM Pralka automatyczna...
- Page 2 Therefore, please read the entire user manual carefully before using the product and keep it as a reference for future use. In case of transferring the product to someone else, give the manual as well.
-
Page 3: Table Of Contents
Technical specifications ... . . 5 table ......20 Auxiliary function selection . -
Page 4: Your Washing Machine
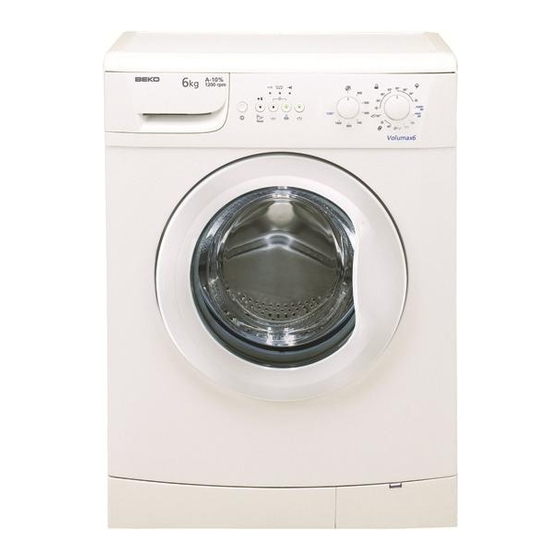
Your washing machine Overview 1- Power cable 5- Adjustable feet 2- Top panel 6- Loading door 3- Control panel 7- Detergent drawer 4- Filter cap 8- Drain hose... -
Page 5: Technical Specifications
1.00 Off-mode power (W) 0.25 Technical specifications may be changed without prior notice to improve the quality of the product. Figures in this manual are schematic and may not match the product exactly. Values stated on the product labels or in the documentation accompanying it are obtained in laboratory conditions in accordance with the relevant standards. -
Page 6: Important Safety Instructions
• Always have the installation and • If the product has a failure, it should not repairing procedures carried out be operated unless it is repaired by the by the Authorized Service Agent. Authorized Service Agent. There is the... - Page 7 Use child lock to prevent children from intervening with the product. • Do not forget to close the loading door when leaving the room where the product is located. • Store all detergents and additives in a safe place away from the reach of the children.
-
Page 8: Installation
1. Loosen all the bolts with a spanner until • Place the machine on a rigid floor. Do they rotate freely (C). not place it on a long pile rug or similar surfaces. • Total weight of the washing machine... -
Page 9: Connecting Water Supply
• The hose should be attached to a on the product. Red hose (left) (max. height of at least 40 cm, and 100 cm at 90 ºC) is for hot water inlet, blue hose most. (right) (max. 25 ºC) is for cold water... -
Page 10: Adjusting The Feet
1. Loosen the lock nuts on the feet by discharge, do not immerse the hose hand. end into the dirty water or drive it in the 2. Adjust the feet until the product stands drain more than 15 cm. If it is too long, level and balanced. -
Page 11: First Use
II. Dry the and break the locking mechanism of the inside of the bellow with a clean piece of loading door so that it will be nonfunctional cloth after the programme has come to an before disposing of the product. -
Page 12: Preparation
Hang without Can be ironed with spinning hot iron heavily soiled or stained. • If you plan to dry your laundry in a dryer, select the highest spin speed recommended during washing Non machine-washable Do not wash process. •... -
Page 13: Correct Load Capacity
The machine automatically adjusts the amount of water according to the weight of the loaded laundry. Follow the information in the “Programme and consumption table”. When overloaded, machine’s washing performance will drop. Moreover, noise and vibration problems may occur. -
Page 14: Using Detergent And Softener
- (II) for main wash specifically for washing machines. – (III) for softener Do not use soap powder. – (*) in addition, there is siphon piece in the Adjusting detergent amount softener compartment. The amount of washing detergent to be used depends on the amount of laundry, the degree of soiling and water hardness. - Page 15 Use the tablet or gel detergent without selecting the prewash function. Using starch • Add liquid starch, powder starch or the dyestuff into the softener compartment as instructed on the package.
-
Page 16: Tips For Efficient Washing
Use detergents and the stains that without bleach. -
Page 17: Operating The Product
3 - Temperature Adjustment button* 4 - Start / Pause / Cancel button 5 - Auxiliary Function buttons 6 - On / Off button 7 - Programme Follow-up indicator 8 - Loading Door light* * Varies depending on the model of your machine. -
Page 18: Preparing The Machine
1. Make sure that the hoses are duration may automatically be shortened connected tightly. during later stages of the programme if you 2. Plug in your machine. wash less amount (e.g. ½ capacity or less) 3. Turn the tap on completely. -
Page 19: Temperature Selection
Start / Pause / Cancel button. First, the machine will drain the water inside of it. Then, it will spin the laundry with the set spin speed and drain the water coming out of them. -
Page 20: Programme Selection And Consumption Table
Water and power consumption may vary subject to the changes in water pressure, water hardness and temperature, ambient temperature, type and amount of laundry, selection of auxiliary functions and spin speed, and changes in electric voltage. The auxiliary functions in the table may vary according to the model of your machine. -
Page 21: Auxiliary Function Selection
In models equipped with Spin Speed Adjustment button, select the Spin Speed Select the desired auxiliary functions before and press Start / Pause / Cancel button if starting the programme. Furthermore, you you want to spin the laundry held in water. -
Page 22: Progress Of Programme
3. Open the Loading Door and add or door of the machine that prevents opening take out the laundry. of the door in cases when the water level is 4. Close the Loading Door. unsuitable. When machine is switched to Pause mode, it checks the level of the water inside. -
Page 23: Canceling The Programme
3 seconds to cancel the current programme. At the end of this period, machine can drain the water inside it or can take in and drain water up to 3 times to cool down the laundry. Washing and End lights turn on. -
Page 24: Maintenance And Cleaning
Cleaning the water intake filters and may cause unpleasant odours and There is a filter at the end of each water washing complaints. To avoid this, use intake valve at the rear of the machine the Drum Cleaning programme. -
Page 25: Draining Remaining Water And Cleaning The Pump Filter
2. Remove the nuts of the water intake hoses to access the filters on the water intake valves. Clean them with an If the filter cap is one piece, pull the cap appropriate brush. If the filters are too from both sides at the top to open. - Page 26 6. If the filter cap is composed of two pieces, close the filter cap by pressing on the tab. If it is one piece, seat the tabs in the lower part into their places first, and then press the upper part to...
-
Page 27: Troubleshooting
• Some water might have remained in the product due to the quality control processes in the production. >>> This is not a failure; water is not harmful to the machine. There is water leaking from the bottom of the washing machine. - Page 28 Door lock is activated because of the water level in the machine. >>> Drain the water by running the Pump or Spin programme. • Machine is heating up the water or it is at the spinning cycle. >>> Wait until the programme completes. •...
- Page 29 • Washing was made at low temperatures for a long time over a long period of time. >>> Select the proper temperature for the laundry to be washed. •...
- Page 30 • Excessive laundry was loaded in. >>> Do not load the machine in excess. • Detergent in use is damp. >>> Keep detergents closed in an environment free of humidity and do not expose them to excessive temperatures. • A higher temperature is selected. >>> Select the proper programme and temperature according to the type and soiling degree of the laundry.
- Page 31 Detergent is put in the wrong compartment. >>> Put the detergent in the correct compartment. • Softener is being taken early. >>> There may be problem in the valves or in the detergent dispenser. Call the Authorized Service Agent. •...
- Page 32 Foam is overflowing from the detergent drawer. • Too much detergent is used. >>> Mix 1 tablespoonful softener and ½ l water and pour into the main wash compartment of the detergent drawer. Put detergent into the machine suitable for the programmes and maximum loads indicated in the “Programme and consumption table”.
- Page 34 ścisłej kontroli jakości, służyć Wam będzie jak najlepiej. Prosimy zatem przed jej uruchomieniem uważnie przeczytać całą instrukcje obsługi i zachować ją do wglądu w przyszłości. Jeśli kiedyś przekażecie tę pralkę komu innemu, wraz z nią oddajcie także tę instrukcję.
-
Page 35: Oto Wasza Pralka
Co można zrobić, aby oszczędzać energię......44 Sortowanie prania ....44 Przygotowanie rzeczy do prania . -
Page 36: Przegląd Ogólny
Oto wasza pralka Przegląd ogólny 1 - Przewód zasilający 5- Nastawiane nóżki 2- Panel górny 6- Drzwiczki 3- Panel sterowania 7- Szuflada na detergent 4- Pokrywka filtru 8- Wąż spustowy... -
Page 37: Dane Techniczne
0.25 Dane techniczne mogą być zmieniane bez uprzedzenia w celu poprawy jakości tego wyrobu. Rysunki w tej instrukcji są schematyczne i mogą nie w pełni odpowiadać danemu modelowi pralki. Wartości podane na naklejkach lub w dołączonej dokumentacji uzyskano w warunkach laboratoryjnych zgodnie z odnośnymi normami. Wartości te mogą się... -
Page 38: Ważne Instrukcje Zachowania Bezpieczeństwa
Nigdy nie otwieraj drzwiczek do zmysłowymi lub umysłowymi oraz wkładania prania ani nie wyjmuj filtru, dla osób niewykształcanych i gdy w bębnie nadal znajduje się woda. niedoświadczonych (w tym dzieci) W przeciwnym razie grozi zalanie wodą bez nadzoru osoby odpowiedzialnej i poparzenie nią. -
Page 39: Bezpieczeństwo Dzieci
• Urządzenie to wolno stosować tylko do prania i płukania tkanin posiadających właściwe oznaczenie. • Producent odmawia jakiejkolwiek odpowiedzialności z tytułu nieprawidłowego użytkowania lub transportu. Bezpieczeństwo dzieci • Urządzenia elektryczne są... -
Page 40: Instalacja
Instalacja O zainstalowanie pralki zwróć się do • Zachowaj co najmniej 1 cm odstępu od najbliższego autoryzowanego agenta krawędzi innych mebli. serwisowego. Aby przygotować pralkę Usuwanie wzmocnienia do użytkowania przed wezwaniem opakowania autoryzowanego agenta serwisowego Przechyl pralkę do tyłu, aby usunąć... -
Page 41: Przyłączanie Zasilania W Wodę
Do nowej pralki nie zakładaj starych lub używanych węży wlotu wody. Może to spowodować zaplamienie prania. 1. Podłącz specjalne węże dostarczone wraz z pralką do wlotów dopływu wody w pralce. -
Page 42: Nastawianie Nóżek
15 cm. Jeśli wąż jest zbyt długi, skróć go. • Końcówka węża nie może być zagięta ani nadepnięta, a wąż... -
Page 43: Uruchomienie Pralki
Napięcie oraz dopuszczalne Pozbywanie się materiałów bezpieczniki podano w rozdziale “Dane opakowaniowych techniczne”. Jeśli prąd zabezpieczenia w domu jest mniejszy niż 16 A, zleć Materiały opakowaniowe są niebezpieczne wykwalifikowanemu elektrykowi dla dzieci. Należy trzymać je w zainstalowanie bezpiecznika 16 A. -
Page 44: Przygotowanie
Temperatura naturalnemu i energooszczędny sposób. dla delikatnych tkanin wody piorącej • Używaj pralki wykorzystując pełną pojemność dopuszczalną w wybranym programie ale jej nie przeładowuj, patrz "Tabela programów i zużycia". Nie używaj Można użyć • Zawsze postępuj zgodnie z instrukcjami wybielacza! wybielacza na opakowaniu detergentu. -
Page 45: Prawidłowa Ilość Wsadu
Kurz i proszki z rzeczy do prania mogą sie odkładać na wewnętrznych częściach pralki i z czasem spowodować jej uszkodzenie. Prawidłowa ilość wsadu Maksymalna ładowność zależy od rodzaju tkaniny, stopnia zabrudzenia i wybranego programu prania. Pralka automatycznie dostosowuje ilość... -
Page 46: Dodaj Detergent I Środek Zmiękczający
• Odzież delikatna pierz tylko w Szuflada na detergent detergentach specjalnych (detergenty Szuflada na detergent składa się z trzech w płynie, szampon do wełny, itp.) części: używanych wyłącznie do prania rzeczy - (I) do prania wstępnego delikatnych. - Page 47 Nie wylewaj a pralka nie jest wyposażona w środka wybielającego wprost na rzeczy specjalny kubek na detergent w płynie, do prania i nie stosuj go do rzeczy włóż detergent w żelu do komory kolorowych. na detergent do prania głównego w •...
- Page 48 "II" w szufladzie na detergent i odczekaj, aż detergent spłynie, gdy pralka pobiera wodę. Dodaj środek wybielający z tej samej komory podczas gdy maszyna nadal pobiera wodę.
-
Page 49: Rady Dotyczące Skutecznego Prania
Do usuwania ciemnej odzieży płynie. Wełna i zalecanych do (trudne do plam z gliny i ziemi należy używać jedwab muszą prania bardzo usunięcia plamy oraz wrażliwych na w dawkach być prane w zabrudzonej odzieży. -
Page 50: Obsługa Pralki
Obsługa pralki Panel sterowania 1 - Pokrętło wyboru programów 2 - Przycisk nastawiania prędkości wirowania* 3 - Przycisk nastawiania temperatury* 4 - Przycisk Start/Pause/Cancel [Start/Zatrzymaj/Anuluj] 5 - Przyciski funkcji pomocniczych 6 - Przycisk On/Off [Wł./Wył.] 7 - Wskaźnik śledzenia programu 8 - Lampka drzwiczek * Zależnie od modelu pralki. -
Page 51: Przygotowanie Pralki
Przygotowanie pralki • Bawełna 1. Upewnij się, że węże są ściśle Normalnie zabrudzone tkaniny bawełniane zamocowane. i lniane można prać w tym programie 2. Włącz pralkę. przy największej oszczędności energii i 3. Całkowicie odkręć kran. wody w porównaniu z innymi programami 4. -
Page 52: Wybór Temperatury
W modelach wyposażonych w przycisk wełnianej/delikatnej z metką “nie nadaje się regulacji temperatury, można go używać do do prania w pralce”, dla której zaleca się prania odzieży w pożądanej temperaturze. pranie ręczne. Pierze bardzo łagodnie, aby Aby nie uszkodzić odzieży, nie nie uszkodzić... -
Page 53: Tabela Wyboru Programów I Zużycia
Etykieta Programu Energetycznego - : Maksymalne ilości prania podano w opisie programów. Zużycie wody i energii może różnić się zależnie od ciśnienia wody, jej twardości oraz temperatury, temperatury otoczenia, typu i ilości rzeczy do prania, wyboru funkcji pomocniczych i prędkości wirowania oraz wahań napięcia w sieci elektrycznej. -
Page 54: Wybór Funkcji Pomocniczych
Użyj tej funkcji, jeśli chcesz prać w zimnej Nie można wybrać funkcji pomocniczej, wodzie. która nie jest zgodna z programem. • Bez wirowania (Patrz "Tabela programów i zużycia") -
Page 55: Przebieg Programu
2. Odczekaj, aż będzie można otworzyć wirowania, uruchomiona być może drzwiczki. funkcja zatrzymania płukania lub być Jeśli w ciągu 1 - 2 minut lampka może uruchomiony został system drzwiczek nie zaświeci się, oznacza to, wykrywania nierównomiernego że poziom wody w pralce jest zbyt niski obciążenia skutkiem nierównomiernego... -
Page 56: Anulowanie Programu
Naciśnij i na 3 sekundy przytrzymaj przycisk Start/Wstrzymaj/Anuluj, aby anulować bieżący program. Po zakończeniu tego czasu, pralka może spuścić wodę z jej wnętrza lub nabierać i spuszczać ją trzy razy, aby ostudzić pranie. Lampki prania i końca programu włączają się. -
Page 57: Konserwacja I Czyszczenie
II). Jeśli środek przeciw osadzaniu się Czyszczenie szuflady kamienia jest w formie tabletek, włóż na detergent tylko jedna tabletkę do komory nr II. Po Aby zapobiec zbieraniu się detergentu ukończeniu działania programu wytrzyj do z upływem czasu, z regularną... -
Page 58: Spuszczanie Pozostałej Wody I Czyszczenie Filtra Pompy
Oczyść je odpowiednią szczoteczką. Jeśli filtry są Jeśli pokrywka filtru jest jednoczęściowa, bardzo brudne, wyjmij je szczypcami i pociągnij za nią z obu stron na górze aby ją oczyścić. otworzyć. 3. Filtry na płaskim końcu węży dopływu wody należy wyjąć... - Page 59 Zawsze miej pod ręką ściereczkę do zbierania rozlanej wody. c. Gdy w pralce nie ma już wody, całkiem wyjmij filtr obracając go. 4. Usuń wszelkie pozostałości z wnętrza filtru, a także włókna, które mogą...
-
Page 60: Usuwanie Problemów
Woda w pralce • Ze względu na proces kontroli jakości w trakcie produkcji we wnętrzu pralki może pozostać trochę wody. >>> Nie jest to błąd, woda ta nie szkodzi pralce. Spod pralki wycieka woda. • Być może jest problem z wężami lub filtrem pompy. >>> Upewnij się, że uszczelki w wężach dopływu wody są... - Page 61 Czas prania jest dłuższy niż czas podany w instrukcji obsługi. • Niskie ciśnienie wody. >>> Pralka czeka aż napełni się odpowiednią ilością wody aby zapobiec pogorszeniu się jakości prania z powodu mniejszej ilości wody. A zatem czas prania przedłuża się.
- Page 62 • Zbyt mało detergentu użyto z twardą wodą. >>> Użycie niedostatecznej ilości detergentu z twardą wodą sprawia, ze brud przywiera do tkaniny i z czasem tkaniny od tego szarzeją. Taką szarość trudno jest wyeliminować. Użyj zalecanej ilości detergentu odpowiednio do twardości wody i do rodzaju prania.
- Page 63 • Ilość, rodzaj i warunki przechowywania użytego detergentu mogą być niewłaściwe.. >>> Użyj detergentu właściwego dla danej pralki i rzeczy do prania. Trzymaj detergent zamknięty w środowisku wolnym od wilgoci i nie narażaj go na działanie nadmiernych temperatur. • Detergent podano do niewłaściwej komory. >>> Jeżeli detergent został...
- Page 64 Nie należy przechowywać detergentów w miejscach, w których panuje nadmierna temperatura. • Jakieś rzeczy do prania o siatkowej fakturze, np. tiul, mogą tworzyć zbyt wiele piany. >>> Użyj mniejszej ilości detergentu do prania takich rzeczy. •...
- Page 65 Z szuflady na detergent wypływa piana. • Użyto zbyt wiele detergentu. >>> Zmieszaj 1 łyżkę środka zmiękczającego z 1/2 litra wody i wlej do komory prania głównego szuflady na detergent. Włóż do pralki detergent odpowiedni dla danych programów i maksymalnych ilości prania wskazanych w "Tabeli programów i zużycia".