Table of Contents
Advertisement
Available languages
Available languages
Quick Links
Advertisement
Chapters
Table of Contents

Related Manuals for Kodak ADVANTIX C650


Summary of Contents for Kodak ADVANTIX C650
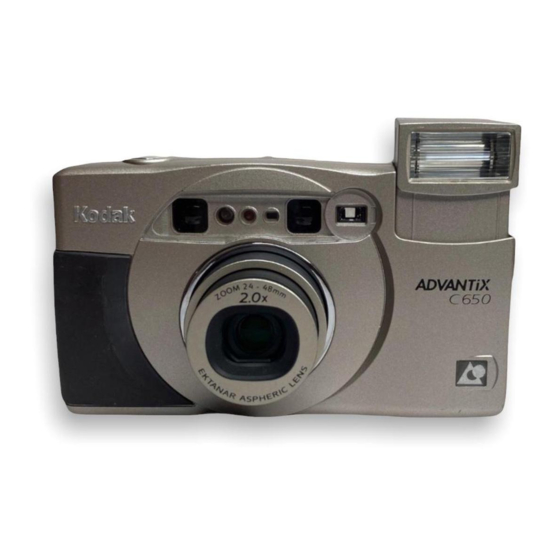
- Page 1 Kodak C650 Zoom Camera ENGLISH/ESPAÑOL/FRANÇAIS...
- Page 2 Camera Identification (16) (15) (14) (13) (12) (11) (10)
- Page 3 Camera Identification (18) (19) (17) (20) (25) (21) (24) (22) (23)
-
Page 4: Lcd Panel
LCD Panel (26) (27) (28) (29) AUTO (36) (35) (30) (34) (31) (33) (32) - Page 5 (2) this device must accept any interference received, including interference that may cause undesired operation. NOTE: Your model camera has been tested and found to comply with the limits for a Class B digital device, pursuant to Part 15 of the FCC Rules. These limits provide reasonable protection against interference in residential use.
- Page 6 Monday through Friday at 1 (800) 242-2424. Kodak (Canada only) from 8:00 a.m. to 5:00 p.m. (Eastern time) Monday through Friday at 1 (800) 465-6325, ext. 36100; for the Toronto area, call (416) 766-8233, ext. 36100. When you call, please have your camera available.
- Page 7 Date and time imprinting providing you with the best possible results. • You can choose to have date and time information printed on the back of your Safety-interlock film door prints. See your photofinisher for a full description of available services.
- Page 8 Look for this logo to be certain that the film you buy is made for this camera. Look for this logo to select a certified photofinisher for developing your film and to assure that you get all the features of the Advanced Photo System.
-
Page 9: Table Of Contents
INFINITY-FOCUS MODES ......13 ATTACHING THE STRAP ........ 6 Red-eye reduction ........13 LOADING THE BATTERY ........ 6 Auto flash without red-eye reduction ..14 Low-battery indicator ........7 Fill flash ............. 14 Battery tips ..........7 Off flash ............. 15 Power shut-off .......... -
Page 10: Camera Identification
CAMERA IDENTIFICATION (Unfold the front and back cover flaps of manual for camera diagrams.) ZOOM DIAL LEVER OFF SWITCH SELECT BUTTON FILM DOOR LATCH ENTER BUTTON STRAP POST FILM REWIND BUTTON FILM CHAMBER LCD PANEL FILM DOOR SELF TIMER BUTTON... -
Page 11: Attaching The Strap
ATTACHING THE STRAP LOADING THE BATTERY 1. Insert the shorter looped end of the This camera uses one 3-volt lithium strap behind the (22). KODAK K123LA (or equivalent) Battery STRAP POST that supplies power for all camera operations. 1. Open the... -
Page 12: Low-Battery Indicator
LCD PANEL the LCD panel will display just the date/ • none of the indicators appears on the time) if it is not operated for more than LCD panel and the 3 minutes. You can press any of the SHUTTER (16) cannot be released. -
Page 13: Loading The Film
• Do not force the film cassette into when the film chamber is empty or the film chamber. the film in the camera is completely 3. Close the film door to start the auto- rewound into the film cassette. film advance. The (30) -
Page 14: Taking Pictures
Panoramic (P) pictures on the same (19). For a sharp VIEWFINDER EYEPIECE film cassette. Your photo-processing cost picture, stand at least 2 ft (0.6 m) from may be based on the format size(s) that your subject. you use to expose the film. -
Page 15: Typical Print Sizes (Formats)
VIEWFINDER NOTE: Your photofinisher will generally provide 2. Partially depress and hold the 4 x 6, 4 x 7 , and 4 x 11.5 in. (102 x 152, 102 x 178, and (16) to lock the SHUTTER BUTTON 102 x 292.7 mm) sizes. Some local printers may offer focus position. -
Page 16: Using The Zoom Lens
When you turn 2 ft (0.6 m). the camera on, it is initially set to the • Take pictures at the subject’s level. wide-angle position. Kneel down to take pictures of children 1. -
Page 17: Taking Flash Pictures
TAKING FLASH PICTURES 4. Keep the subject within the In dim light, such as indoors or outdoors distance range in heavy shade, or on dark overcast days, for the speed of you need flash. Your camera features an film in your... -
Page 18: Selecting The Flash And Infinity-Focus Modes
With the help of the pop-up fill flash, off-flash, infinity-focus, and flash and by following the instructions night-view modes. -
Page 19: Auto Flash Without Red-Eye Reduction
(16). When the BUTTON FLASH CAMERA depress the shutter button to take (18) glows green, fully READY LAMP the picture. depress the shutter button to take the picture. • The camera will now default to the auto-flash mode without red-eye reduction. -
Page 20: Off Flash
Off flash Infinity focus When you do not want to use the flash, Capture sharp, distant scenery at any especially indoors where flash is zoom position (for daylight and outdoor prohibited, such as in theaters and use only). museums, or when you want to take 1. -
Page 21: Night-View
1. Use the (25) to attach TRIPOD SOCKET sunset or at night. Use a tripod or place the camera to a tripod or place it on the camera on another firm support, and another firm support. -
Page 22: Date And Time Imprinting
2. Push the (21) up. FILM DOOR LATCH select • The motor will run for a brief time, desired date then the film door will open. format. 3. Remove the film cassette from the 2. Press the camera and reload with new KODAK select button ADVANTIX Film. -
Page 23: Manual Rewind
Manual rewind CARING FOR YOUR CAMERA If you don’t want to take pictures on the 1. Protect the camera from dust, entire film, you can manually activate the moisture, sudden impact, and automatic rewind. excessive heat. 1. Gently press the... -
Page 24: Troubleshooting
Press any control button to awaken camera Camera turned off Turn on/off switch ON Film cassette does Loaded partially exposed ( ) Load only new film ( ) not fit completely exposed ( ), or processed into the camera into the film chamber;... -
Page 25: Specifications
Main power: one 3 V lithium KODAK K123LA (or equivalent) Battery Dimensions: 4.5 x 2.5 x 1.3 in. (114 x 64 x 34 mm) Weight: 6.9 oz (195 g) without film and battery Kodak, Sensalite, Advantix, and the Advanced Photo System symbol and logotype are trademarks. - Page 26 BESOIN D’AIDE POUR UTILISER VOTRE APPAREIL-PHOTO? Visitez notre site Web à l’adresse http://www.kodak.com. ou appelez : Kodak (Canada seulement) du lundi au vendredi, de 8 h à 17 h (heure de l’Est) au numéro 1 800 465-6325, poste 36100. Dans la région de Toronto, composez le (416) 766-8233, poste 36100.
- Page 27 APPAREIL-PHOTO Choix de trois formats Échange d’information pour l’amélioration de la qualité de • Vous avez le choix de trois formats l’image différents : classique (C), groupe (H) ou panoramique (P), pour chacune des • Votre appareil est doté de la fonction photos d’une même cassette de film.
- Page 28 Ce symbole sur l’emballage de film vous garantit qu’il est compatible avec cet appareil-photo. Assurez-vous que le laboratoire de traitement auquel vous confiez vos films affiche ce symbole; vous profiterez ainsi de toutes les caractéristiques du système Advanced Photo System.
- Page 29 UTILISATION DU RETARDATEUR ....37 Formats des photos ........30 Mémorisation de la mise au point ....30 IMPRESSION DE LA DATE ET DE L’HEURE ..38 Utilisation de l’objectif zoom ...... 31 Réglage de la date et de l’heure ....38 Conseils pour prendre de RETRAIT DU FILM ........
-
Page 30: Description De L'appareil-Photo
DESCRIPTION DE L’APPAREIL-PHOTO (Pour consulter les schémas de l’appareil, ouvrez les rabats des couvertures recto et verso de ce manuel) BARILLET DU ZOOM OCULAIRE DU VISEUR BOUTON DE SÉLECTION INTERRUPTEUR MARCHE ARRÊT BOUTON DE SAISIE LOQUET DU COMPARTIMENT DU FILM... -
Page 31: Fixation De La Dragonne
FIXATION DE LA DRAGONNE INSTALLATION DE LA PILE 1. Enfilez d’abord la petite boucle de la Cet appareil-photo utilise 1 Pile au dragonne sous la lithium KODAK K123LA (ou l’équivalent) TIGE DE LA (22). qui fournit l’alimentation nécessaire à DRAGONNE toutes les fonctions de l’appareil. -
Page 32: Indicateur De Pile Faible
• Lisez le mode d’emploi et observez les mises en garde fournies par le fabricant des piles. • Gardez les piles hors de la portée des enfants. • N’essayez pas de démonter, de recharger ou de court-circuiter les piles, ou de les exposer à... -
Page 33: Chargement Du Film
COUVERCLE DU (24). COMPARTIMENT DU FILM • N’exercez pas de pression • Le couvercle ne s’ouvrira que si le excessive pour insérer la cassette compartiment du film est vide ou si le dans le compartiment du film film qu’il contient est complètement 3. -
Page 34: Pour Prendre Des Photos
POUR PRENDRE DES PHOTOS (C, H ou P). Le cadre du viseur s’ajustera pour délimiter la prise de vue Vous pouvez prendre des photos de sélectionnée. formats classique (C), groupe/HDTV (H)* 3. Cadrez votre sujet en regardant dans et panoramique (P) sur la même cassette l’... -
Page 35: Formats Des Photos
Classique Groupe (HDTV) Panoramique MISE AU POINT 88,9 mm x 127 mm ou 88,9 mm x 152 mm ou 88,9 mm x 216 mm à 102 mm x 152 mm 102 mm x 178 mm 102 mm x 292,7 mm... -
Page 36: Utilisation De L'objectif Zoom
«grand-angulaire» après environ appareil-photo vous permet de choisir la 3 minutes longueur focale de l’objectif convenant le mieux à la situation de prise de vue. Conseils pour prendre de Lorsque vous mettez l’appareil sous meilleures photos tension, la longueur focale est réglée par défaut en position grand-angulaire. -
Page 37: Pour Prendre Des Photos Au Flash
(2 pi à 53 pi) (2 pi à 28 pi) le déclencheur pour prendre la photo. 1 600 0,6 m à 22,6 m 0,6 m à 12,2 m (2 pi à 74 pi) (2 pi à 40 pi) -
Page 38: Sélection Des Modes Flash Et Mise Au Point À L'infini
Outre le mode flash automatique avec certains animaux) peuvent réfléchir le flash réduction des yeux rouges, vous pouvez et ainsi produire un éclat rouge sur les choisir les modes flash automatique photos. Cet appareil-photo est doté d’un sans réduction des yeux rouges, flash flash automatique avec option de réduction... -
Page 39: Flash Automatique Sans Réduction Des Yeux Rouges
Flash automatique sans 4. Demandez ensuite à votre sujet de réduction des yeux rouges regarder bien en face le TÉMOIN DE (14). RÉDUCTION DES YEUX ROUGES Utilisez ce mode pour prendre des photos 5. Enfoncez alors partiellement le sans personnages. -
Page 40: Flash D'appoint
Flash d’appoint Flash désactivé À l’intérieur ou à l’extérieur, la lumière vive Lorsque vous ne voulez pas utiliser le projetée sur des sujets éclairés à contre- flash, notamment à l’intérieur dans les jour peut créer des ombres marquées (en endroits où on l’interdit (comme les particulier sur les visages). -
Page 41: Mise Au Point À L'infini
Saisissez nettement des scènes permettre de prendre de superbes photos éloignées, et ce, à n’importe quelle de gens au coucher du soleil ou en position zoom (seulement en lumière du soirée. Servez-vous d’un trépied ou jour et à l’extérieur). -
Page 42: Utilisation Du Retardateur
à rebours. prendre la photo. • Pour annuler le mode retardateur avant que la photo ne soit prise, il suffit de mettre l’appareil-photo hors UTILISATION DU tension. RETARDATEUR •... -
Page 43: Impression De La Date Et De L'heure
(2) de façon successive SÉLECTION Les appareils-photo traditionnels pour choisir le format de date souhaité. impriment la date et l’heure de la photo 2. Appuyez de directement sur le film. Votre appareil nouveau sur utilise plutôt la bande magnétique du le bouton de film pour y enregistrer les données de... -
Page 44: Retrait Du Film
• Lorsque le moteur s’arrête, le (30) 2. Poursuivez avec les étapes 1 à 3 de la COMPTEUR DE POSES indique «0». section Rembobinage automatique . 2. Soulevez le... -
Page 45: Entretien De Votre Appareil-Photo
2. Si l’objectif est sale, placez-le devant votre bouche, puis expirez légèrement pour former un léger brouillard; nettoyez ensuite à l’aide d’un linge doux, sans charpie, ou d’un tissu nettoyant pour objectif. -
Page 46: Dépannage
Le film que vous tentez de Chargez uniquement de s’insère pas dans le charger dans l’appareil- nouveaux films ( ) dans compartiment du film; le photo est déjà exposé ( ), l’appareil-photo. couvercle du compartiment. partiellement expose ( ) ou traité ( ). -
Page 47: Caractéristiques
Flash : Flash intégré escamotable KODAK SENSALITE Portée du flash (200 ISO) :Grand-angulaire : 0,6 m à 8,2 m (2 pi à 27 pi) Téléobjectif : 0,6 m à 4,3 m (2 pi à 14 pi) f /4,5 à f /8,6... - Page 48 Kodak (en los Estados Unidos solamente), llamada sin cargo al número 1 (800) 242-2424, de lunes a viernes de 9:00 a.m. a 7:00 p.m. (hora del este). Kodak (solamente en el Canadá) , llamada sin cargo al número 1 (800) 465-6325, extensión 36100, de lunes a viernes de 8:00 a.m.
- Page 49 FCC. Estas limitaciones proveen una protección razonable en contra de la interferencia que se encuentra en uso residencial. La cámara genera, usa, y puede emitir energía de frecuencia radial y si no es usada de acuerdo con las instrucciones, puede causar interferencia a comunicaciones de radio.
- Page 50 Busque este logo para asegurarse que la película que usted compre esté hecha para esta cámara. Busque este logo para seleccionar un servicio de fotoacabado certificado para revelar su rollo y para asegurarse de aprovechar todos los beneficios del Advanced Photo System.
- Page 51 Vea a su servicio de Traba de seguridad en la puerta del fotoacabado para una descripción total compartimiento de película...
- Page 52 DISPARADOR AUTOMÁTICO ..... 59 Tamaños típicos de impresión de fotografías (formatos) ......53 COMO IMPRIMIR LA FECHA Y HORA ..60 Como usar el cerrojo de enfoque ....53 Como fijar la fecha y hora ......60 Como usar el lente de zoom ...... 54 COMO DESCARGAR LA PELÍCULA ....
-
Page 53: Panel Lcd
IDENTIFICACIÓN DE LA CÁMARA (Abra la cubierta del frente y la de atrás de este manual para ver los diagramas de la cámara) PALANCA DEL DISCO SELECTOR INTERRUPTOR DE ENCENDER APAGAR DEL ZOOM SEGURO DE LA PUERTA DEL BOTÓN DE SELECCIÓN COMPARTIMIENTO DE PELÍCULA... -
Page 54: Como Ajustar La Correa De La Cámara
COMO CARGAR LA BATERÍA LA CÁMARA Esta cámara utiliza una batería de litio de 3 voltios KODAK K123LA (o su 1. Pase el extremo corto de la correa por equivalente) que proporcionan la energía detrás de la PRESILLA DE LA necesaria para todas las funciones de (22). -
Page 55: Indicador De Batería Débil
(5) o PANEL LCD la energía de la batería (el lente • ninguno de los indicadores aparece en regresará a la posición de gran angular y el panel LCD y el BOTÓN DEL el panel LCD demostrará solamente la (16) no funciona. -
Page 56: Como Cargar La Película
3. Cierre la puerta del compartimiento de vacío o la película en la cámara esté película para comenzar el avance completamente rebobinada dentro automático de la misma. El contador del cartucho de la película. -
Page 57: Como Tomar Fotografías
OCULAR DEL VISOR Puede tomar fotografías Clásicas (C), fotografía nítida, manténgase a una Grupo/HDTV (H)*, y Panorámicas (P) distancia mínima de 2 pies (0,6 m) de usando el mismo cartucho de película. su sujeto. El costo del revelado de sus fotografías puede estar basado en el/los tamaño(s) del... -
Page 58: Tamaños Típicos De Impresión De Fotografías (Formatos)
CÍRCULO AF 4 x 6 “ 4 x 7” 4 x 11.5” (88,9 x 127 mm ó (88,9 x 152 mm ó (88,9 x 216 mm a 102 x 152 mm) 102 x 178 mm) 102 x 292,7 mm) NOTA: Su laboratorio de fotoacabado VISOR usualmente provee impresiones en los tamaños... -
Page 59: Como Usar El Lente De Zoom
Cuando encienda la aproximadamente 3 minutos. cámara, automáticamente el lente se encuentra en la posición de gran angular. Consejos útiles para obtener 1. Para encender la cámara y levantar el mejores fotografías (9), deslice el FLASH INTERRUPTOR DE •... -
Page 60: Como Tomar Fotografías Con Flash
4. Mantenga el sujeto a fotografiar dentro CON FLASH del alcance indicado A poca luz, ya sea en interiores, en para la sensibilidad exteriores donde hay mucha sombra o de la película en su en días oscuros o nublados, necesitará... -
Page 61: Como Seleccionar Los Modos De Flashy Enfoque Infinito
Para cambiar la selección de modos de flash, oprima el botón de modo de flash o apague la 3. Encuadre su sujeto dentro del OCULAR cámara y vuelva a encenderla para regresar a (19). -
Page 62: Flash Automático Sin Reducción De Ojos Rojos
(contraluz). Use el flash de indican: relleno para aclarar estas sombras. 1. Para encender la cámara y levantar el 1. Para encender la cámara y levantar el (9), deslice el FLASH INTERRUPTOR DE... -
Page 63: Flash Apagado
Use un del zoom (para uso en exteriores a la luz tripié o coloque la cámara sobre otra del día). base firme, y use película de alta 1. -
Page 64: Vista De Noche
Vista de noche DISPARADOR AUTOMÁTICO Para que usted pueda tomar fotografías Use esta característica para incluirse en bellas de personas a la puesta del sol o las fotografías. por la noche, en este modo la cámara 1. Use el (25) para crea un balance entre el flash y la luz MONTAJE PARA TRÍPODE... -
Page 65: Como Imprimir La Fechay Hora
4. Oprima el botón de selección para formatos distintos: (año/mes/día, guardar el/los número(s) mes/día/año, o día/mes/año) y un formato seleccionado(s) y para activar el/los para la hora (hora/minuto). próximo(s) número(s) “parpadeante(s)” (vuelva a usar los pasos 3 y 4 hasta completar su selección). -
Page 66: Como Descargar La Película
Rebobinado manual COMO DESCARGAR LA PELÍCULA Si no desea tomar el rollo completo de Rebobinado automático fotografías, usted puede manualmente activar el proceso de rebobinado Esta cámara automáticamente rebobina automático. la película una vez que se haya tomado la última fotografía. -
Page 67: Cuidado De La Cámara
2. Si el lente se ve sucio, cúbralo con su aliento para empañarlo y limpie la superficie cuidadosamente con un paño suave que no tenga pelusas o con un pañuelo especialmente... -
Page 68: Problemas Y Soluciones
La cámara está apagada Ponga el interruptor encender/apagar en ENCENDER El cartucho de la película no Carada con película Solamente ponga cabe completamente dentro expuesta ( ), parcialmente película nueva ( ) del compartimiento de expuesta ( ), o en la cámara... -
Page 69: Especificaciones
Unidad del flash: Integrado/se levanta automáticamente, flash KODAK SENSALITE™ Alcance del flash (ISO 200): Gran angular: 2 a 27 pies (0,6 a 8,2 m) Telefotográfico 2 a 14 pies (0,6 a 4,3 m) Abertura de diafragma: ƒ/4.5– f/ 8.6 Obturador: Obturador electrónico programado, 1/5 a 1/360 segundos...