Technics SU-R1000 - Stereo Integrated Amplifier Manual
- Owner's manual (60 pages) ,
- Operating instructions manual (264 pages) ,
- Operating instructions manual (264 pages)
Advertisement
- 1 Features
- 2 Accessories
- 3 Installation
- 4 Control reference guide
- 5 Connections
- 6 Operations
-
7
Settings
-
7.1
Sound adjustment, Other settings
- 7.1.1 Language setting "Language"
- 7.1.2 Adjusting BASS/MID/TREBLE "Tone Control"
- 7.1.3 Adjusting balance of speakers "Balance L/R"
- 7.1.4 Adjusting the volume attenuator "VOLUME Attenuator"
- 7.1.5 MQA decoding "MQA Decoding"
- 7.1.6 Selecting the speaker terminals to output "SPEAKERS"
- 7.1.7 Enabling the audio output "PRE OUT"
- 7.1.8 Enabling the audio output "REC OUT"
- 7.1.9 Auto off function "Auto Off"
- 7.1.10 Adjusting the dimmer level "Auto DIMMER"
- 7.1.11 Checking the model name "Model No."
- 7.1.12 Checking the firmware version "F/W Version"
- 7.2 Using output correction function (LAPC)
- 7.3 Firmware updates
- 7.4 System control connection
-
7.1
Sound adjustment, Other settings
- 8 Troubleshooting
- 9 Specifications
- 10 IMPORTANT SAFETY INSTRUCTIONS
- 11 Documents / Resources
Features
High-Quality Audio Technologies Employed integrated amplifier
The JENO Engine transmits and processes audio signals in full digital and with minimal jitter from the input stage to the power stage. GaN-FET Driver for the linear speaker drive with highspeed lossless switching, and ADCT (Active Distortion Cancelling Technology) cancels the noise precisely are implemented to achieve the energetic dynamic sound with the superior drive function.
The low-noise and clear sound can be provided by the various technologies such as LAPC that conducts speaker load adaptive phase calibration for ideal gain and phase characteristics of any type of connected speakers.
Low-noise power supply with high responsive ability to the audio signal
"Advanced Speed Silent Power Supply" is embedded for high-speed lossless switching and noise reduction. The unique power supply function can supply the stable power with the lowest noise by the high speed switching feature for the better resolution of audio signal in full digital amplifier.
And this unit improves the potential of JENO Engine for the better playback.
The unique digital technology "Intelligent PHONO EQ"
improves the potential for playback of records.
"Accurate EQ Curve" which has a hybrid component for analog and digital circuits enables the equalizer process with high-precise and S/N. And this unit supports the various equalizer curve other than RIAA for accurate playback.
"Crosstalk Canceller" function which measures the crosstalk and optimizes it with DSP, and "PHONO Response Optimizer" function reduces the resonances on the cartridge are implemented to reproduce the audio signal from the record groove.
Accessories

(ONLY FOR CANADA)
The enclosed Canadian French label sheet corresponds to the English display on the unit.
- Product numbers provided in this Owner's Manual are correct as of October 2020.
- These may be subject to change.
- Do not use AC power supply cord with other equipment.
Installation
Unit
Turn off all equipment before connection and read the appropriate operating instructions.

- For the dimensions of this unit see "Specifications".
- Refer to the following figure for the dimensions of this unit's legs.
Calibration record
- Though the record may be warped depending on the storage environment or usage due to its characteristics, this record is designed to be played back for "Cartridge Optimiser" even if there is a trivial warp.
- Stand this record as straight up for storage. Stacking the records in piles or inclining the record for storage may cause the warp on the record.
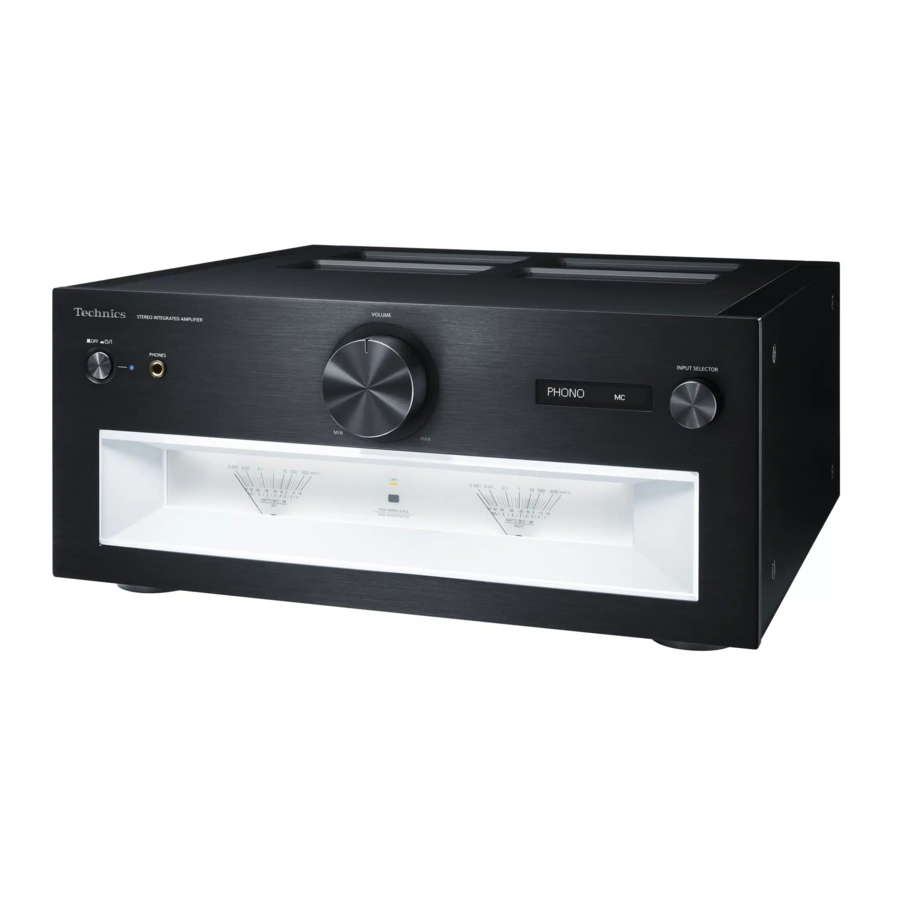
Control reference guide
This unit

- Standby/on button (
![]() )
)
[![]() OFF] (off): The unit is off.
OFF] (off): The unit is off.
[![]() ] (on): The unit is on.
] (on): The unit is on. - The unit is still using a small amount of power in off mode. Off mode uses less power.
- Power indicator
- Blue: The unit is on.
- Off: T he unit is off.
- Headphones jack
- When a plug is connected, the speakers and REC OUT/PRE OUT terminals do not output sound.
- Sound is not output from headphones jack while "MAIN IN" is selected as input source of this unit.
- Excessive sound pressure from earphones and headphones can cause hearing loss.
- Listening at full volume for long periods may damage the user's ears.
- Volume knob
![]() dB (min), -88.0 dB to 0 dB (max)
dB (min), -88.0 dB to 0 dB (max)
- Display
- Information such as input source, etc. is displayed.
- The input source blinks on the display before starting up this unit after turning on. (No sound outputs while blinking.)
- Input selector knob
- Turn this knob clockwise or anticlockwise to switch the input source.
- Peak power meter
- Display the output level. 100% is the rated output
- Peak power meter does not work while the light is turned off by pressing [DIMMER], connecting the headphones, etc.
- LAPC indicator
- Remote control signal sensor
- Reception distance: Within approx. 7 m (23 ft) directly in front
- Reception angle: Approx. 30° left and right
 )
) OFF] (off): The unit is off.
 ] (on): The unit is on.
  dB (min), -88.0 dB to 0 dB (max)
- Speaker output terminals
- Analog audio input terminals (REC IN)
- Analog audio output terminals (REC OUT)
- Analog audio output terminals (PRE OUT)
- Analog audio input terminals (MAIN IN)
- Analog audio input terminals (LINE XLR BALANCED/LINE1/LINE2)
- Analog audio input terminals (PHONO XLR BALANCED/PHONO) / PHONO EARTH terminal
- PHONO EARTH terminal is for connecting the ground wire of a turntable.
- Please use the cable less than 3 m.
- Keep the PHONO short pins out of reach of children to prevent swallowing.
- USB-B terminals (PC1/PC2)
- USB-A terminal (UPDATE) (
![]() DC 5 V 500 mA)
DC 5 V 500 mA) - System terminal (CONTROL)
- Optical digital input terminals (OPT1/OPT2)
- Coaxial digital input terminals (COAX1/COAX2)
- Product identification marking
- The model number is indicated.
- AC IN terminal (
![]() )
)
Remote control

- [
![]() ]: Standby/on button
]: Standby/on button - Press to switch the unit from on to standby mode or vice versa. In standby mode, the unit is still consuming a small amount of power.
- Switch the input source
- [MENU]: Enter menu
![]() /[OK]: Selection/OK
/[OK]: Selection/OK- [SETUP]: Enter setup menu
- [BASS]/[MID]/[TREBLE]: Adjust the tonal range (BASS/MID/TREBLE).
- Press
![]() to adjust the tone.
to adjust the tone.
- Press
- [DIRECT]: Turn on/off Direct mode
- [LAPC]: Measure the output signal of the amplifier when speakers are connected, and correct its output
- [DIMMER]: Adjust the brightness of the peak power meter light, display, etc.
- When the display is turned off, it will light up for a few seconds only when you operate this unit. Before the display turns off, "Display Off" will be displayed for a few seconds.
- Press repeatedly to switch the brightness.
- Peak power meter does not work while the light is turned off.
- [INFO]: View content information
- Press this button to display sampling frequency and other information. (The information varies depending on the input source.)
- [RETURN]: Return to the previous display
- [MUTE]: Mute the sound
- Press [MUTE] again to cancel. "MUTE" is also cancelled when you adjust the volume with this unit or when you turn the unit to standby.
- [CURVE]: Enable the PHONO equalizer curve.
- [+VOL-]: Adjust the volume
- Volume range:
-- dB (min), -88.0 dB to 0 dB (max)
- Volume range:
 /[OK]: Selection/OK
 to adjust the tone.
- Buttons that work for Technics devices supporting system control function
The remote control of this unit also works for Technics devices supporting system control function (Network Audio Player, Compact Disc Player, etc.). For information on the operations of the devices, please also refer to their operating instructions.- Numeric buttons, etc.
- Playback control buttons
Using the remote control

 Note
Note
- Insert the battery so the terminals (
![]() and
and ![]() ) match those in the remote control.
) match those in the remote control. - Point it at the remote control signal sensor on this unit.
- Keep the batteries out of reach of children to prevent swallowing.
 and
and  ) match those in the remote control.
Remote control mode
When other equipment responds to the supplied remote control, change the remote control mode.
- The factory default is "Mode 1".
- Press [SETUP].
- Press [
![]() ], [
], [ ![]() ] repeatedly to select "Remote Control" and then press [OK].
] repeatedly to select "Remote Control" and then press [OK]. - The current remote control mode of this unit is displayed for a few seconds.
- When "Set Mode 1/2" is displayed, change the remote control mode of the remote control.
To set "Mode 1": Press and hold [OK] and [1] for at least 4 seconds.
To set "Mode 2": Press and hold [OK] and [2] for at least 4 seconds. - Point the remote control at this unit, and press and hold [OK] for at least 4 seconds.
- When the remote control mode is changed, the new mode will appear on the display for a few seconds.
 ], [
], [  ] repeatedly to select "Remote Control" and then press [OK].
 - When "Remote 1" or "Remote 2" is displayed
When "Remote 1" or "Remote 2" is displayed, the remote control modes of this unit and remote control are different. Perform step 3 above.
Connections
Speakers/AC power supply cord
- Use only the supplied AC power supply cord.
- Insert the plugs of the cables to be connected all the way in.
- Do not bend cables at sharp angles.
- To optimize the audio output, you can measure the amplifier output signal and correct its output when it is connected to the speakers.
Speaker connection

RISK OF HAZARDOUS ENERGY!
MAKE PROPER SPEAKER CONNECTIONS. CONNECT CABLES AS DESCRIBED IN THIS OWNER'S MANUAL.

- Turn the knobs to loosen them, and insert the core wires into the holes.
![]()
- Tighten the knobs.
![]()


Note
- When the connections are completed, pull the speaker cables lightly to check that they are connected firmly.
- Be careful not to cross (short-circuit) or reverse the polarity of the speaker wires as doing so may damage the amplifier.
DO NOT:
![]()
- Wire the polarity (+/-) of the terminals correctly. Not doing so may adversely affect stereo effects or cause malfunction.
- For details, refer to the operating instructions of the speakers.
- Though the spade plug (A: 16 mm (5/8") or less, B: 8 mm (5/16") or more) can be connected, some plug may not be connected depending on the shape of plug.
![]()


AC power supply cord connection
Connect only after all other connections are completed.

Note
- This unit consumes a small amount of AC power even when the unit is in standby mode. Remove the plug from the main electrical outlet if you will not be using the unit for an extended period of time. Place the unit so the plug can be easily removed.
Operations
Using digital audio output device
You can connect the CD player, etc. with coaxial digital cable (not supplied)/optical digital audio cable (not supplied) to this unit and play back music.

Using coaxial digital cable
- Disconnect the AC power supply cord.
- Connect this unit and a CD player, etc.
- Connect the AC power supply cord to this unit.
- Press the unit on/off button to the [
![]() ] position.
] position. - Press [COAX] to select "COAX1"/"COAX2".
- You can also select the input source by turning the input selector knob on the unit.
- Start playback on the connected device.
Note
- The digital audio input terminals of this unit can only detect the following linear PCM signals. For details, refer to the operating instructions of the connected device.
- Sampling frequency:
Coaxial digital input
32/44.1/48/88.2/96/176.4/192 kHz
Optical digital input
32/44.1/48/88.2/96 kHz - Number of quantization bits: 16/24 bit
- Sampling frequency:
Using optical digital audio cable
- Disconnect the AC power supply cord.
- Connect this unit and a CD player, etc.
- Connect the AC power supply cord to this unit.
- Press the unit on/off button to the [
![]() ] position.
] position. - Press [OPT] to select "OPT1"/"OPT2".
- You can also select the input source by turning the input selector knob on the unit.
- Start playback on the connected device.
Adjusting the delay time of the sound
Set to "Low Latency" to adjust the delay time of the sound while "LAPC" is set to "On".
- Press [MENU].
- Press [OK].
- Press
![]() to select "Normal"/"Low Latency" and then press [OK].
to select "Normal"/"Low Latency" and then press [OK]. - Depending on the track, it may not be effective even when setting.
MQA® decoding
An MQA file or stream can be decoded to deliver the sound like the original master recording.
Using PC, etc.
You can connect the PC, etc. or another device with USB 2.0 cable (not supplied) to this unit and play back music.

- Preparation
Connecting to a PC- Before connecting to a PC, follow the steps below.
- Refer to the following for the recommend OS versions for your PC (as of October 2020):
- Windows 8, Windows 8.1, Windows 10
- OS X 10.7, 10.8, 10.9, 10.10, 10.11,
macOS 10.12, 10.13, 10.14, 10.15
- Download and install the dedicated USB driver to the PC. (Only for Windows OS)
- Download and install the driver from the website below. www.technics.com/support/
- Download and install the dedicated app "Technics Audio Player" (free of charge) on your PC.
- Download and install the app from the website below. www.technics.com/support/
- Disconnect the AC power supply cord.
- Connect this unit and a PC, etc.
- Connect the AC power supply cord to this unit.
- Press the unit on/off button to the [
![]() ] position.
] position. - Press [PC] to select "PC1"/"PC2".
- You can also select the input source by turning the input selector knob on the unit.
- Start playback using the dedicated app "Technics Audio Player" on the connected PC.
Note
- When connecting an audio device with USB output terminal such as ST-G30, etc., refer to the operating instructions of the connected device.
- About supported format, refer to "Format support".
Adjusting the delay time of the sound
Set to "Low Latency" to adjust the delay time of the sound while "LAPC" is set to "On".
- Press [MENU].
- Press [OK].
- Press
![]() to select "Normal"/"Low Latency" and then press [OK].
to select "Normal"/"Low Latency" and then press [OK]. - Depending on the track, it may not be effective even when setting.
 to select "Normal"/"Low Latency" and then press [OK].
 MQA decoding
An MQA file or stream can be decoded to deliver the sound like the original master recording.
Using analog audio output device

*: The illustration shows the example when connecting with analog audio cable. You can also connect the device with XLR cable.
You can connect the Blu-ray Disc player, etc. with analog audio cable (not supplied) to this unit and play back music.
- Disconnect the AC power supply cord.
- Connect this unit and a Blu-ray Disc player, etc.
- Connect the AC power supply cord to this unit.
- Press the unit on/off button to the [
![]() ] position.
] position. - Press [LINE-XLR] or [LINE] to select "LINE XLR"/"LINE1"/"LINE2".
- You can also select the input source by turning the input selector knob on the unit.
- Start playback on the connected device.
When the recorder is connected to this unit
When connecting a recording equipment to this unit, use the analog audio cable (not supplied) and connect REC IN terminal with the audio output terminals of the connected equipment, connect REC OUT terminals with the audio input terminals of the connected equipment.
- Press [REC IN] to switch the input source to "REC IN".
Minimizing sound distortion
If sound distortion occurs when using the analog audio input terminals, setting the attenuator to "On" may improve the sound quality.
- The factory default is "Off".
- Press [MENU].
- Press
![]() repeatedly to select "Attenuator" and then press [OK].
repeatedly to select "Attenuator" and then press [OK]. - Press
![]() to select "On" and then press [OK].
to select "On" and then press [OK].
 repeatedly to select "Attenuator" and then press [OK].
Reducing low frequency noise
Reduces the low frequency noise caused by the warpage of record.
- The factory default is "Off".
- Press [MENU].
- Press
![]() repeatedly to select "Subsonic Filter" and then press [OK].
repeatedly to select "Subsonic Filter" and then press [OK]. - Press
![]() to select "On" and then press [OK].
to select "On" and then press [OK].
Using turntable

*: The illustration shows the example when connecting with PHONO cable. You can also connect the device with PHONO-XLR cable.
- Disconnect the AC power supply cord.
- Connect this unit and a turntable.
- Remove the PHONO short pins when connecting to the analog audio input terminals (PHONO).
- PHONO terminals for connecting the turntable supports MM/MC type cartridge. (PHONO XLR terminals only supports MC type cartridge.)
- Connect the AC power supply cord to this unit.
- Press the unit on/off button to the [
![]() ] position.
] position. - Press [PHONO-XLR] or [PHONO] to select "PHONO XLR"/"PHONO".
- You can also select the input source by turning the input selector knob on the unit.
- Start playback on the connected turntable.
- When connecting a turntable with a built-in PHONO equalizer, use the analog audio cable to connect to the analog audio input terminals (LINE1 or LINE2) of this unit.
- When connecting a turntable with a PHONO earth lead, connect the PHONO earth lead to the PHONO EARTH terminal of this unit.
Selecting the cartridge type
Select the settings (MM/MC) to fit the cartridge type of the connected turntable.
- Press [MENU].
- Press
![]() repeatedly to select "MM/MC" and then press [OK].
repeatedly to select "MM/MC" and then press [OK]. - Press
![]() to select "MM"/"MC" and then press [OK].
to select "MM"/"MC" and then press [OK]. - Not available when "PHONO XLR" is selected as input source. (The setting is fixed to "MC".)
- When "MM/MC" is adjusted, "Cartridge Optimiser" is fixed to "Off". Set "Cartridge Optimiser" again or select the registered data correspond with "MM/MC".
 repeatedly to select "MM/MC" and then press [OK].
  to select "MM"/"MC" and then press [OK].
 Adjusting the audio input level
If sound distortion occurs or the input level is low when using the analog audio input terminals, adjusting the gain may improve the sound quality.
- Press [MENU].
- Press
![]() to select "Gain" and then press [OK].
to select "Gain" and then press [OK]. - Press
![]() to adjust and then press [OK].
to adjust and then press [OK]. - When "Gain" is adjusted, "Cartridge Optimiser" is fixed to "Off". Set "Cartridge Optimiser" again or select the registered data correspond with "Gain".
Optimizing the character of cartridge
This unit measures and optimizes the crosstalk and frequency characteristics of cartridge by playing the supplied calibration record on the connected turntable.
- Depending on the "Cartridge Optimiser" setting, "REC OUT" turns to "Off" and the sound does not output from the analog output terminals (REC OUT).
- Preparation
- Connect the PHONO earth lead of the turntable to the PHONO EARTH terminal of this unit.
- Set "MM/MC" of this unit in accordance with the cartridge type of the turntable.
- Set "Gain" of this unit in accordance with the cartridge of connected turntable.
- Press [MENU].
- Press
![]() repeatedly to select "Cartridge Optimiser" and then press [OK].
repeatedly to select "Cartridge Optimiser" and then press [OK]. - Press
![]() to select "Measurement Start" and then press [OK].
to select "Measurement Start" and then press [OK]. - "Prepare Calibration Record" is displayed.
- Start playback the calibration record on the connected turntable and then press [OK].
- Play the outer track first on the calibration record which has 2 tracks on both sides (approx. 3 minutes). Play another track if the optmization does not start properly.
- The speakers output a test tone.
- Measurement starts for the data of "Crosstalk Canceller" and "Response Optimisation".
- After displaying "Lift up the tone arm", stop the playback of calibration record and press [OK].
- The measured data processing starts (approx. 10 minutes).
- After displaying "Completed", press [OK].
- After displaying "Register 1 - 3", press [OK] and then
![]() to select the data to store.
to select the data to store. - The optimized data can be stored up to 3 type. The data is overwritten when selecting the already registered data.
- Press [OK].
- "Registered" is displayed.
- (When naming the data)
After displaying "Rename?", press [OK].- When the name is not edited, press [
![]() ] to exit. The measurement completes and the optimized data is registered.
] to exit. The measurement completes and the optimized data is registered.
- When the name is not edited, press [
- Press
![]() to enter the name and then press [OK] to exit the setting.
to enter the name and then press [OK] to exit the setting. - • The edited name is stored, the measurement completes and the optimized data is registered.
 to enter the name and then press [OK] to exit the setting.
 - "Crosstalk Canceller"/"Response Optimisation"
- Press [MENU].
- Press
![]() to select "Cartridge Optimiser" and then press [OK].
to select "Cartridge Optimiser" and then press [OK]. - Press
![]() to select the registered data and then press [
to select the registered data and then press [ ![]() ].
]. - Press
![]() to select "Crosstalk Canceller"/"Response Optimisation" and then press [OK].
to select "Crosstalk Canceller"/"Response Optimisation" and then press [OK]. - Press
![]() to select "On"/"Off" and then press [OK].
to select "On"/"Off" and then press [OK]. - "Crosstalk Canceller":
Reduces the crosstalk occurs on the cartridge. - "Response Optimisation":
Optimizes the resonance occurs on the cartridge and cable, also adjusts the right and left balance.
- "Crosstalk Canceller":
 to select "Cartridge Optimiser" and then press [OK].
 ].
].- Call up the registered setting
- Press [MENU].
- Press
![]() to select "Cartridge Optimiser" and then press [OK].
to select "Cartridge Optimiser" and then press [OK]. - Press
![]() ] to select the registered data and then press [OK].
] to select the registered data and then press [OK].
- Edit the name
- Press [MENU].
- Press
![]() to select "Cartridge Optimiser" and then press [OK].
to select "Cartridge Optimiser" and then press [OK]. - Press
![]() to select the registered data, then press and hold [OK].
to select the registered data, then press and hold [OK]. - Press
![]() to enter the name and then press [OK].
to enter the name and then press [OK]. - Only ASCII characters can be used.
- "A" can be added when you press the [
![]() ] at the time of the last letter is selected.
] at the time of the last letter is selected. - Press [CLEAR] to delete a letter.
 to enter the name and then press [OK].
 Switching the PHONO equalizer curve
You can switch the equalizer curve of this unit. This unit supports the simulated equalizer curve before unifying to RIAA".
- The factory default is "RIAA"
- Press [MENU].
- Press
![]() repeatedly to select "EQ CURVE" and then press [OK].
repeatedly to select "EQ CURVE" and then press [OK]. - Press
![]() to select the equalizer setting and then press [OK].
to select the equalizer setting and then press [OK]. - You can also switch the equalizer curve by pressing [CURVE].
Reducing low frequency noise
Reduces the low frequency noise caused by the warpage of record.
Using this unit as power amplifier
You can connect the AV receiver, control amplifier, etc. with analog audio cable (not supplied) to this unit and use this unit as power amplifier.
Set the volume of the AV receiver, control amplifier, etc. to minimum before connecting.
While using this unit as power amplifier, the volume adjustment with this unit is disabled. Adjust the volume little by little with the connected device.
Do not input the audio signal from REC OUT/PRE OUT terminals to the MAIN IN terminals of this unit. Doing so may cause malfunction.

- Disconnect the AC power supply cord.
- Connect this unit and AV receiver, control amplifier, etc. after minimizing the volume of the device.
- Connect the AC power supply cord to this unit.
- Press the unit on/off button to the [
![]() ] position.
] position. - Press [SETUP].
- Press
![]() repeatedly to select "MAIN IN" and then press [OK].
repeatedly to select "MAIN IN" and then press [OK]. - Press
![]() to select "On" and press [OK].
to select "On" and press [OK]. - Confirm the displayed message and press [OK].
- Press
![]() to select "Yes" and then press [OK].
to select "Yes" and then press [OK]. - Start playback on the connected device.
 repeatedly to select "MAIN IN" and then press [OK].
 Note
- It is not possible to adjust the volume with this unit.
- Sound is not output from headphones jack and REC OUT/PRE OUT terminals.
Minimizing sound distortion
If sound distortion occurs, setting the attenuator to "On" may improve the sound quality.
- The factory default is "Off".
- Press [MENU].
- Press [OK].
- Press
![]() to select "On" and then press [OK].
to select "On" and then press [OK].
 to select "On" and then press [OK].
Using analog audio input device
Do not input the audio signal from REC OUT/PRE OUT terminals to the analog audio input terminals of this unit. Doing so may cause malfunction.
Connecting a power amplifier, subwoofer, etc.
You can connect the power amplifier, subwoofer, etc. with analog audio cable (not supplied) to output the analog audio signals.

- Disconnect the AC power supply cord.
- Connect this unit and a power amplifier, subwoofer, etc.
- Connect the AC power supply cord to this unit.
- Press the unit on/off button to the [
![]() ] position.
] position.
Note
- For details, refer to the operating instructions of the connected device.
- The audio signal output from the power amplifier, subwoofer, etc. connected to PRE OUT terminals can be enable/disable.
Connecting a recording equipment
When connecting a recording equipment to this unit, use the analog audio cable (not supplied) and connect REC IN terminal with the audio output terminals of the connected equipment, connect REC OUT terminals with the audio input terminals of the connected equipment.
- Press [REC IN] to switch the input source to "REC IN".

- Disconnect the AC power supply cord.
- Connect this unit and a recording equipment.
- Connect the AC power supply cord to this unit.
- Press the unit on/off button to the [
![]() ] position.
] position.
Note
- The choppy audio occurs in output audio signal when switching the input source.
- The audio signal output from recording equipment connected to REC OUT terminals can be enable/disable.
Settings
Sound adjustment, Other settings
The sound effects and other settings can be set up.
- Press [SETUP].
- Press
![]() repeatedly to select the menu and then press [OK].
repeatedly to select the menu and then press [OK]. - Press
![]() to select a desired item or value, and press [OK].
to select a desired item or value, and press [OK].
 repeatedly to select the menu and then press [OK].
  to select a desired item or value, and press [OK].
Language setting "Language"
Select "English" or "Français" for the display.
- The factory default is "English".
Adjusting BASS/MID/TREBLE "Tone Control"
The tone can be adjusted by pressing [BASS]/ [MID]/[TREBLE].
- The tone adjustment is enabled by pressing [BASS]/[MID]/[TREBLE] and "Tone Control" is set to "On".
- Each level can be adjusted between "-10" and "+10".
- While connecting Technics device supporting system control function (Network Audio Player, etc.) to this unit, sound setting on the connected device may have a priority over this unit. Adjust the sound with the connected device.
- Not available when using this unit as power amplifier. Adjust the sound with the AV receiver, control amplifier, etc.
- Set "Tone Control" to "Off" to cancel the adjustment of "BASS", "MID" and "TREBLE".
Adjusting balance of speakers "Balance L/R"
Adjusts the balance of the output from left and right speakers.
- Each level can be adjusted between 18 dB (L) and 18 dB (R).
- The audio output from the connected headphones and PRE OUT terminals are also adjusted.
- While using this unit as power amplifier, this setting is disabled. Adjust the setting with the connected device.
Adjusting the volume attenuator "VOLUME Attenuator"
Set to "On (-20dB)" for the attenuator to ease the volume adjustment at a low volume.
- The factory default is "Off".
- "ATT" is displayed after setting.
- Not available when using this unit as power amplifier. Adjust the sound with the AV receiver, control amplifier, etc.
MQA decoding "MQA Decoding"
This unit includes the MQA (Master Quality Authenticated) technology, which enables playback of MQA audio files and streams, delivering the sound like the original master recording.
The built-in MQA decoder will restore the high-resolution signal heard in the studio and confirm it, using the authentication signature. Visit www.mqa.co.uk/customer/mqacd for more information.
To deliver the sound like the original master recording, MQA decoding function needs to be set to "On".
- "MQA", "MQA Studio", etc. are displayed while playing back the MQA audio files and streams.
Selecting the speaker terminals to output "SPEAKERS"
Select the speaker terminals from which audio will be output.
- The factory default is "A".
Enabling the audio output "PRE OUT"
Enables/Disables the audio output from PRE OUT terminals.
- The factory default is "On".
Enabling the audio output "REC OUT"
Enables/Disables the audio output from REC OUT terminals.
- When "LAPC" or "Response Optimisation" is set to "On", "REC OUT" may be set to "Off".
- The factory default is "On".
Auto off function "Auto Off"
This unit is designed to conserve its power consumption and save energy. The unit has been left unused for about 20 minutes and will enter standby mode within a minute. Press any button to cancel it.
- The factory default is "Off".
- "Auto Off" is displayed 3 minutes before this unit is turned off.
Note:
The setting is stored even if the power is turned off and on.
Adjusting the dimmer level "Auto DIMMER"
The unit has been left unused for about 20 minutes and will temporarily adjust the brightness of peak power meter light, power indicator, LAPC indicator, etc.
- The factory default is "On".
- "Auto Off" function has a priority while "Auto Off" is set to "On".
Checking the model name "Model No."
The model name is displayed.
Checking the firmware version "F/W Version"
The version of the installed firmware is displayed.
Using output correction function (LAPC)
You can make the optimum adjustment according to your own speakers.
Measuring the output signal of the amplifier and correcting its output (LAPC)
- Preparation
- Disconnect the headphones.
Test tone emitted during measurement
To ensure the measurement accuracy, the speakers output a test tone at regular intervals. (For approximately 3 minutes) It is not possible to change the volume of the audio being output while the measurement is in progress.
- Press the unit on/off button to the [
![]() ] position.
] position. - Press and hold [LAPC] until "Please Wait" is displayed.
"LAPC Measuring" is displayed and this unit will start measuring the output signal of the amplifier. Check that a test tone is output from both the left and right speakers. When the measurement is complete, amplifier output correction will be automatically turned on.- If you connect headphones during amplifier signal measurement or amplifier output correction, it will be cancelled.
Note
- The output correction function can be set for "A", "B", or "A+B" of "SPEAKERS". (The output correction function is not available when setting to "Off".)
- The amplifier signal measurement is cancelled in the following condition.
- Pressing [MUTE]/[LAPC]
- Switching the input source
- Turning on/off the output correction function
Press [LAPC] to select "On"/"Off".
- LAPC indicator lights and "LAPC: On" is displayed while the output correction function is in progress.
Note
- Measurement is not available for the audio output signal from REC OUT/PRE OUT terminals of this unit.
- Depending on the type of the connected speakers, the effect of the output correction function may be minimal.
- The corrected output remains in effect until you measure the output signal again. When you use other speakers, redo the measurement.
- When "REC OUT" is set to "On", "LAPC" may be disabled.
Direct mode
This enables faithful and high quality reproduction of original sound and cancels the tone control setting.
- The factory default is "Off".
Press [DIRECT] to select "On"/"Off".
- Set to "On" to enable the mode.
- When pressing [BASS]/[MID]/[TREBLE], the direct mode is cancelled and "Tone Control" is set to "On"
Firmware updates
Firmware updates "F/W Update"
Occasionally, Panasonic may release updated firmware for this unit that may add or improve the way a feature operates. These updates are available free of charge.
- For the update information, refer to the following website.
www.technics.com/support/firmware/
Downloading takes approx. 3 minutes.
Do not disconnect the AC power supply cord or turn this unit to standby while updating.
Do not disconnect the USB flash memory while updating.
- The progress is displayed as "Updating
![]() %" while updating. ("
%" while updating. ("![]() " stands for a number.)
" stands for a number.)
 %" while updating. ("
 Note
- During the update process, no other operations can be performed.
- If there are no updates, "Firmware is Up To Date" is displayed. (No need to update it.)
- Updating the firmware may reset the settings of this unit.
- Preparation
- Download the latest firmware on the USB flash memory. For details, refer to the following website.
www.technics.com/support/firmware/
- Download the latest firmware on the USB flash memory. For details, refer to the following website.
- Connect the USB flash memory with new firmware.

- Press [SETUP].
- Press
![]() repeatedly to select "F/W Update" and then press [OK].
repeatedly to select "F/W Update" and then press [OK]. - Press
![]() to select "Yes" and then press [OK].
to select "Yes" and then press [OK]. - The progress is displayed as "Updating
![]() %" while updating. ("
%" while updating. ("![]() " stands for a number.)
" stands for a number.) - When the update has finished successfully, "Success" is displayed.
- The progress is displayed as "Updating
- Press the unit on/off button to the [
![]() OFF] position and press again to the [
OFF] position and press again to the [![]() ] position.
] position.

 repeatedly to select "F/W Update" and then press [OK].
  OFF] position and press again to the [
 ] position.
 Note
- Downloading may take longer depending on the USB flash memory.
- Use a USB flash memory with FAT16 or FAT32 format.
- UPDATE terminal is used only for firmware updating. Do not connect any USB device other than the USB flash memory for firmware updating.
- No USB device can be charged from the UPDATE terminal of this unit.
System control connection
You can operate this unit and Technics devices supporting system control function (Network Audio Player, Compact Disc Player, etc.) simultaneously with ease on the remote control.
For details, refer to the operating instructions of each device.

*: The illustration shows the example when connecting with coax digital cable. Connect the device with proper cable/terminal supporting the device.
Using system connection cable and audio cable
- Disconnect the AC power supply cord.
- Connect this unit and Technics device supporting system control function (Network Audio Player, etc.).
- Use both of the system connection cable and the audio cables when connecting this unit and the device.
- Use the system connection cable supplied with the connected device.
- Connect the AC power supply cord to this unit.
- Press the unit on/off button to the [
![]() ] position.
] position. - Press [SETUP].
- Press
![]() repeatedly to select "System Control" and then press [OK].
repeatedly to select "System Control" and then press [OK]. - Press
![]() to select the input source for the device which is connected at step 2, and press [OK].
to select the input source for the device which is connected at step 2, and press [OK]. - Select "Off" to disable the system control function.
 repeatedly to select "System Control" and then press [OK].
 Note: When using this unit as power amplifier, the system control function for the Technics device connected to the MAIN IN terminals is disabled.
Switching this unit and the connected device
- If you point the remote control at this unit and press [
![]() ] when this unit and the connected device are in standby mode, this unit and the device of the selected input source which is set with "System Control" will be turned on simultaneously.
] when this unit and the connected device are in standby mode, this unit and the device of the selected input source which is set with "System Control" will be turned on simultaneously. - If you point the remote control at this unit and press [
![]() ] when this unit and the connected device are turned on, this unit and the connected device will enter standby mode.
] when this unit and the connected device are turned on, this unit and the connected device will enter standby mode.
Switching this unit's input source automatically
When you perform an operation such as playback on the connected device, the input source of this unit will be automatically switched to the source which is set with "System Control". dealer for instructions.
Troubleshooting
Before requesting service, make the following checks. If you are uncertain about some of the check points, or if the solutions indicated in the following guide do not resolve the issue, then consult your dealer for instructions.
Heat buildup of this unit
This unit becomes warm while in use. This is not a malfunction.
Do you have the latest firmware installed?
Panasonic is constantly improving the unit's firmware to ensure that our customers are enjoying the latest technology.
To restore all settings to the factory defaults
When the following situations occur, reset the memory:
- There is no response when buttons are pressed.
- You want to clear and reset the memory contents.
- Press [SETUP].
- Press
![]() repeatedly to select "Initialization" and then press [OK].
repeatedly to select "Initialization" and then press [OK]. - A confirmation screen appears. Select "Yes" in the following steps to restore all the settings to defaults.
- Press
![]() to select "Yes" and then press [OK].
to select "Yes" and then press [OK]. - Press
![]() to select "Yes" and then press [OK] again.
to select "Yes" and then press [OK] again.
 repeatedly to select "Initialization" and then press [OK].
 General
The unit does not work.
Operations are not done properly.
- One of the unit's safety devices may have been activated.
- Press the unit on/off button to the [
![]() ] position.
] position. - If the unit does not switch to standby, disconnect the AC power supply cord, wait for at least 3 minutes, then reconnect it.
- Press the unit on/off button to the [
![]() ] position. If the unit still cannot be operated, consult the dealer.
] position. If the unit still cannot be operated, consult the dealer.
A "humming" sound can be heard during playback.
- An AC power supply cord of another device or fluorescent light is near the cables. Turn off other appliances, or keep them away from the cables of this unit.
- A strong magnetic field near a TV or other device may adversely affect the audio quality. Keep this unit away from such a location.
- The speakers may output noise when a device nearby is emitting powerful radio waves, such as when a mobile phone is on a call.
No sound.
- Check the volume of this unit and the connected device.
- Check connections to speakers and other equipment.
- Connect speakers and measure the output signal of the amplifier.
- Check the impedance of the connected speakers.
- Check to see if the correct input source is selected.
- Insert the plugs of the cables to be connected all the way in.
- Confirm the sound output setting. (Sound is not output from the speakers connected to the speaker output terminals of this unit while "PRE OUT" is set to "Off".)
- Sound is not output from headphones jack and REC OUT/PRE OUT terminals.
- Playback of multi-channel content is not supported.
- The digital audio input terminals of this unit can only detect linear PCM signals. For details, refer to the operating instructions of the device.
Sound is distorted.
- Setting "Attenuator"/"Gain" to "On" according to the analog audio input may minimize the sound distortion.
The unit turns to standby mode automatically.
- Is the auto off function turned on?
- This unit incorporates a protection circuit to prevent damage caused by heat buildup. When you use this unit at a high volume level for a long period of time, it may turn off automatically. Wait for this unit to cool down before turning on this unit again. (For approximately 3 minutes)
The settings are reset to the factory defaults.
- Updating the firmware may reset the settings.
The peak power meter does not operate.
- In the following cases, this meter does not operate:
- When the headphones are connected.
- When the peak power meter light is turned off by pressing [DIMMER].
- When this unit is muted by pressing [MUTE].
- When "SPEAKERS" is set to "Off"
Display turns dim.
- Press [DIMMER] to adjust the dimmer level.
- Check the setting of "Auto DIMMER".
The system control function is not working.
- Use the system connection cable supplied with the connected device.
- Connect the system connection cable to the system terminals (CONTROL).
- Check the connection of system connection cable, audio cable and the input source which is set with "System Control".
- Connect Technics device supporting system control function (Network Audio Player, Compact Disc Player, etc.) to this unit. For details, refer to the following website:
www.technics.com/support/
PC
The PC does not recognize this unit.
- Check your operating environment.
- Restart the PC, turn this unit to standby and on, and then reconnect the USB cable.
- Use another USB port of the connected PC.
- Install the dedicated USB driver if using a PC with Windows.
Remote control
The remote control does not work properly.
- The batteries are depleted or inserted incorrectly.
- To avoid interference, please do not put any objects in front of signal sensor.
- If the remote control mode of the remote control differs from that of this unit, match the mode of the remote control to the mode of this unit.
Unit care
- Pull out the AC power supply cord from the outlet before maintenance. Clean this unit with a soft cloth.
- When dirt is heavy, wring a wet cloth tightly to wipe the dirt, and then wipe it with a soft cloth.
- Do not use solvents including benzine, thinner, alcohol, kitchen detergent, a chemical wiper, etc. This might cause the exterior case to be deformed or the coating to come off.
To dispose or transfer this unit
- This unit may contain private information. Before disposing of or transferring this unit, perform the following to delete the data, including personal or secret information.
- "To restore all settings to the factory defaults"
Messages
ATTENTION: MAX Output Setting
- While using this unit as power amplifier, the volume adjustment with this unit is disabled.
- Adjust the volume little by little with the connected device.
AUTO OFF
- The unit has been left unused for about 20 minutes and will shut down within a minute. Press any button to cancel it.
Connect USB Device
- The firmware download has failed.
- Download the latest firmware on the USB flash memory and try again.
Disconnect PHONES
- When the headphones are connected, measuring the output signal of the amplifier (LAPC) will not start.
- Disconnect the headphones.
- If you connect headphones during amplifier signal measurement or amplifier output correction, it will be cancelled.
"F  " ("
" ("  " stands for a number.)
- An abnormality has occurred. (If this unit detects an abnormality, the protection circuit is activated, and the power may be turned off automatically.)
- Is the volume extremely high? Or is this unit placed in an extremely hot place?
Wait a few seconds and then turn the unit on again. (The protection circuit will be deactivated.)
- Is the volume extremely high? Or is this unit placed in an extremely hot place?
Load Fail
- The firmware cannot be found on the USB flash memory.
- Download the latest firmware on the USB flash memory and try again.
Measurement Fail
- The measurement or processing of "Cartridge Optimiser" fails. Make the following checks.
"High Level":
The output signal is so noisy or the output signal level of turntable is too high. Remove the dust from the record. Confirm the setting of "Gain" and adjust the input level of this unit.
Check if "MM/MC" setting of this unit matches the cartridge type of the turntable or not.
"Low Level":
The record is not played back, or the output signal level of turntable is too low. Confirm the turntable is connected correctly and the record is played back properly.
Confirm the setting of "Gain" and adjust the input level of this unit.
Check if "MM/MC" setting of this unit matches the cartridge type of the turntable or not.
"Low Quality":
The output signal of turntable is so noisy. Remove the dust from the record. Or play another track. If the problem still persists, consult your dealer.
"Speed Mismatch":
Rotation per minute (RPM) is incorrect. Adjust the rotation of turntable and play back in correct RPM.
"System Error":
It may be system error. Consult your dealer.
No Device
- USB flash memory with new firmware is not connected.
Connect the USB flash memory with new firmware.
Not Measured
- Measuring the output signal for the output correction function (LAPC) has not been done yet.
- Measure the output signal.
Not Valid
- The function you have tried to use is not available with the current settings. Check the steps and settings.
- The current input source is different from the one in "Cartridge Optimiser" setting. Switch the input source correctly.
- [MUTE] is not valid while the measurement of "Cartridge Optimiser". Adjust the volume.
PHONES Connected
- The headphones are connected.
- Sound is not output from headphones jack and speaker output terminals when the headphones are connected and "MAIN IN" is selected as input source of this unit.
"Remote " (" " stands for a number.)
- The remote control and this unit are using different modes.
Change the mode on the remote control.
Unlocked
- "COAX1", "COAX2", "OPT1", "OPT2", "PC1" or "PC2" is selected, but no device is connected.
Check the connection with the device. - The sampling frequency components, etc. of the audio signals are not input correctly.
- About supported format, refer to "Format support".
USB Over Current
USB device is drawing too much power.
- Disconnect the USB device and connect it again.
- Turn the unit to standby and on again.
VOLUME ![]() OK ("
OK ("![]() " stands for a number.)
" stands for a number.)
- When the input source is switched from "MAIN IN", the volume level after switching the input source is displayed.
- Confirm and adjust the volume before pressing [OK].
Specifications
GENERAL
| Power supply | AC 120 V, 60 Hz |
| Power consumption | 220 W |
| Power consumption in standby mode | Approx. 0.3 W |
| Dimensions (W×H×D) | 430 mm × 191 mm × 459 mm (16 15/16") × (7 17/32") ×(18 3/32") |
| Mass | Approx. 22.8 kg (50.3 lbs) |
| Operating temperature range | 0°C to +40°C (+32°F to +104°F) |
| Operating humidity range | 35% to 80% RH (no condensation) |
AMPLIFIER SECTION
| Output power/ FTC OUTPUT POWER | 150 W + 150 W (1 kHz, T.H.D. 0.5%, 8 Ω, 20 kHz LPF) 300 W + 300 W (1 kHz, T.H.D. 0.5%, 4Ω, 20 kHz LPF) |
| Load impedance | 4Ω - 16Ω |
| Frequency response | |
| PHONO (MM) | 20 Hz to 20 kHz (RIAA DEVIATION ±1 dB, 8Ω) |
| LINE | 5 Hz to 80 kHz (-3 dB, 8Ω) |
| DIGITAL IN | 5 Hz to 80 kHz (-3 dB, 8Ω) |
| Input sensitivity/ Input impedance | |
| PHONO (MM) | 2.5 mV / 47 kΩ |
| PHONO (MC) | 300 mV / 100 kΩ |
| LINE | 2 00 mV / 22 kΩ |
TERMINALS SECTION
| Headphones Jack | Stereo, ∮6.3 mm (1/4") 0.75 mW, 32Ω |
| PC | REAR USB Type B Connector ×2 |
| Analog input | |
| LINE ×2 | Pin jack |
| LINE XLR BALANCED | 3-pin XLR |
| PHONO (MM/MC) | Pin jack |
| PHONO XLR BALANCED (MC) | 3-pin XLR |
| MAIN IN | Pin jack |
| REC IN | Pin jack |
| Digital input | |
| Optical digital input ×2 | Optical terminal |
| Coaxial digital input ×2 | Pin jack |
| Format support | LPCM |
| Analog output | |
| REC OUT | Pin jack |
| PRE OUT | Pin jack |
| System port | |
| System control | ∮3.5 mm (1/8"), Jack |
FORMAT SECTION USB-B
| USB Standard | USB 2.0 High-speed USB Audio Class 2.0. Asynchronous mode |
| DSD control mode | ASIO Native mode, DoP mode |
Format support
This unit supports the following formats.
- Playback of all formats supported by this unit is not guaranteed.
- Playback of a format not supported by this unit may cause choppy audio or noise. In such cases, check to see if this unit supports the format.
- File information (sampling frequency, etc.) shown by this unit and playback software may differ from each other.
PC (USB-B)*
| File format | Sampling frequency | Bit rate / Number of quantization bits |
| PCM | 32/44.1/48/88.2/96/176.4/192/352.8/384 kHz | 16/24/32 bit |
| DSD | 2.8 MHz/5.6 MHz/11.2 MHz/22.4 MHz (ASIO Native mode only) |
MQA decorder
The MQA decoding function is available for the digital input
*: If you download and install the dedicated app, you can play back files in wide-ranging formats. For details, refer to the operating instructions of the app.
Note
- Specifications are subject to change without notice.
- Mass and dimensions are approximate.
IMPORTANT SAFETY INSTRUCTIONS
Read these operating instructions carefully before using the unit. Follow the safety instructions on the unit and the applicable safety instructions listed below. Keep these operating instructions handy for future reference.
- Read these instructions.
- Keep these instructions.
- Heed all warnings.
- Follow all instructions.
- Do not use this apparatus near water.
- Clean only with dry cloth.
- Do not block any ventilation openings. Install in accordance with the manufacturer's instructions.
- Do not install near any heat sources such as radiators, heat registers, stoves, or other apparatus (including amplifiers) that produce heat.
- Do not defeat the safety purpose of the polarized or grounding-type plug. A polarized plug has two blades with one wider than the other. A grounding type plug has two blades and a third grounding prong. The wide blade or the third prong are provided for your safety. If the provided plug does not fit into your outlet, consult an electrician for replacement of the obsolete outlet.
- Protect the power cord from being walked on or pinched particularly at plugs, convenience receptacles, and the point where they exit from the apparatus.
- Only use attachments/accessories specified by the manufacturer.
- Use only with the cart, stand, tripod, bracket, or table specified by the manufacturer, or sold with the apparatus. When a cart is used, use caution when moving the cart/ apparatus combination to avoid injury from tip-over.
![]()
- Unplug this apparatus during lightning storms or when unused for long periods of time.
- Refer all servicing to qualified service personnel. Servicing is required when the apparatus has been damaged in any way, such as power-supply cord or plug is damaged, liquid has been spilled or objects have fallen into the apparatus, the apparatus has been exposed to rain or moisture, does not operate normally, or has been dropped.


Unit
- To reduce the risk of fire, electric shock or product damage,
- Do not expose this unit to rain, moisture, dripping or splashing.
- Do not place objects filled with liquids, such as vases, on this unit.
- Use only the recommended accessories.
- Do not remove covers.
- Do not repair this unit by yourself. Refer servicing to qualified service personnel.
- Do not let metal objects fall inside this unit.
- Do not place heavy items on this unit.
AC power supply cord
- The power plug is the disconnecting device. Install this unit so that the power plug can be unplugged from the socket outlet immediately.
- Ensure the earth pin on the power plug is securely connected to prevent electrical shock.
- An apparatus with CLASS I construction shall be connected to a power socket outlet with a protective earthing connection.

Unit
- Do not place sources of naked flames, such as lighted candles, on this unit.
- This unit may receive radio interference caused by mobile telephones during use. If such interference occurs, please increase separation between this unit and the mobile telephone.
- Do not touch the top surface of this unit. This unit becomes hot while it is on.
Placement
- Place this unit on an even surface.
- To reduce the risk of fire, electric shock or product damage,
- Do not install or place this unit in a bookcase, builtin cabinet or in another confined space. Ensure this unit is well ventilated.
- Do not obstruct this unit's ventilation openings with newspapers, tablecloths, curtains, and similar items.
- Do not expose this unit to direct sunlight, high temperatures, high humidity, and excessive vibration.
- Ensure that the placement location is sturdy enough to accommodate the weight of this unit see "Specifications".
- Keep your speakers at least 10 mm (13/32") away from the system for proper ventilation.
- Do not lift or carry this unit by holding the knobs.
Doing so may cause this unit to fall, resulting in personal injury or malfunction of this unit.
Battery
- Danger of explosion if battery is incorrectly replaced. Replace only with the type recommended by the manufacturer.
- Mishandling of batteries can cause electrolyte leakage and may cause a fire.
- Remove the battery if you do not intend to use the remote control for a long period of time. Store in a cool, dark place.
- Do not heat or expose to flame.
- Do not leave the battery(ies) in a car exposed to direct sunlight for a long period of time with doors and windows closed.
- Do not take apart or short circuit.
- Do not recharge alkaline or manganese batteries.
- Do not use batteries if the covering has been peeled off.
- Do not mix old and new batteries or different types at the same time.
- When disposing of the batteries, please contact your local authorities or dealer and ask for the correct method of disposal.

RISK OF ELECTRIC SHOCK
DO NOT OPEN
 TO REDUCE THE RISK OF ELECTRIC SHOCK, DO NOT REMOVE SCREWS. NO USER-SERVICEABLE PARTS INSIDE. REFER SERVICING TO QUALIFIED SERVICE PERSONNEL.
The lightning flash with arrowhead symbol, within an equilateral triangle, is intended to alert the user to the presence of uninsulated "dangerous voltage" within the product's enclosure that may be of sufficient magnitude to constitute a risk of electric shock to persons.
The exclamation point within an equilateral triangle is intended to alert the user to the presence of important operating and maintenance (servicing) instructions in the literature accompanying the appliance.
If you have any questions, visit:
U.S.A.: http://shop.panasonic.com/support
Canada: www.panasonic.ca/english/support
Register online at http://shop.panasonic.com/support
(U.S. customers only)
Documents / Resources
References
Support | Technics
![www.mqa.co.uk]() MQA-CD Playback | Experience the best sound with MQA | MQA
MQA-CD Playback | Experience the best sound with MQA | MQAFirmware Update | Technics
![shop.panasonic.com]() Panasonic - Official Consumer Product Support
Panasonic - Official Consumer Product Support![www.panasonic.ca]() Panasonic - Official Consumer Product Support
Panasonic - Official Consumer Product Support
Download manual
Here you can download full pdf version of manual, it may contain additional safety instructions, warranty information, FCC rules, etc.
Download Technics SU-R1000 - Stereo Integrated Amplifier Manual
Advertisement
Thank you! Your question has been received!


Need Assistance?
Do you have a question about the SU-R1000 that isn't answered in the manual? Leave your question here.