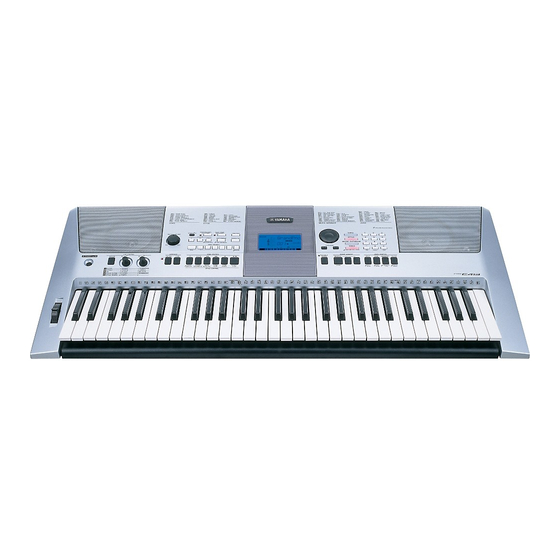
Yamaha PSR-E413 Owner's Manual
Yamaha psr-e413: user guide
Hide thumbs
Also See for PSR-E413:
- Gebruikershandleiding (128 pages) ,
- Owner's manual (128 pages) ,
- Service manual (58 pages)
Table of Contents
Advertisement
Advertisement
Table of Contents

Related Manuals for Yamaha PSR-E413


Summary of Contents for Yamaha PSR-E413
- Page 1 DIGITAL KEYBOARD Owner’s Manual...
-
Page 2: Special Message Section
For longer extension cords, consult a local electrician. This product should be used only with the components supplied or; a cart, rack, or stand that is recommended by Yamaha. If a cart, etc., is used, please observe all safety markings and instructions that accom- pany the accessory product. - Page 3 Compliance with FCC regulations does * This applies only to products distributed by YAMAHA CORPORATION OF AMERICA. IMPORTANT NOTICE FOR THE UNITED KINGDOM Connecting the Plug and Cord IMPORTANT.
- Page 4 • Only use the voltage specified as correct for the instrument. The required voltage is printed on the name plate of the instrument. • Use the specified adaptor (PA-130 or an equivalent recommended by Yamaha) only. Using the wrong adaptor can result in damage to the instrument or overheating.
- Page 5 fluids, or chemical-impregnated wiping cloths. Yamaha cannot be held responsible for damage caused by improper use or modifications to the instrument, or data that is lost or destroyed. Always turn the power off when the instrument is not in use.
-
Page 6: Copyright Notice
STYLE FILE The Style File Format is Yamaha’s original style file format which uses a unique conversion system to pro- vide high-quality automatic accompaniment based on a wide range of chord types. PSR-E413 Owner’s Manual... -
Page 7: Included Accessories
Make sure to keep this manual in a safe and handy place even after you finish reading, and refer to it often when you need to better understand an operation or function. Included Accessories The PSR-E413 package includes the following items. Please check that you have them all. • Owner’s Manual • Music rest •... -
Page 8: Special Features Of The Psr-E413
Special Features of the PSR-E413 ■ Creating New Sounds Page 18 By adjusting just two knobs you can add varying degrees of distortion, “sweetness,” or other characteristics to a sound to change it subtly or drasti- cally. Parameters that can be assigned to the knobs include effect, filter, enve- lope generator and more. -
Page 9: Table Of Contents
Copyright Notice ... 6 Logos ... 6 Included Accessories ... 7 Special Features of the PSR-E413 ... 8 Setting Up Power Requirements ... 10 Connecting Headphones (PHONES/OUTPUT Jack)... 11 Connecting a Footswitch (SUSTAIN Jack) ... 11 Connecting to a Computer (USB Terminal) ... 11 Turning the Power On... -
Page 10: Setting Up
Be sure to do the following operations BEFORE turning on the power. Power Requirements Although the instrument will run either from an optional AC adaptor or batteries, Yamaha recommends use of an AC adaptor whenever possible. An AC adaptor is more environmentally friendly than batteries and does not deplete resources. -
Page 11: Connecting Headphones (Phones/Output Jack)
Connecting a Footswitch (SUSTAIN Jack) The sustain function lets you produce a natural sustain as you play by pressing a footswitch. Plug the Yamaha FC4 or FC5 footswitch into this jack and use it to switch sustain on and off. -
Page 12: Panel Controls And Terminals
[START] button ... page 44 o [METRONOME] button ... page 63 !0 [TEMPO/TAP] button ... page 27 !1 SONG MEMORY [REC], [1]–[5], [A] buttons... page 52 PSR-E413 Owner’s Manual Song Category List Style Category List (page 41) (page 112) !2 ARPEGGIO [ON/OFF] button... -
Page 13: Rear Panel
“Standard Kit 1” is selected. @7 USB terminal ...pages 11, 87 @8 SUSTAIN jack... page 11 @9 PHONES/OUTPUT jack ... page 11 #0 DC IN 12V jack... page 10 Panel Controls and Terminals Rear Panel Rear Panel PSR-E413 Owner’s Manual... -
Page 14: Creating Arpeggios
Voice No. Voice Name Concerto Pizzicato Piano Ballad Synth Sequence Guitarist Pauls Bass Trance Bass SynthChords Acid Bass Funky Clavi PSR-E413 Owner’s Manual Voice No. Voice Name ReggaeOrgan Harpeggio SalsaPIano AnalogSequence Sawtooth Piano Arpeggio Guitar Arpeggio ClubBeat R&B Loop ClubAdds NOTE •... - Page 15 ARPEGGIO [ON/OFF] button to turn it off. ARP Type DownOct The currently selected arpeggio type NOTE • Make sure that you are not pressing any of the keyboard’s keys while turning the arpeggio function on or off. PSR-E413 Owner’s Manual Creating Arpeggios...
- Page 16 Press the [STYLE] button and the name of the currently selected style will appear in the display. Rotate the dial to select the desired style. For this example we’ll use the “002 8BtModrn” (8 Beat Modern) style. NOTE • Refer to “Playing Styles” on page 33. PSR-E413 Owner’s Manual 8BtModrn...
- Page 17 Whenever you’re playing a style as well as a right-hand part, be sure that your left hand plays only to the left of the split point and your right hand plays only to the right of the split point. (page 30) 8BtModrn The ACMP ON icon will appear. Split point Creating Arpeggios 7sus4 PSR-E413 Owner’s Manual...
-
Page 18: Create Original Sounds
It is not possible to assign different effect combinations. z–c affect the main and dual voices only. Split voices will not be affected. Styles and songs will also not be affected. v–b affect styles only. PSR-E413 Owner’s Manual GrandPno Knob A Filter Cutoff... - Page 19 Knob A adjusts the depth of the reverb effect, and Knob B adjusts the depth of the chorus effect. Filter Filter Resonance Cutoff Frequency Frequency Frequencies in this range are cut off. Resonance Frequency Chorus Send Level Create Original Sounds PSR-E413 Owner’s Manual...
-
Page 20: Style Tempo
Style Tempo Knob A adjusts the tempo of the style and arpeggios. Rotating the knob clockwise increases the tempo while rotating it counterclockwise decreases the tempo. The knob’s center position produces the initial default tempo. PSR-E413 Owner’s Manual Attack Release Time... -
Page 21: Using The Knobs
Rotating the knob to the right while the volume is set to a high level can result in distortion. If this occurs, reduce the volume level. SquareLd SquareLd Filter Filter Resonance Create Original Sounds “ ” appears here. PSR-E413 Owner’s Manual... - Page 22 Number/Effect FILTER EFFECT STYLE FILTER STYLE TEMPO PSR-E413 Owner’s Manual Filter Resonance Select a synth-type lead or pad voice (page 106). Turn Knob B all the way up and operate Knob A while playing for some spacey, floating 1980’s effects.
-
Page 23: The Easy Way To Play Piano
“song” also refers to the data that makes up a piece of music. You can listen to the songs, use them for lessons, and use them with a range of other functions (page 39). Song name AveMaria Song number The song displayed here will be played. PSR-E413 Owner’s Manual... - Page 24 Keep playing, and performance assistant technology will continue to “correct” the notes that you play. You can stop song playback at any time by pressing the [ STOP) button. PSR-E413 Owner’s Manual After ] (START/ Adjusts volume.
-
Page 25: Use The Performance Assistant To Play Like A Pro
The Easy Way to Play Piano You will get even better results if you match your left-hand rhythm to the rhythm of the chord indica- tor in the display. right hands—type 3. Play 3 notes at once with your right hand. PSR-E413 Owner’s Manual... - Page 26 When you get used to playing the left hand part, refer to “The Easy Way to Play Piano” on page 23 and try adding the right-hand part. Press the [PERFORMANCE ASSISTANT] button to turn the performance assistant technology feature off. The complete score for Nocturne is provided on page 104. PSR-E413 Owner’s Manual Nocturne...
-
Page 27: Change The Song Tempo
You can return to the original tempo by simultaneously pressing the [+] and [-] buttons. ● About the Beat Display The arrow marks in the beat display flash in time with the rhythm of the song or style. First beat of measure Third beat Second beat Fourth beat PSR-E413 Owner’s Manual... -
Page 28: Try Playing A Variety Of Instrument Voices
The voice selected here becomes the main voice. For this example select the “092 Flute” voice. Play the keyboard. Try selecting and playing a variety of voices. PSR-E413 Owner’s Manual Voice name GrandPno Appears when the Voice mode is engaged. -
Page 29: Play Two Voices Simultaneously-Dual
(page 43). NOTE • You can also select the Dual Voice display by pressing the [FUNCTION] button and then using the CATEGORY [ ] and ] buttons to select the “D.Voice” item. The currently selected dual voice PSR-E413 Owner’s Manual... -
Page 30: Play Different Voices With The Left And Right Hands-Split
“S.VOICE” appears in the display for a few seconds, then the currently selected split voice will be displayed. Hold for longer than a second PSR-E413 Owner’s Manual Two voices will sound at the same time. Split point Main voice and dual voice... -
Page 31: Play The Grand Piano Voice
• When you press the [PORTA- BLE GRAND] button all settings other than touch sensitivity are turned off. The dual and split voices will also be turned off, so only the Grand Piano voice will play over the entire keyboard. PSR-E413 Owner’s Manual... -
Page 32: Fun Sounds
◆ Sound Effect Selection Procedure ➔ (refer to steps 1 and 2 on page 28) Press the [VOICE] button. Use the dial to select “128 SFX Kit2”. Try out each key and enjoy the sound effects! PSR-E413 Owner’s Manual Fun Sounds Drum Kits Sound Effects As you try out the various keys you’ll hear the sound... -
Page 33: Playing Styles
For these styles first turn auto accompaniment on as described on page 34, press the [START/STOP] button, and the accompaniment bass and chord parts will begin playing when you play a key to the left of the keyboard split point. PSR-E413 Owner’s Manual... -
Page 34: Play Along With A Style
Press the button a second time to turn the sync start function off. PSR-E413 Owner’s Manual PopBossa This icon appears when auto- matic accompaniment is on. - Page 35 Press the [START/STOP] button to stop style playback when you’re done. You can switch style “sections” to add variety to the accompaniment. Refer to “Pattern Variation (Sections)” on page 70. Split point Split point Playing Styles PSR-E413 Owner’s Manual...
-
Page 36: Playing The Chord Progressions
This is a simple-but-effective chord progression. When you play through to the end of the score, start again from the beginning. When you’re ready to stop playing press the [INTRO/ENDING/rit.] button and the auto accompaniment function will create a perfect ending. PSR-E413 Owner’s Manual... - Page 37 5 This progression includes jazzy “two-five” (II-V) changes. Try playing it through several times. When you’re ready to stop playing press the [INTRO/ENDING/rit.] button. 158 Piano Boogie 101 Bossa Nova Playing Styles Press the [INTRO/ENDING/rit.] button. PSR-E413 Owner’s Manual...
-
Page 38: Playing Auto-Accompaniment Chords
• To play a minor seventh chord Press the root note together with the nearest white and black keys to the left of it (three keys altogether). PSR-E413 Owner’s Manual Split point (default: 54/F#2) D E F G A B C D E F Accompaniment... -
Page 39: Using Songs
NOTE • You can also play songs you have recorded yourself (User Songs) or songs that have been transferred to the instrument from a computer in the same way that you play the internal songs. PSR-E413 Owner’s Manual... -
Page 40: Song Fast Forward, Fast Reverse, And Pause
] (REW) and pause [ ] (PAUSE) playback of the song. Press the fast reverse button to rapidly return to an earlier point in the song. PSR-E413 Owner’s Manual ] (START/ PAUSE Press the fast forward Press the pause but- button to rapidly skip ton to pause playback. -
Page 41: Song List
These songs allow you to Country Piano practice backing parts one hand at a time, which can be the easiest way to master this important Gospel R&B skill. Medium Swing Jazz Waltz Medium Bossa SlowRock Using Songs Suggested Uses PSR-E413 Owner’s Manual... -
Page 42: Types Of Songs
* The Accessory CD-ROM includes a selection of 70 MIDI songs. See page 91 for instructions on how to transfer the songs to the instrument. The chart below shows the basic PSR-E413 processes flow for using the preset songs, user songs, and external song files—from storage to playback. -
Page 43: Select A Song For A Lesson
Press the [SONG] button, and rotate the dial to select the song you want to use for your lesson. As listed on page 42 there are a variety of song types. For this example try selecting the “012 ForElise”. Select lesson Lesson 1, 2, or 3. start! ForElise PSR-E413 Owner’s Manual... - Page 44 Lesson 1 → Lesson 2 → Lesson 3 → Off → Lesson 1 …. The currently selected mode is shown in the display. Song playback will begin automatically when you select Lesson 1. PSR-E413 Owner’s Manual Right Right-hand lesson...
- Page 45 Good, or Excellent. “Excellent!” is the highest evaluation. Select a Song For a Lesson In this case “ ” indicate that right-hand lesson 1 has been selected. NOTE • The evaluation feature can be turned off via the FUNCTION Grade item (page 85). PSR-E413 Owner’s Manual...
-
Page 46: Lesson 2-Your Tempo
Stop the Lesson mode. You can stop the Lesson mode at any time by pressing the [ (START/STOP) button. Once you’ve mastered Lesson 2, move on to Lesson 3. PSR-E413 Owner’s Manual YourTemp Left-hand part Right-hand part (In the case of a right-hand lesson) In this case “... -
Page 47: Lesson 3-Minus One
You can stop the Lesson mode at any time by pressing the [ (START/STOP) button. Select a Song For a Lesson MinusOne In this case “ hand lesson 3 has been selected. Start the lesson! Right-hand part (In the case of a right-hand lesson) PSR-E413 Owner’s Manual ” indicate that right-... -
Page 48: Practice Makes Perfect-Repeat And Learn
Jump back 4 measures and repeat playback Song playback direction PSR-E413 Owner’s Manual ] (REPEAT & LEARN) button Press immediately Oops! A mistake! NOTE •... -
Page 49: Play Using The Music Database
Split Point NOTE • Music Database (MDB) files transferred from a computer can be selected and used in the same way as the internal Music Data- bases (MDB numbers 301–). File transfer instructions are provided on page 90. PSR-E413 Owner’s Manual... -
Page 50: Change A Song's Style
You can use the [SONG] and [STYLE] buttons to select a song or style, respectively, while the Easy Song Arranger function is on. Select a Song. Press the [SONG] button, then select the song you want to arrange. PSR-E413 Owner’s Manual ] (START/STOP) Halleluj... -
Page 51: Select A Style
OFF] button will not function. • If the time signature of the song and style are different, the time signature of the song will be used. GrandPno The currently selected voice number and name are displayed here. SONG MEL PSR-E413 Owner’s Manual... -
Page 52: Record Your Own Performance
(page 79). Recording Procedure Press the [SONG] button, then use the dial to select the user song number (031–035) you want to record to. PSR-E413 Owner’s Manual Melody Chords Specify track(s) and... - Page 53 Use the song clear or track clear (page 55) function to delete unwanted User 1 data and make more room avail- able for recording, then do the recording again. Current measure ] (START/STOP) or PSR-E413 Owner’s Manual...
- Page 54 • The split voice cannot be recorded. • The following data are recorded at the beginning of the track. Changes made during the song will not be recorded. reverb type, chorus type, time signature, style number, style volume, tempo PSR-E413 Owner’s Manual...
-
Page 55: Song Clear-Deleting User Songs
• To execute the Song Clear func- tion press the [+] button. Press [-] to cancel the Song Clear operation. NOTE • To execute the Track Clear func- tion press the [+] button. Press [-] to cancel the Track Clear operation. PSR-E413 Owner’s Manual... -
Page 56: Backup And Initialization
flash memory from a computer, turn the power on by pressing the [STANDBY/ON] switch while simultaneously holding the highest white key on the keyboard and the three highest black keys. PSR-E413 Owner’s Manual CAUTION • When you execute the Flash... -
Page 57: Basic Operation And Displays
Basic Operation and Displays Basic Operation Overall PSR-E413 control is based on the following simple operations. Press a button to select a basic function. Use the dial to select an item or value. Start a function. Start a function. ● Volume Adjustment Adjusts the volume of the sound heard via the instrument’s speakers or a pair of headphones... -
Page 58: Use The Dial To Select An Item Or Value
• [3] (“003” will appear on the dis- play after a brief delay) Start a function. PSR-E413 Owner’s Manual This portion of the display indi- ForElise cates the name and number of the currently selected song, voice and style. -
Page 59: Display Items
Information related to the song tracks is shown here. (see page 52, 79) GrandPno Beat Display Indicates the current style or song beat with flashing arrows. (see page Knob Assign Display This display allows you to visually confirm parameters assigned to the knobs. (see page 18) PSR-E413 Owner’s Manual... -
Page 60: Adding Effects
Auto Accompaniment is on (page 34). • Harmony type 06 to 12 (Trill) Hold down two keys. PSR-E413 Owner’s Manual Use the dial to select a harmony type. Refer to the Effect Type List on page 117 for information about the available harmony types. -
Page 61: Adding Reverb
Refer to the Effect Type List on page 117 for information about the available reverb types. ● Adjusting the Reverb Send Level You can individually adjust the amount of reverb that is applied to the main, dual, and split voices. (See page 84). PSR-E413 Owner’s Manual Adding Effects... -
Page 62: Adding Chorus
Chorus Chorus1 The currently selected chorus type PSR-E413 Owner’s Manual Use the dial to select a chorus type. You can check how the selected chorus type sounds by playing on the keyboard. Chorus2... -
Page 63: Handy Performance Features
● ● ● ● ● ● ● ● ● ● ● ● ● ● ● ● ● ● ● ● ● Press the [TEMPO/TAP] button to call up the tempo setting. Use the dial to select a tempo from 11 to 280. Tempo Current Tempo setting PSR-E413 Owner’s Manual... -
Page 64: Setting The Number Of Beats Per Measure, And The Length Of Each Beat
Press the [FUNCTION] button. Use the CATEGORY [ ] and [ ] but- tons to select the Metronome Volume item. PSR-E413 Owner’s Manual The available range is from 0 through 60. Select 5 for this example. NOTE • The metronome time signature will synchronize to a style or song that is playing, so these parameters cannot be changed while a style or song is playing. -
Page 65: Tap Start
1 and 3. Higher values produce greater (easier) volume varia- tion in response to keyboard dynam- ics—i.e. greater sensitivity. NOTE • The initial default touch sensitivity setting is “2”. Touch Sensitivity Handy Performance Features PSR-E413 Owner’s Manual... -
Page 66: Pitch Bend
-12 and +12 as required. NOTE • The pitch of Drum Kits voices cannot be changed. PSR-E413 Owner’s Manual ◆ Small Pitch Changes (Tuning) The overall tuning of the instrument can by shifted up or down by a maximum of 100 cents in 1-cent increments (100 cents = 1 semitone). -
Page 67: Controlling Arpeggio Volume With Keyboard Dynamics
ARP Velo Original The currently selected arpeggio velocity. Handy Performance Features Use the dial to select “2 Thru”. When “1 Original” is selected the arpeggio vol- ume is the same regardless of changes in key- board velocity. PSR-E413 Owner’s Manual... -
Page 68: One Touch Setting
If you have stopped playback at some point during this procedure press the [ (START/STOP) button to start playback again. PSR-E413 Owner’s Manual Use the dial to change songs, then play the keyboard and listen to the voice. You should hear a different keyboard voice than you played in step 3. -
Page 69: Adjusting The Harmony Volume
EQ setting. Five settings are available: 1–5. Settings 1 and 2 are best for listening via the instrument’s built-in speakers, setting 3 is for headphones, and settings 4 and 5 are ideal for listening via external speakers. PSR-E413 Owner’s Manual... -
Page 70: Style (Auto-Accompaniment) Functions
Pattern Variation (Sections) The PSR-E413 features a wide variety of style “sections” that allow you to vary the arrangement of the accompaniment to match the song you are playing. - Page 71 To turn the function on, press the [SYNC STOP] button. Appears when the syn- chro-stop function is engaged. The style will play while you are playing Style playback will the keys stop when you release the keys PSR-E413 Owner’s Manual...
-
Page 72: Adjusting The Style Volume
Hold for longer than a second SplitPnt Split point PSR-E413 Owner’s Manual Use the CATEGORY [ ] and [ ] but- tons to select the Style Volume item. StyleVol Use the dial to set the style volume between 000 and 127. -
Page 73: Play A Style With Chords But No Rhythm (Stop Accompaniment)
(page 38). Press the [STYLE] button to engage the style function, then press the [ACMP ON/ OFF] button to turn the auto accompani- ment on. PopBossa Appears when auto accompaniment is on Accompaniment range PSR-E413 Owner’s Manual... -
Page 74: Loading Style Files
[+] and [-] buttons to select the other files in sequence. PSR-E413 Owner’s Manual Execute the load operation. With the name of the style file you want to load shown in the display, press the number [0] but- ton. -
Page 75: Chord Basics
flatted seventh, what alterations or tensions it uses ... all at a glance. ● Some Chord Types (These are just some of the “Standard” chord types recognized by the PSR-E413.) Suspended 4 sus4... - Page 76 7 b 5, 6(9), sus2. PSR-E413 Owner’s Manual ● ● ● ● ● ● ● ● ● ● ● ● ● ● ● ● ● ● ● ● ● ● ● ● ● ● ● ● ● ● ● ● ● ● ●...
-
Page 77: Looking Up Chords Using The Chord Dictionary
When you’ve played the chord properly, a bell sound signals your success and the chord name in the display flash. Chord name (root and type) Dict. PSR-E413 Owner’s Manual... -
Page 78: Song Settings
Play the song (page 39) and press the ] (A-B REPEAT) button at the beginning of the section you want to repeat (the “A” point). PSR-E413 Owner’s Manual Use the dial to set the song volume between 000 and 127. NOTE •... -
Page 79: Muting Independent Song Parts
“SONG MELODY VOICE” appears in the display for a few seconds, indicating that the voice selected in step #2 has replaced the song’s original melody voice. SONG MEL PSR-E413 Owner’s Manual Song Settings Hold for longer than a second... -
Page 80: Memorize Your Favorite Panel Settings
1 to NOTE • Data cannot be saved to the registration memory during song play- back. PSR-E413 Owner’s Manual Up to 16 presets (eight banks of two each) can be memorized. Memory 1... -
Page 81: Recalling A Registration Memory
• Arpeggio settings Arpeggio Type, Arpeggio ON/OFF • Harmony settings Harmony ON/OFF, Harmony Type, Harmony Volume • Other settings Transpose, Pitch Bend Range, Knob Assign * Style settings are not available for Registration Memory when using the Song features. PSR-E413 Owner’s Manual... -
Page 82: Setting The Sleep Mode
Use the CATEGORY [ ] and [ ] buttons to select the SLEEP item. Sleep Time to Sleep Mode PSR-E413 Owner’s Manual Rotate the dial to set the desired time until Sleep Mode begins (3–20 minutes). The time can be set in one-minute increments. -
Page 83: The Functions
Parameters” on page 56 for information on the function settings that are stored on the instru- ment. To restore all initial factor default settings per- form the “Backup Clear” procedure described in the “Initialization” section on page 56. PSR-E413 Owner’s Manual Direct numeric entry. - Page 84 S.Octave Split Voice Pan S.Pan Split Voice Reverb Level S.Reverb Split Voice Chorus Level S.Chorus PSR-E413 Owner’s Manual Range/Settings 000–127 Determines the volume of the Style. 000–127 Determines the volume of the Song. -12–12 Determines the pitch of the instrument by semitone increments.
- Page 85 Determines whether Demo cancel is enabled or not. When this is set to ON/OFF ON, the Demo Song will not play, even if the [DEMO/PC] button is pressed. 3–20, OFF Sets the amount of time before the instrument will go into Sleep Mode. The Functions Description PSR-E413 Owner’s Manual...
-
Page 86: Connecting To A Computer
So then what is the information from the keyboard that becomes the basis for note production? PSR-E413 Owner’s Manual For example, let’s say you play a “C” quarter note using the grand piano sound on the instrument. -
Page 87: Connecting A Personal Computer
(1) when turning the power of the instrument off then on again, or (2) when alternately connecting/disconnecting the USB cable. PSR-E413 Connecting to a Computer Instrument Operation/Panel Setting Reverb/chorus settings, etc. Start/stop operation PSR-E413 Owner’s Manual... -
Page 88: Transferring Performance Data To And From A Computer
• If External Clock is ON and no clock signal is being received from an external device, the song, style, and metronome functions will not start. Press the [FUNCTION] button. PSR-E413 Owner’s Manual USB terminal USB terminal USB cable Description... -
Page 89: Remote Control Of Midi Devices
• You can also access the PC Mode item by first pressing the [FUNC- TION] button and then using the CATEGORY [ locate it (page 83). Connecting to a Computer PC mode ] and [ ] buttons to PSR-E413 Owner’s Manual... -
Page 90: Initial Send
Song: (.mid) SMF format 0/1 Style: (.sty) Music Database: (.mfd) Backup File: 08PK61.bup PSR-E413 Owner’s Manual Press [+/YES] to send, or press [-/NO] to cancel. ● What is SMF (Standard MIDI File)? The SMF (Standard MIDI File) format is one of the most common and widely compatible sequence formats used for storing sequence data. - Page 91 Click the “Electronic Musical Instruments”, and then “Flash mem- ory.” “ Look in” Connecting to a Computer Click the CD-ROM drive Click “Open” Click the “Electronic Musical Instruments”, and then “Flash Memory” PSR-E413 Owner’s Manual...
- Page 92 We recommend that you select channel 1 for the right-hand part and channel 2 for the left-hand part. PSR-E413 Owner’s Manual ■Transfer a backup file from the instrument to a computer You can use the Musicsoft Downloader to transfer “Backup Files”...
-
Page 93: Accessory Cd-Rom Installation Guide
• Yamaha makes no representations or warranties with regard to the use of the software and documentation and can- not be held responsible for the results of the use of this manual and the software. -
Page 94: Cd-Rom Contents
Refer to “Installing the USB-MIDI Driver” on page 95 for installation and setup instructions. PSR-E413 Owner’s Manual This application can be used to download MIDI song data from the Internet and transfer it from the computer to the instrument’s memory. -
Page 95: System Requirements
(16-bit) recommended) at least 3 MB of free — space at least 3 MB of free — space 1024 x 768 at least 150 MB of HighColor free space (16-bit) ● ● ● ● MIDI device PSR-E413 Owner’s Manual... - Page 96 Click [Finish]. (Some computers may take a while to display the Wizard window.) Restart the computer. The USB-MIDI driver installation is complete. PSR-E413 Owner’s Manual Installing the driver on Windows XP Start the computer and use the “Adminis- trator” account to log on to Windows XP.
-
Page 97: Downloader And Digital Music Notebook Applications
The system starts the installation. NOTE • If the “Windows Security” window appears, confirm this software is authored by Yamaha Corporation then click [Install]. When the installation is complete, the system displays the message “The soft- ware for this device has been success- fully installed.”... - Page 98 • Have you selected an appropriate port in the sequence software? PSR-E413 Owner’s Manual • Are you using the latest USB-MIDI driver? The latest driver can be downloaded from the following web site.
-
Page 99: Troubleshooting
Types 06–26 will function whether style playback is on or off. For types 06 = 12 you need to play two notes at the same time. PSR-E413 Owner’s Manual... -
Page 100: Scores
Scores This demo is an example of how the Easy Song Arranger can be used to change styles throughout a piece. q q q q =123 Song No. (Function Demo for Easy Song Arranger) Hallelujah Chorus PSR-E413 Owner’s Manual... - Page 101 Scores PSR-E413 Owner’s Manual...
- Page 102 =61 Song No. (Function Demo for performance assistant technology) Ave Maria P.A.T. Type =CHORD Your Turn. Repeatedly Play the Same Key. PSR-E413 Owner’s Manual...
- Page 103 Scores PSR-E413 Owner’s Manual...
- Page 104 =108 Song No. (Function Demo for performance assistant technology) Nocturne op.9-2 P.A.T. Type =CHORD You Can Even Play the Same Keys! PSR-E413 Owner’s Manual...
- Page 105 Scores PSR-E413 Owner’s Manual...
-
Page 106: Voice List
Fretless Bass Slap Bass Synth Bass Hi-Q Bass Dance Bass PSR-E413 Owner’s Manual NOTE • The Voice List includes MIDI program change numbers for each voice. Use these program change numbers when playing the instrument via MIDI from an external device. - Page 107 Tremolo Organ Flute Reed Organ Puff Organ Accordion Harmonica Harmonica 2 Tango Accordion Tango Accordion 2 GUITAR Nylon Guitar Velocity Guitar Harmonics Ukulele Steel Guitar 12-string Guitar Nylon & Steel Guitar Steel Guitar with Body Sound Mandolin PSR-E413 Owner’s Manual...
- Page 108 60’s Strings Orchestra Orchestra 2 Tremolo Orchestra Velocity Strings Strings 2 Stereo Slow Strings Legato Strings Warm Strings Kingdom Synth Strings 1 PSR-E413 Owner’s Manual Bank Select Voice Voice Name (0–127) MIDI Program Voice Name Change# (0–127) (1–128) Synth Strings 2...
- Page 109 Car Crash Siren Train Jet Plane Starship Burst Roller Coaster Submarine Laugh Scream Punch Heartbeat Footsteps Machine Gun Laser Gun Explosion Firework The voice number with an asterisk (*) is XGlite optional voice. PSR-E413 Owner’s Manual Voice List Voice Name...
-
Page 110: Drum Kit List
MSB (0–127) / LSB (0–127) / PC (1–128) Keyboard MIDI Alternate assign Note# Note Note# Note C# -1 D# -1 G# -1 PSR-E413 Owner’s Manual 127/000/001 127/000/002 127/000/009 Standard Kit 1 Standard Kit 2 Room Kit Surdo Mute Surdo Open Hi Q Whip Slap Scratch H... - Page 111 Hand Cymbal 2 Train Jet Plane Hand Cymbal 2 Short Starship Burst Roller Coaster Submarine Shower Laugh Thunder Scream Wind Punch Stream Heartbeat Bubble Footsteps Feed Machine Gun Horse Laser Gun Bird Tweet 2 Explosion Firework Maou PSR-E413 Owner’s Manual...
-
Page 112: Style List
ChartPop HouseMsk Swing H TcnPolis Clubdanc Club Ltn Garage 1 Garage 2 TcnParty UK Pop HHGroove Hip Shfl HipHopPp PSR-E413 Owner’s Manual Style No. Style Name DISCO ModDisco 70sDsc 1 70sDsc 2 LatinDsc DscPhily SatNight DscChoco DscHands SWING&JAZZ BB Fast... -
Page 113: Arpeggio List
AcidBas1 AcidBas2 FunkyBs ComboJaz TranceBs LatinBs PercArp Strings1 Strings2 Strings3 StrngDwn StrngUp Orchestr Pizz1 Pizz2 Perc1 Perc2 R&B Funk1 Funk2 HipHop Trance Dream 2 Step Ibiza1 ClubHs1 ClubHs2 EuroTek House Ibiza2 Ibiza3 Garage African Tamb Latin Arabic PSR-E413 Owner’s Manual... -
Page 114: Music Database List
NeedLove POP CLASSICS Standing RainLaff Sunshine ForNamdo ThankFor ManPiano CoinLane LovesYou Tmbourin Alone GldField Raindrop SultanSw Life’sWk TopWorld PSR-E413 Owner’s Manual MDB No. MDB Name WatchGrl POP BALLAD WnderLnd CanIStop EvryTime IvoryAnd TheWorld LovWoman Dolannes Madigan Paradise Whisper BALLAD AllOdds... - Page 115 Trumpetr VanMass PIANIST ItalySun BeGood Birdland BlueRose Chaie’s Highwy66 Leaves Miload Cabaret Wonderfl Imagine LtleStar MapleRag Mi-Re-Do NoBuiz OhBlah Charades Sally’s Nabucco SunnyStr MistyFln LdnBridg GrndClck Importnc Snowman Favorite SongForU SugerSpn ThisWay WenSmile ZipperD Music Database List PSR-E413 Owner’s Manual...
-
Page 116: Songs Provided On The Supplied Cd-Rom
O du lieber Augustin (DUET) 069Londo.mid London Bridge (DUET) 070Three.mid Three Blind Mice (DUET) The easy song arranger can only be used with songs that include chord data. PSR-E413 Owner’s Manual Song Name Composer P.I. Tchaikovsky J. Offenbach A. Dvorák ˇ... -
Page 117: Effect Type List
• The Echo effect Types (20–26) create delayed repeats of each note played. Concert hall reverb. Small room reverb. Reverb for solo instruments. Simulated steel plate reverb. No effect. Conventional chorus program with rich, warm chorusing. Pronounced three-phase modulation with a slight metallic sound. No effect. Description Description PSR-E413 Owner’s Manual... -
Page 118: Midi Implementation Chart
MIDI Implementation Chart PSR-E413 Owner’s Manual... - Page 119 MIDI Implementation Chart PSR-E413 Owner’s Manual...
-
Page 120: Midi Data Format
(02)Chorus2 Celeste Flanger 068...127 No Effect PSR-E413 Owner’s Manual <MIDI Master Tuning> F0H, 43H, 1nH, 27H, 30H, 00H, 00H, mm, ll, cc, F7H • This message simultaneously changes the tuning value of all channels. • The values of “mm” and “ll” are used for MIDI Master Tuning. - Page 121 (14) days from the date of receipt, as evidenced by a copy of the receipt. Yamaha’s entire liability and your exclusive remedy will be replacement of the defective media if it is returned to Yamaha or an authorized Yamaha dealer within fourteen days with a copy of the receipt.
- Page 122 Licensor belongs to the Licensor or its licensors and is protected by copyright laws, national and international, and all other applicable laws. PSR-E413 Owner’s Manual Disclaimer of Liability In consideration of the fact that the Product is licensed hereunder free of charge, (a) the Licensor disclaims any and all...
-
Page 123: Specifications
• Headphones: HPE-150 * Specifications and descriptions in this owner’s manual are for information purposes only. Yamaha Corp. reserves the right to change or modify products or specifications at any time without prior notice. Since specifications, equipment or options may not be the same in every locale, please check with your Yamaha dealer. -
Page 124: Index
SYNC START ... 12, 70 SYNC STOP ... 12, 71 TEMPO/TAP ... 12, 27 TOUCH ... 13, 65 USB ... 13, 87 VOICE ... 13, 28 PSR-E413 Owner’s Manual Alphabetical order A-B Repeat ...78 Accessories ...7 ACMP ...34 Arpeggio ...14 Arpeggio List ...113... - Page 125 Touch Sensitivity ...65 Track ... 52-55 Track Clear ...55 Transfer ... 90-92 Transpose ...66 Troubleshooting (Installation) ...98 Troubleshooting (Instrument) ...99 Tuning ...66 USB ...87 USB-MIDI Driver ... 96-97 User Song ...52 Voice ...28 Voice List ...106 XGlite ...6 Index PSR-E413 Owner’s Manual...
-
Page 126: Limited Warranty
If during the first 90 days that immediately follows the purchase date, your new Yamaha product covered by this warranty is found to have a defect in material and/or workmanship, Yamaha and/or its authorized representative will repair such defect without charge for parts or labor. - Page 127 For details of products, please contact your nearest Yamaha representative or the authorized distributor listed below. Pour plus de détails sur les produits, veuillez-vous adresser à Yamaha ou au distributeur le plus proche de vous figurant dans la liste suivante.
- Page 128 Yamaha Home Keyboards Home Page (English Only) http://music.yamaha.com/homekeyboard Yamaha Manual Library http://www.yamaha.co.jp/manual/ U.R.G., Pro Audio & Digital Musical Instrument Division, Yamaha Corporation © 2007 Yamaha Corporation WM17300 XXXPOXXX.X-01A0 Printed in China...