Yamaha PSRE413 - KEYBOARD USB 100 PATTERNS Owner's Manual
Owner's manual
Hide thumbs
Also See for PSRE413 - KEYBOARD USB 100 PATTERNS:
- Gebruikershandleiding (128 pages) ,
- Owner's manual (128 pages) ,
- Service manual (58 pages)
Table of Contents
Advertisement
Quick Links
Advertisement
Table of Contents

Related Manuals for Yamaha PSRE413 - KEYBOARD USB 100 PATTERNS


Summary of Contents for Yamaha PSRE413 - KEYBOARD USB 100 PATTERNS
- Page 1 DIGITAL KEYBOARD Owner’s Manual...
-
Page 2: Special Message Section
This product should be used only with the components supplied or; a of a different type. Batteries MUST be installed correctly. Mismatches or cart, rack, or stand that is recommended by Yamaha. If a cart, etc., is incorrect installation may result in overheating and battery case rupture. - Page 3 Yamaha Corporation of America or its subsidiaries. of other electronic devices. Compliance with FCC regulations does * This applies only to products distributed by YAMAHA CORPORATION OF AMERICA. (class B) IMPORTANT NOTICE FOR THE UNITED KINGDOM...
- Page 4 If any liquid such as water seeps into the instrument, turn off the • Use the specified adaptor (PA-130 or an equivalent recommended by Yamaha) power immediately and unplug the power cord from the AC outlet. Then have only.
- Page 5 (pages 92). Yamaha cannot be held responsible for damage caused by improper use or modifications to the instrument, or data that is lost or destroyed. Always turn the power off when the instrument is not in use.
-
Page 6: Copyright Notice
STYLE FILE The Style File Format is Yamaha’s original style file format which uses a unique conversion system to pro- vide high-quality automatic accompaniment based on a wide range of chord types. PSR-E413 Owner’s Manual... -
Page 7: Included Accessories
Congratulations and thank you for purchasing the Yamaha PSR-E413 Digital Keyboard! Please read this owner’s manual carefully before using the instrument in order to take full advantage of its various features. Make sure to keep this manual in a safe and handy place even after you finish reading, and refer to it often when you need to better understand an operation or function. -
Page 8: Special Features Of The Psr-E413
Special Features of the PSR-E413 ■ Creating New Sounds Page 18 By adjusting just two knobs you can add varying degrees of distortion, “sweetness,” or other characteristics to a sound to change it subtly or drasti- cally. Parameters that can be assigned to the knobs include effect, filter, enve- lope generator and more. -
Page 9: Table Of Contents
Contents Reference Copyright Notice ..............6 Logos ..................6 Included Accessories ............. 7 Adding Effects Special Features of the PSR-E413 ........8 Harmony................60 Setting Up Adding Reverb ..............61 Adding Chorus ..............62 Power Requirements ............10 Connecting Headphones (PHONES/OUTPUT Jack)... 11 Handy Performance Features Connecting a Footswitch (SUSTAIN Jack) ...... -
Page 10: Setting Up
Be sure to do the following operations BEFORE turning on the power. Power Requirements Although the instrument will run either from an optional AC adaptor or batteries, Yamaha recommends use of an AC adaptor whenever possible. An AC adaptor is more environmentally friendly than batteries and does not deplete resources. -
Page 11: Connecting Headphones (Phones/Output Jack)
The sustain function lets you produce a natural sustain restored to the initial factory defaults when the power is as you play by pressing a footswitch. Plug the Yamaha turned on. FC4 or FC5 footswitch into this jack and use it to switch sustain on and off. -
Page 12: Panel Controls And Terminals
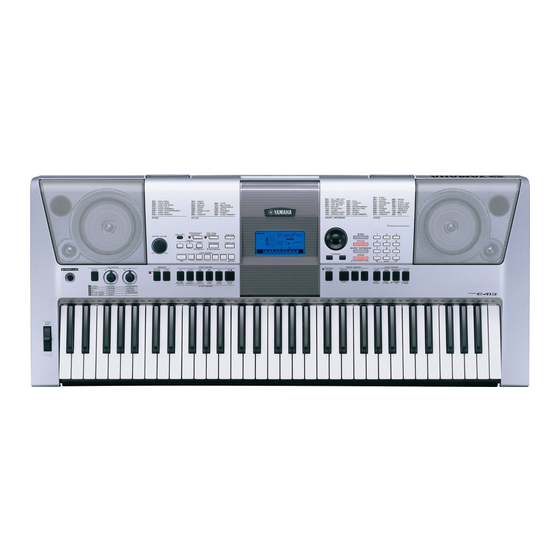
Panel Controls and Terminals Front Panel Song Category List Style Category List Display (page 41) (page 112) (page 59) GrandPno !2 ARPEGGIO Front Panel [ON/OFF] button......page 14 q [STANDBY/ON] switch ....page 11 [TYPE] button ........page 15 w LIVE CONTROL !3 SONG CONTROL [ASSIGN] button ...... -
Page 13: Rear Panel
Panel Controls and Terminals Music Database List Voice Category List (page 114) (page 106) Rear Panel !5 Dial..........pages 58, 83 @5 PITCH BEND wheel ......page 66 !6 CATEGORY [ ] and [ ] @6 Drum Kit........... page 32 buttons ........ -
Page 14: Creating Arpeggios
Creating Arpeggios Quick Guide The arpeggio function lets you create arpeggios (broken chords) by simply playing the required notes on the keyboard. For example, you could play the notes of a triad—the root, third, and fifth—and the arpeg- gio function will automatically create a variety of interesting arpeggio- type phrases. - Page 15 Creating Arpeggios Select an arpeggio type. The most suitable arpeggio type is automatically selected when you select a voice, but you can easily select any other arpeggio type. ARP Type DownOct The currently selected arpeggio type Press the ARPEGGIO [TYPE] button and the name of the current arpeggio type will appear in the display.
- Page 16 Creating Arpeggios Create a Pop Tune You can play a style and specify the style chords with your left hand while playing arpeggios with your right hand to create interesting sonic textures and backgrounds. Select the keyboard voice (page 28). For this example we’ll use a grand piano voice, so press the [PORTABLE GRAND] button.
- Page 17 Creating Arpeggios Press the [ACMP ON/OFF] button to turn auto accompaniment on. 8BtModrn The ACMP ON icon will appear. When auto accompaniment is turned on, the left-hand section of the keyboard is used only for specifying accompaniment chords. NOTE • Refer to “When automatic accompaniment is on ...” on page 34. Press the [START/STOP] button.
-
Page 18: Create Original Sounds
Create Original Sounds The two knobs located in the lower left area of the panel can be used to add variations to the sound being played, transforming the sound in a variety of musical ways. Filter, envelope generator, and other effects can be assigned to the two knobs as required. - Page 19 Create Original Sounds z Filter Filter effects shape sound by allowing only a specified range of frequencies to pass and/or by producing a resonance peak at the filter’s “cutoff” fre- quency. Filter effects can be used to create a range of synthesizer-like sounds.
-
Page 20: Style Tempo
Create Original Sounds c EG (Envelope Generator) Envelope Generator effects determine how the level of the sound varies over time. You can make the attack faster for a more percussive sound or slower for a violin-like sound, for example. Or you can lengthen or shorten the sus- tain to most ideally match the music. -
Page 21: Using The Knobs
Create Original Sounds Using the Knobs Select the voice you want to play on the keyboard. SquareLd The name of the currently selected voice will appear in the display when you press the [VOICE] button. Use the dial to select the desired voice. For this example we want to use a synth-lead type voice, so select “97 SquareLd”... - Page 22 Create Original Sounds Play with the right hand while operating Knob A with the left hand. Filter Filter Cutoff Resonance If you select a different keyboard voice the knobs will be reset and the ideal settings for the selected voice will be automatically recalled. In the same way, if the “v STYLE FILTER”...
-
Page 23: The Easy Way To Play Piano
The Easy Way to Play Piano This instrument includes a performance assistant technology feature that lets you play along with a song and sound like a great pianist (even though you might be making lots of mistakes)! In fact, you can play any notes and still sound good! So even if you can’t play piano and can’t read a note of music, you can have some musical fun. - Page 24 The Easy Way to Play Piano Press the [ ] (START/STOP) button. Adjusts volume. Song playback will begin. The basic pattern will repeat. Listen to four measures while memorizing the basic pattern. It’s your turn to play the part from the fifth measure. Play on the keyboard.
-
Page 25: Use The Performance Assistant To Play Like A Pro
The Easy Way to Play Piano Press the [PERFORMANCE ASSISTANT] button to turn the performance assistant technology feature off. The complete score for Ave Maria is provided on page 102. Use the Performance Assistant to Play Like a Pro! To begin, try to feel the rhythm of the song. Then, with your hands spread as shown in the illustration, simply play the keyboard alter- nately with your left and right hands (any notes will do). - Page 26 The Easy Way to Play Piano Next try playing the Chopin Nocturne. The procedure is that same as that described for playing Ave Maria on pages 23–25. Select “011 Nocturne”. Nocturne Listen to eight measures, then begin playing from the ninth measure.
-
Page 27: Change The Song Tempo
The Easy Way to Play Piano Change the Song Tempo When using the performance assistant technology or in other situations in which the tempo of the song is too fast or too slow for you, you can change the tempo as required. Press the [TEMPO/TAP] button. The tempo display will appear and you can use the dial, the [+] and [-] buttons, or the [0] to [9] number buttons to set to tempo to anywhere from 011 and 280 quarter-note beats per minute. -
Page 28: Try Playing A Variety Of Instrument Voices
Try Playing a Variety of Instrument Voices In addition to piano, organ, and other “standard” keyboard instruments, this instrument has a large range of voices that includes guitar, bass, strings, sax, trumpet, drums and percussion, sound effects … a wide variety of musical sounds. -
Page 29: Play Two Voices Simultaneously-Dual
Try Playing a Variety of Instrument Voices Play Two Voices Simultaneously—DUAL You can select a second voice which will play in addition to the main voice when you play the keyboard. The second voice is known as the “dual” voice. Press the [DUAL] button. -
Page 30: Play Different Voices With The Left And Right Hands-Split
Try Playing a Variety of Instrument Voices Play the keyboard. Two voices will sound at the same time. Try selecting and playing a range of dual voices. Play Different Voices with the Left and Right Hands—SPLIT In the split mode you can play different voices to the left and right of the keyboard “split point”. The main and dual voices can be played to the right of the split point, while the voice played to the left of the split point is known as the “split voice”. -
Page 31: Play The Grand Piano Voice
Try Playing a Variety of Instrument Voices Select the desired split voice. Watch the displayed split voice and rotate the dial until the voice you want to use is selected. The voice selected here becomes the split voice which will play to the left of the keyboard split point. For this example try selecting the “033 Folk Guitar”... -
Page 32: Fun Sounds
Fun Sounds This instrument includes a range of drum kits and unique sound effects you can use for entertainment. Laughter, babbling brooks, jet fly-bys, eerie effects, and much more. These sounds can be a great way to enhance the mood at parties. Drum Kits Drum kits are collections of drum and percussion instruments. -
Page 33: Playing Styles
Playing Styles This instrument has an auto accompaniment feature that produces accompaniment (rhythm + bass + chords) in the style you choose to match chords you play with your left hand. You can select from 165 dif- ferent styles covering a range of musical genres and time signatures (see page 112 for a complete list of the available styles). -
Page 34: Play Along With A Style
Playing Styles Play Along with a Style You learned how to select a style rhythm on the preceding page. Here we’ll see how to add bass and chord accompaniment to the basic rhythm to produce a full, rich accom- paniment that you can play along with. Press the [STYLE] button and select the desired style. - Page 35 Playing Styles Play a left-hand chord to start the style. You can still “play” chords even if you don’t actually know any chords. This instrument will recognize even a single note as a chord. Try play- ing from one to three notes at the same time to the left of the split point. The accompaniment will change according to the left-hand notes you play.
-
Page 36: Playing The Chord Progressions
Playing Styles Styles Are More Fun When You Understand Chords Chords, created by playing multiple notes at the same time, are the basis for harmonic accompaniment. In this section we’ll take a look at sequences of different chords played one after another, or “chord sequences.”... - Page 37 Playing Styles Recommended Style 158 Piano Boogie —3-chord boogie-woogie— Press the [INTRO/ENDING/rit.] button. Press the [INTRO/ENDING/rit.] button. This progression provides varied harmonic backing with just three chords. When you get a feel for the progression in the score, try changing the order of the chords! Recommended Style 101 Bossa Nova —Bossa nova with jazz-style chords—...
-
Page 38: Playing Auto-Accompaniment Chords
Playing Styles Playing Auto-accompaniment Chords There are two ways of playing auto-accompaniment chords: ● Easy Chords ● Standard Chords The instrument will automatically recognize the different chord types. This function is called Multi Fingering. Press the [ACMP ON/OFF] button to turn auto-accompaniment on (page 34). The keyboard to the left of the split point (default: 54/F#2) becomes the “accompaniment range”. -
Page 39: Using Songs
Using Songs With this instrument the term “song” refers the data that makes up a piece of music. You can simply enjoy listening to the 30 internal songs, or use them with just about any of the many functions provided—the performance assistant technology feature, lessons, and more. -
Page 40: Song Fast Forward, Fast Reverse, And Pause
Using Songs 001–030 Built in Songs (see next page) 031–035 User Songs (Songs you record yourself). 036– Songs transferred from a computer (pages 90–92) Listen to the song. Press the [ ] (START/STOP) button to begin playback of the selected song. You can stop playback at any time by pressing the [ ] (START/ STOP) button again. -
Page 41: Song List
Using Songs ● Song List These 30 songs include songs that effectively demonstrate the instrument’s easy song arranger feature, songs that are ideally suited for use with the performance assistant technology feature, and more. The “Sug- gested Uses” column provides some ideas as to how the songs can most effectively used. Category Name Suggested Uses... -
Page 42: Types Of Songs
Using Songs Types of Songs The following three types of songs can be used by the PSR-E413. ● Preset Songs (the 30 songs built into the instrument) ....Song numbers 001–030. ● User Songs (recordings of your own performances) ....Song numbers 031–035. ●... -
Page 43: Select A Song For A Lesson
Select a Song For a Lesson Yamaha Education Suite You can select song you like and use it for a left-hand, right-hand, or both-hands lesson. You can also use songs (only SMF format 0) down- loaded from the Internet and saved to flash memory. (pages 90–92) Dur- ing the lesson you can play as slowly as you like, and you can even play wrong notes. - Page 44 Select a Song For a Lesson Select the part you want to practice. Press the [R] button for a right-hand lesson, [L] button for a left-hand lesson, or press both the [R] and [L] buttons simultaneously for a both- hands lesson. The currently selected part is shown in the display.
- Page 45 Select a Song For a Lesson Play the note shown in the display. When you play the correct note, the next note you need play is shown. The song will wait until you play the correct note. Waiting In this case “ ”...
-
Page 46: Lesson 2-Your Tempo
Select a Song For a Lesson Lesson 2—Your Tempo Learn to play the correct notes with the correct timing. Song playback tempo will vary to match the speed you are playing at. The song will slow down when you play wrong notes, so you can learn at your own pace. -
Page 47: Lesson 3-Minus One
Select a Song For a Lesson Lesson 3—Minus One Here’s where you can perfect your technique. The song will play at the normal tempo, minus the part you have chosen to play. Play along while listening to the song. Select the song and part you want to practice (steps 1 and 2 on pages 43, 44). -
Page 48: Practice Makes Perfect-Repeat And Learn
Select a Song For a Lesson Practice Makes Perfect—Repeat and Learn Use this feature when you want to start again just ahead of a section on which you made a mistake, or to repeatedly practice a section you find difficult. Press the [ ] (REPEAT &... -
Page 49: Play Using The Music Database
Play Using the Music Database You want to play music in your favorite style, but you’re not sure how to select the best voice and style for the type of music you want to play ... simply select the appropriate style from the Music Database. The panel settings will automatically be adjusted for the ideal combination of sounds and style! Press the [MUSIC DATABASE] button. -
Page 50: Change A Song's Style
Change a Song’s Style In addition to each song’s default style, you can select any other style to play the song with the Easy Song Arranger feature. This means that you can play a song that is normally a ballad, for example, as a bossa nova, as a hip-hop tune, etc. -
Page 51: Select A Style
Change a Song’s Style Listen to the song. Press the [ ] (START/STOP) button to begin playback of the song. NOTE • When playing song numbers Move on to the next step while the song is playing. 010, 011 and 020 to 030 while using the Easy Song Arranger, melody tracks will be automati- cally muted and no melody will... -
Page 52: Record Your Own Performance
Record Your Own Performance You can record up to 5 of your own performances and save them as user songs 031 through 035. The recorded song can be played back on the instrument. ■ Recordable Data You can record to a total of 6 tracks: 5 melody tracks and 1 style (chord) track. NOTE •... - Page 53 Record Your Own Performance Select the track(s) you want to record to and confirm your selection on the display. CAUTION • If you record to a track that contains previously-recorded ◆ Record a Melody Track and the Accompaniment Track data the previous data will be overwritten and lost.
- Page 54 Record Your Own Performance If you press the [INTRO/ENDING/rit.] button while recording the style track an appropriate ending pattern will play and then recording will stop. When recording stops the current measure number will return to 001 and the recorded track numbers in the display will light. ●...
-
Page 55: Song Clear-Deleting User Songs
Record Your Own Performance Song Clear—Deleting User Songs This function clears an entire user song (all tracks). NOTE • If you only want to clear a spe- cific track from a user song use Press the [SONG] button, then select the user song (031– the Track Clear function. -
Page 56: Backup And Initialization
Backup and Initialization Backup The following settings are always backed up, and are maintained even when the power is turned off. If you want to initialize the settings, use the Initialize operation as explained below. ● The Backup Parameters • User Songs •... -
Page 57: Basic Operation And Displays
Basic Operation and Displays Basic Operation Overall PSR-E413 control is based on the following simple operations. Press a button to select a basic function. Use the dial to select an item or value. Start a function. Start a function. Select an item or value. Select a basic function. -
Page 58: Use The Dial To Select An Item Or Value
Basic Operation and Displays Use the dial to select an item or value. When you select a basic function, the item corresponding to that function will be displayed. You can then use the dial or the number buttons [0]–[9] to select the desired item. This portion of the display indi- ForElise cates the name and number of... -
Page 59: Display Items
Basic Operation and Displays Display Items The display shows all of the current basic settings: song, style, voice. It also includes a range of indicators that show the on/off status of a range of functions. Notation BEAT number and MEASURE Displays the melody and chord Indicates the beat number in a mea- notes of a song when the Song... -
Page 60: Adding Effects
Reference Adding Effects Harmony This feature adds harmony notes to the main voice. Press the [HARMONY] button to turn Use the dial to select a harmony type. Harmony feature on. Refer to the Effect Type List on page 117 for To turn Harmony off, press the [HARMONY] information about the available harmony types. -
Page 61: Adding Reverb
Adding Effects Adding Reverb Reverb lets you play with a rich concert hall type ambience. When you select a style or song the optimum reverb type for the voice used is automatically selected. If you want to select a different reverb type, use the procedure described below. -
Page 62: Adding Chorus
Adding Effects Adding Chorus The chorus effect creates a thick sound that is similar to many of the same voices being played in unison. When you select a style or song the optimum chorus type for the voice used is automatically selected. If you want to select a different chorus type, use the procedure described below. -
Page 63: Handy Performance Features
Handy Performance Features The Metronome The instrument includes a metronome with adjustable tempo and time signature. Use it to set the tempo that is most comfortable for you. ■Start the metronome ■Adjusting the Metronome ● ● ● ● ● ● ● ● ● ● Tempo ●... -
Page 64: Setting The Number Of Beats Per Measure, And The Length Of Each Beat
Handy Performance Features Setting the Number of Beats per Measure, and the Length of Each Beat In this example we’ll set up a 5/8 time signature. Press and hold the [METRONOME] but- The available range is from 0 through 60. Select 5 for this example. -
Page 65: Tap Start
Handy Performance Features Tap Start You can supply a count-in at any tempo you like to start playback. Simply tap the [TEMPO/TAP] button at any tempo—4 times for time signatures in 4, and 3 times for time signatures in 3—and the selected style/ song will begin playing at the tapped tempo. -
Page 66: Pitch Bend
Handy Performance Features Pitch Bend The pitch bend wheel can be used to add smooth pitch variations to notes you play on the keyboard. Roll the wheel upward to raise the pitch, or downward to lower the pitch. If you use this feature with a voice such as the “040 Overdriven”... -
Page 67: Controlling Arpeggio Volume With Keyboard Dynamics
Handy Performance Features Controlling Arpeggio Volume with Keyboard Dynamics Press the [FUNCTION] button. Use the dial to select “2 Thru”. When “1 Original” is selected the arpeggio vol- ume is the same regardless of changes in key- board velocity. Press the CATEGORY [ ] and [ ] but- tons as many times as necessary to select the arpeggio velocity function “ARP Velo”. -
Page 68: One Touch Setting
Handy Performance Features One Touch Setting Sometimes selecting the ideal voice to play with a song or style can be confusing. The One Touch Setting feature automatically selects a well-balanced voice for you when you select a style or song. Simply select voice number “000”... -
Page 69: Adjusting The Harmony Volume
Handy Performance Features Adjusting the Harmony Volume Press the [FUNCTION] button. Use the dial to set the harmony volume between 000 and 127. Use the CATEGORY [ ] and [ ] but- tons to select the Harmony Volume item. HarmVol Select an EQ Setting for the Best Sound Five different master equalizer (EQ) settings are provided to give you the best possible sound when listen- ing through different reproduction systems—the instrument’s internal speakers, headphones, or an external... -
Page 70: Style (Auto-Accompaniment) Functions
Style (Auto-accompaniment) Functions Basic operation of the Style (auto-accompaniment) feature is described on page 33 of the Quick Guide. Here are some other ways you can play the styles, the style volume adjustment proce- dure, how you can play chords using the styles, and more. Pattern Variation (Sections) The PSR-E413 features a wide variety of style “sections”... - Page 71 Style (Auto-accompaniment) Functions Press the [MAIN/AUTO FILL] button. Press the [INTRO/ENDING/rit.] button. MAIN A ENDING The name of the selected section— MAIN A or MAIN B—will be displayed. This switches to the ending section. When the ending is finished, the auto accompa- Press the [INTRO/ENDING/rit.] button.
-
Page 72: Adjusting The Style Volume
Style (Auto-accompaniment) Functions Adjusting the Style Volume Press the [STYLE] button to engage the Use the CATEGORY [ ] and [ ] but- style function. tons to select the Style Volume item. Press the [FUNCTION] button. StyleVol Use the dial to set the style volume between 000 and 127. -
Page 73: Play A Style With Chords But No Rhythm (Stop Accompaniment)
Style (Auto-accompaniment) Functions Play a Style with Chords but No Rhythm (Stop Accompaniment) When auto accompaniment is on (the ACMP ON icon is showing) and Synchro Start is off, you can play chords in the left-hand accompaniment range of the keyboard while the style is stopped and still hear the accompaniment chords. -
Page 74: Loading Style Files
Style (Auto-accompaniment) Functions Loading Style Files This instrument features 165 internal styles, but other styles, such as those provided on the CD-ROM and others that can be obtained from the internet (only styles with the “.sty” suffix), can be loaded into style number 166 and used in the same way as the internal styles. -
Page 75: Chord Basics
Style (Auto-accompaniment) Functions Chord Basics Two or more notes played together constitute a “chord”. The most basic chord type is the “triad” consisting of three notes: the root, third, and fifth degrees of the corresponding scale. A C major triad, for example, is made up of the notes C (the root), E (the third note of the C major scale), and G (the fifth note of the C major scale). - Page 76 Style (Auto-accompaniment) Functions ■Recognized Standard Chords ● ● ● ● ● ● ● ● ● ● ● ● ● ● ● ● ● ● ● ● ● ● ● ● ● ● ● ● ● ● ● ● ● ● ● All chords in the chart are “C-root”...
-
Page 77: Looking Up Chords Using The Chord Dictionary
Style (Auto-accompaniment) Functions Looking Up Chords Using the Chord Dictionary The Dictionary function is essentially a built-in “chord book” that shows you the individual notes of chords. It is ideal when you know the name of a certain chord and want to quickly learn how to play it. Press and hold the LESSON [START] Press the “M7”... -
Page 78: Song Settings
Song Settings Song Volume Press the [FUNCTION] button. Use the dial to set the song volume between 000 and 127. NOTE • Song volume can be adjusted while a song is selected. Use the CATEGORY [ ] and [ ] but- tons to select the Song Volume item. -
Page 79: Muting Independent Song Parts
Song Settings Muting Independent Song Parts Each “track” of a song plays a different part of the song—melody, percussion, accompaniment, etc. You can mute individual tracks and play the muted part on the keyboard yourself, or simply mute tracks other than the ones you want to listen to. To mute a track, press the appropriate track button Track number on—Track will playback (TRACK [1]–[5], [A]) button. -
Page 80: Memorize Your Favorite Panel Settings
Memorize Your Favorite Panel Settings This instrument has a Registration Memory feature that lets you save your favorite set- tings for easy recall whenever they’re needed. Up to 16 complete setups can be saved (8 banks of two setups each). 8 Banks Up to 16 presets (eight banks of two each) can be... -
Page 81: Recalling A Registration Memory
Memorize Your Favorite Panel Settings Recalling a Registration Memory Press the [MEMORY/BANK] button. A ● Settings That Can be Saved to the Registra- bank number will appear in the display tion Memory when you release the button. • Style settings* Style number, Auto Accompaniment ON/OFF, Split Point, Style settings (Main A/B), Style Volume, Tempo... -
Page 82: Setting The Sleep Mode
Setting the Sleep Mode This instrument has a Sleep Mode function that allows it to automatically go into a low- power “sleep” mode if not operated for specified period of time. In Sleep Mode all panel indicators and the display backlight are off to conserve power. The Sleep Mode func- tion is initially disabled (OFF) by default. -
Page 83: The Functions
The Functions The “Functions” provide access to a range of detailed instrument parameters for tun- ing, setting the split point, and adjusting the voices and effects. Take a look at the func- tion list starting on the opposite page. When you locate a function you want to set up, simply select the function’s display name (shown to the right of the function name in the list) and adjust as required. - Page 84 The Functions ● Function Setting List Setting Item title Range/Settings Description Style Volume StyleVol 000–127 Determines the volume of the Style. Song Volume SongVol 000–127 Determines the volume of the Song. Transpose Transpos -12–12 Determines the pitch of the instrument by semitone increments. Tuning Tuning -100–100...
- Page 85 The Functions Setting Item title Range/Settings Description Reverb Type Reverb 01–10 Determines the Reverb type, including off (10). (See the list on page 117) Chorus Type Chorus 01–05 Determines the Chorus type, including off (05). (See the list on page 117) Speaker1, Speaker2, Sets the equalizer applied to the speaker output for optimum sound in...
-
Page 86: Connecting To A Computer
Connecting to a Computer Nearly all of the electronic musical instruments made today—particularly synthesizers, sequencers and computer music related devices—use MIDI. MIDI is a worldwide stan- dard that allows these devices to send and receive performance and setting data. Natu- rally, this instrument lets you save or send your keyboard performance as MIDI data, as well as the songs, styles and panel settings. -
Page 87: Connecting A Personal Computer
Connecting to a Computer ● Channel Messages ● System Messages This instrument is capable of handling 16 MIDI This is data that is used in common by the entire channels simultaneously—meaning it can play up MIDI system. System messages include messages to sixteen different instruments at the same time. -
Page 88: Transferring Performance Data To And From A Computer
Connecting to a Computer Transferring Performance Data to and from a Computer By connecting the instrument to a computer, the instrument’s performance data can be used on the com- puter, and performance data from the computer can be played on the instrument. ●... -
Page 89: Remote Control Of Midi Devices
Connecting to a Computer ■PC Mode Press and hold the [DEMO/PC] button ● ● ● ● ● ● ● ● ● ● ● ● ● ● ● ● ● ● ● for longer than a second so that the PC A number of MIDI settings need to be made when Mode item appears. -
Page 90: Initial Send
Connecting to a Computer Initial Send This function lets you send the panel setup data to a computer. Before you record performance data to a sequencer application running on your computer, it is a good idea to first send and record the panel setup data before the actual performance data. - Page 91 Connecting to a Computer ● Backup files can be transferred from the instru- Click the CD-ROM drive ment to a computer and back. ⇒ refer to the procedure described on page 92. Use the Musicsoft Downloader application with Internet Explorer 5.5 or higher. ■Use Musicsoft Downloader Double-click “SampleData”...
- Page 92 Connecting to a Computer ■Transfer a backup file from After selecting the file in the “List of files stored temporarily”, click the the instrument to a computer ● ● ● downward [Move] button and a confir- You can use the Musicsoft Downloader to transfer mation message will appear.
-
Page 93: Accessory Cd-Rom Installation Guide
• Yamaha makes no representations or warranties with regard to the use of the software and documentation and can- not be held responsible for the results of the use of this manual and the software. -
Page 94: Cd-Rom Contents
Accessory CD-ROM Installation Guide CD-ROM Contents Folder Name Application / Data Name Contents This application can be used to download MIDI song data from the Internet MSD_ Musicsoft Downloader and transfer it from the computer to the instrument’s memory. Digital Music Notebook is a combination music learning program and online service that makes it easy and fun to practice and master your DMN_ Digital Music Notebook... -
Page 95: System Requirements
Accessory CD-ROM Installation Guide System Requirements Application/Data Memory Hard Disk Display ® 233 MHz or higher; Intel at least 128 MB of Windows 2000/XP Home ® ® Pentium /Celeron 64 MB or more free space (at least 800 x 600 Edition/XP Professional/ Musicsoft Downloader Processor family... - Page 96 Accessory CD-ROM Installation Guide Installing the driver on Windows 2000 Installing the driver on Windows XP Start the computer and use the “Adminis- Start the computer and use the “Adminis- trator” account to log on to Windows trator” account to log on to Windows XP. 2000.
-
Page 97: Downloader And Digital Music Notebook Applications
* You can obtain the latest version of the Musicsoft • If the “Windows Security” window appears, confirm this software is Downloader at the following Internet URL. authored by Yamaha Corporation then click [Install]. http://music.yamaha.com/download/ When the installation is complete, the IMPORTANT system displays the message “The soft-... - Page 98 • Is the USB cable connected correctly? web site. Check the USB cable connection. Disconnect the http://music.yamaha.com/download/ USB cable, then connect it again. • Is the USB function enabled on your computer? Playback response is delayed.
-
Page 99: Troubleshooting
Appendix Troubleshooting Problem Possible Cause and Solution When the instrument is turned on or off, a popping This is normal and indicates that the instrument is receiving electrical power. sound is temporarily produced. Using a mobile phone in close proximity to the instrument may produce interfer- When using a mobile phone, noise is produced. -
Page 100: Scores
Scores This demo is an example of how the Easy Song Arranger can be used to change styles throughout a piece. q q q q =123 Song No. (Function Demo for Easy Song Arranger) Hallelujah Chorus PSR-E413 Owner’s Manual... - Page 101 Scores PSR-E413 Owner’s Manual...
- Page 102 Scores This score is provided with the intent that the pitch will be corrected by the performance assistant technol- ogy feature. If you play the “Play These Notes” part using the performance assistant technology feature, the part will be corrected and played so that it matches the backing part. q q q q =61 Song No.
- Page 103 Scores PSR-E413 Owner’s Manual...
- Page 104 Scores This score is provided with the intent that the pitch will be corrected by the performance assistant technol- ogy feature. If you play the “Play These Notes” part using the performance assistant technology feature, the part will be corrected and played so that it matches the backing part. q q q q =108 Song No.
- Page 105 Scores PSR-E413 Owner’s Manual...
-
Page 106: Voice List
Voice List ■ Maximum Polyphony ● ● ● ● ● ● ● ● ● ● ● ● ● ● ● ● ● ● The instrument has 32-note maximum polyphony. This means NOTE that it can play a maximum of up to 32 notes at once, regard- •... - Page 107 Voice List Bank Select MIDI Bank Select MIDI Voice Program Voice Program Voice Name Voice Name Change# Change# (0–127) (0–127) (0–127) (0–127) (1–128) (1–128) Analogon Electric Piano 1 KSP Fargo Chorus Electric Piano 1 Star Dust Electric Piano 2 Voice Lead Electric Piano 2 KSP Brightness *165...
- Page 108 Voice List Bank Select MIDI Bank Select MIDI Voice Program Voice Program Voice Name Voice Name Change# Change# (0–127) (0–127) (0–127) (0–127) (1–128) (1–128) Jazz Guitar Synth Strings 2 Jazz Amp Choir Aahs Clean Guitar Stereo Choir Chorus Guitar Mellow Choir Muted Guitar Choir Strings Funk Guitar...
- Page 109 Voice List Bank Select MIDI Bank Select MIDI Voice Program Voice Program Voice Name Voice Name Change# Change# (0–127) (0–127) (0–127) (0–127) (1–128) (1–128) Fifths Lead Bonang Big Five Altair Bass & Lead Gamelan Gongs Big & Low Stereo Gamelan Gongs Fat &...
-
Page 110: Drum Kit List
Drum Kit List • “ ” indicates that the drum sound is the same as “Standard Kit 1”. • Each percussion voice uses one note. • The MIDI Note # and Note are actually one octave lower than keyboard Note # and Note. For example, in “117: Standard Kit 1”, the “Seq Click H”... - Page 111 Drum Kit List Voice No. MSB (0–127) / LSB (0–127) / PC (1–128) 127/000/001 127/000/113 127/000/033 127/000/041 127/000/049 126/000/001 126/000/002 Keyboard MIDI Alternate Standard Kit 1 Dance Kit Jazz Kit Brush Kit Symphony Kit SFX Kit 1 SFX Kit 2 assign Note# Note...
-
Page 112: Style List
Style List Style No. Style Name Style No. Style Name Style No. Style Name 8BEAT DISCO BALLROOM BritRock ModDisco VienWltz 8BtModrn 70sDsc 1 EngWaltz Cool 8Bt 70sDsc 2 Slowfox 60sGtPop LatinDsc Foxtrot 8BtAdria DscPhily Quickstp 60s8Beat SatNight Tango BblgumPp DscChoco Pasodobl BritPpSw DscHands... -
Page 113: Arpeggio List
Arpeggio List Arpeggio No. Arpeggio Name Arpeggio No. Arpeggio Name UpOct GuitChd2 DownOct GuitChd3 UpDnOct GuitArp SynArp1 FngrPck1 SynArp2 FngrPck2 SynArp3 CleanGt SynArp4 Slowfl SyncEcho Samba1 PulsLine Samba2 StepLine Harp1 Random Harp2 Down&Up FngrBass SuperArp CooFunk AcidLine SlapBass TekEcho AcidBas1 VelGruv AcidBas2 Trance1... -
Page 114: Music Database List
Music Database List MDB No. MDB Name MDB No. MDB Name MDB No. MDB Name ALL TIME HITS WatchGrl Shouting Jude Hey POP BALLAD Rock&Rll New UK WnderLnd HonkyTnk MyLoving CanIStop OLDIES All OK EvryTime Daydream Buttercp IvoryAnd Sumertme JustCall TheWorld Diana’s CheepChp... - Page 115 Music Database List MDB No. MDB Name MDB No. MDB Name COUNTRY Donald’s OnTheRd MoonWlz Breathe MoulinHt InMyMind Sunshine ContryHw PieceOf GreenGrs GreenSlv EverNeed TakeFour Lonesone TexRose Lucille ThePolka HomeRng Scarboro Tennesse Edelweis LATIN AroundWd Bananabt Whatever DanceMng Yankee’s DntWorry WORLD Jamaica Hawaii...
-
Page 116: Songs Provided On The Supplied Cd-Rom
Songs Provided On the Supplied CD-ROM File Name Song Name Composer 001Nutcr.mid Danse des Mirlitons from “The Nutcracker” P.I. Tchaikovsky 002Orphe.mid “Orphée aux Enfers” Ouverture J. Offenbach 003Slavo.mid Slavonic Dances op.72-2 A. Dvorák ˇ 004Prima.mid La Primavera (from Le Quattro Stagioni) A. -
Page 117: Effect Type List
Effect Type List ● Harmony Types Harmony Type Description Duet Harmony types 01–05 are pitch-based and add one-, two- or three-note harmonies to the sin- gle-note melody played in the right hand. These types sound when chords are played in the Trio auto accompaniment range of the keyboard. -
Page 118: Midi Implementation Chart
MIDI Implementation Chart PSR-E413 Owner’s Manual... - Page 119 MIDI Implementation Chart PSR-E413 Owner’s Manual...
-
Page 120: Midi Data Format
MIDI Data Format NOTE: <MIDI Master Tuning> F0H, 43H, 1nH, 27H, 30H, 00H, 00H, 1 By default (factory settings) the instrument ordinarily functions mm, ll, cc, F7H as a 16-channel multi-timbral tone generator, and incoming • This message simultaneously changes the tuning value of data does not affect the panel voices or panel settings. - Page 121 THIRD PARTY SOFTWARE. Copyrighted data, including but not limited to MIDI data for songs, obtained • Yamaha is not liable to you or any other person for any damages, including, by means of the SOFTWARE, are subject to the following restrictions which without limitation, any direct, indirect, incidental or consequential damages, you must observe.
- Page 122 SIBELIUS SCORCH LICENSE AGREEMENT By installing and/or using this Product you (an individual or legal entity) agree with the Licensor to be bound by the terms of this License which will govern your use of the Product. If you do not accept these terms, do not install or use this Product. The Product is copyright ©...
-
Page 123: Specifications
HPE-150 Registration Memory • 8 banks x 2 types Function * Specifications and descriptions in this owner’s manual are for information purposes only. Yamaha Corp. reserves the • VOLUME Style Volume Song Volume right to change or modify products or specifications at any •... -
Page 124: Index
Index Panel controls and terminals Alphabetical order +, - ..........13, 58 Flash Memory ........42 ............57 Foot Switch .......... 11 A-B Repeat ...........78 (REPEAT & LEARN) .... 12, 48 Function .......... 83-84 Accessories ..........7 (A-B REPEAT) ....12, 78 ACMP ...........34 (REW) ........ - Page 125 Index Touch Response ........65 Touch Sensitivity ........65 PC Mode ..........89 Track ..........52-55 Performance assistant technology ..23 Track Clear ...........55 Pitch Bend Range ......... 84 Transfer ........... 90-92 Power Adaptor ........10 Transpose ..........66 Preset Song ........39, 41-42 Troubleshooting (Installation) ....98 Troubleshooting (Instrument) ....99 Tuning ...........66...
-
Page 126: Limited Warranty
PSR SERIES OF DIGITAL KEYBOARD If during the first 90 days that immediately follows the purchase date, your new Yamaha product covered by this warranty is found to have a defect in material and/or workmanship, Yamaha and/or its authorized representative will repair such defect without charge for parts or labor. - Page 127 Niederlassung und bei Yamaha Vertragshändlern in den jeweiligen Bestimmungsländern erhältlich. Pour plus de détails sur les produits, veuillez-vous adresser à Yamaha ou au distributeur le plus proche de vous figurant dans la liste suivante. Para detalles sobre productos, contacte su tienda Yamaha más cercana o el distribuidor autorizado que se lista debajo.
- Page 128 Yamaha Home Keyboards Home Page http://music.yamaha.com/homekeyboard Yamaha Manual Library http://www.yamaha.co.jp/manual/ U.R.G., Pro Audio & Digital Musical Instrument Division, Yamaha Corporation © 2007 Yamaha Corporation WM17300 XXXPOXXX.X-02B0 Printed in China...