Table of Contents
Advertisement
Quick Links
IMPORTANT
Check Your Power Supply
Make sure that your local AC mains
voltage matches the voltage speci-
fied on the name plate on the bottom
panel. In some areas a voltage se-
lector may be provided on the bottom
panel of the main keyboard unit near
the power cord. Make sure that the
voltage selector is set for the voltage
in your area. The voltage selector is
set at 240V when the unit is initially
shipped. To change the setting use a
"minus" screwdriver to rotate the se-
lector dial so that the correct voltage
appears next to the pointer on the
panel.
WICHTIG
Netzspannung überprüfen
Vergewissern Sie sich vor dem An-
schließen an das Stromnetz, daß die
örtliche Netzspannung den Betriebs-
spannungswerten auf dem Typenschild
an der Unterseite des Instruments ent-
spricht. In bestimmten Verkaufs-
gebieten ist das Instrument mit einem
Spannungswähler an der Unterseite
neben der Netzkabeldurchführung aus-
gestattet. Falls vorhanden, muß der
Spannungswähler auf die örtliche Netz-
spannung eingestellt werden. Der
Spannungswähler wurde werkseitig auf
240 V voreingestellt. Zum Verstellen
drehen Sie den Spannungsregler mit
einem Schlitzschraubendreher, bis der
Zeiger auf den korrekten Spannungs-
wert weist
IMPORTANT
Vérifiez la source d'alimentation
Vérifiez que la tension spécifiée sur
le panneau arrière correspond à la
tension du secteur. Dans certaines
régions, l'instrument peut être équipé
d'un sélecteur de tension situé sur
le panneau inférieur du clavier à
proximité du cordon d'alimentation.
Vérifiez que ce sélecteur est bien
réglé en fonction de la tension sec-
teur de votre région. Le sélecteur de
tension est réglé sur 240 V au dé-
part d'usine. Pour modifier ce ré-
glage, utilisez un tournevis à lame
plate pour tourner le sélecteur afin
de mettre l'indication correspondant
à la tension de votre région vis à vis
du repère triangulaire situé sur le
panneau.
IMPORTANTE
Compruebe la alimentación de su área
Asegúrese de que tensión de alimen-
tación de CA de su área correspon-
de con la tensión especificada en la
placa de características del panel
inferior de la unidad del teclado prin-
cipal, cerca del cable de alimenta-
ción. Asegúrese de que el selector
de tensión esté ajustado a la tensión
de su área. El selector de tensión
se ajusta a 240V cuando la unidad
sale de fábrica. Para cambiar el ajus-
te, emplee un destornillador de ca-
beza "recta" para girar el selector de
modo que aparezca la tensión co-
rrecta al lado del indicador del pa-
nel.
Advertisement
Chapters
Table of Contents

Related Manuals for Yamaha Clavinova CVP-92


Summary of Contents for Yamaha Clavinova CVP-92
- Page 1 IMPORTANT Check Your Power Supply Netzspannung überprüfen Vergewissern Sie sich vor dem An- Make sure that your local AC mains voltage matches the voltage speci- schließen an das Stromnetz, daß die fied on the name plate on the bottom örtliche Netzspannung den Betriebs- spannungswerten auf dem Typenschild panel.
-
Page 2: Special Message Section
SPECIFICATIONS SUBJECT TO CHANGE: The information contained in this manual is believed to be correct at the time of printing. However, Yamaha reserves the right to change or modify any of the specifications without notice or obligation to update existing units. - Page 3 • Always save data to a floppy disk frequently, in order to help prevent the loss of important data due to a malfunction or user operating error. Yamaha cannot be held responsible for damage caused by improper use or modi- fications to the instrument, or data that is lost or destroyed.
-
Page 4: Table Of Contents
Thank you for purchasing the Yamaha Clavinova CVP-94/92! We recommend that you read this manual carefully so that you can fully take advantage of the advanced and convenient functions of the CVP-94/92. We also recommend that you keep this manual in a safe and handy place for future refer- ence. - Page 5 Voice Effects Effect ON/OFF ... 36 Selecting the Effect Type ... 36 Setting the Effect Depth ... 37 Restoring the Basic Settings ... 37 CHAPTER Accompaniment Styles (Rhythm and Auto Accompaniment) Selecting Accompaniment Styles Selecting a style from the STYLE SELECT Display ...
-
Page 6: Features Of The Cvp-94/92
1: Getting Ready CHAPTER Features of the CVP-94/92 G Large, Easy-to-use LCD Display The large LCD (along with the dedicated buttons) provides comprehen- sive and easy-to-understand control of the CVP-94/92’s operations (page 12). G Wealth of Rich, Realistic Voices The CVP-94/92 has a wide variety of authentic and dynamic voices (133 Clavinova voices + 480 XG voices + 12 Drum Kits). -
Page 7: About This Manual
About This Manual Conventions Used in This Manual I Indications of Buttons and LCD Display [ ]: This indicates actual panel buttons. When this mark is used, words such as button, slider, jack (terminal) sometimes may not be used. For example, the slider for the master volume is expressed as [MASTER VOLUME] in this manual. - Page 8 About This Manual I Basic Settings: The functions of the CVP-94/92 are set to certain standard values or standard conditions when the instrument is shipped. These settings and conditions are called the basic settings. The basic settings of each func- tion can be changed according to your preferences.
-
Page 9: Handling Floppy Disks
Handling Floppy Disks The “Music Software Collection” disk and one blank disk are supplied with the Clavinova. I Taking Care of Your Floppy Disks G Do NOT eject the disk during recording or play- back, or at any time when the DISK IN USE lamp is lit. -
Page 10: Setting Up The Cvp-94/92
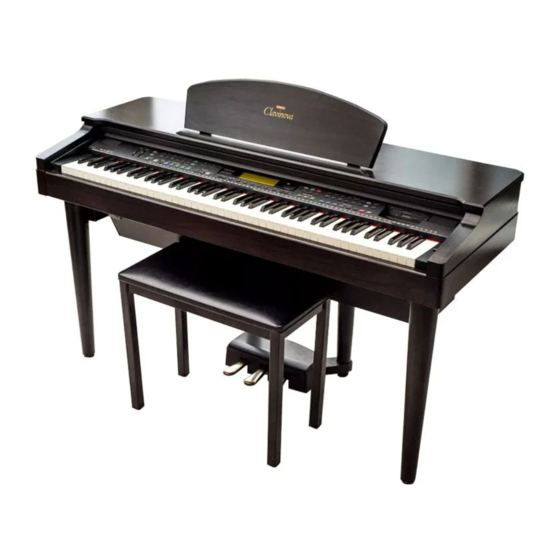
Setting Up the CVP-94/92 Music Stand CVP-94 CVP-94 Key Cover (Instruments with a Key Cover only) CVP-94 Be careful to avoid catching your fingers when opening or closing the cover. CVP-94 I To raise the music stand: Pull the stand up and toward yourself as far as it will go. Flip down the two metal supports at the left and the right on the rear of the music stand. -
Page 11: Turning On The Power
Insert the plugs at the ends of the cord, one into the AC INLET on the rear panel of the CVP-94/92, and the other into a standard AC outlet. CVP-92 Press the [POWER] switch. The power is turned on and the main display appears in the LCD display. -
Page 12: Panel Controls And Terminals
Manual for more information on the DOC for- mat. This is the Style File logo. This indicates that the CVP-94/92 can use optional Yamaha Style File disks. See page 69 for more information on Style File data. Volume Section [MASTER VOLUME] ... -
Page 13: The Panel Controls
Damper pedal ... page 32 [PHONES]... page 9 AUX OUT [R], [L/L+R] ... page 138 AUX IN [R], [L/L+R] ... page 138 [TO HOST] ... page 139 [HOST SELECT] ... page 139 MIDI [IN], [OUT]... page 139 The Panel Controls CVP-92 POWER... -
Page 14: Basic Operation
Basic Operation Virtually all of the CVP-94/92’s operations are done from the LCD display. When you press a button on the panel once, the relevant function’s display appears. Depending on the display that ap- pears, you can conveniently perform various functions and change values/settings by using the buttons located under the LCD, and the data dial and [–/+] buttons at the right of the LCD. - Page 15 I When function is within “soft” rectangle: First press the appropriate LCD button under the display (the selected item is highlighted), and use the data dial or [–/+] to set the items which are in “soft” rectangles with rounded corners. Alternately, after selecting the item, press the LCD button again.
-
Page 16: Page [<] [>] Buttons
Basic Operation PAGE [< < < < < ] [> > > > > ] Buttons Some of the CVP-94/92’s functions are contained on successive dis- play pages. To select the next page or previous page, press the appropri- ate PAGE [<] [>] button. The current page and the entire number of pages for the function are indicated at the top right of the display. -
Page 17: Adjusting The Contrast Of The Lcd Display
Adjusting the Contrast of the LCD Display Turn the [CONTRAST] button in order to adjust the contrast or brightness of the display. CONTRAST Memory Backup The Backup function (page 132) can be used to maintain various val- ues and settings, even after the power has been turned off. In the Backup function display, each parameter group to be backed up can be selected individually. -
Page 18: Adjusting The Volume [Master Volume]
Adjusting the Volume The CVP-94/92 has two sliders on the panel for adjusting the volume. It also allows you to adjust the volume of each part of the Automatic Accompaniment or song. VOLUME MASTER ACMP/SONG VOLUME VOLUME [MASTER VOLUME] This determines the entire volume of the CVP-94/92. Louder Softer [ACMP/SONG VOLUME]... -
Page 19: [Mixer]
[MIXER] Call up the Mixer display by pressing [MIXER]. In the Mixer dis- play, the volume of Automatic Accompaniment and individual parts of a song can be adjusted. Press [MIXER] again (or [EXIT]) to return to the previous display. There are three types of mixer display, as shown below. G Automatic Accompaniment Volume See Automatic Accompaniment volume (page 51) for details. -
Page 20: Using The Help Mode
2: Help Mode and Demo CHAPTER Using the Help Mode The Help mode provides convenient explanations of the main functions of the CVP-94/92. As the explanations shown in the display automatically progress, the CVP-94/92 actually operates itself in demonstration — the CVP-94/92 sounds various voices and styles. - Page 21 Play Select the desired menu. Select the desired menu by pressing SELECT M or L. The selected menu is highlighted. Ten menus (listed below) are avail- able. Help Menus 1. Introduction 2. Basic Operation 3. Demo Songs 4. Voices 5. Styles Start the explanation.
-
Page 22: Demo Play
Demo Play The CVP-94/92 features a total of 27 demo pieces: 4 entire Demo songs, 12 special pieces showcasing the voices, and 11 showcasing the styles. Listen to them all and hear what the CVP-94/92 can do. DEMO Call up the Demo Play mode. Press [DEMO]. - Page 23 (A) To listen to a Demo song for voices, press the VOICE button corresponding to the desired voice. ➔ Playback starts from the Demo song of the selected voice. The lamp of the corresponding VOICE button flashes. VOICE CLAVI. TONE/ PIANO E.
-
Page 24: Demo Songs
March and Progression of Bacchus Sax/Flute Londonderry Air • Some of the demonstration pieces listed above are specially-arranged excerpts from the original compositions listed above. All other songs are original (©1997 by Yamaha Corporation). Composer Robert Alexander Schumann (Traditional) (American Folk Song) -
Page 25: Selecting Voices
3: Voices CHAPTER Selecting Voices The CVP-94/92 features a wealth of rich, authentic voices, includ- ing piano, strings and brass instruments. Keyboard Percussion function that lets you play the realistic drum and percussion sounds directly from the keyboard. VOLUME STYLE CONTRAST DANCE MASTER... -
Page 26: Selecting Voices From The Main Display
Selecting Voices Select the voice. Select the desired voice by pressing the appropriate LCD button. The data dial and [–/+] buttons can be also used. The VOICE SELECT display has several successive pages. Use the PAGE [<] [>] buttons to call up the various pages. Play the selected voice. -
Page 27: Keyboard Percussion
G About XG Voices Yamaha’s XG format is a major new enhancement to the GM (Gen- eral MIDI) System Level 1 format. It provides for more instrument sounds and variations, as well as greater expressive control over voices and effects. XG also ensures compatibility with future instruments and software. -
Page 28: Playing Two Voices Simultaneously - Dual Mode
Playing Two Voices Simultaneously — Dual Mode The Dual mode of the CVP-94/92 allows you to select and play two different voices simultaneously in a layer. This makes it easy to create exceptionally rich and thick tonal textures. The volume balance and the depth of detune* can also be set for the two voices. -
Page 29: Setting The Volume Balance Of The Two Voices
You can also select a voice by using RIGHT1 VOICE or RIGHT2 VOICE, even after the pop-up DUAL display has changed back to the main DUAL display. After pressing RIGHT1 VOICE or RIGHT2 VOICE (it is high- lighted), select the voice in the normal way. Exit the Dual mode. -
Page 30: Detuning The Pitches Of The Two Voices
Playing Two Voices Simultaneously — Dual Mode Detuning the Pitches of the Two Voices The Detune Depth setting lets you produce an even richer sound by finely detuning the pitch of the two voices. DETUNE DEPTH Press play. ➔ It is highlighted. Adjust the Detune Depth by using the data dial or [–/+] buttons. -
Page 31: Playing Two Voices From Different Sides Of The Keyboard - Split Mode
Playing Two Voices from Different Sides of the Keyboard — Split Mode The Split mode of the CVP-94/92 allows you to select and play two different voices with your left and right hands — for example, play bass with the left and piano with the right. •... -
Page 32: Changing The Split Point
Playing Two Voices from Different Sides of the Keyboard — Split Mode You can also select a voice by using LEFT VOICE or RIGHT1 VOICE, even after the pop-up SPLIT display has changed back to the main SPLIT display. After pressing LEFT VOICE or RIGHT1 VOICE (it is highlighted), select the voice in the normal way. -
Page 33: Setting The Volume Balance Of The Two Voices
Playing Two Voices from Different Sides of the Keyboard — Split Mode Setting the Volume Balance of the Two Voices Press BAL. from the SPLIT pop-up display. ➔ It is highlighted. Adjust the volume balance of the two voices by us- ing the data dial or [–/+] buttons. -
Page 34: Using The Pedals
• Certain voices in the [DRUMS] or [XG] groups may not be affected by use of the damper pedal. CVP-92 • Some voices may sound continuously or have a long decay after the notes have been released while the damper pedal is held. -
Page 35: Reverb
Reverb Reverb is an effect that recreates the decaying reflections of a sound in a performance space, and reproduces the special ambi- ence of a concert hall. The CVP-94/92 has various Reverb effects and allows you to set the Reverb Depth to your preference. VOLUME STYLE CONTRAST... -
Page 36: Setting The Total Depth
Reverb G Reverb Type List HALL1 HALL2 HALL3 Concert hall reverb. HALL4 HALL5 ROOM1 ROOM2 Small room reverb. ROOM3 ROOM4 STAGE1 STAGE2 Reverb for solo instruments. STAGE3 PLATE Simulated steel plate reverb. WHITE ROOM Distinctive short reverb with initial delay. TUNNEL Simulation of long tunnel-like space. -
Page 37: Setting The Depth For Each Part - Reverb Part Depth
Setting the Depth for Each Part — Reverb Part Depth The Reverb Part Depth parameter lets you make different Reverb Depth settings for the rhythm, bass, and chord parts of the Automatic Accompaniment (page 38), as well as the parts you play from the key- board. -
Page 38: Voice Effects
Voice Effects The CVP-94/92 has various types of effects besides Reverb that enhance the sound of the voices or create wild, special effects. You can also adjust the depth of the effect as desired. VOLUME STYLE DANCE MASTER ACMP/SONG DEMO 16BEAT ROCK VOLUME... -
Page 39: Setting The Effect Depth
G Effect Type List Reverb Types (selectable from the Effect display) HALL1 HALL2 Concert hall reverb. HALL3 ROOM1 ROOM2 Small room reverb. ROOM3 Effect Types CHORUS1 Conventional chorus program with CHORUS2 rich, warm chorusing. CHORUS3 CELESTE Three-phase LFO for richer, more pronounced chorusing. -
Page 40: Accompaniment Styles
CHAPTER Selecting Accompaniment Styles The CVP-94/92 has 100 musical “Styles” that can be used as a basis for rhythm accompaniment, or fully orchestrated rhythm, bass, and chord accompaniment (Auto Accompaniment; page 47). STYLE DANCE 16BEAT ROCK BALLAD BALL– LATIN TRADI– ROOM TIONAL COUNTRY... -
Page 41: Selecting A Style From The Style Select Display
(Rhythm and Auto Accompaniment) Selecting a style from the STYLE SELECT Display Select the accompaniment style group. Select the desired style group by pressing the appropriate STYLE button. ➔ The STYLE SELECT pop-up display appears. 16BEAT BALL– LATIN ROOM Select the Style. Press the LCD button to select the de- sired style. -
Page 42: Selecting Styles From The Main Display
Selecting Accompaniment Styles Selecting styles from the Main Display You can also select a style by using STYLE M L, even after the STYLE SELECT display has changed back to the main display. Press either STYLE M or L. ➔ STYLE is highlighted. Select the style. -
Page 43: Starting/Stopping The Accompaniment Style
Starting/Stopping the Accompaniment Style Starting the Accompaniment Style There are several ways to start the accompaniment style, as described below: I Straight Start Press the [START/STOP] button. ➔ The lamp lights up and the style starts. Each of the styles also has two main variations that can be selected by pressing the [MAIN A] or [MAIN B] buttons. -
Page 44: Tap Start
Starting/Stopping the Accompaniment Style I Synchronized Start This method lets you start the style by simply playing a note or chord on the keyboard. To use this, press the [SYNCHRO] button. (The lamp lights.) The [BEAT] lamp flashes in time with the selected tempo, indicating that Synchronized Start is in stand-by. - Page 45 There are two introduction patterns: Intro A and Intro B. If you press [INTRO] after pressing [MAIN B], the style starts with the Intro B pattern, followed by Main B. AUTO ACCOMPANIMENT VIRTUAL ACMP ON ARRANGER INTRO I Start with Fade In This function lets you gradually fade in the volume of the Style with any of the start methods above.
-
Page 46: Break
Starting/Stopping the Accompaniment Style Break When the Left Pedal function (page 119) is set to BREAK, you can use the left pedal to trigger a break (silence) in the accompaniment for dynamic effect. Holding down the left pedal creates the break, and playback resumes from the top of the next measure after the pedal is released. -
Page 47: Using The Metronome
Using the Metronome The CVP-94/92 features a convenient metronome that is ideal for practicing. I [START/STOP] of Metronome To start the metronome, simply press the [METRONOME] button so that its lamp lights. ➔ The metronome pop-up display appears and the currently selected beat and volume are indicated. - Page 48 Using the Metronome I Selecting the Beat (Time Signature) The pop-up display that appears when the [METRONOME] button is pressed also lets you select the beat or time signature. Select the Beat parameter with BEAT Mor L (it is highlighted), then change the value with the data dial or [–/+] buttons.
-
Page 49: Playing With The Auto Accompaniment
Playing with the Auto Accompaniment The CVP-94/92 includes a sophisticated Auto Accompaniment system that can provide automated rhythm, bass and chord backing for your performance in 100 different styles. • The playback data of the Auto Accompaniment is normally not output through the MIDI [OUT]. -
Page 50: Set The Tempo
Playing with the Auto Accompaniment G Pianist Press the [PIANIST] button to select the piano-only accompaniment styles. Forty different Pianist styles are available. When the [PIANIST] button is pressed, the Pianist STYLE SELECT pop-up display appears. ➔ The [PIANIST] lamp lights. Select the desired Pianist style by using the LCD buttons, the data dial or the [–/+] buttons. - Page 51 Select the chord indication method. To do this, press one of the SINGLE FINGER, MULTI FINGER, FINGERED or FULL KBD LCD buttons while the ACCOMPANIMENT MODE pop-up display is active. Start the Auto Accompaniment. To start Auto Accompaniment, press [START/STOP]. Alternately, press [SYNCHRO], then play the keyboard.
-
Page 52: Stopping The Auto Accompaniment
Playing with the Auto Accompaniment G Fingered To play Auto Accompaniment, play any chord in the left range (below and including the split point). Play the melody in the right range along with the Auto Accompaniment. If the CVP-94/92 cannot recognize the played chord, “*” will appear instead of the chord name in the display. -
Page 53: Adjusting The Overall Auto Accompaniment Volume
AUTO ACCOMPANIMENT AUTO FILL VIRTUAL ACMP ON ARRANGER INTRO MAIN A Adjusting the Overall Auto Accompaniment Volume Use the [ACMP/SONG VOLUME] control to adjust the overall volume of the Auto Accompaniment. (This does not affect the volume of parts played from the key- board.) This control lets you adjust the level balance of the accompaniment and the voices played from the keyboard. -
Page 54: Changing The Split Point
Playing with the Auto Accompaniment FUNCTION MIXER Select the desired part by pressing BASS, CHORD, PAD, PHRASE, or RHYTHM and set the value by using the data dial or [–/+] buttons. The value changes in units of two. You can also select several parts and adjust their volume settings simultaneously. -
Page 55: Other Auto Accompaniment Functions
Other Auto Accompaniment Functions The CVP-94/92 has many other features and functions that make the use of the Auto Accompaniment even more convenient and enjoyable. Harmony This feature adds harmony or embellishment notes to the melody you play in the right range of the keyboard. The harmony notes are produced automatically to match chords played with Auto Accompaniment. -
Page 56: One Touch Setting
Each style has programmed panel setups of voices and effects that can be recalled easily and instantly via the One Touch Setting function. For the CVP-94, each style has three, while the CVP-92 has two for each style. For a list of the One Touch Setting parameters, refer to page 29 of the Reference Manual. -
Page 57: Virtual Arranger
The panel setup called up here can be freely changed according to your preferences. You can also save it to memory by using the Regis- tration function (page 72). To exit One Touch Setting, press the [ONE TOUCH SETTING] button again (the lamp turns off), and the previous panel setup before using One Touch Setting is recalled. -
Page 58: Small Accompaniment (Small Acmp)
Other Auto Accompaniment Functions Press the [ACMP ON] button to call up the ACCOMPANIMENT MODE pop-up display, then use the PAGE [<] [>] buttons to select the second page. ➾ Press SYNCHRO STOP so that it is highlighted. ➔ The [SYNCHRO START] lamp lights. To turn Synchronized Stop off, press SYNCHRO STOP again. -
Page 59: Chord Assist
Chord Assist This function uses the keyboard guide lamps to show you appropriate fingerings for chords. (See page 92.) The Chord Assist feature is essentially an electronic “chord book” that shows you appropiate fingerings for chords, and is ideal when you want to quickly learn how to play certain chords. - Page 60 Other Auto Accompaniment Functions Enter the chord type. Press TYPE M or L (it is highlighted), then use the data dial or [–/+] buttons to select the desired chord type. You can also select the chord type by pressing TYPE. Enter the chord.
-
Page 61: Custom Style
Custom Style The CVP-94/92 Custom Style feature allows you to create original accompaniment styles that can be later recalled and played at any time, just like the presets. Up to 4 custom styles can be maintained in internal memory at the same time, and any number can be saved to disk for later reloading and use. - Page 62 Custom Style Select the section you want to record. In the CUSTOM STYLE display page 1, press the first LCD button as many times as necessary to select the section you want to program first: MAIN A, MAIN B, INTRO, FILL IN, or ENDING. The MAIN A section is initially selected.
- Page 63 Use the LCD button to select a different number of measures for the selected section, or the data dial or [–/+] buttons once the parameter has been selected. As soon as you choose to change the number of measures in the section, the “ will appear, since you will have to clear all parts of the currently selected section and start recording from scratch if you change the number of measures.
- Page 64 Custom Style At this point you can also select the voice you want to record with (the preset voice for that part will initially be selected). For the R1 part, only [DRUMS] voices can be used. For the R2 part, all voices can be used.
- Page 65 Once the required quantize size has been selected press the LCD button to actually quantize the current part. Playback will stop for an instant while the data is being quantized, then the will change to , allowing you to undo the quantize operation and return to the pre-quantized data if the results are not as you expected.
-
Page 66: Other Custom Style Functions
Custom Style Store the custom style. Press the LCD button in CUSTOM STYLE display page 3 to store the current custom style in the internal memory. The “ ” confirmation prompt and will appear (“ L and M LCD buttons to select the memory number — 1 through 4 — to which you want to store the custom style, then press to abort. - Page 67 I Style Clear Press the LCD button in CUSTOM STYLE display page 3 to entirely clear the current custom style. The “ ” confirmation prompt will appear. Press to abort. I Volume & Effects CUSTOM STYLE display page 4 includes a range of parameters that let you individually set the volume, reverb, effect, and pan for each part of each custom style section.
-
Page 68: Save To Disk
Custom Style I Save to Disk A complete set of 4 custom styles or individual custom styles can be saved to disk via CUSTOM STYLE page 5. After making sure that a properly formatted disk is inserted in the Clavinova disk drive (page 7), use the to select the memory number of the custom style you want to save to disk, or “ALL”... -
Page 69: Playing Back Your Custom Styles
Playing Back Your Custom Styles Once created, your original custom styles can be selected for play- back by pressing the [DISK/CUSTOM] button (its LED will light), and L and M LCD buttons — or the data dial or [–/+] then using the buttons —... - Page 70 Custom Style I Memory Full During Recording This alert message will appear if the memory becomes full during record- ing or editing. Press to return to CUSTOM STYLE display page 1 and simplify the style by clearing a part, etc. I Exit Before Store If you press [EXIT] button to exit from the Custom Style function before storing the style the following display will appear.
-
Page 71: Style File Load
Style File Load Style files from optional Yamaha “Style File” disks, or disks contain- ing custom style files you’ve created yourself, can be loaded into the CVP-94/92 and played as required. About the Yamaha Style File Format • The Style File Format is Yamaha’s original auto-accompaniment format which has evolved through years of development and refinement. - Page 72 Style File Load A set of 4 files saved by using the Custom Style save “ALL” function (page 66) can be loaded by pressing the than the essentially the same as the LOAD SINGLE procedure, as follows. Select a Style File L and M LCD buttons —...
-
Page 73: Using Loaded Style Files
Eject the Disk When Done When you’ve finished with the Style File disk, press the disk drive EJECT button to remove it and return to the normal play mode display. You can return to the normal play mode without removing the disk by pressing the [EXIT] button or a STYLE selector. -
Page 74: Registrations
5: Registrations CHAPTER Registrations The Registration feature can be used to memorize a number of complete panel setups that you can recall whenever needed. A total of 20 setups (5 banks x 4 memories) can be registered. CONTRAST VOLUME STYLE DANCE MASTER ACMP/SONG... -
Page 75: Recalling The Registered Panel Settings
Setups) Register the panel setup. While holding the [MEMORY] button, simultaneously press one of the REGISTRATION [1] — [4] buttons. Any data that was previously in the selected location is erased and replaced by the new settings. The corresponding Registration number (bank/button number) will appear at the top left in the LCD display. -
Page 76: Freeze Function
Registrations (Registering/Recalling Panel Setups) Freeze Function When the Registration Freeze function is set to on, the parameters set in the FREEZE display will not be changed when a Registration is re- called. This allows you to recall different Registrations while using the Auto Accompaniment, without suddenly changing the styles or volume settings. -
Page 77: Chapter 6: Song Control
Playback of Different Disks • In addition to songs you’ve recorded yourself, the CVP-94/92 can play back commercially available disks of Yamaha DOC software, XG software, and Disklavier PianoSoft as well as GM software. See the section “Playing Other Types of Music Data” on page 87. - Page 78 G File Icons There are four icons (shown below) that indicate the type of the file. XG/SMF format file DOC/ESEQ format file Yamaha Disklavier PianoSoft or XG/ESEQ file Song data recorded with the CVP-94/92 Current voice for the keyboard File icon •...
- Page 79 Use the PAGE [<] [>] buttons to call up the SONG PLAY [LIST] display (display page 3), to view the entire list of the song names in the disk. The desired song can be selected easily by using the data dial or [–/ +] buttons.
-
Page 80: Adjusting The Tempo
Song Playback G Adjusting the Tempo The playback tempo of the song can be changed freely as desired. (See page 40.) The preset tempo for the selected song can be restored at any time by simultaneously pressing the TEMPO [–/+] buttons. Usually the tempo is indicated by numbers. -
Page 81: Part Cancel
(page 80), or when the assigned track is set to “TRK - - (OFF).”] • In the case of Yamaha Disklavier PianoSoft files, DOC files and XG/ ESEQ files, the part indication does not appear for the parts without data. -
Page 82: Assignment Of Tracks To 1/Right And 2/Left, And Voice Assignment
You can also select the track by pressing the 1/RIGHT or 2/LEFT button. • The track assignments of DOC files and Yamaha Disklavier PianoSoft files are fixed, and therefore cannot be changed. • Tracks cannot be assigned during... -
Page 83: Overall Song Playback Volume Control
I Selecting Voices for 1/RIGHT and 2/LEFT Parts The playback voices for the 1/RIGHT and 2/LEFT parts can be se- lected in the SONG PLAY [PART] display. Press PART1,2 VOICE M or L to highlight the corresponding sec- tion of the display, then select the playback voice for 1/RIGHT and 2/ LEFT parts by using the data dial or [–/+] buttons. - Page 84 Song Playback Individual Part Volume Control To adjust the playback volume of individual parts, press the [MIXER] button while in the Song Play mode to call up the MIXER display. The display corresponding to the software being played back appears in display page 1, and you can control the volume balance of the keyboard sound and the orchestra accompaniment.
- Page 85 L&R Right- and left-hand parts (piano part) ORCH Accompaniment part Volume of your keyboard performance G When Playing Back Yamaha Disklavier PianoSoft Files L&R Right- and left-hand parts (piano part) Volume of your keyboard performance I Page 2 Use the PAGE [<] [>] buttons to call up display page 2 of the TRACK MIXER display so that all sixteen tracks appear.
-
Page 86: Individual Part Volume Control
Song Playback Changing Settings in the TRACK MIXER Display Select the track to be changed. Select the desired track by pressing TRACK < or >. Selecting TO- TAL will change the overall settings of the song rather than the settings of individual tracks. -
Page 87: Repeat Functions
Repeat Functions The CVP-94/92 has convenient repeat functions that let you repeated play back the same song or sections within the song. This function is useful if you want to practice a difficult phrase repeatedly. Select the desired mode from the available four Repeat modes from the SONG PLAY [REPEAT] display (display page 4). -
Page 88: Other Playback Controls
Song Playback I AB Repeat This function allows you to specify any section (between point A and point B) of a song, letting you repeatedly play back the selected section for practice. When AB mode is selected by the REPEAT MODE M or L but- tons, A ➔... -
Page 89: Playing Other Types Of Music Data
The internal tone generator of the CVP-94/92 automatically resets for compatibility with song data of the Yamaha XG format (including GM System Level 1) (page 8 in the Reference Manual) or of Yamaha DOC voice allocation (page 8 in the Reference Manual), depending on the playback data. -
Page 90: Guide Control
Guide Control The CVP-94/92 has a special Guide function which allows you to practice by using the appropriate disk software. The “piano roll” display and the keyboard guide lamp indicate which keys you should play, and when you should play them. You can even practice at your own pace since the CVP-94/92 pauses playback of the accompaniment until you play the correct keys. -
Page 91: Using The Guide Function
I Practicing Phrase-by-phrase with the Playback: Sound Repeat In the Sound Repeat method, the CVP-94/92 plays back a short phrase. Listen to the phrase and practice. Playback of one phrase repeats three times, then is followed automati- cally by the next phrase. G Piano Roll To show the piano roll in the display, press any GUIDE CONTROL button, then press the [PLAY/STOP] button to start playback. - Page 92 Guide Control Select the Guide method. Press one of the GUIDE CONTROL buttons: [EASY PLAY], [NEXT NOTE] or [SOUND REPEAT]. ➔ The lamp of the corresponding button lights. EASY PLAY Practice the part. Press the [PLAY/STOP] button to start playback. ➔...
-
Page 93: Other Guide-Related Functions
Other Guide-related Functions Various settings related to the Guide functions can be made in the SONG PLAY [GUIDE MODE] display (display page 5). I GUIDE MODE NORMAL is ususally displayed in the location of the GUIDE MODE. Change the indication to ENSEMBLE by pressing the GUIDE MODE button;... - Page 94 Guide Control I Setting the Sound Repeat Number To set the number of times the phrase is repeated in the Sound Repeat mode, press the SOUND REPEAT button. When AUTO is selected, only the notes which have not been played correctly are repeated; the Guide function will automatically go on to the next phrase once the previous one has been played properly.
-
Page 95: Song Recording
Song Recording The CVP-94/92 features comprehensive song recording functions that allow you to record your own performances to floppy disks. Three recording methods are available: Quick Recording (page 95), which lets you record quickly and easily; Track Recording (page 98), with which you can record multiple instrumental parts; and Chord Sequence (page 104), which lets you step-record Auto Accompaniment chords. -
Page 96: Recording Setup: Disk Format
Song Recording Recording Setup: Disk Format Before you can record to the included blank disk, you will have to format it. Commercially available blank disks must also be formatted before using. Refer to Format in the Function section (page 120) to re- format floppy disks that have already been used for recording. -
Page 97: Quick Recording
Quick Recording Insert a formatted disk. Make sure that the disk’s write protect tab is set to the “write” posi- tion, then insert the disk face up with the shutter forward until it clicks into place. Shutter Label ➔ The DISK IN USE lamp stays lit until the CVP-94/92 reads and recognizes the disk. - Page 98 Song Recording Select the record mode. Press the [REC] button. ➔ The [REC] lamp lights and the QUICK RECORD display of record mode page 1 appears. Call up page 1 by using the PAGE [<] [>] buttons if the lamp is lit but the QUICK RECORD display is not shown.
-
Page 99: Start Recording
Select the desired voices and accompaniment style, etc. Select the voices and accompaniment style and set the tempo in the normal way, and other settings needed. (If you want to try out the selected voices, style and tempo, etc., make sure to do so be- fore entering the SONG PLAY mode, since the recording will start as soon as you play the keyboard or press the [START/STOP] button.) -
Page 100: Track Recording (Multi-Track Recording)
Song Recording Stop recording. Press the [PLAY/STOP] button. ➔ Recording stops. When the recorded data has been written to disk, the [REC] lamp goes out and the song play display appears. You can also stop recording by pressing the [REC] button. When pressing the [START/STOP] button, only the recording of the Auto Accompaniment or rhythm will stop. - Page 101 Select the desired track for recording. Press the TRACK < or > buttons or use the data dial or [–/+] buttons to select the track. ➔ The selected track is indicated by an underline mark. Use the LCD button at the far right to set the selected tracks to REC (record enable) or OFF (record/playback disable).
-
Page 102: • Intro
Song Recording Start recording. There are several ways to start recording, as described below. • Recording your keyboard performance Start playing the keyboard or press the [PLAY/STOP] button. • Recording the Auto Accompaniment or rhythm Start playing the keyboard (in the left range when the keyboard is split) with the Synchronized Start function or press the [START/ STOP] button. -
Page 103: Adding New Tracks
Stop recording. Press the [PLAY/STOP] button. ➔ Recording stops. The [REC] lamp goes out when the data has been written to the disk, and the song play display appears. You can also stop recording by pressing the [REC] button. When pressing the [START/STOP] button, only the recording of the Auto Accompaniment or rhythm will stop. - Page 104 Song Recording Pause before the Punch-in point. Press the [PAUSE] button to pause play back a bit before the point at which you want to start recording. Leave a measure or more before the Punch-in point so you’ll be able to grasp the timing for the Punch in. SONG PAUSE Turn on the Punch-in/out function.
- Page 105 Select the Punch-in mode. Select the desired Punch-in mode by using the LCD button located second from the right. Two modes are available, as described below. 1ST KEY Recording begins as soon as the first key is played, after Punch-in playback is started in step 7 (below). PEDAL Recording begins as soon as the left pedal is pressed, after Punch-in playback is started in step 7 (below).
-
Page 106: Chord Sequence
Song Recording Chord Sequence The Chord Sequence function allows you to enter Auto Accompani- ment data step-by-step according to chord names, and lets you record the accompaniment part without having to play the song in time with the rhythm or at a certain tempo. Set up the instrument for recording. - Page 107 Turn on the Chord Sequence function. Press the CHORD SEQ. button in the RECORD [EDIT] dis- play. ➔ The CHORD SEQUENCE display appears and Auto Ac- companiment is turned on. If the Full Keyboard mode is currently active, the Fingered Chord mode will be selected instead.
- Page 108 Song Recording Enter and set the chords and/or style changes. To enter a chord, either play the chord with appropriate fingering on the left range of the Auto Accompaniment section of the keyboard (lower than the split point), or highlight ROOT or TYPE in the LCD display and use the data dial or [–/+] buttons.
-
Page 109: Other Chord Sequence Functions
Stop recording. When all recording has been finished, select page 2 of the CHORD SEQUENCE display, then press the END MARK and SET buttons and input an “end mark” which determines the location of the ending. The end mark will be displayed in the box at the right of the LCD display. Finally, press the [REC] button and a “Save recorded data?”... -
Page 110: Record Edit Function
Song Recording RHYTHM ON/OFF To turn the rhythm sound on or off, press the RHYTHM ON/OFF button followed by the SET button. No rhythm sound is produced fol- lowing the location to which a “rhythm off” event is entered; the rhythm starts sounding again from the location to which a “rhythm on”... -
Page 111: Track Edit
Enter the desired name. Use the [>] button to move the underline cursor to the desired char- acter position in the file name display. (File names can be up to 12 char- acters in length). ➾ Use the data dial or [–/+] buttons to select and highlight the char- acter or mark you wish to enter. - Page 112 Song Recording Specify the two tracks to be mixed. Press the TRK A and TRK B buttons to highlight the parameters, and use the data dial or [–/+] buttons to select the two track numbers to be mixed. The voices which are used for the selected tracks are indicated at the side of A:/B:, located at the left of the LCD display.
- Page 113 To exit the Track Delete function, press the [REC] button (the lamp goes out). You can also press the [EXIT] button to exit the Track Delete func- tion. I Track Quantize You can “tighten up” the timing of a recorded part by aligning all notes to specified beats with the Track Quantize function.
-
Page 114: Initial Edit (Changing The Initial Data)
Song Recording Initial Edit (Changing the Initial Data) The Initial Edit function allows you to change the volume level of each track or the initial data set for the entire song after you’ve finished recording. The INITIAL EDIT display appears when you press the INITIAL EDIT button in the RECORD [EDIT] display. - Page 115 Change the settings. Use the data dial or [–/+] buttons to change the settings. You can instantly check the effect of the changes, since the settings can be changed during playback. Write the changes. When all the Initial Data changes have been made as desired, press the WRITE button.
-
Page 116: Recording Without A Disk
Song Recording Recording Without a Disk The CVP-94/92 has internal RAM memory (about 25KB) that allows a limited amount of recording — even if a disk is not loaded — up to approximately 2,500 notes, if no other data is recorded. If you enter the Song Record mode without inserting a disk, CVP MEMORY will be indicated in the SONG display as shown below, and the Quick Record- ing, Track Recording and Punch-in/out Recording functions will become... -
Page 117: The Utility Functions
CHAPTER The Function mode provides various advanced functions that, for example, let you make various MIDI settings, or give you greater, more convenient control over disk-related operations. These sophisticated functions let you customize the CVP-94/92 to your own musical needs and preferences. I Selecting and Operating the Functions All functions in this mode can be selected and set by using the fol- lowing procedure. -
Page 118: Keyboard
Keyboard Keyboard 1 (KEYBOARD 1) Display — I Tune The Tune function lets you make fine adjustments to the pitch, allowing you to accurately match the tuning with that of other instru- ments. The frequency (in Hz) of A3 is displayed in the TUNE sec- tion. -
Page 119: Keyboard 2 (Keyboard 2) Display
I Effect Setting This feature determines whether the basic effect setting (page 36) for each voice is automatically selected or not, when the voice is selected. To change the setting, press the EFFECT SETTING button. When set to AUTO, the basic effect setting for each voice is automatically selected when the voice is selected;... - Page 120 Keyboard I Pan Pan determines the stereo image of the voices, or in other words, where the sound of the voice appears to come from — left, center, or right. The Pan position can be set individually for the following three voice assignments: LEFT Left voice in the Split mode...
-
Page 121: Pedal
Pedal Pedal (PEDAL) Display — I Left Pedal This function conveniently lets you set the left pedal to control one of various functions. Controllable Functions and Data SOFT The left pedal functions as the soft pedal (basic setting). (See page 32.) START/STOP The left pedal functions the same as the [START/STOP] button. -
Page 122: Disk
Disk When using the disk-related function, make sure to first set the [FUNCTION] button to on and call up the appropriate page before inserting the floppy disk. Disk functions cannot be used — even when pressing the [FUNCTION] button — if a floppy disk has been inserted and the [SONG] button is set to on. -
Page 123: Song Copy (Song Copy) Display
Song Copy (SONG COPY) Display — This function allows you to copy song data (data files on disk) re- corded by the CVP-94/92 to a different song number on the same disk, or to a different disk. Set up the disk(s). Insert the disk containing the source song. - Page 124 Disk Execute the Copy operation. Press the COPY button. ➔ The Copy operation begins. If you are copying to the same disk, an “Are you sure?” confirmation prompt will appear. Press the YES button to continue or the NO button to cancel. If you are copying the data to a different disk, a “Number of disk ex- change (**)”...
-
Page 125: Song Delete (Song Delete) Display
G Copying Data Recorded Without a Disk If you’ve recorded a song without inserting a disk, the song data is automatically recorded to the CVP-94/92’s internal RAM. To copy the data to the disk, first select the Song Copy display and insert a formatted disk. -
Page 126: Registration (Registration) Display
Disk Registration (REGISTRATION) Display — This function allows you to save the panel settings registered using the Registration function to disk, load Registration data from disk, delete Registration data from a disk, or name Registration files. Before executing the Registration function, make sure that the disk you want to use for this operation is inserted in the disk drive. - Page 127 I SAVE When you select SAVE, the name entry function display for the file to be saved will appear. Press the [>] button to move the underline cursor, and select the character position of the file name. (File names can contain up to twelve characters.) ➾...
- Page 128 Disk I LOAD When you select LOAD, the Load function display will appear. The original internal data will be erased and overwritten when executing the Load operation. Make sure to save all important data to disk (see page 125) before using the Load operation. First, select the desired file to be loaded.
-
Page 129: Transform (Transform) Display
Transform (TRANSFORM) Display — This function allows you to convert song data recorded on the CVP- 94/92 so that the data can be played back on other Clavinova models or a Disklavier. Make sure to insert a proper disk (2DD disk containing the data to be converted) in the disk drive. -
Page 130: Midi
MIDI MIDI 1 Display — Functions related to MIDI (Musical Instrument Digital Interface) can be called up from pages 9 through 11. I Set the Send Channel SEND CH In any MIDI control setup, the MIDI channels of the transmitting and receiving equipment must be matched for proper data transfer (channels 1 through 16). -
Page 131: Midi 2 Display
I Sync Playback of songs and Auto Accompaniment is normally controlled by the internal clock (INT.) of the CVP-94/92 at a specific tempo. By setting this clock to “EXT.”, the CVP-94/92’s tempo can be controlled by an external sequencer or rhythm machine. For example, this lets you play the Auto Accompaniment of the CVP-94/92 in perfect synchroniza- tion with an external sequencer. -
Page 132: Start/Stop
MIDI The program numbers of the CVP-94/92’s voices are standarized ac- cording to the XG voice allocation. See the Voice List on page 20 in the Reference Manual for details. I Control ON/OFF Control change messages are used for various non-keyboard perform- ance controls, such as the damper pedal, or for expressive control of the sound of a connected MIDI device, such as effects and volume. -
Page 133: Midi 3 Display
MIDI 3 Display — From the MIDI 3 display you can set whether or not MIDI data re- ceived from an external device is affected by the Transpose setting (page 116) or not, whether or not the Auto Accompaniment, rhythm and Har- mony data is transmitted, and whether or not the MIDI data received from an external device affects the keyboard-played voices. -
Page 134: Backup
Backup Backup (BACKUP) Display — This function allows you to set the backup of various parameter groups on or off. When set to on, the corresponding settings will not be reset to the basic settings (default settings) when power is turned off. Press the M or L button or use the data dial or [–/+] buttons to select the desired group, then use the right-most LCD button to set the selected group to backup on/off. -
Page 135: Recall (Recall) Display - Page
Recall (RECALL) Display — This funciton can be used to recall the initial factory settings (basic settings) for a range of parameters — individually or all at once. Press the M or L buttons or use the data dial or [–/+] buttons to select the group you want to recall, then press the START button. -
Page 136: Utility
Utility Micro Tuning (MICRO TUNING) Display — The Micro Tuning Feature makes it possible to individually tune each key of the keyboard. The created tuning can be saved to a disk and loaded whenever necessary. The set tuning can be turned on or off at anytime by using the left-most LCD button in this display. -
Page 137: Scale Tuning (Scale Tuning) Display
SAVE See page 125. NAME See page 125. LOAD See page 126. DELETE See page 126. Scale Tuning (SCALE TUNING) Display — This feature allows you to select from various tuning (temperament) configurations, when selecting PRESET in this display. By selecting USER, you can create your own user scale, in which the tuning you set for a single octave takes effect for the entire keyboard. -
Page 138: User Scale
Utility I User Scale This function allows you to individually tune each key within an oc- tave. The setting made for one key is automatically assigned to the same key in all other octaves. Select USER with the left-most LCD button left; the following dis- play will appear. -
Page 139: Pop-Up Time (Popup Time) Display
Pop-up Time (POPUP TIME) Display — This determines the amount of time the pop-up displays remain on the display screen before disappearing. The pop-up time of the voice/ac- companiment style displays can be set independently from all other pop- up displays. To set the pop-up time of voice/accompaniment style, first press the VOICE/STYLE button to highlight the parameter, then use the data dial or [–/+] buttons. -
Page 140: The Connectors
TER VOLUME] of the CVP-94/92 to around the middle position and adjust the volume level from the connected equipment. Recommended Headphones: • Yamaha HPE-160 headphones • Do not return the sound output through AUX OUT [L/L+R] [R] jacks to the AUX IN [L/L+R] [R] jacks. - Page 141 I MIDI [IN] [OUT] Terminals Connect the CVP-94/92 to external MIDI devices by using MIDI connecting cables. Set the HOST SELECT switch below to “MIDI” when using the MIDI terminals. MIDI Tone Generator MIDI Sequencer I HOST SELECT switch and [TO HOST] terminals [TO HOST] terminal is connected directly to the personal computer.
-
Page 142: Connecting To A Personal Computer
Connecting to a Personal Computer Although the CVP-94/92 can be connected to a personal computer via the MIDI IN/OUT connectors and a MIDI interface, the TO HOST connector and HOST SELECT switch allow direct connec- tion to Apple Macintosh or IBM-PC/AT personal computers for sequencing and other music applications without the need for a separate MIDI interface. - Page 143 G Connector Pin Numbers MINI DIN 8-PIN 6 7 8 D-SUB 9-PIN Trademarks • Apple and Macintosh are trademarks of Apple Computer, Inc. • IBM-PC/AT is a trademark of International Business Machines Corporation. • Windows is the registered trademark of Microsoft® Corporation. •...
-
Page 144: Index
Index Accompaniment style ... 39 Alert Sound ... 137 Auto Accompaniment ... 38, 47 Auto Accompaniment/Song Volume ... 16 Backup ... 15, 132 Break ... 44 Chord Assist ... 57 Chord Sequence ... 104 computer, connecting to a ... 140 contrast ... - Page 145 1. IMPORTANT NOTICE: DO NOT MODIFY THIS UNIT! This product, when installed as indicated in the instructions contained in this manual, meets FCC requirements. Modifications not expressly approved by Yamaha may void your authority, granted by the FCC, to use the product. 2. IMPORTANT: When connecting this product to accessories and/or another product use only high quality shielded cables.
-
Page 146: Important Safety Instructions
Some of these items are designed to be dealer assembled or installed Please make sure that benches are stable and any optional fixtures (where applicable) are well se- cured BEFORE using. Benches supplied by Yamaha are designed for seating only. No other uses are recommended. - Page 147 For details of products, please contact your nearest Yamaha or the authorized distributor listed below. Pour plus de détails sur les produits, veuillez-vous adresser à Yamaha ou au distributeur le plus proche de vous figurant dans la liste suivante. NORTH AMERICA CANADA Yamaha Canada Music Ltd.
- Page 148 M.D.G., EMI Division © 1997 Yamaha Corporation VV68530 810POCP2.3-10F0 Printed in Japan...