Advertisement
Quick Links
Advertisement

Related Manuals for NCR 7358-K580


Summary of Contents for NCR 7358-K580
- Page 1 Kit Instructions Large Basket Corner Module (Corner Bagwell) 7358-K580/K583/K584 Issue B...
- Page 2 NCR, therefore, reserves the right to change specifications without prior notice. All features, functions, and operations described herein may not be marketed by NCR in all parts of the world. In some instances, photographs are of equipment prototypes. Therefore, before using this document, consult with your NCR representative or NCR office for information that is applicable and current.
- Page 3 Revision Record Issue Date Remarks Mar 2019 First issue. Mar 2020 • Updated K580/K583/K584 Kit Contents. • Modified the following sections: • Installation Procedures page 9. • Installing Power Pole Cover Assembly page 20. • Installing Skirt Panels page 11. • Installing Corner Bagwell page 13.
- Page 4 • Large Basket Corner Module (Corner Bagwell)—a bagging area that provides customers an area where they can place their items after scanning. The NCR FastLane SelfServ™ Checkout (7358) R6L Plus with a Bagging Area (Bagwell) Module or Large Basket (Basket) Module can be configured for either Left-hand (LH) orientation or Right-hand (RH) orientation, which refers to the direction customers scan and bag items.
- Page 5 Kit Contents Depending on the color variant of the Corner Bagwell, refer to the following sections for information about kit contents: • 7358-K580 Corner Bagwell Module (NCR Dark White) on the facing page. • 7358-K583 Corner Bagwell Module (Walmart Light Blue) on page 5.
- Page 6 Large Basket Corner Module 7358-K580 Corner Bagwell Module (NCR Dark White)
- Page 7 Large Basket Corner Module Part Numbers Description 497-0527589 Kit - Large Basket Corner Module (NCR Dark White) 006-8627719 Split Lock Washer, Zinc-Plated Steel,½ in Screw Size (4 pcs) 006-8611505 Bushing, Nylon 006-8627720 Washer, Zinc-Plated Steel, ½ in Screw Size (8 pcs) 006-8612443 Flexible Leveling Foot - 2 in Dia.
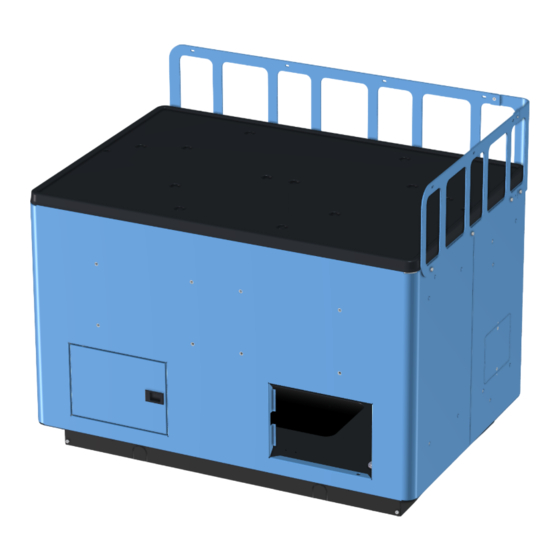
- Page 8 Large Basket Corner Module 7358-K583 Corner Bagwell Module (Walmart Light Blue)
- Page 9 Large Basket Corner Module Part Number Description 497-0527590 Kit - Large Basket Corner Module (Walmart Light Blue) 006-8627719 Split Lock Washer, Zinc-Plated Steel,½ in Screw Size (4 pcs) 006-8627720 Washer, Zinc-Plated Steel, ½ in Screw Size (8 pcs) 006-8612443 Flexible Leveling Foot - 2 in Dia. (5/16 in Hex x 3.25 in Length) (2 pcs) 795-0281612 Hole Cover Label - (Walmart Light Blue) 795-0275412 Rectangle End Fence (Walmart Light Blue)
- Page 10 Large Basket Corner Module 7358-K584 Corner Bagwell Module (Walmart Medium Gray)
- Page 11 Large Basket Corner Module Part Number Description 497-0527591 Kit - Large Basket Corner Module (Walmart Medium Gray) 006-8627719 Split Lock Washer, Zinc-Plated Steel,½ in Screw Size (4 pcs) 006-8627720 Washer, Zinc-Plated Steel, ½ in Screw Size (8 pcs) 006-8612443 Flexible Leveling Foot - 2 in Dia. (5/16 in Hex x 3.25 in Length) (2 pcs) 795-0284828 Walmart, Goods Shelf, Rectangle Module (Walmart Medium...
- Page 12 • Install the Bag Racks. For more information, refer to Installing Bag Racks page 27. Note: The Large Basket Corner Module can hold up to two (2) bag racks (497- 0509740) that are ordered separately. To order bag racks, contact an NCR Customer Service Representative.
- Page 13 Large Basket Corner Module 7. Do the following: a. Install the top cover tray to close the Corner Bagwell. b. Push and turn the Service screws clockwise to lock the top cover trays in place, as shown in the image below. 8.
- Page 14 Large Basket Corner Module Installing Skirt Panels To install the Corner Bagwell Skirt Panels, follow these steps: 1. Install the side skirt panels by doing the following: a. Each side skirt panel includes a knockout. This knockout should be removed for the cables to pass through from the Corner Bagwell to the SelfServ Checkout unit.
- Page 15 Large Basket Corner Module 2. Install the front and back skirt panels by doing the following: a. Attach the skirt panel to the skirt brackets by aligning the open slots in the skirt panel with the screw holes in the bracket. b.
- Page 16 Large Basket Corner Module Installing Corner Bagwell To install the Corner Bagwell, follow these steps: Note: For the purpose of illustration only, this procedure shows images using Left- hand (LH) orientation. 1. Do the following: a. On both sides of the top cover tray, turn the Service screw counterclockwise to unlock the tray from the Corner Bagwell.
- Page 17 Large Basket Corner Module b. Remove the top cover of the Corner Bagwell to access the mounting holes, as shown in the image below. Note: Depending on the orientation of the SelfServ Checkout, one of the access doors and cable access holes are opened by default. 2.
- Page 18 Large Basket Corner Module b. Remove the back core skirt knockout near the Power Pole, as shown in the image below. 3. Align the screw slots of the Corner Bagwell to the corresponding holes on the SelfServ Checkout unit.
- Page 19 Large Basket Corner Module 4. Using four (4) Phillips pan head screws, secure the Corner Bagwell to the SelfServ Checkout Core Cabinet, as shown in the image below. To install the Power Strip on the Bagwell floor, refer to Installing Power Strip in the Corner Bagwell on the facing page.
- Page 20 Large Basket Corner Module Installing Power Strip in the Corner Bagwell To install the Power Strip inside the Corner Bagwell, follow these steps: 1. Remove the top cover tray of the Corner Bagwell, if necessary. 2. Position the Power Strip so that its mounting holes are aligned to the corresponding holes on the Bagwell floor, as shown in the image below.
- Page 21 Large Basket Corner Module Routing Cables to Power Pole To route cables from the Core Cabinet to the Power Pole, follow these steps: Note: For the purpose of illustration only, this procedure shows images using a Left- hand (LH) orientation unit. 1.
- Page 22 Large Basket Corner Module 4. Do the following: a. Route the cables through the Bagwell and Core Cabinet Side Skirt knockouts. b. Route the cables out through the back core skirt knockout near the Power Pole, as shown in the image below. Note: For the purpose of illustration only, the image below shows one (1) cable only.
- Page 23 Large Basket Corner Module Installing Power Pole Cover Assembly To install the Power Pole Cover Assembly, follow these steps: Note: For the purpose of illustration only, this procedure shows images using Left-hand (LH) orientation. 1. Position the Power Pole Enclosure at the back of the SelfServ Checkout unit, as shown in the image below.
- Page 24 Large Basket Corner Module b. Mount the Power Pole Cover on the Power Pole enclosure and then secure using a screw. 3. Do the following: a. Secure the Power Pole Enclosure on the SelfServ Checkout unit using three (3) self drilling screws. b.
- Page 25 Large Basket Corner Module Installing Fences To install the fences, follow these steps: 1. Ensure that the Corner Bagwell and V-Bagwell are installed. For more information, refer to the following kit instructions: 2. Install the fences on the Corner Bagwell by doing the following: a.
- Page 26 Large Basket Corner Module b. Secure the side fences on the Corner Bagwell using seven (7) screws, as shown in the image below. c. Secure each side fence to the corner fence, as shown in the image below.
- Page 27 Large Basket Corner Module 3. Install the fences on the V-Bagwell by doing the following: a. Secure the corner fence using two (2) screws, as shown in the image below. b. Secure the side fences on the V-Bagwell using screws, as shown in the image below.
- Page 28 Large Basket Corner Module c. Secure each side fence to the corner fence, as shown in the image below.
- Page 29 Large Basket Corner Module Installing Hole Label Covers Attach the hole label covers on the areas shown in the image below. Note: For the purpose of illustration only, the image below shows a unit with Left-hand (LH) orientation.
- Page 30 To install the bag racks on the Bagwells, follow these steps: Note: The Large Basket (Basket) Module can hold up to four (4) bag racks (497-0509740) that are ordered separately. To order bag racks, contact an NCR Customer Service Representative. 1. Ensure that the Corner Bagwell and V-Bagwell are installed. For more information, refer to the following: 2.
- Page 31 Large Basket Corner Module 4. Secure each bag rack to the top cover tray using two (2) screws, as shown in the image below. Note: Attach the screws on opposite corners.
- Page 32 Large Basket Corner Module Changing Corner Bagwell Orientation This procedure should be done before installing the Large Basket Corner Module (Corner Bagwell) to the SelfServ Checkout Core Cabinet. To change the orientation of the Corner Bagwell, follow these steps: Note: For the purpose of illustration only, this procedure shows images using Left- hand (LH) orientation.
- Page 33 Large Basket Corner Module b. Install the blanking plate to the side cable access hole on the opposite side of the Corner Bagwell using two (2) screws. 3. Remove and install the access door panel on the Corner Bagwell by doing the following: a.
- Page 34 Large Basket Corner Module b. Remove the grommet from the access hole (A) and then insert it into the hinge slot of the adjacent access hole (B), as shown in the image below. c. Rotate the access door panel sideways and then insert its hinges into the hinge slots, as shown in the image below.
- Page 35 For more information, refer to 7358-K582 Bottom-of- Basket Camera Kit Instructions. 5. Level the SelfServ Checkout and Large Basket (Basket) Module assembly. For more information, refer to the "Leveling SelfServ Checkout Unit" section of NCR FastLane SelfServ™ Checkout (7358) R6L Plus Hardware Installation Guide (BCC5-0000-5263).
- Page 36 Large Basket Corner Module Removing Fences To remove the fences, follow these steps: 1. Remove the fences from the V-Bagwell by doing the following: a. Remove the two (2) screws securing each side fence to the corner fence, as shown in the image below. b.
- Page 37 Large Basket Corner Module c. Remove the two (2) screws securing the corner fence on the V-Bagwell, as shown in the image below. 2. Remove the fences from the Corner Bagwell by doing the following: a. Remove the two (2) screws securing each side fence to the corner fence, as shown in the image below.
- Page 38 Large Basket Corner Module b. Remove the seven (7) screws securing the side fences on the Corner Bagwell, as shown in the image below. c. Remove the two (2) screws securing the corner fence on the Bagwell using , as shown in the image below.
- Page 39 Large Basket Corner Module Removing Corner Bagwell To remove the Corner Bagwell, follow these steps: Note: For the purpose of illustration only, this procedure shows images using Left-hand (LH) orientation. 1. Remove the top cover tray of the Corner Bagwell, if necessary. 2.
- Page 40 Large Basket Corner Module Removing Power Strip from the Corner Bagwell To remove the Power Strip from the Corner Bagwell, follow these steps: 1. Do the following: a. On both sides of the top cover tray, turn the Service screw counterclockwise to unlock the tray from the Corner Bagwell.
- Page 41 Large Basket Corner Module 2. Disconnect all cables plugged to the Power Strip. 3. Remove the two (2) screws securing the Power Strip on the Bagwell floor and the screw allocated for the grounding cable.