
Related Manuals for VocoPro TWISTER-II


Summary of Contents for VocoPro TWISTER-II
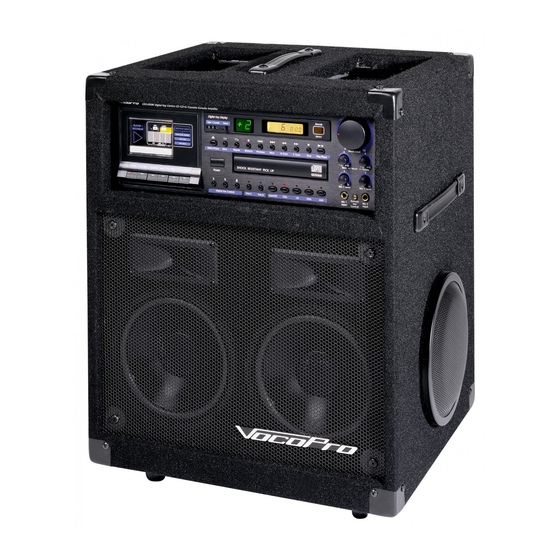
- Page 1 OWNER’S MANUAL TWISTER II DIGITAL KARAOKE SYSTEM IMPORTANT INFORMATION: Thank you for purchasing the Twister II . To make full and effective use of this unit, please read this Owner ’s Manual carefully before operating.
- Page 2 GENERAL WARNING RISK OF ELECTRIC SHOCK CAUTION: TO REDUCE RISK OF ELECTRIC SHOCK, DO NOT REMOVE COVER (OR BACK). NO USER-SERVICABLE PARTS INSIDE. REFER SERVICING TO QUALIFED SERVICE PERSONNEL The lightning flash with arrowhead symbol, within an equilateral triangle is intended to alert the user to the presence of uninsulated “dangerous voltage”...
-
Page 3: Table Of Contents
TABLE OF CONTENTS Congratulations! And thank you for purchasing the Vocopro Twister II ..With proper care and handling, this unit will continue to provide you with years of entertainmentand fun for friends and family. Please read this manual carefully before getting started. -
Page 4: Before You Start
BEFORE YOU START Thank you for purchasing the Twister II. At VocoPro we care about product quality and customer satisfaction. We know the Twister II will provide years of quality enjoyment and reliable music entertainment for you when used properly. -
Page 5: Assembly
Assembling the Twister II After fully unscrewing the Phillips head screw from the top back of the carpeted road case carefully insert the Twister II amplifier/player by sliding the unit into the space provided for the unit as far forward as it will go. -
Page 6: Quick Start
QUICK START SUPPLYING POWER TO THE TWISTER II You are now ready to connect your Twister II to a power source. Be sure to use caution when plugging in any electrical appliance. The Twister II comes with it’s own standard wall outlet power cord. It is attached to the back of the Twister II amplifier/player unit. Plug the power cord into any wall outlet. -
Page 7: Quick Start (Cont.) Using The Cdg Player
PLAYING CD/CDG’s Locate the “OPEN/CLOSE” button on the front of the Twister II amplifier/player. Press once to open the CD tray. The tray will open automatically after the button is pressed. Lay the CD/CDG on the open tray and press the “OPEN/CLOSE” button again. The tray will close automatically after the button is pushed. -
Page 8: Using Effects And Changing The Key
USING EFFECTS AND CHANGING THE KEY ADDING BASS OR TREBLE TO THE MUSIC Locate the small “BASS” and “TREBLE” control knobs on the front of the Twister II underneath the large “MUSIC VOL” knob. To add bass tones to the music, turn the “BASS” knob clockwise until you have added the desired amount of bass tone to the music. -
Page 9: Changing The Key (Cont.)
CHANGING THE KEY (Cont.) USING THE CASSETTE DECK RAISING OR LOWERING THE PITCH (OR KEY) OF THE MUSIC To raise the pitch or key of the music press the “sharp” (#) sign once for each ½ step you would like the music raised. To lower the pitch or key of the music press the “flat”... -
Page 10: Using The Cassette Deck (Cont.)
USING THE CASSETTE DECK (Cont.) TO RECORD WITH THE CASSETTE DECK You can record you voice on the cassette deck while singing with a Karaoke CD/CDG. NOTE: Be sure to select the “CGD” button located under the CDG tray before you start. Follow the instructions for playing a CD/CDG and select the desired “track”... -
Page 11: Listen To Your Recording
OTHER PARTS OF THE TWISTER TO LISTEN TO YOUR RECORDING When you have finished recording stop the tape by pressing the “ST/EJ” key. Rewind the tape by pressing the “REW” key until the tape stops at the desired location. Select the “CASSETTE” button located below the CDG player to switch to cassette mode. Note: This button should be set to CDG when recording from CDG to cassette. -
Page 12: Connecting Other Components To The Twister
CONNECTING OTHER COMPONENTS TO THE TWISTER BEFORE YOU START!! IMPORTANT INFORMATION ABOUT CONNECTING ADDITIONAL SPEAKERS OR AMPLIFIERS TO THE TWISTER II 1) IT IS NOT RECOMMENDED THAT ADDITIONAL SPEAKERS BE CONNECTED DIRECTLY TO THE TWISTER II AMPLIFIER. THE AMPLIFIER IN THE TWISTER II UNIT IS DESIGNED TO POWER ONLY THE SPEAKERS WITHIN THE UNIT. -
Page 13: Using The Remote Control
COMPONENTS TO THE TWISTER CONNECTING AN ADDITIONAL TAPE DECK TO PLAY OR RECORD ON THE TWISTER II TO PLAY MUSIC FROM AN ADDITIONAL TAPE DECK ON THE TWISTER II: Using and RCA connector cable, connect the “L” and “R” “AUX” INPUT jacks on the Twister II to the “L” and “R” “AUDIO OUTPUT OR PLAY OUT” jacks on the tape deck (check manufacturer’s instructions). -
Page 14: Parts And Functions Of The Remote Control
PARTS AND FUNCTIONS OF THE REMOTE CONTROL INFRARED REMOTE SENSOR: The sensor on the top of the hand held remote control communicates with the infrared sensor on the front panel of the Twister II and should not be covered or the remote control wil not work properly. OPEN/CLOSE: The OPEN/CLOSE button on the hand held remote control operates the CD/CDG tray. -
Page 15: Trouble Shooting Guide
TROUBLE SHOOTING GUIDE PROBLEM No video signal. Words don’t appear on the TV monitor. Unable to connect the Twister II to my television monitor with the “RCA” cabel provided. There is a loud “squeeling” noise coming from speakers. No sound from either or both speakers. -
Page 16: Parts And Functions (Front Panel)
PARTS AND FUNCTIONS (FRONT PANEL) POWER BUTTON: Turns on the power to the Twister II. TAPE COUNTER: Use the tape counter when playing or recording cassettes to keep track of your location on the tape. OPEN/CLOSE BUTTON: To open/close CD/CDG tray. RESET BUTTON: Push the reset button to reset the tape counter to zero when using the cassette deck. -
Page 17: Parts And Functions (Rear Panel)
PARTS AND FUNCTIONS NEXT SELECTION CONTROL BUTTON: button to advance the CDG to the next song selection Press once for each song you want to advance to, or hold the button down to advance continually. The selection number will be displayed in the display window (#10). B-SCAN: Press this button to “scan”... - Page 18 PARTS AND FUNCTIONS (FRONT PANEL CONT.) SHARP KEY: Press this key to RAISE the pitch of the song selection being played. This feature raises the pitch of the song one half-step for each time it is pressed, up to nine half-steps. The sharp key is part of the “key control” feature and will work with the CDG player and cassette deck.
- Page 19 PARTS AND FUNCTIONS 3RD MICROPHONE INPUT VOLUME CONTROL: This controls the volume for the 3rd microphone input. Turn clockwise to increase volume, counter-clockwise to decrease. BASS CONTROL FOR MIC-1 AND MIC-2: This controls the amount BASS tone microphones 1 and 2 will receive.
- Page 20 PARTS AND FUNCTIONS (REAR PANEL CONT.) AC POWER CORD: Plugs into any AC wall outlet. LEFT AND RIGHT CHANNEL RECORD (“REC”) OUTPUT JACKS: These two outputs jacks can be used to connect an additional tape deck. Connect the left (“L”) and right (“R”) record (REC) output jacks to the respective left (“L”) and right (“R”) record (REC) input jacks on the back of your external tape deck.
-
Page 21: Connection A Television Monitor (Diagram)
CONNECTING A TELEVISION MONITOR... -
Page 22: Connection Diagram For Other Components
CONNECTION DIAGRAM for other components... -
Page 23: Specifications
AUDIO INPUT (AT1KHZ) MICROPHONE ... AUX/DVD/LD/CDG/CASSETTE... AUDIO OUTPUT... VIDEO INPUT CDG/LD/DVD... FREQUENCY RESPONSE AUX/DVD/LD/CDG/CASSETTE... TONE CONTROL (MUSIC) BASS... TREBLE ... ECHO TIME DELAY... KEY CONTROL RANGE ... SIGNAL TO NOISE RATIO... CASSETTE MOTOR SPEED (ATT-111N 3KHZ) ... CASSETTE WOW-FILTER ATT-111N 3KHZ) ... POWER SUPPLY, OTHERS POWER REQUIREMENTS...