Advertisement
Quick Links
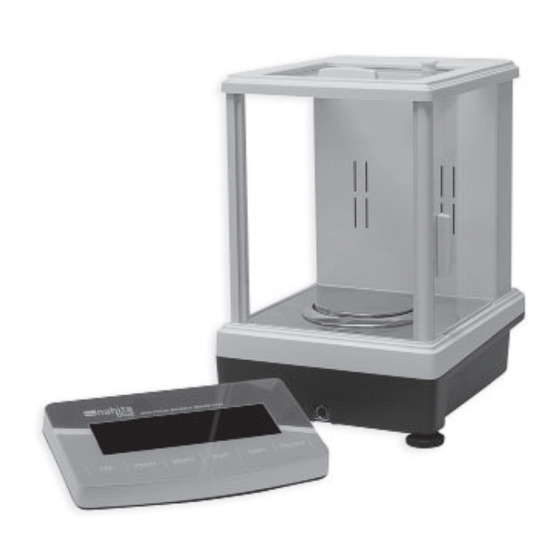
BALANZAS ANALITICAS NAHITA BLUE
NAHITA BLUE ANALYTICAL BALANCES
BALANCES ANALYTIQUES NAHITA BLUE
SERIES - SERIES - SÉRIES 5144, 5145, 5183
Este manual es parte inseparable del aparato por lo que debe estar disponible a todos
los usuarios del equipo. Le recomendamos leer atentamente el presente manual y seguir
rigurosamente los procedimientos de uso para obtener las máximas prestaciones y una
mayor duración del mismo.
This manual should be available for all users of these equipments. To get the best
results and a higher duration of this equipment it is advisable to read carefully this
manual and follow the processes of use.
Ce manuel est une partie indissociable de l'appareil et doit être mis à la disposition de
tous les utilisateurs de l'équipement. Nous vous recommandons de lire attentivement
ce manuel et de suivre scrupuleusement les procédures d'utilisation afin d'obtenir des
performances maximales et une plus longue durée de vie de l'appareil.
Pág. 1
Versión 1, septiembre 2023
Manual de uso de balanzas analíticas
Advertisement

Related Manuals for Nahita 5144 Series


Summary of Contents for Nahita 5144 Series
- Page 1 BALANZAS ANALITICAS NAHITA BLUE NAHITA BLUE ANALYTICAL BALANCES BALANCES ANALYTIQUES NAHITA BLUE SERIES - SERIES - SÉRIES 5144, 5145, 5183 Este manual es parte inseparable del aparato por lo que debe estar disponible a todos los usuarios del equipo. Le recomendamos leer atentamente el presente manual y seguir rigurosamente los procedimientos de uso para obtener las máximas prestaciones y una...
- Page 2 ENGLISH INDEX OF CONTENTS English 2-21 English 22-41 French 42-61 INDEX OF CONTENTS 1. Introduction ........22 4. Set up and operation ......29 2. Preparation ......... 25 5. Troubleshooting ........41 3. Calibration .......... 26 1. INTRODUCTION 5144, 5145, 5183 Series analytical balances work on electromagnetic force compensation technology and microprocessor, which allows high speed stabilization and high reliability.
- Page 3 ENGLISH Control panel Display information Display Description Model display Internal calibration sign Negative weight value Stable value Weighing sign Density determination Piece counting Dynamic weighing Summation Progress bar Time setting W1 W2 W1: weight in air, W2: weight in liquid Unauthenticated numbers Unit Page 23...
- Page 4 Interface RS232/USB Pan size Ø 90 mm Net weight 6280 g Power supply AC 110-240 V; 9 VD 2 A Technical data - 5144 Series analytical balances (0.1 mg) Reference (ext. calibration) KBF010 KBF011 KBF012 Reference (int. calibration) KBF013 KBF014...
- Page 5 ENGLISH Technical data - 5183 Series analytical balances (1mg) Reference (ext. calibration) KBD015 KBD016 KBD017 Reference (int. calibration) KBD018 KBD019 Capacity 500 g 1000 g 2000 g Readability 1 mg Stabilization time 1-2 s Preheating time 30-60 min Weighing unit g / oz / ct / mg Min.
- Page 6 ENGLISH Conexión y encendido Press the ON/OFF button. Balance enters the weighing interface. When the operating temperature changed, put the balance in the new place for 2 hours in the state of “power on”, to make the balance comply with the new temperature. Recommended temperature between 15 and 25 ºC.
- Page 7 ENGLISH External calibration (single-point calibration) Balance back to zero Enter external calibration mode; “CAL-100” flicker Put the 100g weight (for example, in balance ref. KBF010) Put the 100g weight (for example, in balance ref. KBF010). Screen shows “CAL-100”. Remove the weight.
- Page 8 CASTELLANO Internal calibration weight value setting (balance with internal calibration only) Enter calibration mode Chose the calibration method Screen shows “CAL-dn” Put the corresponding weight. Screen shows “CAL- uP”. Remove the weight. Finish the setting Auto-calibration If the balance model is an internal calibration model, please directly press the calibration button to calibrate.
-
Page 9: Setup And Operation
ENGLISH 4. SET UP AND OPERATION Unit conversion Unit “g” Unit “oz” Unit “ct” Unit “mg” Baud rate setting Enter Baud rate setting mode Baud rate is 1200 Baud rate is 2400 Baud rate is 4800 Baud rate is 9600. Save setting Page 29 Version 1, September 2023 User’s manual for analytical balances... - Page 10 ENGLISH Time setting 1. Enter time setting mode 2. Set seconds 3 Set minutes 4. Set hours 5. CAL increase. ON/OFF decrease. Press the TARE button to save the settings. Sensitivity setting 1. Enter sensitivity setting mode 2. -ASD-0- highest sensitivity 3.
- Page 11 ENGLISH Sensitivity setting 5. -ASD-3- low sensitivity Save setting NOTE: Factory setting sensitivity “-ASD-3-” is suitable for most environments. Higher sensi- tivity requires better environment. Don’t adjust the sensitivity without consulting the manu- facturer. Filter level setting 1. Enter filter level setting mode 2.
-
Page 12: Interface Parameters
ENGLISH Print setting 1. Enter print setting mode 2. -Prt-0- press “PRINT” printing 3. -Prt-1- interval 0.5 s printing 4. -Prt-2- interval 1 s printing 5. -Prt-3- interval 2 s printing 6. -Prt-4- interval 3 s printing Save setting INTERFACE PARAMETERS RS232 interface Connection Balance (9 pins) - Page 13 ENGLISH Piece counting 1. Enter piece counting mode 2. -COU-10- sample quantity 10 pcs 3. -COU-25- sample quantity 25 pcs 4. -COU-50- sample quantity 50 pcs 5. Enter piece counting mode Put 10 pcs on the balance pan according to above setting.
- Page 14 ENGLISH Percent weighing 1. Enter percent weighing mode. Put the contrast target sample on the balance pan, for example, 2 pcs of screw. 2. Save the sample weight. “100.00” (100%) is shown. 3. If you put 1 screw on the balance pan, “50.00” (50%) is shown.
- Page 15 ENGLISH Density determination (gravity kit needed – optional) 7.-dEN-1- open solid density weighing 8. Save setting. Display shows and “W1” 9. Press “MENU”. Display shows 10. Enter auxiliary liquid density value. If the auxiliary liquid is water, enter 1 g/cm 11.
- Page 16 ENGLISH Dynamic weighing 1. Enter dynamic weighing mode 2. -COU-0- close dynamic weighing 3. -COU-10- data sampling 10 seconds (approx.) 4. -COU-20- data sampling 20 seconds (approx.) 5. Save setting. Display shows . Place the sam- ple on the balance pan (if the weight is not displayed, press the UNIT key) and the weight of the object will be displayed.
- Page 17 ENGLISH Summation function 4. -Add-10- accumulate 10 times weighing value 3. -Add-15- accumulate 15 times weighing value 4. -Add-20- accumulate 20 times weighing value 5. Save setting. Display shows Summation function 1. Enter summation function mode 2. -Add-5- accumulate 5 times weighing value (e.g.) 3.
- Page 18 ENGLISH Summation function 7. Put on target object 2 8. Record value of target object 2. Bottom right corner shows “2” times. 9. Remove target object 2. Balance back to zero. 10. Repeat the procedure for target objects 3 and 4 Put on target object 5 11.
- Page 19 ENGLISH Pipette calibration 3.-COU-2- get 2 times weighing value as reference 4. -COU-5- get 5 times weighing value as reference 5. -COU-7- get 7 times weighing value as reference 6. -COU-10- get 10 times weighing value as reference 7. Save setting and enter pipette calibration interface Pipette calibration 1.
- Page 20 ENGLISH Pipette calibration 6. Remove the first value. Balance back to zero. 7. Repeat the above procedure 3 times Take with the pipette 100μl, drop into the container, fifth time 8. Get liquid volume directly. Calibration completed. 9. If no more calibrations, enter pipette calibration mode again 10.
-
Page 21: Troubleshooting
ENGLISH 5. TROUBLESHOOTING Problem Cause Solution No display - No power supply - Plug in AC/DC adapter - Fuse damaged - Change the fuse - Power transformer is damaged - Change the power transformer - If problem persists, send the balance to the Technical Service Unstable display - Bad working conditions...