Table of Contents
Advertisement
Advertisement
Table of Contents

Related Manuals for Visioneer OneTouch 6600


Summary of Contents for Visioneer OneTouch 6600
- Page 1 Visioneer OneTouch 6600 USB Scanner Installation Guide F O R W I N D O W S...
- Page 2 Visioneer's Limited Product Warranty If you find physical defects in the materials or the workmanship used in making the product described in this document, Visioneer will repair or (at its option) replace the product at no charge to you, provided you return it (postage prepaid, with proof of your purchase from the original reseller) during the 3-month period after the date of your original purchase of the product.
-
Page 3: Table Of Contents
Step 1: Installing the Scanner Software ..... . . 4 Step 2: Connecting the Scanner ......6 Step 3: Checking Out Your Scanner . - Page 4 Troubleshooting ........38 Cleaning the Scanner Glass ....... 39 How to Uninstall Your Scanner .
-
Page 5: Welcome
ELCOME ELCOME Congratulations on purchasing your Visioneer OneTouch 6600 USB scanner. With your scanner, you can quickly scan paper documents and color photos to place their electronic images on your computer. ’ S IN THE Before starting the installation, check the contents of the box to make sure that all parts are included. -
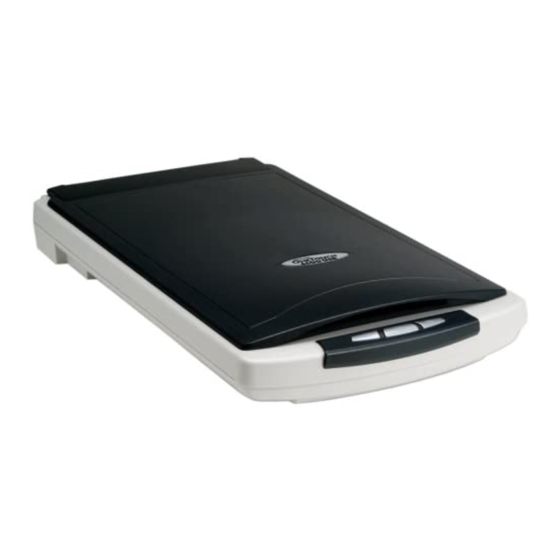
Page 6: The Visioneer Onetouch 6600 Scanner
Power jack—Connects the power cord to the scanner. Universal Serial Bus (USB) cable—Connects the scanner to the computer. Note: The scanner does not have an on/off switch. Press a button on the front of the scanner to start scanning an item. -
Page 7: What You Need
Your scanner is delivered with the following documentation: Quick Install Card ■ Getting Started Guide ■ Visioneer OneTouch 6600 Scanner Installation Guide ■ On the Installation CD; contains detailed installation, scanning, configuration, and maintenance information ScanSoft PaperPort User’s Guide ■... -
Page 8: Chapter 1: Installation
Note: You must install the scanner software before connecting the scanner to your computer. Otherwise, the correct driver software for your scanner will not be installed and it may not work properly. To install the scanner software: 1. Start Microsoft Windows and make sure that no other applications 2. - Page 9 3. From the list of options, click PaperPort Deluxe. 4. From the list of options, click Install PaperPort Deluxe. 5. Read the license agreement. If you accept the terms, click Yes. 6. Enter a name and company, or leave current values, and click Next. 7.
-
Page 10: Step 2: Connecting The Scanner
ISIONEER OUCH 10. On the Visioneer License Agreement dialog box, read the license 11. On the Welcome window, click Next. 12. When you see the Connect Scanner window, do NOT click Finish. The Visioneer OneTouch 6600 scanner connects to any available USB port. - Page 11 2. Plug the USB cable on the back of your scanner into any USB port on your computer. The USB symbol identifies the location of the USB port on your computer. If the plug does not attach easily, make sure that you are plugging it in correctly.
-
Page 12: Step 3: Checking Out Your Scanner
Scanner Icon If the icon has a red X through it, the scanner is not properly connected. See the next section, “If the Scanner Is Not Properly Connected” on page 9, for the steps to fix the problem. -
Page 13: If The Scanner Is Not Properly Connected
The lamp then remains ready so you don’t have to wait for it to warm up each time you want to scan. To conserve electricity and prolong the life of the scanner, you can set the length of time for the lamp to remain lit before powering down. See “Setting Preferences”... - Page 14 Readme file, and the scanner icon still has a red X through it, you may have a malfunctioning scanner. Please see “Visioneer OneTouch 6600 Specifications” on page 48. Also visit our web site at www.visioneer.com for additional technical information. 6600 S...
-
Page 15: Chapter 2: Scanning
This chapter describes three methods of scanning, as well as how to customize scanning options. HREE AYS TO You can scan items by using buttons on the scanner, buttons on the screen, or from the PaperPort software (or other Twain software). • Scan with the scanner buttons Press a button on the scanner’s front panel. -
Page 16: Scanning By Pressing The Scanner Buttons
ISIONEER OUCH CANNING BY Pressing a scanner button scans the item and then sends the image to the printer or a software application on your computer. To scan by pressing a button on the scanner: 1. Place an item face-down on the glass and align the edge of the item 2. -
Page 17: About The Buttons On The Scanner
CANNING BY BOUT THE UTTONS ON THE The scanner buttons are preconfigured to scan items at various settings and then send the scanned image to a preselected destination software application. You can change the settings for each button. See “About the Configuration Dialog Box”... -
Page 18: Scanning From The Button Panel On The Screen
Scanning from the button panel on the screen is just like pressing a scanner button, except you click the button on the computer screen. The scanner scans the item and then sends the image to the printer or a destination application on your computer. This method of scanning is especially helpful if the scanner is not located close to your computer. -
Page 19: Configuring The Scanner And Screen Buttons
ONFIGURING THE When you first connect your scanner to a computer, the scanner’s software configures each button with appropriate settings. Using the Configuration dialog box, you can modify the button settings to meet your specific needs. BOUT THE The Configuration dialog box shows the current settings for each button on the scanner and screen panel. - Page 20 PENING THE You can open the Configuration dialog box from the scanner’s shortcut menu or the Button Panel on the screen, or from the scanner itself. To open the Configuration dialog box from the shortcut menu: 1. Right-click the scanner icon.
- Page 21 To open the Configuration dialog box from the scanner: 1. Press and hold down one of the scanner buttons on the scanner’s button panel. The Configuration dialog box opens. The tab for the scan button you clicked is selected for you.
-
Page 22: Selecting New Options For The Buttons
To select new options for a scanner button: 1. On the Windows taskbar, right-click the scanner icon to see the 2. To change the application used to view and work with the scanned... - Page 23 4. To change the scan format and page option(s) for the button, select one of the Format and Page(s) options. 5. Click OK. Now when you press the scanner button, it scans the image using the new configuration settings and displays the scanned image in the new destination application.
-
Page 24: Creating New Configurations
To create a new configuration: 1. Press and hold down a button on the scanner. 2. Click New to start creating a new configuration. 3. On the New Scan Configuration dialog box, type a name for your... - Page 25 CANNING FROM THE 4. On the Scan Settings tab, set the scan settings as required. Mode—Select Black/White to scan in black and white. For example, letters and memos are usually scanned in black and white. Select Grayscale to scan items such as documents containing drawings or black and white photographs.
- Page 26 AutoCrop—Select this option to let the scanner automatically determine the size of the item being scanned. For example, if you put a photo in the middle of the glass, the scanner will automatically determine the size of the photo. When AutoCrop is selected, the scanner makes two passes—the first pass senses the...
-
Page 27: Adjusting Scan Settings And
To adjust the scan settings and page settings: 1. Press and hold down a button on the scanner. The Configuration dialog box opens. The selected tab on the dialog box corresponds to the button you pressed. - Page 28 ISIONEER OUCH 3. Click the Edit button. 4. On the Scan Settings tab, adjust the scan settings as required. 5. Click the Page Settings tab to adjust the scan page settings. 6. Click OK. 7. On the Configuration dialog box, Click OK. Note: If you selected the Copy/Print button, the Edit Scan Configuration dialog box will have a Device tab for selecting options for a printer or copier.
-
Page 29: Setting Preferences
CANNING FROM THE ETTING REFERENCES The preferences options apply to each button and to the scanner. To set preferences: 1. On the Configuration dialog box, select the tab for a button to set its preferences. 2. Click the Preferences tab on the Configuration dialog box. - Page 30 Show Scan Progress Window—Select this option to see the window that shows a rendition of the image during scanning. 4. Click the General tab to set preferences for the scanner. Show Status Window—Select this option to see the small window...
- Page 31 After idling for xx minutes—Select this option to automatically turn off the lamp if the scanner hasn’t been used for the specified time. This option saves energy and extends the lamp’s life. Click in the box and enter the number of minutes for the lamp to remain idle before turning off.
-
Page 32: Scanning From The Paperport Software
ISIONEER OUCH CANNING FROM THE Instead of using a scanner button, you can scan directly from the PaperPort software. This is particularly helpful when you are using PaperPort to file and save your scanned items. Note: You can also scan directly with other software that meets the Twain standards for scanning, which includes many graphics and imaging applications available for your computer. -
Page 33: Scanning An Item Using The Twain Button
Windows desktop to start it. The PaperPort desktop opens. 2. Open the scanner cover, place the item you want to scan face down, and close the cover. 3. Click the Twain icon on the PaperPort software’s command bar, or click Acquire from the File menu. - Page 34 In the example above, the selected setting is “Color Document-Faster.” The scanner scans a preview of the item and displays it in the Scan Manager. In the figure below, the picture shows a close-up of a boy and a dog.
- Page 35 7. Check the preview image. If you want to change the scanner setting for the item, click one of the options in the Scan Page For list. For example, to scan a black and white image instead of a color photo, select Black &...
-
Page 36: Adjusting Paperport Scanner Settings
ISIONEER OUCH DJUSTING Using the Scan Manager, you can adjust the scanner settings to fine tune the scanned item. This section tells you how to: Select a predefined scanner setting ■ Select scan configuration options ■ Customize a scanner setting ■... -
Page 37: Selecting A Predefined Scanner Setting
ELECTING A In the Scan Manager, you can select one of the predefined scanner settings from the Scan Page For list. The settings are described in the following table. Scan Page For Default Setting Editing Text Black-and-white (OCR) 300 dpi... -
Page 38: Selecting Scan Configuration Options
True Color Grayscale B&W symbols next to the setting names indicate the scan mode—True Color, Grayscale, or Black and White. The scanner settings affect the speed of the scan and the file size. The Scan Manager shows the approximate file size of a scanned item to help you decide whether to use a particular scanner setting. -
Page 39: Customizing A Scanner Setting
AutoCrop—Select this option to let the scanner automatically determine the size of the item being scanned. For example, if you put a photo in the middle of the glass, the scanner will automatically determine the size of the photo. When AutoCrop is selected, click Preview to crop the image, and then click Scan to start the scan. -
Page 40: Adjusting The Brightness And Contrast
ISIONEER OUCH 6. Click Save. The new setting is added to the Scan Page For list at the top of the Scan Manager dialog box. DJUSTING THE Sometimes an item is scanned with the brightness and contrast set too light or too dark. For example, a note written with a light pencil may need to be scanned darker to improve legibility. -
Page 41: Selecting The Area Of The Item You Want To Scan
2. Select the User Defined option. 3. Drag the Brightness slider to the left to make the item darker or to the right to make the item lighter. 4. Drag the Contrast slider to the left to decrease the contrast or to the right to increase the contrast. -
Page 42: Chapter 3: Maintenance
Readme file, and the scanner still has problems, you may have a malfunctioning scanner. Please see the technical support card that you received with your scanner for technical assistance telephone numbers. Also visit our web site at www.visioneer.com for additional technical information. Problem: The scanner won’t scan. What’s wrong? Check for one of these possible problems: •... -
Page 43: Cleaning The Scanner Glass
LASS Scanning items that have excessive amounts of dirt or dust may dirty the glass. To ensure the best quality scanned item, wipe the scanner glass with a soft clean cloth to rid the glass of dust or other debris. -
Page 44: How To Uninstall Your Scanner
ISIONEER OUCH OW TO To uninstall the Visioneer OneTouch 6600 scanner, you first remove the scanner software, and then remove the PaperPort software, or other software you installed for the scanner. 1. On the Windows taskbar, click Start, point to Settings, and then 2. - Page 45 The scanner software is uninstalled from your computer. 9. If the Remove Shared Component window opens, we recommend selecting No to All. 10. Unplug the power to the scanner and remove its USB cable from your computer. OW TO NINSTALL...
- Page 46 The other options are for advanced users only. 7. Click Next. 8. Click Finish. 9. If the Remove Shared Component window opens, we recommend 10. Unplug the power to the scanner and remove its USB cable from 6600 S CANNER NSTALLATION AND windows.
-
Page 47: Step 2: Uninstalling The Paperport Software
11. Close both the Add or Remove Programs and the Control Panel windows. 12. Restart your computer. 13. Proceed to “Step 2: Uninstalling the PaperPort Software”. 2: U NINSTALLING THE 98, 98SE, INDOWS 1. On the Windows taskbar, click Start, point to Settings, and then click Control Panel. - Page 48 ISIONEER OUCH Important: Files created by PaperPort are in a proprietary format (with a .max extension) and cannot be opened by other applications. If you decide to keep your scanned image files and want to be able to view them, you can use the PaperPort Viewer instead of the PaperPort application.
- Page 49 7. Click No to keep your image files, click Yes to permanently remove the image files from your computer. Important: Files created by PaperPort are in a proprietary format (with a .max extension) and cannot be opened by other applications. If you decide to keep your scanned image files and want to be able to view them, you can use the PaperPort Viewer instead of the PaperPort application.
- Page 50 ISIONEER OUCH Important: We recommend choosing No to All. Removing shared files could cause other applications not to run correctly. 8. Click No to keep your image files, click Yes to permanently remove Important: Files created by PaperPort are in a proprietary format (with a .max extension) and cannot be opened by other applications.
-
Page 51: Visioneer-Us And Canada Technical Support
—I ISIONEER NTERNATIONAL Visioneer provides technical support to all registered users in English and German. Please see the chart below for contact telephone numbers. For Latin America, call our U.S. Technical Support (1-541-884-5548). Visioneer bietet allen registrierten Benutzern technische Unterstützung auf Deutsch und Englisch. -
Page 52: Visioneer Onetouch 6600 Specifications
ISIONEER OUCH ISIONEER OUCH Bit Depth Scanning resolution Maximum Item sizes Scanner dimensions Height Width Length Weight Operating temperature Relative humidity Power supply Input voltage/frequency Output voltage/watt Safety and agency certifications UL, ULc, FCC Class B, Hardware warranty 6600 S... -
Page 53: Index
Document cover 2 Document pad 2 folder for images 18 gamma 22 glass 2 cleaning 39 hardware 1 installation 4 scanner 6 software 4 locking tab 6 mode 21 new configuration 20 page settings adjusting 23 page size 21 PaperPort 5... - Page 54 3 scanner buttons configuring 15 scanning 11 from the PaperPort software 11, 28 from the screen 11, 14 modes 33 with the scanner buttons 11, 12 screen buttons configuring 15 specifications 48 system requirements 3 troubleshooting 38 uninstall...