Advertisement
Quick Links
True to the Music
Radial JD6
Six Channel Rack Mount D.I.
User Guide
Radial Engineering Ltd.
1845 Kingsway Ave, Port Coquitlam BC V3C 0H3
Tel: 604-942-1001 • Email: info@radialeng.com
Radial JD6 User Guide Part # R870 1045 00. Specifications and appearance subject to
change without notice. Copyright © 2015 Radial Engineering Ltd. All rights reserved. / 11-2023
Advertisement

Related Manuals for Radial Engineering JD6 Six Channel Rack Mount D.I.


Summary of Contents for Radial Engineering JD6 Six Channel Rack Mount D.I.
- Page 1 1845 Kingsway Ave, Port Coquitlam BC V3C 0H3 Tel: 604-942-1001 • Email: info@radialeng.com Radial JD6 User Guide Part # R870 1045 00. Specifications and appearance subject to change without notice. Copyright © 2015 Radial Engineering Ltd. All rights reserved. / 11-2023...
-
Page 2: Table Of Contents
JD6 with keyboard racks. Should you have a question or application in mind that is not covered in this manual, we invite you visit www.radialeng.com to check the FAQ section for the latest updates. Radial Engineering Ltd. JD6 Six Channel DI User Guide... -
Page 3: Introduction
Like all Radial products, the JD6 is designed to handle the harshest touring environments. Welded 14 gauge steel construction, baked enamel finish, high-cycle rate switches and glass-filled high-impact polymer connectors with nickel silver contacts combine for maximum durability. The Radial JD6 is supported with a 3-year limited warranty. Radial Engineering Ltd. JD6 Six Channel DI User Guide... -
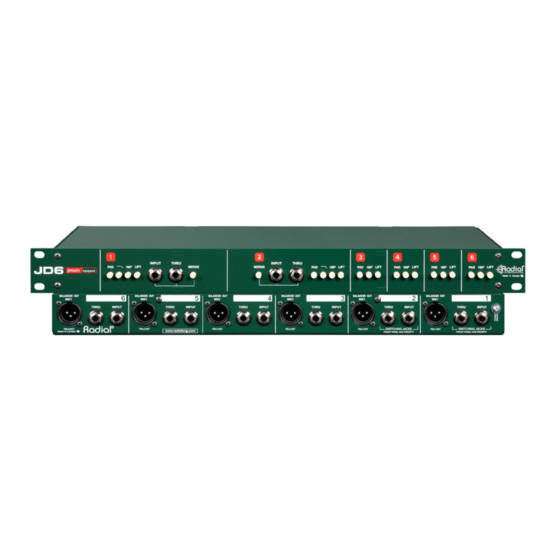
Page 4: Front Panel Features
Depressing the merge switch affects both the front and rear jacks. Radial Engineering Ltd. JD6 Six Channel DI User Guide... -
Page 5: Rear Panel Connections
Should you need to sum a stereo source down to mono, connect the left and right outputs of your device to the input and thru connectors of channel 1 or 2 and press the merge switch. Radial Engineering Ltd. JD6 Six Channel DI User Guide... -
Page 6: Grounding Options For The System Engineer
NOTE: Chassis grounding is usually not required with the Radial JD6 because of the isolating nature of the device and the extensive ground plane that is employed. Unless you are a qualified system engineer, we recommend that these be left in the factory set position. As such, changing these has purposely been made difficult. Fig. 3 Channel 1 side access switch connects chassis ground to pin-1. Factory set 'out' to 'float' Radial Engineering Ltd. JD6 Six Channel DI User Guide... -
Page 7: Typical Stage Set-Up Using The Radial Jd6
Balanced outputs to house mixer SWITCHING JACKS SWITCHING JACKS FRONT PANEL HAS PRIORITY FRONT PANEL HAS PRIORITY To Radial JD6 Direct Box Computer Samplers Keyboards From JD6 to musician’s personal mixer Radial Engineering Ltd. JD6 Six Channel DI User Guide... -
Page 8: Specifications And Block Diagram
Shipping Weight: ..........................3.7 kg (8.15 lbs) Power: ..........................Passive, no power required Conditions: .................For use in dry locations only between 5°C and 40°C Warranty: ........................... Radial 3-year, transferable Specifications are subject to change without notice. Radial Engineering Ltd. JD6 Six Channel DI User Guide... - Page 9 1845 Kingsway Ave, Port Coquitlam BC V3C 0H3 Tel: 604-942-1001 • Email: info@radialeng.com Radial JD6 User Guide Part # R870 1045 00. Specifications and appearance subject to change without notice. Copyright © 2015 Radial Engineering Ltd. All rights reserved. / 11-2023...