
Related Manuals for UMAX Technologies Astra 4400


Summary of Contents for UMAX Technologies Astra 4400
- Page 1 OPERATION OPERATION OPERATION OPERATION MANUAL MANUAL MANUAL MANUAL UMAX Data Systems, Inc. For the Astra Astra Astra Astra 4400 4400 4400 4400 Color Scanner...
- Page 2 Copyright Copyright 2001 UMAX Data Systems, Inc. All Rights Reserved. No part of this publication may be reproduced, transmitted, transcribed, stored in a retrieval system, or translated into any language or computer language, in...
-
Page 3: Important Safeguards
♦ ♦ ♦ ♦ Do not use this product near water or in rainy/moist environment. ♦ ♦ ♦ ♦ Do not place the scanner on an uneven surface. This may cause serious damage to the scanner. ♦ ♦ ♦ ♦... -
Page 4: Table Of Contents
Contents Overview of Your Scanner... 5 Completing Your First Scan ... 8 Configuring the Push Buttons ... 15 Scanning with VistaScan... 20 Troubleshooting ... 28 Maintenance ... 30 Specifications ... 32 Glossary... 33... -
Page 5: Overview Of Your Scanner
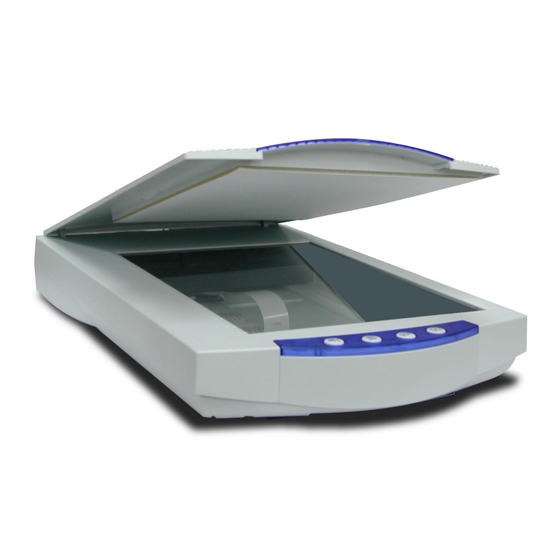
The plastic cover over the object glass that can be raised and lowered over a document. Object Glass The glass surface on which the document or image should be placed. Power Indicator Illuminates to indicate that the scanner is powered on. Scan, Copy, E-mail/Fax and Custom buttons NNER NNER NNER... -
Page 6: Back View
Back View Power Adapter Receptacle The power adapter is plugged-in here. 4-Pin USB Connector Universal Transparency Cover Socket The socket used by the Universal Transparency Cover. - Page 7 Push buttons on the front panel The defining feature of the Astra 4400 is its push button functionality. You can scan an image to e-mail, perform OCR, or even use the scanner as a copy machine by pressing the buttons on the front panel of the scanner.
-
Page 8: Completing Your First Scan
Press the push buttons on the front panel of your scanner and the image or the text document on the scanner will be scanned to the destination selected. - Page 9 2. A scan progress window showing the executed task appears. 3. Once the scan is completed, the scanned image is converted to text through the OCR engine and the text editing application automatically opens for editing the document. on the front panel of the scanner and a...
-
Page 10: Copy Button
Copy Button Scanning images to the printer 1. Press the Copy button scan progress window appears, as shown below. on the front panel of the scanner and a on the front panel of the scanner and a... - Page 11 2. A FaxUI window appears: please input the fax number of the recipient in the FAX Number field, and then click on the Send Fax icon. on the front panel of the scanner on the front panel of the scanner...
-
Page 12: Custom Button
VistaScan and launching an image editing application installed in your computer. Before utilizing any function of this button, please click on the scanner icon in the Taskbar with the right mouse button to edit settings of this button first. - Page 13 Open an image editing application Right click on the scanner icon up menu as shown on the right appears. Click the Push Button Configuration option. The Push Button configuration window appears. Select the custom icon and the image editing application icon.
- Page 14 If you want to change the default configuration of the push buttons, please refer to the next chapter for more on the front of your scanner, details.
-
Page 15: Configuring The Push Buttons
CONFIGURING THE PUSH BUTTONS CONFIGURING THE PUSH CONFIGURING THE PUSH CONFIGURING THE PUSH Configuring the Scan button 1. Click on the scanner icon with the right mouse button. A pop-up menu as shown on the right appears. 2. Click the Push Button Configuration The Push Button configuration window appears. - Page 16 Select the type of document, the resolution, and the scanning intensity level by clicking on the arrows on the right of each field. Click on the OK button to save the settings. Configuring the text editing application Click on the Edit icon and the text editing application icon. Select the text editing application by clicking on the arrow on the right of the OCR Destination field.
- Page 17 Select the type of document, resolution, and scanning intensity by clicking on the arrows on the right of each field. Click on the OK button to save the settings. Configuring the Copy button Click on the VistaAccess icon Taskbar with the right mouse button. A pop-up menu as shown on the right appears.
- Page 18 Click on the OK button. This setting will be used whenever you press the Copy button on the front of the scanner. Configuring the E-mail/Fax button 1. Click on the scanner icon with your right mouse button.
- Page 19 Configuring the values for the E-mail function Click on the E-mail Icon Select the e-mail application and the resolution for sending the scanned image by clicking on the arrow on the right of the field. Click on the OK button to save the settings. For more details on using the VistaAccess Utilities, please refer to the Utilities User’s Guide in the VistaScan program group.
-
Page 20: Scanning With Vistascan
A. Using an image editing application to invoke VistaScan 1. Open a TWAIN-compliant application from Microsoft Windows in order to start. For example, launch MGI PhotoSuite on the Astra 4400 CD. Follow these steps to open MGI PhotoSuite: I. Click on the Start button on your desktop. - Page 21 9. Double click on the thumbnail icon to load the image. Refer then to the on-line help of MGI PhotoSuite for more detail on editing the scanned image. For more details about scanning the image, please refer to the on-line help of VistaScan Fig.
- Page 22 Fig. 2 Fig. 3...
- Page 23 Fig. 4...
- Page 24 B. Initiating VistaScan directly From the VistaScan program group on the desktop Launch the VistaScan program group as shown to the right. The VistaScan Window will appear as shown in Fig. 5. From the Scan To menu, choose a destination for the scanned image.
- Page 25 Fig. 5 Click on the Preview and appear in the Preview window. From this image, you can determine the area you want to scan. From the five Scan To desired destination for the scanned image. Click on the Preferences Enter the relevant details. Select the area to scan by clicking on the Frame tool cursor diagonally to form a rectangle that best defines the area to be scanned.
- Page 26 Fig. 6...
- Page 27 From VistaAccess Utility 1. Click on the VistaAccess icon Task bar with the right mouse button. A pop-up menu appears as shown on the right. 2. Click on the VistaScan option. The VistaScan window appears. The following steps are similar to the section “From the VistaScan program group on the desktop”...
-
Page 28: Troubleshooting
If the scanner lamp flickers, dims, or fails to come on: The scanning lamp is failing or has failed and needs to be changed. Please contact your dealer or our Technical Support. -
Page 29: If All Else Fails
Technical Support. Be sure to have the following information ready: The scanner model you are using. The version number of the scanner driver. (Located on the front of the The computer model you are using. The operating system version that you are using. -
Page 30: Maintenance
With the exception of periodic cleaning or lamp replacement, your scanner is virtually maintenance free. The following sections give the procedures for basic maintenance of the scanner. Static electricity precautions Static electricity is a constant danger to computer systems. The charge that can build up in your body may be strong enough to damage electronic components on the scanner’s printed circuit board or the computer’s... - Page 31 Regularly cleaning the object glass will ensure that dirt or smudges will not reduce the quality of your scanned images. Before you clean the glass, make sure the scanner is turned off and the power cord is unplugged. Clean the object glass and document cover with a soft damp cloth and a mild detergent or alcohol.
-
Page 32: Specifications
Warm Up Time ... 30 sec. Sample Depth Color Mode... 48 bit/pixel Grayscale Mode ... 16 bit/pixel Scanner Settings Scaling ... 1% to 200% in 1% increments at 600 dpi Highlight/Shadow ... 255 steps Contrast/Brightness ... +100%~-100% Gamma Curve... Downloadable curves Data Output Color Mode... -
Page 33: Glossary
Power Indicator: The indicator that glows when the scanner’s power cable is connected to the scanner and a “live” outlet and the power switch is turned on. Transparency Adapter: A scanner option that consists of additional hardware allowing the scanning of transparent originals, such as slides or X- rays. - Page 34 TWAIN: A standardized interfacing system that allows many different software applications to access many different image input devices. TWAIN is currently more popular on the Windows platform than it is on the Macintosh. USB: Universal Serial Bus. An interface between host and peripherals.
- Page 35 Missing something? UMAX often bundles different third party software with its products. If any of these options were ordered with your UMAX product and they appear to be missing or incorrect, contact the store you purchased your UMAX product from immediately. UMAX will not be responsible for missing or incorrect shipments of third party software delivered from your reseller.
- Page 36 At our option we may repair your scanner or replace it (see your Warranty). In either case you will have to call UMAX to arrange the return your scanner. When you call UMAX we will issue you a Return Merchandise Authorization (RMA) number.
- Page 37 Failure to lock or restrain these items could cause serious damage to the product and void the warranty. 6) Ship to UMAX via a traceable shipping method and retain the tracking number. This warranty is only valid within the boundaries and territories of the USA and Canada.
-
Page 38: Fcc Declaration Of Conformity
Consult the dealer or an experienced radio / TV technician for help. Caution : Changes or modifications not expressly approved by the manufacturer responsible for compliance could void the user's authority to operate the equipment. - Model No. :Astra 4400 For home or office use accordance with the instructions, may... - Page 39 The party responsible for product compliance : - Corporate Name : - Address : 3561 Gateway Boulevard. Fremont, California 94538, U.S.A. - Telephone No. : 510-651-4000 Person responsible for making this declaration : -Position/Title : Chief Financial Officer UMAX Technologies, Inc.
- Page 40 OPERATION OPERATION OPERATION OPERATION MANUAL MANUAL MANUAL MANUAL UMAX Data Systems, Inc. For the Astra Astra Astra Astra 4450 0 0 0 Color Scanner...
- Page 41 Copyright Copyright 2001 UMAX Data Systems, Inc. All Rights Reserved. No part of this publication may be reproduced, transmitted, transcribed, stored in a retrieval system, or translated into any language or computer language, in...
- Page 42 ♦ ♦ ♦ ♦ Do not use this product near water or in rainy/moist environment. ♦ ♦ ♦ ♦ Do not place the scanner on an uneven surface. This may cause serious damage to the scanner. ♦ ♦ ♦ ♦...
- Page 43 Contents Overview of Your Scanner... 5 Completing Your First Scan ... 8 Configuring the Push Buttons ... 17 Scanning with VistaScan... 22 Troubleshooting ... 30 Maintenance ... 32 Specifications ... 34 Glossary... 35...
-
Page 44: Overview Of Your Scanner
The Universal Transparency Cover can be raised and lowered over the object glass. Object Glass The glass surface on which the document or image should be placed. Power Indicator Illuminates to indicate that the scanner is powered on. Scan, Copy, E-mail/Fax and Custom buttons NNER NNER NNER... - Page 45 Back View Power Adapter Receptacle The power adapter is plugged-in here. 4-Pin USB Connector Universal Transparency Cover Socket The socket used by the Universal Transparency Cover.
- Page 46 The defining feature of the Astra 4450 is its push button functionality. You can scan an image to e-mail, perform OCR, or even use the scanner as a copy machine by pressing the buttons on the front panel of the scanner.
-
Page 47: Completing Your First Scan
If the media to be scanned is a slide, negative or film: 1. Raise the Universal Transparency Cover. 2. Place the black transparency holder on the object glass of the scanner. 3. Place transparent media (35mm slides, negatives, or film) in the specific scanning area of the transparency holder. - Page 48 How to select the transmissive or negative scan type 1. Invoking the scanner driver VistaScan 2. If the media to be scanned is a slide: The VistaScan window appears, click on the “Advanced” button. The “Advanced” window appears as shown in figure below. From the scan modes listed, select “Transmissive”.
-
Page 49: Scan Button
Press the push buttons on the front panel of your scanner and the image or the text document on the scanner will be scanned to the destination selected. - Page 50 2. A scan progress window showing the executed task appears. 3. Once the scan is completed, the scanned image is converted to text through the OCR engine and the text editing application automatically opens for editing the document.
- Page 51 Copy Button Scanning images to the printer 1. Press the Copy button scan progress window appears, as shown below. on the front panel of the scanner and a on the front panel of the scanner and a...
- Page 52 2. A FaxUI window appears: please input the fax number of the recipient in the FAX Number field, and then click on the Send Fax icon. on the front panel of the scanner on the front panel of the scanner...
- Page 53 VistaScan and launching an image editing application installed in your computer. Before utilizing any function of this button, please click on the scanner icon in the Taskbar with the right mouse button to edit settings of this button first.
- Page 54 Open an image editing application Right click on the scanner icon up menu as shown on the right appears. Click the Push Button Configuration option. The Push Button configuration window appears. Select the custom icon and the image editing application icon.
- Page 55 If you want to change the default configuration of the push buttons, please refer to the next chapter for more on the front of your scanner, details.
-
Page 56: Configuring The Push Buttons
CONFIGURING THE PUSH BUTTONS CONFIGURING THE PUSH CONFIGURING THE PUSH CONFIGURING THE PUSH Configuring the Scan button 1. Click on the scanner icon with the right mouse button. A pop-up menu as shown on the right appears. 2. Click the Push Button Configuration The Push Button configuration window appears. - Page 57 Select the type of document, the resolution, and the scanning intensity level by clicking on the arrows on the right of each field. Click on the OK button to save the settings. Configuring the text editing application Click on the Scan icon and the text editing application icon. Select the text editing application by clicking on the arrow on the right of the OCR Destination field.
- Page 58 Select the type of document, resolution, and scanning intensity by clicking on the arrows on the right of each field. Click on the OK button to save the settings. Configuring the Copy button Click on the VistaAccess icon Taskbar with the right mouse button. A pop-up menu as shown on the right appears.
- Page 59 Click on the OK button. This setting will be used whenever you press the Copy button on the front of the scanner. Configuring the E-mail/Fax button 1. Click on the scanner icon with your right mouse button.
- Page 60 Configuring the values for the E-mail function Click on the E-mail Icon Select the e-mail application and the resolution for sending the scanned image by clicking on the arrow on the right of the field. Click on the OK button to save the settings. For more details on using the VistaAccess Utilities, please refer to the Utilities User’s Guide in the VistaScan program group.
-
Page 61: Scanning With Vistascan
5. Click on the green Scan button on the left panel to invoke VistaScan, the VistaScan window will open as shown in Fig. 4. 6. Place the item you will scan on top of the scanner’s object glass. 7. Click on Preview to preview the scanned image on the Preview window and then from the four modes on the Click to scan panel, click on a scan mode button that best suits the required scan. - Page 62 9. Double click on the thumbnail icon to load the image. Refer then to the on-line help of MGI PhotoSuite for more detail on editing the scanned image. For more details about scanning the image, please refer to the on-line help of VistaScan Fig.
- Page 63 Fig. 2 Fig. 3...
- Page 64 Fig. 4...
- Page 65 B. Initiating VistaScan directly From the VistaScan program group on the desktop Launch the VistaScan program group as shown to the right. The VistaScan Window will appear as shown in Fig. 5. From the Scan To menu, choose a destination for the scanned image.
- Page 66 Fig. 5 Click on the Preview and appear in the Preview window. From this image, you can determine the area you want to scan. From the five Scan To desired destination for the scanned image. Click on the Preferences Enter the relevant details. Select the area to scan by clicking on the Frame tool cursor diagonally to form a rectangle that best defines the area to be scanned.
- Page 67 Fig. 6...
- Page 68 From VistaAccess Utility 1. Click on the VistaAccess icon Task bar with the right mouse button. A pop-up menu appears as shown on the right. 2. Click on the VistaScan option. The VistaScan window appears. The following steps are similar to the section “From the VistaScan program group on the desktop”...
-
Page 69: Troubleshooting
If the scanner lamp flickers, dims, or fails to come on: The scanning lamp is failing or has failed and needs to be changed. Please contact your dealer or our Technical Support. - Page 70 Technical Support. Be sure to have the following information ready: The scanner model you are using. The version number of the scanner driver. (Located on the front of the The computer model you are using. The operating system version that you are using.
-
Page 71: Maintenance
With the exception of periodic cleaning or lamp replacement, your scanner is virtually maintenance free. The following sections give the procedures for basic maintenance of the scanner. Static electricity precautions Static electricity is a constant danger to computer systems. The charge that can build up in your body may be strong enough to damage electronic components on the scanner’s printed circuit board or the computer’s... - Page 72 Regularly cleaning the object glass will ensure that dirt or smudges will not reduce the quality of your scanned images. Before you clean the glass, make sure the scanner is turned off and the power cord is unplugged. Clean the object glass and document cover with a soft damp cloth and a mild detergent or alcohol.
-
Page 73: Specifications
Warm Up Time ... 30 sec. Sample Depth Color Mode... 48 bit/pixel Grayscale Mode ... 16 bit/pixel Scanner Settings Scaling ... 1% to 200% in 1% increments at 600 dpi Highlight/Shadow ... 255 steps Contrast/Brightness ... +100%~-100% Gamma Curve... Downloadable curves Data Output Color Mode... -
Page 74: Glossary
Power Indicator: The indicator that glows when the scanner’s power cable is connected to the scanner and a “live” outlet and the power switch is turned on. Transparency Adapter: A scanner option that consists of additional hardware allowing the scanning of transparent originals, such as slides or X- rays. - Page 75 TWAIN: A standardized interfacing system that allows many different software applications to access many different image input devices. TWAIN is currently more popular on the Windows platform than it is on the Macintosh. USB: Universal Serial Bus. An interface between host and peripherals.
- Page 76 Missing something? UMAX often bundles different third party software with its products. If any of these options were ordered with your UMAX product and they appear to be missing or incorrect, contact the store you purchased your UMAX product from immediately. UMAX will not be responsible for missing or incorrect shipments of third party software delivered from your reseller.
- Page 77 At our option we may repair your scanner or replace it (see your Warranty). In either case you will have to call UMAX to arrange the return your scanner. When you call UMAX we will issue you a Return Merchandise Authorization (RMA) number.
- Page 78 Failure to lock or restrain these items could cause serious damage to the product and void the warranty. 6) Ship to UMAX via a traceable shipping method and retain the tracking number. This warranty is only valid within the boundaries and territories of the USA and Canada.
- Page 79 FCC Declaration of Conformity Declares that the products : - Product Name : Color Scanner - EXT. Model No. : U0001-HXXX(X=0~9,A~Z) - FCC Rules : Tested to comply with FCC Part 15, Class B - Operating Environment : FCC Compliance Statement : This device complies with part 15 of the FCC Rules.
- Page 80 The party responsible for product compliance : - Corporate Name : - Address : 3561 Gateway Boulevard. Fremont, California 94538, U.S.A. - Telephone No. : 510-651-4000 Person responsible for making this declaration : -Position/Title : Chief Financial Officer UMAX Technologies, Inc.