
Related Manuals for Brother GTXpro BULK DTF R2R


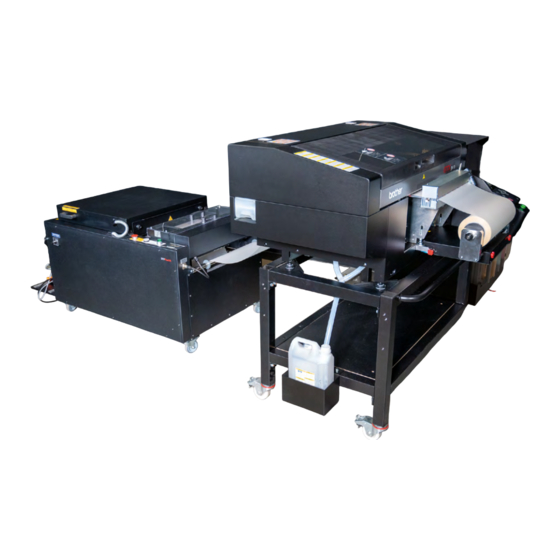
Summary of Contents for Brother GTXpro BULK DTF R2R
-
Page 1: Table Of Contents
DTF R2R BULK We share our experience to give you the best Support COOKBOOK CONTENT GENERAL INFORMATION 4.3 Ink refill 1.1 Software 4.4 Ink tank calibration 1.2 Rule regarding the power supply 4.5 Cleaning solution refill 1.3 Environmental printing conditions 4.6The obstacle sensor 1.4 Storage of liquids 4.7 End of film sensor... -
Page 2: General Information
The printer should only be used by operators who are appropriately trained in its safe operation. The printer is not suitable for use in places where children are present. SOFTWARE Always make sure that you use the latest software for your GTXpro BULK DTF R2R. You find the latest versions here: https://base.brother.digital/driver-firmware/gtxpro-roll/ IMPORTANT RULE REGARDING THE POWER SUPPLY The GTXpro should always be left with power ON, also when it is not in use. -
Page 3: Storage Of Liquids
Please check the temperature and air humidity in the menu of the printer: Menu Temperature/Humidity Info Temperature/Humidity Info Confirm network setting Temperature [ 21°C ] Language Humidity [ 55 % ] Version Press OK to return If temperature is too cold: The printer will switch automatically to “Low-Temp Mode” and reduce the speed. -
Page 4: Before Printing
A: Freely assignable speed dial button B: Button for platen moving C: Cancel button D: Print start MENU/OK: Opens the menu and confirms actions. : Cursor buttons for moving through the menus. E: The LEFT cursor button is the go back button. F: Power switch ON/OFF G: USB 3.0 Typ A port to load print files from an USB-stick. -
Page 5: Alignment Of The Machines
ALIGNMENT OF THE MACHINES AND THE FILM Check that the GTXpro Roll and the PowDR are still aligned (a laser is helpful). The brakes of the castors should always be applied. A: 23 cm parallel to the printer; B: 25-30 cm parallel to the printer The film can run skewed through the system for various reasons, even if the machines are precisely aligned. - Page 6 Is the film roll centred and does the film have Is the film just aligned with the roll? equal tension at the edges? Is the fixing lever closed? Is the film aligned straight on the printing table? Can the film slide freely through the guide Does the film have the same tension at the edges? The film does not touch any part of the powder unit?
-
Page 7: Refill The Powder At The Powdr
Is the film in the melting unit well aligned? REFILL THE POWDER AT THE PowDR If a new powder type has been filled into the pow- der unit or the unit has been moved, the powder sensor must be recalibrated. Consult the PowDR manual. - Page 8 Test Print Nozzle Check White Printing... Press OK to Start 14x16 inch 0.07 cc 1200 dpi When the nozzle checks are done, run the film Check the nozzle pattern by holding a white out of the back of the printer: (CMYK print) or black (White print) paper sheet A: Press for transportation of the film.
-
Page 9: How To Print
3 HOW TO PRINT You can find instructions for printing here ( >TIP-Sheets > GTXpro Roll > Print Settings/Software Guide): https://base.brother.digital/tip-sheets/ Please make sure that the resolution of your printfile is not too low. A resolution of 300 dpi in relation to the print format is recommended. - Page 10 Insert the film roll between the jaws. Center the roll between the edges of the plates. A: The rolling direction Then fasten the thumbscrews. Turn the brake knob right side counter-clockwise Repeat the operation on the left side. until it stops to release the brake completely.
- Page 11 Adjust the guides. The guides should only cover Switch OFF the power at the PowDR. the film with a maximum of half of their width. Then slide the film out of the printer by hand. Remove the transparent lid. Pull some film through the printer and insert it over the rod into the PowDR.
- Page 12 Place the film on the left edge of the belt when Make sure that the film lays completely parallel installimg a roll with 40 cm width. to the conveyor belt. Tape the film at a point in the middle of the roll. HELPFUL: Check the alignment of the film with The film can thus freely align itself a little.
-
Page 13: Before White Ink Refill
Make sure that the edges of the film have the same tension on both sides. If not so, align the machines with each other! Never join two films with tape or in any other way. Switch ON the power. HELPFUL to know: Put some powder on the film via the menu to have a little weight on the slack. -
Page 14: Ink Refill
INK REFILL The ink refilling process is guided by the menu. The IC-Stick, which is included with each ink canister, is necessary to activate the refill process in the menu. – If the IC stick is not in place, the printer will ask for it. –... - Page 15 Ink refill ▉ Yellow Refill the tank Finish refilling Press OK Insert the IC-Stick from the needed refill bottle into the dedicated slot of the printer. Ink refill ▉ Yellow Make sure the cap is closed Press OK ...
-
Page 16: Ink Tank Calibration
INK TANK CALIBRATION Every 30 days a warning appears: the ink tank calibration must be performed for all ink tanks. If it is not performed after 32 days error, 1011 will occur. You will not be able to print until calibration is done. ... -
Page 17: Cleaning Solution Refill
CLEANING SOLUTION REFILL The refill of the Cleaning Solution circuit is done from the bottom tank. The upper tank is refilled by a pump activated by a sensor. Please refill the bottom tank, when ”C.S. Empty“ is shown on the display. ... -
Page 18: End Of Film Sensor
END OF FILM SENSOR Normal situation (Sectional view): Position: E: The well aligned film presses the sensor down with its tension. End of film situation (Sectional view): E: The sensor comes up when: - the end of the film passes the sensor - the film curves due to misalignment and looses contact with the sensor. -
Page 19: Event Of Power Failure
EVENT OF POWER FAILURE In the event of a power failure in your workshop, push the print head carriage to the capping po- sition by hand. This will protect the print heads from drying out for some minutes, giving you some time to solve the problem. -
Page 20: Maintenances
In case of a ”Warning/Error“ message connected to the fan filter, please carry out the following actions: Position of the fan filters. Insert a new filter with the coarse side A facing to Please remove the two fan filter holders. the inner area of the GTXpro Bulk in each holder. - Page 21 Maintenance Part Clean/Replace Maintenance Part Clean/Replace Error and warning parts Select individually Platen/Heads will move for operation Press OK to move Maintenance Part Clean/Replace Turn OFF power See Instruction Manual Clean within 15 min to prevent the head from drying out Perform the cleaning within 15 min to prevent the print heads from damage.
- Page 22 When cleaning the exhaust start from the front and go backwards. Always move the stick away from the drain hole placed in front. Before you start cleaning the white capping, take a new cleaning stick T and fresh cleaning solution. Pour the dirty cleaning solution into the waste tank.
-
Page 23: Monthly Maintenance
A: The nozzle guard must be cleaned from Be careful not to touch the nozzle surface underneath through the gap between the during cleaning. Move the print head carriage by platen and the maintenance unit. hand from left to right to reach the complete B: If the gap seems too narrow for you, you can nozzle guard. - Page 24 Clean the 3 carriage rollers on top and the roller Use a non-fuzzy cloth moistened with a bit of underside with a new stick R dipped in cleaning Isopropyl Alcohol (95%) for the cleaning of: solution. A: The 3 sides of the roller guide B: The carriage guide shaft C: Both sides of the encoder strip.
-
Page 25: Preventive Maintenance
PREVENTIVE MAINTENANCE Preventive maintenance of the machine is necessary to keep the machine in good working condition and to ensure good printing quality. The following maintenance intervals must be observed: at 25k / 50k / 75k / 100k prints and so on. Regular maintenances are carried out by the service technician and can only be done by using the GTXpro Bulk “Preventive Maintenance Tool”... -
Page 26: Consumables
6 CONSUMABLES Inks Name (Pieces) Quantity Order Number CYAN Refill ink bottle (1) 1.8 L BGCX40C002K0152 MAGENTA Refill ink bottle (1) 1.8 L BGCX40M002K0152 YELLOW Refill ink bottle (1) 1.8 L BGCX40Y002K0152 BLACK Refill ink bottle (1) 1.8 L BGCX40K002K0152 CYAN Refill ink bottle (1) BGCX40C009L0132 MAGENTA Refill ink bottle (1) BGCX40M009L0132...