Advertisement
Quick Links
EXTENDED WARRANTY
Available in U.S. only. Extend your warranty for an additional 4 years from date of purchase for $5. You
can pay with AMEX, Discover, Visa or MasterCard by calling 1 800-448-4639 during normal business
hours. Payment must be made within 30 days of purchase. Name, address, telephone number, purchase
date, and 5-digit model number required. You can also mail a check for $5 to: Timex Extended Warranty,
P.O. Box 1676, Dept. EF, Little Rock, AR 72203.
Please read instructions carefully to understand how to operate your Timex® watch. Your model may
not have all of the features described in this booklet.
• Time with 12- or 24-hour format
• Day of week and date display in M-D or D-M format
• Automatic time/date setting and synchronization to atomic clock via radio signals broadcast from U.S.,
U.K., Germany, or Japan
• Optional hourly chime
• 24-hour chronograph with split time display
• 24-hour countdown timer
• Daily alarm
• INDIGLO® night-light with NIGHT-MODE® feature
Press MODE repeatedly to step through modes: Chrono, Timer, and Alarm. Press MODE to exit current
mode and return to Time mode.
INDIGLO® BUTTON
Watch sets itself and maintains synchronization with atomic clock by receiving one of several radio
signals: WWVB (Colorado, U.S.), MSF (U.K.), DCF77 (Germany), or JJY (Japan).
Watch automatically listens for radio signal daily at 2:00:25 AM.
For best reception, note the following:
• Reception is better outside of buildings or vehicles.
• Inside a building, reception is better at a window.
• Avoid sources of radio interference, such as electronic devices, power lines, and machinery.
• Reception is generally best at night.
• Reception may be adversely affected by hills and mountains.
To activate receiver and set watch for the first time:
1) Perform first three steps of setting procedure in TIME section to select city and DST (daylight savings
time) setting.
2) Press SET to exit setting.
3) Press and hold RECEIVE to activate receiver.
4) Receiver icon
flashes to indicate receiver is on. Signal level is shown at the top of the display, as
follows:
5) Place watch on flat surface and rotate slowly 90° to find best reception. Leave watch in that
position until reception complete.
6) Receiver icon stops flashing at end of reception period. This may take a few minutes. Receiver icon
indicates result:
Last reception successful
Last reception failed, but successful reception occurred in the past 7 days
No successful reception in the past 7 days
If reception fails, try to improve reception using tips above. If unsuccessful, watch may be set
manually using procedure below.
Setting procedure below is necessary to set watch's city (time zone) and options. Time and date setting
are only necessary if automatic setting by radio broadcast is unsuccessful.
To set time, date, and options:
1) With time and day showing, press and hold SET.
2) City code flashes. Press START/STOP to select city that represents your time zone. See table below
for city codes.
3) Press MODE. DST (daylight savings time) setting flashes. Press START/STOP to select AUTO (obey
setting in radio signal), ON, or OFF (disregarding setting in radio signal for ON/OFF).
4) Press MODE. Hour flashes. Press START/STOP to change hour (including AM/PM); hold button to
scan values
5) Press MODE. Minutes flash. Press START/STOP to change minutes
6) Press MODE. Seconds flash. Press START/STOP to set seconds to zero.
7) Press MODE. Year flashes. Press START/STOP to change year.
8) Press MODE. Month flashes. Press START/STOP to change month.
9) Press MODE. Day flashes. Press START/STOP to change day.
10) Press MODE. Date flashes. Press START/STOP to select M-D (month-day) or D-M (day-month) format.
11) Press MODE. Hourly chime setting flashes. Press START/STOP to select ON/OFF. When ON is
selected, watch chimes on every hour.
12) Press MODE. Button beep setting flashes. Press START/STOP to select ON/OFF. When ON is
selected, watch beeps for every button press.
13) Press SET, at any step, when done setting.
Press and hold MODE to switch between 12- and 24-hour time format.
Press SET to view date. Year is at top of display and date is below.
Press RECEIVE to view current city.
Press and hold RECEIVE to begin manual reception of time signal, as described in ATOMIC CLOCK
SYNCHRONIZATION section.
Register your product at
www.timex.com
W-207
THANK YOU FOR PURCHASING YOUR TIMEX® WATCH.
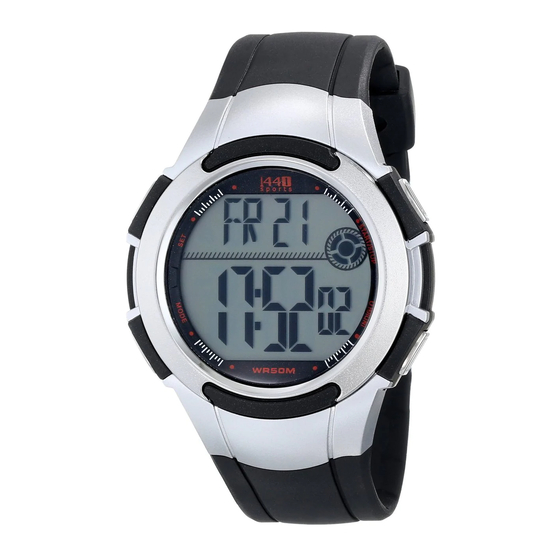
FEATURES AND BASIC OPERATION
MODE
(NEXT STEP)
Button functions shown with setting functions in parentheses
ATOMIC CLOCK SYNCHRONIZATION
City Code
City
MDY
Midway
HNL
Honolulu
ANC
Anchorage
LAX
Los Angeles
DEN
Denver
CHI
Chicago
NYC
New York
CCS
Caracas
BSB
Brasilia
-2H
Mid Atlantic Region
-1H
Cape Verde, Azores
LON
London
BER
Berlin
CAI
Cairo
MOW
Moscow
DXB
Dubai
KHI
Karachi
DAC
Dacca
BKK
Bangkok
SHA
Shanghai
TYO
Tokyo
SYD
Sydney
NOU
Noumea
WLG
Wellington
NA
115-095000 Rev 02
RECEIVE/START/STOP
(INCREASE VALUE)
SET
(DONE)
TIME
Zone
-11
-10
-9
-8
-7
-6
-5
-4
-3
-2
-1
0
+1
+2
+3
+4
+5
+6
+7
+8
+9
+10
+11
+12
Signal
-
-
-
WWVB
WWVB
WWVB
WWVB
-
-
-
-
MSF
DCF77
-
-
-
-
-
-
JJY
JJY
-
-
-
Advertisement

Related Manuals for Timex T5K081


Summary of Contents for Timex T5K081
- Page 1 Payment must be made within 30 days of purchase. Name, address, telephone number, purchase date, and 5-digit model number required. You can also mail a check for $5 to: Timex Extended Warranty, P.O. Box 1676, Dept. EF, Little Rock, AR 72203.
- Page 2 To obtain warranty service, please return your watch to Timex, one of its affiliates or the Timex retailer where the watch was purchased, together with a completed original Watch Repair Coupon or, in the U.S. and Canada only, the completed original Watch Repair Coupon or a written statement identifying your name, address, telephone number and date and place of pur- chase.