Table of Contents
Advertisement
Advertisement
Table of Contents

Related Manuals for Nikon EL2


Summary of Contents for Nikon EL2
- Page 1 Nikon INSTRUCTION MANUAL...
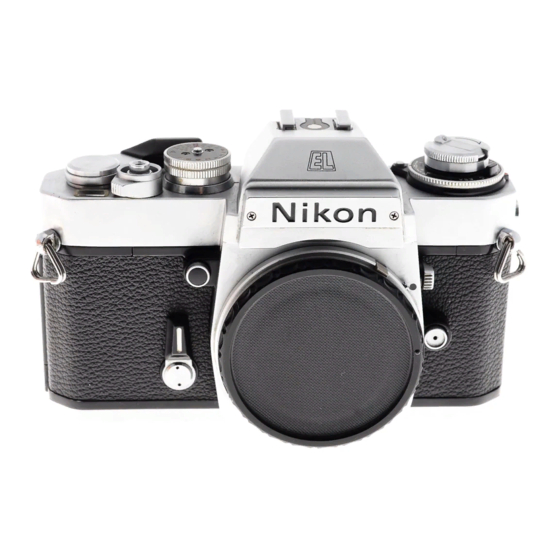
- Page 2 NOMENCLATURE Shutter-speed dial lock Film rewind knob...
- Page 3 Distance scale Focusing ring Aperture ring Meter coupling ridge ASA film-speed dial ASA film-speed scale Film rewind crank Film-speed scale index Power check button Power check lamp Accessory shoe Aperture/Distance scale index Meter coupling shoe Depth-of-field indicators Shutter-speed scale Frame counter Meter ON index Film-advance lever Film-plane indicator...
- Page 4 "Preparation for Use" (pages 8 ~ 12), shoot- ing with the Nikon EL2 is as simple as: 1) Set the shutter speed dial to " A " to prepare the camera for automatic operation, as de- tailed on page 13.
-
Page 6: Table Of Contents
CONTENTS Foreword Preparation for use Installing the battery Removing the battery Checking the battery Loading the film Prior to shooting Operation of camera controls Setting the film speed Setting the shutter speed Setting the aperture Film-advance lever Frame counter Shutter release button lock Self-timer Memory lock Unloading film... -
Page 7: Foreword
35mm SLR camera. The EL2 is engineered to take the guess- work out of photography with automatic features anyone can learn to use in minutes. To get the most... -
Page 8: Preparation For Use
Installing the Battery The exposure measurement and shutter control circuits of the EL2 are powered by a single 6-volt (type 544) battery mounted in the battery chamber at the bottom of the mirror box. To install the battery, first remove... -
Page 9: Removing The Battery
After removing the battery, install a fresh one as explained previously. Checking the Battery The EL2 is provided with a special circuit that enables the photographer to check the battery power condition without causing excessive battery drain which might occur by having to turn the camera on. -
Page 10: Loading The Film
Then, with the rewind knob in the up posi- tion, drop a standard film cartridge (a Nikon reloadable- type cassette cannot be used) into the left-hand film chamber with the film leader aligned along the film guide rails. -
Page 11: Prior To Shooting
Prior to Shooting Fold out the rewind crank and turn it gently in the direction of the engraved arrow until you feel a slight tension; this tension indicates that there is no more slack in the film cartridge. (Be sure not to rewind the film back into the cartridge.) Set the shutter-speed dial to one of the fixed-speed set- tings (see page 13), advance the film via the film-... -
Page 12: Operation Of Camera Controls
OPERATION OF CAMERA CONTROLS Setting the Film Speed As film response sensitivity during exposure to light (called "film speed") varies with film type, adjustment of the camera's metering circuit is essential to ensure uniform exposures under all operational conditions. Thus, a film-speed dial (ASA graduations) is provided for this purpose, with a safety lock mechanism built-in to prevent accidental shifting of the dial during shooting. -
Page 13: Setting The Shutter Speed
Setting the Shutter Speed The Nikon EL2 is set for automatic or manual shutter speed selection via the shutter-speed dial positioned to the right of the finder, with setting operation possible at any time either before or after the shutter is wound. -
Page 14: Setting The Aperture
OPERATION OF CAMERA CON Setting the Aperture The ring fitted at the base of the lens adjusts the size of the aperture (or opening) in the iris diaphragm. To pre- set the lens aperture, turn the aperture ring until the de- sired f/number setting on the scale is aligned with the index mark provided on the lens. -
Page 15: Frame Counter
A special control is fitted around the base of the shut- ter release button to provide for greater ease of opera- tion when using the EL2 with the Auto Winder AW-1 mounted for automatic film advance. With the shutter release button lock, the film-advance lever's meter... -
Page 16: Self-Timer
OPERATION OF CAMERA CONTROLS-continued Self-Timer The built-in self-timer can be used to trip the shutter after a delay of approximately 10 seconds, and it will operate whether the shutter speed dial is set for auto- matic or manual shutter speed selection. To take a pic- ture using the self-timer to fire the camera, first set the aperture and shutter-speed controls, advance the film, and cock the self-timer by turning its lever downward... -
Page 17: Unloading Film
UNLOADING FILM When the frame counter indicates the last exposure has been made, or when the film-advance lever can no long- er be stroked, the roll of film has been fully exposed and it should be removed from the camera. To unload the camera, first press the rewind button on the camera baseplate;... -
Page 18: Holding The Camera
HOLDING THE CAMERA Camera shake is one of the most common causes of un- sharp pictures, especially at slow shutter speeds. Learn to hold the camera correctly and practice steady shutter squeezing. The photos show the best ways to hold the camera for sharp pictures. -
Page 19: Shutter Release Operation
And, as two mounting threads are provided, virtually any type cable release can be used. To attach an ISO-thread release (Nikon model AR-3, etc.), screw the connector into the V-shaped thread in the center of the button. For Nikon-thread releases (model AR-2, etc.), screw the connector onto... -
Page 20: Focusing
The Nikon Type K screen comes with the camera as standard equipment. To focus, turn the focusing ring on the lens until the two halves of the rangefinder image coincide to form a single, crisp image;... - Page 21 Out of focus In focus...
-
Page 22: Infrared Photography
Note: Some new optics using Nikon's Extra-low Dispersion (ED) glass, as well as reflex (catadioptric) lenses, do not require refocusing for infrared photography. Refer to individual lens instruction manuals for details. -
Page 23: Depth Of Field
DEPTH OF FIELD Depth of field refers to the zone of acceptable focus ex- tending in front of, and behind, the plane of sharpest focus. Within this zone, image blur is negligible and everything may be considered as being in sharp focus. Three factors greatly influence the depth of field: the focal length of the lens in use, the camera-to-subject dis- tance, and the taking aperture. -
Page 24: Depth-Of-Field Indicators
DEPTH OF FIELD-continued Depth-of-Field Indicators Depth of field can be read directly from the distance scale in meters or feet with the aid of the color-coded depth-of-field indicators engraved on the lens barrel. Each pair of colored lines on either side of the central distance scale index line corresponds to f/numbers of the same color on the aperture scale. -
Page 26: Exposure Measurement
A u t o m a t i c Shutter Speed Selection When set to the " A " shutter-speed dial setting, the EL2 is capable of fully automatic selection of the shutter speed appropriate for the aperture setting of the lens and the existing lighting conditions. - Page 27 ' ' ,' ,"'--"* " «•?" '*.-"•' 50° H ^ J • - l ^ j j j H • • l & v v '••"^2jj|^^^^^^^^.'. ^ ... O ^ ^ ^ ' *•V B | f l T^— •MEn^ £...
-
Page 28: Manual Shutter Speed Selection
EXPOSURE MEASUREMENT-continued Manual Shutter Speed Selection When the shutter-speed dial is set to other than the " A " setting, manual shutter speed selection is provided, with exposure determination via the "match-needle" method. To determine the correct exposure using manual speed selection, perform the following: Switch on the meter in the usual way and adjust the shutter-speed dial until the green needle in the exposure meter display aligns... -
Page 29: Exposure Control
< < Deliberate . . . and one-step one-step overexposure, underexposure Exposure Control The amount of light reaching the film plane is deter- mined by a combination of the lens aperture and the shutter speed. Since the two are interrelated, different combinations will give the same exposure. -
Page 30: Metering Range
EXPOSURE MEASUREMENT-continued Metering Range If the black meter needle fails to leave the " A " or " B " positions during auto (or fails to "match" the green needle in manual), even after all possible lens-aperture/ shutter-speed combinations have been tried, then the available light is too bright or too dim for the meter's range. - Page 31 • Metering with a bright area in the center will • For correct exposure, first measure the main subject; then, recompose and shoot. cause underexposure of the main subject.
-
Page 32: Stop-Down Exposure Measurement
STOP-DOWN EXPOSURE MEASUREMENT With some Nikkor lenses, full-aperture exposure mea- surement is not possible, either because the lens has no automatic diaphragm, or because the lens does not cou- ple with the built-in meter; with certain accessories, too, lens/meter coupling is not possible, thus, prevent- ing full-aperture measurement. - Page 33 For automatic diaphragm lenses with no coupling ridge, first set the shutter-speed dial for either automatic or manual shutter speed selection. When using automatic, next depress and hold the depth-of-field button to stop- down the lens diaphragm and adjust the aperture ring until the black needle indicates the desired shutter speed;...
-
Page 34: Exposure Compensation Adjustments
+1J4 stops for general use necessary Caution: When performing general photography with the EL2, always make sure that the exposure compensation ring is set to the " 0 " position; if not, incorrect exposure will occur. using Panchromatic Photo-... -
Page 35: Ev Range Of The Camera
Careful attention to the following instructions will as- sure precise exposure, automatically, over the complete exposure control and meter range capability of your Nikon EL2. • Auto exposure control at full aperture For example, with an f/1.4 lens and ASA 100 film, the automatic shutter will function down to one second with the lens set at 1.4, and proportionately slower as... - Page 36 To determine the shutter speed range, note that the bars in section A indicate the responsive range of the EL2's photosensitive SPD element (i.e., f/8 covers EV 6 ~ 23, f/16 covers EV 8 ~ 23) for the f-stop in use.
- Page 37 Section C...
-
Page 38: Flash Synchronization
FLASH SYNCHRONIZATION Nikon | The Nikon EL2 camera is designed to synchronize with most types of flashbulbs at almost all shutter speeds and with electronic flash at speeds to 1/125 second. Addi- tionally, the camera is fitted with an automatic sync... -
Page 39: Mirror Lockup
MIRROR LOCKUP The reflex mirror must be locked in the up position when using either the Fisheye-Nikkor 6mm f/5.6 or the OP Fisheye-Nikkor 10mm f/5.6 lenses, since their rear elements protrude into the camera body and interfere with mirror movement. Locking up the mirror is also necessary when changing the battery mounted in the chamber at the bottom of the mirror box. -
Page 40: Tips On Camera Care
TIPS ON CAMERA CARE Good camera care is primarily common-sense care. Treat your Nikon EL2 camera as you would any other precision optical instrument and it will provide you years of trouble-free service. Although ruggedly constructed, your camera may be damaged by shock, heat, water or misuse. - Page 41 perature and, then, store in a cool, dry location. Remember that fail- ure to dry out the camera may result in the growth of fungus on lens surfaces—a condition that will render your camera useless. • Should your camera be accidently dropped on the floor or in water, take it to your dealer immediately for servicing.
-
Page 42: Changing The Lens
CHANGING THE LENS To remove the lens from the camera body, press the lens release button and, holding the button depressed, twist the lens clockwise as far as it will go. With this action, the lens will come loose and can be lifted out. To mount a lens fitted with a meter coupling ridge, perform the following: Check that the meter coupling lever is released (see "Coupling Lever Lock/Release... -
Page 43: Coupling Lever Lock/Release Operation
Coupling Lever Lock/Release Operation The EL2 is fitted with a meter coupling lever at the base of the lens to provide for coupling between the metering circuit and the lens' meter coupling ridge. When the camera body is used with lenses offering automatic maximum aperture indexing, the lever remains in the normal position. -
Page 44: Accessories
The compact and lightweight Nikon Auto Winder AW-1 is a precision drive accessory which offers greater ver- satility of operation with the EL2. The winder attaches directly to the baseplate of the camera and provides for effortless, automatic film advance operation that com- plements the camera's built-in automatic exposure fea- tures. - Page 45 An extensive lineup of hoods is avail- able to meet the needs of all Nikkor lenses. Filters Nikon filters, made of the finest optical glass finished to piano-parallel flatness, are available in a wide range of mounting sizes and types to meet the needs of both color and black-and-white photography.
-
Page 46: Features/Specifications
Ty^pe of camera: 35mm single-lens reflex (SLR) Picture format: 24mm x 36mm (35mm film format) Lens mount: Nikon F mount (bayonet type) Lenses available: Nikkor 50mm f/1.4, f/2 or 55mm f/1.2 as standard; more than 50 Nikkor lenses in all Shutter: Vertical-travel focal-plane shutter;... - Page 48 NIPPON KOGAKU K.K. No reproduction in any form of this booklet, in whole or in part (except for brief quotation in critical articles or reviews), may be made without written authorization from the publishers. Printed in Japan (77.7.80) &-2...