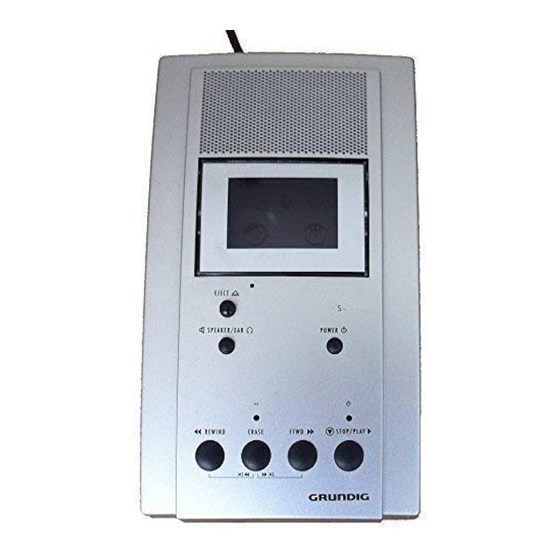
Grundig Steno-Cassette 30 Manual
Hide thumbs
Also See for Steno-Cassette 30:
- Instructions manual (24 pages) ,
- Manual (21 pages) ,
- Manual (20 pages)
Table of Contents
Advertisement
Quick Links
Advertisement
Table of Contents

Summary of Contents for Grundig Steno-Cassette 30
- Page 1 St 3210 Steno-Cassette 30 ENGLISH www.grundig-gbs.com...
- Page 2 St 3210 ________________________________________________________ ac 9V-10V HEADSET FOOT CONTROL ac 9V-10V HEADSET FOOT CONTROL FFWD STOP START ic 800 FX...
- Page 3 St 3210 ________________________________________________________ ac 9V-10V ac 9V-10V HEADSET FOOT CONTROL HEADSET FOOT CONTROL t e n o - C a s s e t t e 3 0 ßW E J E C T t 3210 ßQ S P E A K E R / E A R P O W E R ß` ß?
- Page 4 St 3210 ________________________________________________________ ßZ ßT ´I ßU ßU ´? Made in Germany Fabriqué en Allemagne ßE ßR...
-
Page 5: Table Of Contents
CONTENTS ____________________________________________________ General Mains connection Important information Preparation Switching on/off 3 ßW Steno-cassette compartment ßQ Playback Starting and stopping Volume and sound ßE Playback speed ßR Short rewind 7 ß? Fast Forward and Rewind Recording Dictations 1 ßT Preparation ß` ßZ ´I Switching the record function on ´? Pausing a recording... - Page 6 CONTENTS ____________________________________________________ Care and Maintenance Housing Parts that come in contact with the tape Technical Data...
-
Page 7: General
______________________________________________________ Mains connection With the NT 683 GB power supply unit. This mains unit can be used to operate all Grundig office equipment. It can be connected to IT mains with a maximum line-to- line current of 250 V. Connect the mains cable to the alternating voltage mains 230V ~, 50Hz…60Hz. -
Page 8: Preparation
PREPARATION _______________________________________________ Switching on and off With the » – POWER« button. – The operating lamp is on » «. Note: Your unit and the mains unit are disconnected from the alternating voltage system only when the mains plug has been removed from the mains socket! Stand by If you do not select a function within a 10 minute period, the unit... -
Page 9: Playback
PLAYBACK ____________________________________________________ … using the speaker on the unit Click the speaker button down. … using accessories such as the microphone ProMic 800 FX, 568 GBS Swingphone. Click the speaker button out. Note: The maximum playback volume is 95 dB (A) when using heaphone accessories. -
Page 10: Playback Speed Ssr
PLAYBACK ____________________________________________________ Playback speed … with the speed adjuster “SPEED” (on the bottom); locks at in the middle position (normal speed). You can adjust the playback speed when a foot control 536 or a hand control 541 is connected. The speed adjuster does not work if a microphone ProMic 800 FX is connected. - Page 11 RECORDING DICTATIONS ______________________________ Preparation (on the Connect microphone ProMic 800 FX HEADSET FOOT CONTROL HEADSET FOOT CONTROL bottom of the unit). The microphone ProMic 800 FX can be used to operate all functions. – 3 settings: Recording sensitivity Dictation – Dictation/Conference – Conference To record a dictation, place the microphone approx.
-
Page 12: Recording Dictations
RECORDING DICTATIONS ______________________________ Switching the record function – The recording lamps in the microphone and recorder light up. (sliding switch is locked) Pausing a recording STOP START STOP (sliding switch is locked) Beginning a recording START – If there is no signal, this means there is either no stenocassette in the cassette compartment or the tape is at the end! Ending a recording... -
Page 13: Recording A Conference
RECORDING A CONFERENCE _________________________ – 3 settings: Recording sensitivity Dictation – Dictation/Conference – Conference Place the microphone ProMic 800 FX in the middle of the conference table. Place the microphone on a soft surface to reduce the amount of background noise recorded. …... -
Page 14: Erasing
ERASING _______________________________________________________ you auto- When making a new recording, matically erase any previous recordings on that part of the tape. To erase longer text passages an entire steno-cassette: Wind the tape to the desired position. From the operating mode Stop Press (approx. -
Page 15: Foot Control 536
FOOT CONTROL 536 _____________________________________ Connection Plug the foot control plug into the socket. HEADSET FOOT CONTROL HEADSET FOOT CONTROL Operation You can operate the foot control with both feet. You can rest the foot that you are not using on the middle section. Switch options: right pedal = start left pedal... - Page 16 CARE AND MAINTENANCE ____________________________ Housing Only clean the machine with a soft cloth suitable for removing dust. Polish and cleaning agents can damage the surface. Liquids should not be allowed to penetrate the inside of the unit. Parts that come into contact with the tape You should check regularly within the steno-cassette compartment for dust and for dirt caused by tape usage.
- Page 17 The CE mark confirms that the device corresponds to the relevant guidelines of the European Union. Environment-friendly materials – environment-compliant packing: Grundig dictation machines are conceived and fabricated according to the highest environmental requirements. Technical data and design subject to change.
- Page 18 Grundig Business Systems GmbH Weiherstraße 10 D - 95448 Bayreuth Germany 36121 942 0206 07/2013...


