Sunbeam BM4500 - Automatic Bread Maker and Dough Maker Manual
- Instruction booklet (68 pages) ,
- Instruction/recipe booklet (68 pages) ,
- User manual (48 pages)
Advertisement
- 1 Safety Precautions
- 2 Using your Device safely
- 3 Getting to know your Device
- 4 The Control Panel
- 5 Quick Start Guide
- 6 Using the Time Delay
- 7 Using the Bake Only menu
- 8 Power Interruption Program Protection
- 9 Fruit and Nut Dispenser
- 10 Care and Cleaning
- 11 Help Guide
- 12 Menu Settings & Recipes
- 13 Documents / Resources
Safety Precautions
SAFETY PRECAUTIONS FOR YOUR SUNBEAM BREADMAKER
![burn hazard]()
![shock hazard]()
Do not use attachments not recommended by Sunbeam. They may cause fire, electric shock or injury.- Do not use outdoors or for commercial use, or for any other purpose other than its intended use.
- This unit is intended for household use only.

Sunbeam is very safety conscious when designing and manufacturing consumer products, but it is essential that the product user also exercise care when using an electrical appliance. Listed below are precautions which are essential for the safe use of an electrical appliance:
- Read carefully and save all the instructions provided with an appliance.
- Always turn the power off at the power outlet before you insert or remove a plug. Remove by grasping the plug - do not pull on the cord.
- Turn the power off and remove the plug when the appliance is not in use and before cleaning.
- Do not use your appliance with an extension cord unless this cord has been checked and tested by a qualified technician or service person.
- Always use your appliance from a power outlet of the voltage (A.C. only) marked on the appliance.
- This appliance is not intended for use by persons (including children) with reduced physical, sensory or mental capabilities, or lack of experience and knowledge, unless they have been given supervision or instruction concerning use of the appliance by a person responsible for their safety.
- Children should be supervised to ensure that they do not play with the appliance.
- The temperature of accessible surfaces may be high when the appliance is operating.
- Never leave an appliance unattended while in use.
- Do not use an appliance for any purpose other than its intended use.
- Do not place an appliance on or near a hot gas flame, electric element or on a heated oven.
- Do not place on top of any other appliance.
- Do not let the power cord of an appliance hang over the edge of a table or bench top or touch any hot surface.
- Do not operate any electrical appliance with a damaged cord or after the appliance has been damaged in any manner. If damage is suspected, return the appliance to the nearest Sunbeam Appointed Service Centre for examination, repair or adjustment.
- For additional protection, Sunbeam recommend the use of a residual current device (RCD) with a tripping current not exceeding 30mA in the electrical circuit supplying power to your appliances.
- Do not immerse the appliance in water or any other liquid unless recommended.
- Appliances are not intended to be operated by means of an external timer or separate remote control system.
- This appliance is intended to be used in household and similar applications such as: staff kitchen areas in shops, offices and other working environments; farm houses; by clients in hotels, motels and other residential type environments; bed and breakfast type environments.
If you have any concerns regarding the performance and use of your appliance, please visit www.sunbeam.com.au or contact the Sunbeam Consumer Service Line.
Ensure the above safety precautions are understood.
Using your Device safely
Before use
- Read all instructions, product labels and warnings. Save these instructions
- Remove all foreign matter from the bread pan and baking chamber
- Wipe over bread pan and kneading blade before use
- Always use the bread maker from a 230-240V AC power outlet
- Do not allow anything to rest on the power cord or allow it to touch any hot surface. Do not plug in cord where people may walk or trip on it or allow the cord to hang over the edge of a table or benchtop.
Whilst in use
- The bread maker does become quite warm during operation. Be careful to keep your hands and face away from the unit, and away from the steam vents.
- Do not open the lid or remove the bread pan during operation except as indicated in the instructions.
- Do not place anything on the bread maker lid. Do not cover the vents.
- This bread maker has a built-in Power Interruption Program Protection to maintain your baking cycle, in the advent of an interruption in your power supply (black out). Any extended power outage may result in the program being cancelled.
- Do not touch moving parts.
Where to use
- Use only on a stable, heat-resistant surface.
- Do not use the bread maker where it will be exposed to direct sunlight or other heat sources such as a stove or oven.
- Do not place on top of any other appliance.
- Keep the bread maker out of reach of children as it does become quite warm. Also if any buttons are accidentally touched during operation, baking may stop.
- Place the unit at least 200 millimetres away from walls and curtains as they may discolour from the heat.
After use
- Always turn the unit off and remove the plug from the power outlet after use and before cleaning.
- Use oven mitts when taking out the baking pan after baking.
- Allow the bread maker to cool down before cleaning or storing.
![shock hazard]() Read instructions before cleaning. Do not immerse the unit or plug in water. This will cause electric shock or damage to the unit.
Read instructions before cleaning. Do not immerse the unit or plug in water. This will cause electric shock or damage to the unit.
 Hot Surfaces
Do Not Touch
This symbol indicates, temperature of accessible surfaces may be high when the appliance is operating and for some time after use.
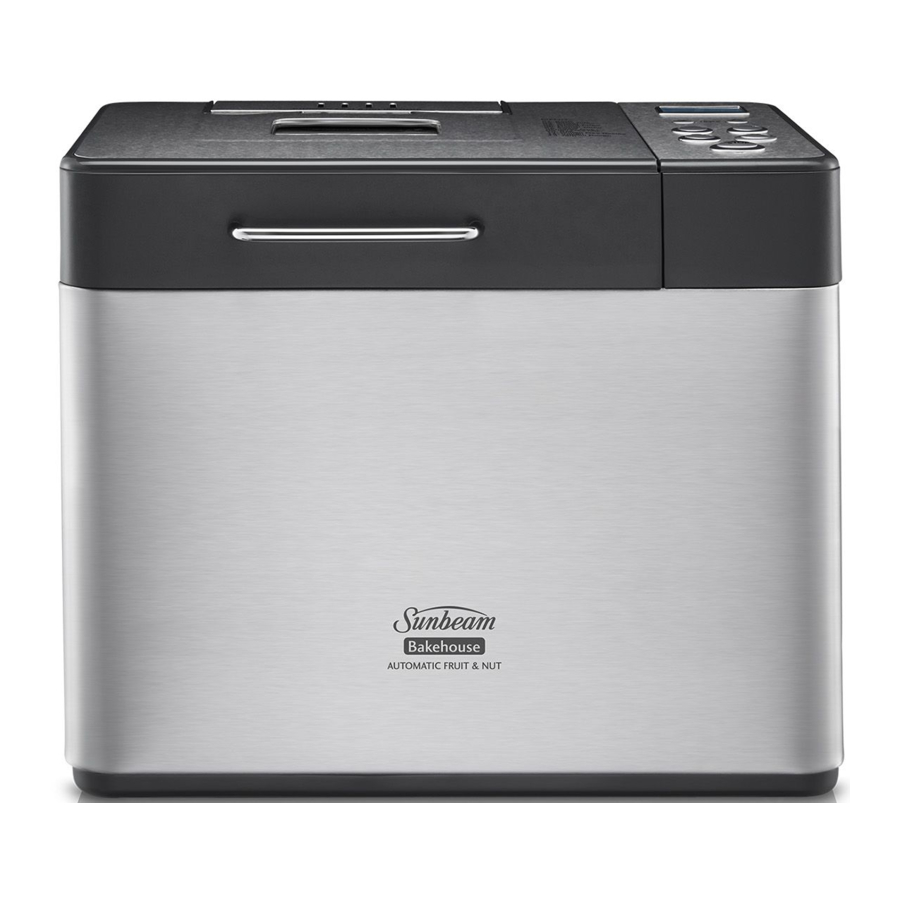
Getting to know your Device

Automatic Fruit & Nut Dispenser
Automatically releases ingredients into the dough during the kneading cycle, taking the guess work out of recipes.
Bonus Blade Hook
To assist in removing the blade from baked bread if necessary.

Collapsible Kneading Blade
The kneading blade is upright during the mixing stage, then collapses in the baking stage for a more uniform shaped loaf.

The Control Panel

- LCD Window
Displays the Menu setting, Crust colour, Loaf size and remaining time until the cycle is complete - '0:00'. - Timer Buttons
Use to adjust the BAKE ONLY time and to set the Delay Start timer.
![]() Increases the time in 10 minute intervals
Increases the time in 10 minute intervals
![]() Decreases the time in 10 minute intervals
Decreases the time in 10 minute intervals - Loaf Size Button
Press the SIZE button to select the loaf size – 500g, 750g or 1.0kg. The default loaf size is 1.0kg. - Menu Button
Press to select an automatic bread making menu from (1) to (13). - Bake Button
Use this button to activate the BAKE ONLY setting, then adjust the time needed by using the timer buttons. - Crust Button
Press the CRUST button to select the desired crust colour – Light, Medium or Dark. The default crust colour setting is Medium. - Start / Stop Button
Press to commence selected setting or begin timer countdown for delay timer. To stop the operation or cancel a timer setting, press and hold for 2-3 seconds to clear.
 Increases the time in 10 minute intervals
 Decreases the time in 10 minute intervals
Quick Start Guide
- Insert the kneading blade into the bread pan ensuring that it is in the upright position.

- Add ingredients into the bread pan before placing in the bread maker.
- Liquid ingredients
- Dry ingredients
- Yeast
- Insert the bread pan into the baking chamber until you hear a click sound and close the lid.
- Add fruit and nuts to the automatic dispenser if required.
- Select the desired menu using the MENU button.
- Set the Time Delay if required.
- Select the crust colour using the CRUST button.
- Select the loaf size using the SIZE button.
- Press the START button.

HINT: LIFT THE LID AND CHECK THE CONSISTENCY DURING THE FIRST 15 MINUTES OF KNEADING, TO ENSURE IT'S A FIRM, ROUND DOUGH. IF IT'S A LITTLE DRY, ADD A LITTLE WATER, IF IT'S A LITTLE WET, ADD A LITTLE FLOUR.
Keep Warm
If the bread is not removed after baking it will enter Keep Warm cycle for 60 minutes.
Removing the Bread
Allow the bread to cool in the pan for 10 minutes before removing. The collapsible blade is designed to stay in the bread pan however sometime it can be baked into the bread. ensure this is removed using the bonus blade hook.
Using the Time Delay
The Bakehouse allows you to delay the completion of your bread by up to 15 hours, so you can wake up to the smell of freshly baked bread, or go out for the day while your Bakehouse does all the work.
Note: Do not use the Time Delay when the recipe has perishable ingredients such as milk, eggs or cheese as these may spoil.
- Follow steps 1 – 5 from previous section.
- Press
![]() and
and ![]() buttons until you reach the number of hours and minutes you want your bread to be ready. Press to add or minus time in 10 minute intervals.
buttons until you reach the number of hours and minutes you want your bread to be ready. Press to add or minus time in 10 minute intervals. - Follow remaining steps 7 - 10 from previous section.
Note: You do not need to take into account the amount of time required to cook the program selected. This is automatically registered in the Bakehouse when it is selected.
Using the Bake Only menu
The BAKE menu setting is useful if the bread crust is too light or requires more baking time. This setting will bake for 1 hour and 30 minutes and can be controlled by pressing the Start/Stop button at any time.
- Press the BAKE button.
- Adjust the amount of time using the
![]() and
and ![]() buttons.
buttons. - Press the Start/Stop button.
Power Interruption Program Protection
Your Bakehouse features a 7 minute Power Interruption Protection that protects the program memory in the advent of power surges, or short term power failure (blackout)
This means that if there is a power interruption during your bread making, the machine will retain its memory for at least 7 minutes and continue cooking when the power supply returns.
If you experience a power failure greater than 7 minutes you may need to discard ingredients and start again. If the power interruption occurs in the baking cycle, you can use the BAKE ONLY setting to finish baking.
Fruit and Nut Dispenser
Your Bakehouse has an Automatic Fruit and Nut dispenser which automatically releases dry ingredients into the dough during the kneading cycle. This will occur during the second kneading cycle, ensuring that the dried fruit and nuts are not crushed and the pieces remain whole and are evenly dispersed.
This option is available on all menus except Turbo, Rye, Jam and Bake Only. Do not overfill the dispenser and ensure the dispenser is closed prior to each use. The dispenser may be open from the previous time it was used.
Care and Cleaning
Before cleaning the Bakehouse, unplug it from the power outlet and allow it to cool completely.
To clean the exterior
Wipe exterior with a slightly dampened cloth and polish with a soft dry cloth. Do not use metal scourers or abrasives as this may scratch the exterior surface.
To clean the non-stick baking pan
Gently wash bread pan in warm soapy water using a soft cloth and dry well before and after each use. Wipe baking pan and kneading blade with a damp cloth and dry thoroughly. Do not use any harsh abrasives or strong household cleaners as these may damage the non-stick surface.
Caring for your non-stick baking pan
Do not use metal utensils to remove ingredients or bread, as they may damage the non-stick coating. Do not be concerned if the non-stick coating wears off or changes colour overtime. This is result of steam, moisture, food acids, mixing of various ingredients and normal wear and tear. This is in no way harmful and does not affect the performance of your Bakehouse.
Do not wash any part of your bread maker in a dishwasher.
Do not immerse the Bakehouse in water.
Remove and clean lid
To remove lid, simply raise the lid just short of the vertical position (approx. 70°). While holding the base of the unit with one hand, gently lift the lid out of the hinge. Wipe interior and exterior of lid with a damp cloth and dry thoroughly before replacing lid.
Storage
Make sure the Bakehouse is completely cool and dry before storing. Store the Bakehouse with the lid closed and do not place heavy objects on top of the lid.
Help Guide
Should you require any further assistance on using your breadmaker, please follow these simple steps.
- Consult Troubleshooting tips.
- Visit the BM4500 product page on our website sunbeam.com.au.
- To answer any further questions please call Sunbeam on toll free (Aust) 1800 025 059, (NZ) 0800 786 232.
- For any further concerns contact one of our Sunbeam Authorised Service Centres
Menu Settings & Recipes
- Size - 500g/750g/1kg
- Crust - light/med/dark
- Fruit & Nut
- Time Delay
- Keep Warm
Menu 1: Basic
Use to bake standard bread loaves which are light in texture with a thin crust.
- Ensure kneading blade is upright in the bread pan.
- Add ingredients to the bread pan in order listed.
- Insert bread pan into the baking chamber and press down firmly until the pan is clicked into place. Close lid.
- Add ingredients to the fruit and nut dispenser if required.
- Press the MENU button to Menu 1 (Basic). Choose CRUST and SIZE settings.
- Press START.
| White Bread | 500g | 750g | kg |
| Water, luke-warm | 195mls | 260mls | 325mls |
| Butter or margarine | 15g | 20g | 25g |
| White Sugar | ½ teaspoons | teaspoons | ½ teaspoons |
| Skim Milk Powder | teaspoons | tablespoon | ¼ tablespoons |
| Salt | ¾ teaspoon | teaspoon | ¼ teaspoons |
| Bread Improver | teaspoon | ½ teaspoons | ¾ teaspoons |
| Plain Flour | 280g | 375g | 470g |
| Dry yeast | teaspoon | ¼ teaspoons | ½ teaspoons |
| Salami Cheese Bread | 500g | 750g | 1kg |
| Water, luke-warm | 180mls | 240mls | 300mls |
| Butter or margarine | 15g | 20g | 25g |
| White Sugar | teaspoons | tablespoon | ½ tablespoons |
| Skim Milk Powder | teaspoons | tablespoon | ½ tablespoons |
| Salt | teaspoon | ½ teaspoons | teaspoons |
| Bread Improver | ¾ teaspoon | teaspoon | teaspoon |
| Salami, finely chopped | 75g | 100g | 125g |
| Tasty Cheese | ¼ cup | ¼ cup | ¹⁄³ cup |
| Parmesan Cheese | ¼ cup | ¼ cup | ¹⁄³ cup |
| Plain Flour | 310g | 410g | 510g |
| Dry yeast | ¾ teaspoon | teaspoon | ½ teaspoons |
| Garlic and herb bread | 500g | 750g | 1kg |
| Water, luke-warm | 160mls | 235mls | 315mls |
| Butter or margarine | 10g | 15g | 20g |
| Garlic, crushed | 1 clove | 2 cloves | 2 cloves |
| Dried mixed herbs | 1 teaspoon | 2 teaspoons | 2 teaspoons |
| Salt | 1 teaspoon | 1 teaspoon | 1 ½ teaspoons |
| Sugar | 2 teaspoons | 3 teaspoons | 1 tablespoon |
| Skim milk powder | 2 teaspoons | 3 teaspoons | 1 tablespoon |
| Bread improver | 1 teaspoon | 1 teaspoon | 1 teaspoon |
| Plain flour | 300g | 450g | 600g |
| Dry yeast | 1 teaspoon | 1 teaspoon | 1 ½ teaspoons |
| Cornbread | 500g | 750g | 1kg |
| Water, luke-warm | 160mls | 235mls | 315mls |
| Butter or margarine | 10g | 15g | 20g |
| Polenta | 2 tablespoons | ¼ cup (40g) | ¹⁄³ cup (55g) |
| White Sugar | 2 teaspoons | 3 teaspoons | 1 tablespoon |
| Salt | 1 teaspoon | 1 teaspoon | 1 ½ teaspoons |
| Skim milk powder | 2 teaspoons | 3 teaspoons | 1 tablespoon |
| Bread improver | 1 teaspoon | 1 teaspoon | 1 teaspoon |
| Flour | 280g | 420g | 560g |
| Dry yeast | 1 teaspoon | 1 teaspoon | 1 ½ teaspoons |
| Fruit & Nut Dispenser | |||
| Canned corn kernels | ¼ cup (40g) | ¹⁄³ cup (55g) | ½ cup (80g) |
Menu 2: Basic Turbo
- Size - Medium
- Crust - Medium
- Keep Warm
Use to bake 1kg basic bread loaves in a faster time (around 1 hour).
- Ensure kneading blade is upright in the bread pan.
- Add ingredients to the bread pan in order listed.
- Insert bread pan into the baking chamber and press down firmly until the pan is clicked into place. Close lid.
- Add ingredients to the fruit and nut dispenser if required.
- Press the MENU button to Menu 2 (Basic Turbo).
- Press START.
Recipes
Use any 1kg recipes from menu 1 (Basic).
For more information on your bread maker and if you have any concerns regarding the performance, please visit www.sunbeam.com.au or call Sunbeam Customer Service
Australia 1300 881 861
New Zealand 0800 786 232

Documents / ResourcesDownload manual
Here you can download full pdf version of manual, it may contain additional safety instructions, warranty information, FCC rules, etc.
Download Sunbeam BM4500 - Automatic Bread Maker and Dough Maker Manual
Advertisement
Thank you! Your question has been received!


Need Assistance?
Do you have a question about the BM4500 that isn't answered in the manual? Leave your question here.