
Related Manuals for Emerson Copeland Site Supervisor Controller


Summary of Contents for Emerson Copeland Site Supervisor Controller
- Page 1 Site Supervisor Controller (Contrôleur superviseur de site) Quick Setup Guide (Guide d’installation rapide)
-
Page 3: Table Of Contents
Contents Table des matières English Technical Specifications ..................5 Ethernet Connection ....................6 Direct Connect Instructions - Connect your Laptop to Site Supervisor’s Ethernet Port ETH1: ....................7 Logging Into the Site Supervisor .................8 How to Change the IP Address ................9 Setup Wizard ......................10 Basic Navigation ..................... -
Page 5: Technical Specifications
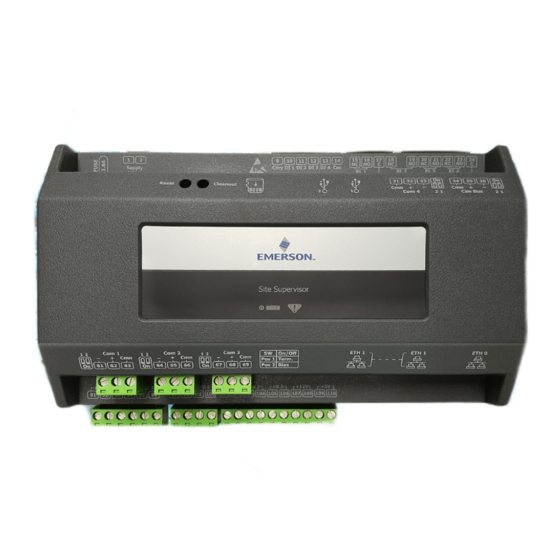
Site Supervisor Controller Quick Setup Guide The Site Supervisor is a system that combines energy management with the ability to monitor various facility systems and provide alerts when there are issues that need attention. This system provides HVAC control, Refrigeration System Monitoring and Control, as well as Lighting Control. -
Page 6: Ethernet Connection
Ethernet Connection ETH1 is designed to be used for directly connecting to laptop, PC, or optional touchscreen with a CAT5 network cable. The default IP for ETH1 is 192.168.1.250. The optional Site Supervisor Display touchscreen default IP is 192.168.1.200 and will connect automatically to the Site Supervisor when plugged into ETH1. -
Page 7: Direct Connect Instructions - Connect Your Laptop To Site Supervisor's Ethernet Port Eth1
Direct Connect Instructions - Connect your Laptop to Site Supervisor’s Ethernet Port ETH1: Under the Control Panel - Network and Sharing Center, select Change adapter settings. Select the Local Area Connection port being used. Select Properties. Change Adapter Settings Click Use the following IP address: and Highlight the section Internet Protocol enter the IP address 192.168.1.251 and Version 4 (TCP/IPv4) and click Properties:... -
Page 8: Logging Into The Site Supervisor
Logging Into the Site Supervisor Launch a preferred Web browser: Google Chrome 105.0.5195 and later, Firefox 105.0 and later, MAC Safari 14.1.2 and later, iOS Safari 14.7 and later, Microsoft Edge 84.0.522 and later, and Chrome/ WebView 105.0.5195 and later are the supported browsers. Enter the IP Address of the device. -
Page 9: How To Change The Ip Address
How to Change the IP Address Method 1: Direct Connect Select the Main Menu icon > Configure System > General System Properties > Network Settings: Enter IP Address in the ETH 0 IP Address Field On the INTERNET (TCP/IP) section on the screen, enter the IP Address in the ETH 0 IP Address field. Note that you can set up the Peer Group, Unit Number, Network Mask, and Default Gateway on this screen. -
Page 10: Setup Wizard
Setup Wizard Note that if setpoints have been pre-loaded in the unit, the Setup Wizard will not auto-start after logging in. If your unit has been received directly from the Copeland factory, the Setup Wizard will open and take you through the following setup screens: Localization Screen Localization Screen... - Page 11 System Values Screen From the System Values screen, name the unit by entering it in the Site Name field. The Confirmation window will slide open. Click OK. Then click the right arrow > to proceed to the Network Settings Screen. System Values Screen Network Settings Screen Configure the settings on the Internet TCP/IP screen such as host name, text, and email settings.
-
Page 12: Basic Navigation
Basic Navigation For every Site Supervisor screen, the Main Menu, Home, Back Arrow, Control Inventory, and Schedules/Events icons appear at the first row of top of the screen. A screen title also appears at the top left of the screen. Basic Screen Parts and Elements •... -
Page 13: Housing Dimensions And Mounting
Housing Dimensions and Mounting Mounting Tab Extended Mounting Dimensions The Site Supervisor can be mounted to standard 35mm DIN Rail. Snap the orange tabs on the back of the unit to the down position to fasten. If not using the DIN Rail mounting option, fasten to the mounting surface using the openings in the mounting tabs. -
Page 14: Site Supervisor Rs485 Wiring Guide Examples
Site Supervisor RS485 Wiring Guide Examples For more wiring information, refer to the latest Supervisor Control user manual (P/N 026-1803). • The Site Supervisor IONet connections must be wired reverse polarity. • For the Site Supervisor Serial IONet connections, connect the white wire to the negative terminal and the black wire to the positive terminal. - Page 15 Site Supervisor and XR75 (120V models) MAX CABLE MAX CABLE DEVICE NUMBER ON RUN LENGTH RUN LENGTH NETWORK 9600 BAUD 19.2k BAUD XR75 2500 ft 1250 ft (120V) Twist shield wires together with insulated wire crimp and use electrical tape or heatshrink to insulate shield joint connection.
-
Page 16: Spécifications Techniques
Contrôleur superviseur de site Guide d’installation rapide Le superviseur de site est un système qui combine la gestion de l’énergie avec la capacité de surveiller divers systèmes d’installation et de fournir des alertes en cas de problèmes nécessitant une attention particulière. Ce système fournit le contrôle CVCR, la surveillance et le contrôle du système de réfrigération, ainsi que le contrôle de l’éclairage. -
Page 17: Connexion Ethernet
Connexion Ethernet ETH1 est conçu pour être utilisé pour se connecter directement à un ordinateur portable, un PC ou un écran tactile en option avec un câble réseau CAT5. L’adresse IP par défaut pour ETH1 est 192.168.1.250. L’adresse IP par défaut de l’écran tactile en option du superviseur de site est 192.168.1.200 et se connectera automatiquement au superviseur de site lorsqu’il est branché... -
Page 18: Instructions De Connexion Directe - Connectez Votre Ordinateur Portable Au Port Ethernet Eth1 Du Superviseur De Site
Instructions de connexion directe - Connectez votre ordinateur portable au port Ethernet ETH1 du superviseur de site : Sous le Panneau de configuration - Centre Réseau et Partage, sélectionnez Modifier les paramètres de l’adaptateur. Sélectionnez le port de connexion au réseau local utilisé. Sélectionnez Propriétés. -
Page 19: Connexion Au Superviseur De Site
Connexion au superviseur de site Lancez un navigateur Internet de préférence : Google Chrome 105.0.5195 et versions ultérieures, Firefox 105.0 et versions ultérieures, MAC Safari 14.1.2 et versions ultérieures, iOS Safari 14.7 et versions ultérieures, Microsoft Edge 84.0.522 et versions ultérieures et Chrome/WebView 105.0.5195 et versions ultérieures sont les navigateurs pris en charge. -
Page 20: Comment Changer L'adresse Ip
Comment changer l’adresse IP Méthode 1 : Connexion directe Sélectionnez l’icône Menu principal > Configurer le système > Propriétés générales du système > Paramètres réseau: Entrez l’adresse IP dans le champ Adresse IP ETH 0 Dans la section INTERNET (TCP/IP) de l’écran, saisissez l’adresse IP dans le champ Adresse IP ETH 0. Notez que vous pouvez configurer le groupe de pairs, le numéro d’unité, le masque de réseau et la passerelle par défaut sur cet écran. -
Page 21: Assistant De Configuration
Assistant de configuration Notez que si les points de consigne ont été préchargés dans l’unité, l’assistant de configuration ne démarrera pas automatiquement après la connexion. Si votre unité a été reçue directement de l’usine Copeland, l’assistant de configuration s’ouvrira et vous guidera à... - Page 22 Écran des valeurs de système À partir de l’écran des valeurs de système, nommez l’unité en l’entrant dans le champ Nom du site. La fenêtre de confirmation s’ouvrira. Cliquez sur OK. Cliquez ensuite sur la flèche vers la droite > pour accéder à l’écran des paramètres réseau.
-
Page 23: Navigation De Base
Navigation de base Pour chaque écran de superviseur de site, les icônes Menu principal, Accueil, Flèche de retour, Inventaire de contrôle et Horaires/Événements s’affichent sur la première ligne en haut de l’écran. Un titre d’écran apparaît également en haut à gauche de l’écran. Pièces et éléments d’écran de base •... -
Page 24: Dimensions Du Boîtier Et Fixation
Dimensions du boîtier et fixation Languette de montage étendue Dimensions de fixation Le superviseur de site peut être monté sur un rail DIN standard de 35 mm. Enclenchez les languettes orange à l’arrière de l’appareil en position basse pour fixer. Si vous n’utilisez pas l’option de fixation sur rail DIN, fixez-la à... -
Page 25: Exemples De Guide De Câblage Rs485 Du Superviseur De Site
Exemples de guide de câblage RS485 du superviseur de site Pour plus d’informations sur le câblage, référez-vous au dernier manuel d’utilisation du contrôle du superviseur (P/N 026-1803). • Les connexions IONet du superviseur de site doivent être câblées en polarité inversée. •... - Page 26 Superviseur de chantier et XR75 (modèles 120V) Nombre Longueur Longueur maximum maximale du maximale du Appareil sur le câble câble réseau 9600 BAUD 19.2k BAUD XR75 2500 peids 1250 peids (120V) Torsadez les fils de blindage ensem- ble avec un sertissage de fil isolé et utilisez du ruban électrique ou une gaine thermo rétractable pour isoler la connexion du joint de blindage.
- Page 27 NOTES...
- Page 28 The contents of this publication are presented for informational purposes only and they are not to be construed as warranties or guarantees, express or implied, regarding the products or services described herein or their use or applicability. Copeland reserves the right to modify the designs or specifications of such products at any time without notice.