Table of Contents
Advertisement
Available languages
Available languages
MDE17MN
MDG17MN
TABLE OF CONTENTS
Dryer Safety ......................................................................... 2
Tools & Parts ........................................................................ 5
Dimensions/Clearances ...................................................... 6
Gas Dryer Installation Requirements ................................... 7
Electric Dryer Installation Requirements ........................... 10
Dryer Venting Requirements ............................................. 13
Gas Supply Connection ..................................................... 15
Installing Leveling Legs, Coin Slide, and Coin Box ............... 17
Electric Dryer Electrical Connections ................................. 18
Leveling ............................................................................. 22
Complete Installation ........................................................ 23
Reversing Dryer Door Swing ............................................... 24
Changing to a 30- or 60-Minute Timing Cam ...................... 25
Maintenance Instructions .................................................. 26
If You Need Assistance ....................................................... 26
Warranty .......................................................................... 27
W10184576C
W10184577C - SP
MDE17CS
MDG17CS
TABLE DES MATIÈRES
Page
Sécurité de la sécheuse ...................................................... 28
Outils et pièces .................................................................. 31
Dimensions/Distances de dégagement .............................. 32
Exigences d'installation pour la sécheuse à gaz ................... 33
Exigences d'installation pour la sécheuse électrique ......... 36
Exigences concernant l'évacuation de la sécheuse ............. 38
Raccordement à la canalisation de gaz ............................... 40
Nivellement ........................................................................ 43
Achever l'installation .......................................................... 44
Inversion du sens d'ouverture de la porte ........................... 45
Instructions d'entretien ...................................................... 47
Si vous avez besoin d'assistance .......................................... 47
Garantie ............................................................................ 48
INSTALLATION
INSTRUCTIONS
Commercial Dryer
Gas or Electric
INSTRUCTIONS
D'INSTALLATION
Sécheuse à usage
commercial
à gaz ou électrique
www.maytagcommerciallaundry.com
Page
Advertisement
Table of Contents

Related Manuals for Maytag MDE17CSAYW


Summary of Contents for Maytag MDE17CSAYW
-
Page 1: Table Of Contents
MDE17MN MDG17MN TABLE OF CONTENTS Dryer Safety ... 2 Tools & Parts ... 5 Dimensions/Clearances ... 6 Gas Dryer Installation Requirements ... 7 Electric Dryer Installation Requirements ... 10 Dryer Venting Requirements ... 13 Gas Supply Connection ... 15 Installing Leveling Legs, Coin Slide, and Coin Box ... 17 Electric Dryer Electrical Connections ... -
Page 2: Dryer Safety
DRYER SAFETY It is recommended that the owner post, in a prominent location, instructions for the customer’s use in the event the customer ■ smells gas. This information should be obtained from your gas supplier. Post the following warning in a prominent location. ■... - Page 3 DRYER SAFETY IMPORTANT: When discarding or storing your old clothes dryer, remove the door.
-
Page 4: Important Safety Instructions
DRYER SAFETY WARNING: To reduce the risk of fire, electric shock, or injury to persons when using the dryer, follow basic precautions, including the following: Read all instructions before using the dryer. ■ This dryer is intended only for drying clothes and textiles ■... -
Page 5: Tools & Parts
Tools Needed: 8" (200 mm) 8" (200 mm) or 10" (250 mm) or 10" (250 mm) pipe wrench Torx T-20 security ®† screwdriver or bit level caulk gun and caulk (for installing new exhaust vent) flashlight (optional) Parts Supplied: foot boots (4) 5/16"... -
Page 6: Dimensions/Clearances
DIMENSIONS/CLEARANCES Dimensions Front View 27" (686 mm) " (1.089 m) 1" (25 mm) Back View 27" (686 mm) Electric " (343 mm) 16" (406 mm) " (32 mm) 4" dia (102 mm) " (137 mm) 13" (330 mm) Clearances Recessed front view 15"... -
Page 7: Gas Dryer Installation Requirements
GAS DRYER INSTALLATION REQUIREMENTS Location Requirements Your dryer can be installed in a basement, laundry room, or recessed area. Companion appliance location requirements should also be considered. IMPORTANT: Do not install or store the dryer where it will be exposed to the weather. Proper installation is your responsibility. -
Page 8: Electrical Requirements
GAS DRYER INSTALLATION REQUIREMENTS Electrical Requirements IMPORTANT: The dryer must be electrically grounded in accordance with local codes and ordinances or, in the absence of local codes, with the National Electrical Code, ANSI/NFPA 70, latest edition, or Canadian Electrical Code, CSA C22.1. If codes permit and a separate ground wire is used, it is recommended that a qualified electrical installer determine that the ground path is adequate. - Page 9 GAS DRYER INSTALLATION REQUIREMENTS Gas Supply IMPORTANT: Observe all governing codes and ordinances. This installation must conform with all local codes and ordinances. In the absence of local codes, installation must conform with American National Standard, National Fuel Gas Code ANSI Z223.1/NFPA 54 or CAN/CSA B149. A copy of the above code standards can be obtained from: National Fire Protection Association One Batterymarch Park, Quincy, MA 02269...
-
Page 10: Electric Dryer Installation Requirements
ELECTRIC DRYER INSTALLATION REQUIREMENTS Location Requirements Your dryer can be installed in a basement, laundry room, or recessed area. Companion appliance location requirements should also be considered. IMPORTANT: Do not install or store the dryer where it will be exposed to the weather. Proper installation is your responsibility. - Page 11 ELECTRIC DRYER INSTALLATION REQUIREMENTS Electrical Requirements – U.S.A. only (cont.) Electrical Connection To properly install your dryer, you must determine the type of electrical connection you will be using and follow the instructions provided for it here. This dryer is manufactured ready to install with a 3-wire ■...
-
Page 12: Grounding Instructions
ELECTRIC DRYER INSTALLATION REQUIREMENTS Direct Wire Electrical Requirements – Canada only It is your responsibility: To contact a qualified electrical installer. ■ To be sure that the electrical connection is adequate ■ and in conformance with the Canadian Electrical Code, C22.1 –... -
Page 13: Dryer Venting Requirements
WARNING: To reduce the risk of fire, this dryer MUST BE EXHAUSTED OUTDOORS. IMPORTANT: Observe all governing codes and ordinances Dryer exhaust must not be connected into any gas vent, chimney, wall, ceiling, attic, crawlspace, or a concealed space of a building. Only rigid or flexible metal vent shall be used for exhausting. - Page 14 DRYER VENTING REQUIREMENTS Vent Hoods 4" (102 mm) Diameter Exhaust Hoods box hood louvered hood Vent System Length Maximum Vent Length/Vent Connection Maximum length of vent system depends upon the type of vent used, number of elbows, and type of exhaust hood. Vent System Chart (Rigid Metal Vent) No.
-
Page 15: Gas Supply Connection
If an Exhaust Hood Cannot be Used The outside end of main vent should have a sweep elbow directed downward. 24" min. (610 mm) 12" min. (305 mm)* * Minimum clearance above any accumulation of snow, ice, or debris such as leaves If main vent travels vertically through the roof, rather than through wall, install a 180°... - Page 16 GAS SUPPLY CONNECTION Type of Gas This dryer is equipped for use with natural gas. It is design- certified by CSA International for LP (propane and butane) gases with appropriate conversion. No attempt shall be made to convert dryer from gas specified on serial/rating plate for use with a different gas without consulting the serving gas supplier.
-
Page 17: Installing Leveling Legs, Coin Slide, And Coin Box
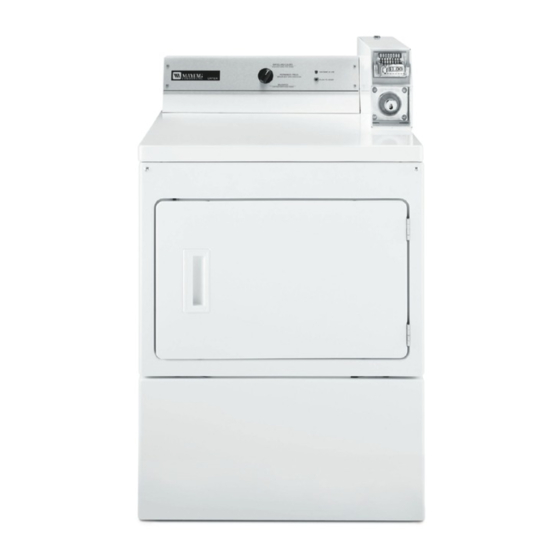
INSTALLING LEVELING LEGS, COIN SLIDE, AND COIN BOX The console houses the factory-installed accumulator timer with actuating arm and button. The factory-installed timer is set to provide 45 minutes (4 pins) of drying time when activated by the coin slide. Timer cams for 30-minute (6 pins) and 60-minute (3 pins) drying times are included in the parts bag. -
Page 18: Electric Dryer Electrical Connections
ELECTRIC DRYER ELECTRICAL CONNECTIONS Strain Relief Remove Terminal Block Cover Strain Relief Direct Wire Strain Relief 1. Insert strain relief. Power Supply Cord Strain Relief 1. Insert strain relief. 2. Insert power cord into strain relief. 2. Insert conduit into strain relief and tighten clamp. - Page 19 ELECTRIC DRYER ELECTRICAL CONNECTIONS Connection Options Power Cord 4-wire receptacle (NEMA Type 14-30R) 3-wire receptacle (NEMA Type 10-30R) Connecting 4-Wire Connection: Power Supply Cord IMPORTANT: A 4-wire connection is required for mobile homes and where local codes do not permit the use of 3-wire connections.
- Page 20 ELECTRIC DRYER ELECTRICAL CONNECTIONS Connecting 3-Wire Connection: Power Supply Cord Standard Power Cord Connectors Flanged spade connector Connecting Neutral Wire 1. Loosen or remove center terminal block screw. Connecting 4-Wire Connection: Direct Wire IMPORTANT: A 4-wire connection is required for mobile homes and where local codes do not permit the use of 3-wire connections.
- Page 21 ELECTRIC DRYER ELECTRICAL CONNECTIONS Connecting 4-Wire Connection: Direct Wire Connecting Ground and Neutral Wires (cont.) 2. Connect ground and neutral wire to center terminal block. Connecting Direct Wire Ground 3. Connect ground wire (green or bare) with external ground connector screw. Connecting 3-Wire Connection: Direct Wire Use where local codes permit connecting cabinet-ground conductor to neutral wire.
-
Page 22: Leveling
ELECTRIC DRYER ELECTRICAL CONNECTIONS Connecting 3-Wire Connection: Optional Use for direct wire or power supply cord where local codes do not permit connecting cabinet-ground conductor to neutral wire. Connecting Neutral Wire 1. Remove center terminal block screw. Also remove neutral ground wire by removing external ground conductor screw. -
Page 23: Complete Installation
2. Grip dryer from top and rock back and forth, making sure all four legs are firmly on floor. Repeat, rocking dryer from side to side. If dryer rocks, go to Step 3 and adjust leveling legs. If all four legs are in firm contact with floor, go to Step 4. 3. -
Page 24: Reversing Dryer Door Swing
REVERSING DRYER DOOR SWING (OPTIONAL) You can change your door swing from a right-side opening to left-side opening, if desired. Remove the Door Assembly 1. Place a towel or soft cloth on top of dryer or work space to avoid scratching of the surface. 2. -
Page 25: Changing To A 30- Or 60-Minute Timing Cam
CHANGING TO A 30- OR 60-MINUTE TIMING CAM WARNING Electrical Shock Hazard Disconnect power before making cam changes. Failure to follow these instructions can result in death or electrical shock. Coin-slide models: You can install the 30-minute or 60-minute timing cam (shipped with dryer) as follows: 1. -
Page 26: Maintenance Instructions
IF YOU NEED ASSISTANCE Contact your authorized Maytag® Commercial Laundry distributor. To locate your authorized Maytag® Commercial Laundry distributor, or for web inquiries, visit www.MaytagCommercialLaundry.com. If you cannot locate your distributor, the Commercial Laundry Support Center will answer any questions about operating or maintaining your dryer not covered in the “Installation Instructions.”... -
Page 27: Warranty
For the first five years from the date of purchase, when this commercial appliance is installed, maintained and operated according to instructions attached to or furnished with the product, Maytag brand of Whirlpool Corporation (thereafter “Maytag”) will pay for factory specified parts or original equipment manufacturer parts to correct defects in materials or workmanship. Proof of original purchase date is required to obtain service under this warranty. -
Page 28: Sécurité De La Sécheuse
SÉCURITÉ DE LA SÉCHEUSE On recommande que le propriétaire place les instructions à l’usage du client en un lieu bien visible, au cas où le client percevrait ■ une odeur de gaz. Ces renseignements doivent être obtenus auprès de votre fournisseur en gaz. Placer l’avertissement qui suit à... - Page 29 SÉCURITÉ DE LA SÉCHEUSE IMPORTANT : Pour mettre l’ancienne sécheuse au rebut ou pour la remiser, enlever la porte.
- Page 30 SÉCURITÉ DE LA SÉCHEUSE IMPORTANTES INSTRUCTIONS DE SÉCURITÉ AVERTISSEMENT : Pour réduire les risques d’incendie, de choc électrique ou de blessures lors de l’utilisation de la sécheuse, suivre les précautions fondamentales dont les suivantes : Lire toutes les instructions avant d’utiliser la sécheuse. ■...
-
Page 31: Outils Et Pièces
Outillage nécessaire : clé à tuyau clé à molette de 8" (200 mm) de 8" (200 mm) ou 10" (250 mm) (ouverture ou 10" (250 mm) tournevis isolé ou foret Torx®† T-20 niveau pistolet à calfeutrage et composé de calfeutrage (pour l’installation d’un nouveau conduit d’évacuation) lampe de poche... -
Page 32: Dimensions/Distances De Dégagement
DIMENSIONS/DISTANCES DE DÉGAGEMENT Dimensions Vue de face 27" (686 mm) " (1.089 m) 1" (25 mm) Vue arrière 27" (686 mm) Électrique Electric " (343 mm) 16" (406 mm) " (32 mm) 4" dia (102 mm) " (137 mm) 13" (330 mm) Distances de dégagement Encastrement, vue avant... -
Page 33: Exigences D'installation Pour La Sécheuse À Gaz
EXIGENCES D’INSTALLATION POUR LA SÉCHEUSE À GAZ Exigences de l’emplacement La sécheuse peut être installée dans un sous-sol, une salle de buanderie ou un encastrement. Il faut aussi prendre en compte les exigences d’emplacement des appareils voisins. IMPORTANT : Ne pas installer ou remiser la sécheuse dans un endroit où... - Page 34 EXIGENCES D’INSTALLATION POUR LA SÉCHEUSE À GAZ Spécifications électriques IMPORTANT : La sécheuse doit être reliée à la terre conformément aux codes et règlements locaux en vigueur, ou en l’absence de tels codes, avec la dernière édition du National Electrical Code, ANSI/NFPA 70, ou du Canadian Electrical Code, CSA C22.1.
- Page 35 EXIGENCES D’INSTALLATION POUR LA SÉCHEUSE À GAZ Alimentation en gaz IMPORTANT : Observer les dispositions de tous les codes et règlements en vigueur. L’installation doit satisfaire aux critères de tous les codes et règlements locaux. En l’absence de code local, l’installation doit satisfaire aux prescriptions de la norme American National Standard, National Fuel Gas Code ANSI Z223.1/NFPA 54 ou CAN/CSA B149.
-
Page 36: Exigences D'installation Pour La Sécheuse Électrique
EXIGENCES D’INSTALLATION POUR LA SÉCHEUSE ÉLECTRIQUE Exigences de l’emplacement La sécheuse peut être installée dans un sous-sol, une salle de buanderie ou un encastrement. Il faut aussi prendre en compte les exigences d’emplacement des appareils voisins. IMPORTANT : Ne pas installer ou remiser la sécheuse dans un endroit où... - Page 37 EXIGENCES D’INSTALLATION POUR LA SÉCHEUSE Spécifications électriques C’est à l’utilisateur qu’incombe la responsabilité de : Communiquer avec un électricien qualifié. ■ S’assurer que les connexions électriques sont adéquates et ■ conformes au Code canadien de l’électricité, C22.1 - dernière édition et à tous les codes locaux. Pour obtenir un exemplaire de la norme des codes ci-dessus, contacter : Association canadienne de normalisation, 178 Rexdale Blvd., Toronto, ON M9W 1R3 CANADA.
-
Page 38: Exigences Concernant L'évacuation De La Sécheuse
EXIGENCES CONCERNANT L’ÉVACUATION DE LA SÉCHEUSE AVERTISSEMENT : Pour réduire le risque d’incendie, cette sécheuse doit ÉVACUER L’AIR À L’EXTÉRIEUR. IMPORTANT : Observer les dispositions de tous les codes et règlements en vigueur. Le conduit d’évacuation de la sécheuse ne doit pas être raccordé... - Page 39 Hottes d’extraction Clapets d’évacuation – Diamètre de 4" (102 mm) clapet de type boîte clapet à persiennes Longueur du système d’évacuation Longueur maximale du conduit/raccord La longueur maximale du système d’évacuation dépend du type de conduit utilisé, du nombre de coudes et du type de clapet d’évacuation.
-
Page 40: Raccordement À La Canalisation De Gaz
EXIGENCES CONCERNANT L’ÉVACUATION DE LA SÉCHEUSE Si on ne peut pas utiliser de clapet d’évacuation L’extérieur du conduit d’évacuation principal doit comporter un conduit de déviation orienté vers le bas. 24" min. (610 mm) 12" min. (305 mm)* * Distance de dégagement minimale au-dessus d’une accumulation de neige, de glace ou de débris tels des feuilles... - Page 41 RACCORDEMENT À LA CANALISATION DE GAZ Type de gaz Cette sécheuse est équipée pour une alimentation au gaz naturel. Sa conception est homologuée par CSA International pour l’alimentation au gaz de pétrole liquéfié (propane ou butane), avec conversion appropriée. Ne pas entreprendre de convertir la sécheuse pour une utilisation avec un gaz différent Canalisation d’alimentation en gaz Méthode recommandée...
-
Page 42: Installation Des Pieds De Nivellement, De La Glissière À Monnaie Et De La Caisse À Monnaie
INSTALLATION DES PIEDS DE NIVELLEMENT, DE LA GLISSIÈRE À MONNAIE ET DE LA CAISSE À MONNAIE La console inclut la minuterie (accumulation préinstallée) avec bouton et bras de manoeuvre. La minuterie, installé à l’usine, commande une période de séchage de 45 minutes (came à 4 broches) après activation par le mécanisme d’insertion des pièces de monnaie. -
Page 43: Nivellement
Le nivellement de la sécheuse permet le bruit et les vibrations excessifs. 1. Enlever la plaque de carton placé sous la sécheuse. Placer un niveau sur les bords supérieurs de la sécheuse en contrôlant chaque côté et l’avant. Si elle n’est pas d’aplomb, faire basculer la sécheuse et régler les pieds vers le haut ou vers le bas tel qu’indiqué... -
Page 44: Achever L'installation
ACHEVER L’INSTALLATION 1. Consulter les spécifications électriques. Vérifier que la tension électrique disponible est correcte et que la prise de courant est convenablement reliée à la terre. Voir “Spécifications électriques”. 2. Vérifier que toutes les pièces sont maintenant installées. S’il reste une pièce, passer en revue les différentes étapes. 3. -
Page 45: Inversion Du Sens D'ouverture De La Porte
INVERSION DU SENS D’OUVERTURE DE LA PORTE (FACULTATIF) Le sens d’ouverture de la porte peut être changé du côté droit au côté gauche, si désiré. Retirer l’assemblée de porte 1. Placer une serviette sur le dessus de la sécheuse pour protéger sa surface. -
Page 46: Installation D'une Came De Minutage De 30 Ou 60 Minutes
INSTALLATION D’UNE CAME DE MINUTAGE DE 30 OU 60 MINUTES AVERTISSEMENT Risque de choc électrique Déconnecter la source de courant électrique avant d'effectuer des modifications sur la came. Le non-respect de ces instructions peut entraîner un décès ou un choc électrique. Modèles avec la glissière à... -
Page 47: Instructions D'entretien
élément susceptible d’obstruer le débit d’air de combustion et de ventilation. Contacter le revendeur autorisé d’appareils de buanderie à usage commercial Maytag®. Pour localiser votre revendeur autorisé d’appareils de buanderie à usage commercial Maytag® ou pour toute question via internet, consulter www.MaytagCommercialLaundry.com. -
Page 48: Garantie
Maytag de Whirlpool Corporation (ci-après désignée “Maytag”) paiera pour les pièces spécifiées par l’usine ou pour les pièces originales du fabricant de l’équipement pour corriger tout vice de matériau ou de fabrication. Une preuve de la date d’achat d’origine est exigée pour obtenir un service dans le cadre de la présente garantie.