
Related Manuals for Star Micronics TSP212


Summary of Contents for Star Micronics TSP212
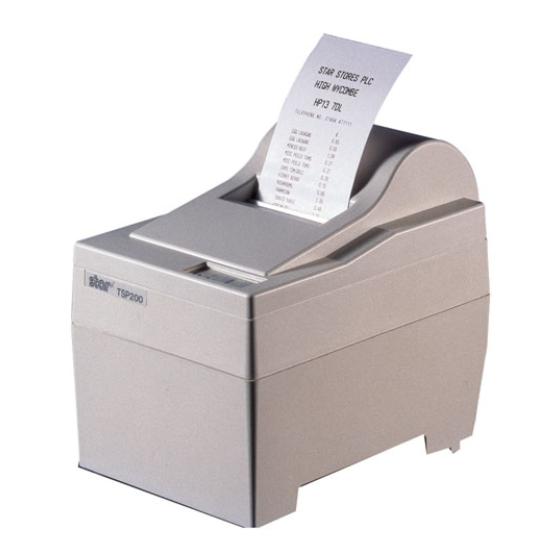
- Page 1 THERMAL PRINTER TSP200 SERIES USERS MANUAL GUIDE D’UTILISATION BEDIENUNGSANLEITUNG MANUALE DI ISTRUZIONI...
- Page 2 However, should any errors be detected, STAR would greatly appreciate being informed of them. The above notwithstanding, STAR can assume no responsibility for any errors in this manual. © Copyright 1996 Star Micronics Co., LTD. Radio Frequency Interference Statement Statement of Radio Interference Regulations...
-
Page 3: Table Of Contents
TABLE OF CONTENTS 1. SETTING THE PAPER ... 1 1-1. Setting the Paper ... 1 1-2. Changing the Paper ... 3 1-3. Paper Jams... 4 2. CONTROL PANEL ... 5 2-1. Power ON ... 5 2-2. Errors ... 6 3. CAUTIONS ... 7 3-1. -
Page 4: Setting The Paper
1. SETTING THE PAPER 1-1. Setting the Paper Prepare a roll of paper. Make sure that the feeding edge of the paper is cut in a straight right angle to the direction of feed. Roll paper Paper roll holder 1 Open the cover. 2 If the unit has an auto-cutter unit, move the unit in the direction of the arrow until the lock engages. -
Page 5: Auto Loading
After confirming that 15 to 20 centimeters of paper is extending from the printer, push the head up lever back to the previous position. Manual Loading Pull the head up lever forward to bring the print head into the up po- sition. -
Page 6: Changing The Paper
1-2. Changing the Paper 5 Hold the edge of the paper and press it against the head and cut it. Be careful not to cut your hands or fingers on the edge of the auto- cutter unit. 6 Close the auto-cutter unit. (This step is unnecessary if there is no auto- cutter unit.) 7 Close the cover and press the on-... -
Page 7: Paper Jams
1-3. Paper Jams 1 Turn the power off and open the cover. 2 If the unit has an auto-cutter unit, move the unit in the direction of the arrow until the lock engages. (This step is unnecessary if there is no auto-cutter unit.) 3 Cut the roll of paper just before the paper opening and remove the paper. -
Page 8: Control Panel
2-1. Power ON Operating Panel Paper - Yes POWER ON LINE FEED 1 2 3 Paper - No POWER ON LINE FEED When the power switch is turned on, the Power Lamp and On-Line Lamp will come on. If there is no paper, the Power Lamp will flash at approximately one second intervals. -
Page 9: Errors
2-2. Errors 1) Automatic Recovery (Power Lamp: Flashing; On-Line Lamp: On) Error Description Power Lamp Flashing Pattern Abnormal head Approx. 1 Sec temperature 2) Recoverable Errors (Power Lamp: Flashing; On-Line Lamp: Off) Error Description Power Lamp Flashing Pattern No paper Approx. -
Page 10: Cautions
2 Never touch any moving parts, such as gears or knobs, during printing. 3 Always use care near the edges of printer components, especially metal components, as they may cause injury. 3. CAUTIONS... -
Page 11: Command Summary
4. COMMAND SUMMARY 4-1. Star Mode Commands to Select Characters Hexadecimal Control codes codes <ESC> “R” n 1B 52 n <ESC> “/” “1” 1B 2F 31 <ESC> “/” <1> 1B 2F 01 <ESC> “/” “0” 1B 2F 30 <ESC> “/” <0> 1B 2F 00 <ESC>... - Page 12 Hexadecimal Control codes codes <ESC> “4” 1B 34 <ESC> “5” 1B 35 <SI> <DC2> <ESC> “ E ” 1B 45 <ESC> “ G ” 1B 47 <ESC> “ F ” 1B 46 <ESC> “ H ” 1B 48 Commands to Set the Page Format Hexadecimal Control codes codes...
- Page 13 Commands to Print Dot Graphics Hexadecimal Control codes codes <ESC> “K” n <0> 1B 4B n 00 m1 m2 m1 m2 ... <ESC> “L” n1 n2 1B 4C n1 n2 m1 m2 Print high density graphics m1 m2 ... <ESC> “k” n <0> m1 ... 1B 6B n 00 m1 ...
-
Page 14: Other Commands
<LF> <NUL> 0A 00 <ESC> “@” 1B 40 <ENQ> <ESC> “?” <LF> <NUL> 1B 3F 0A 00 Function Cancel last line & Initialize printer Deselect printer Set select mode Beep the buzzer Set memory switch Initialize printer Enquiry Reset printer hardware... -
Page 15: Esc/Pos Mode
Horizontal tab Print line feed Page mode print and return Real time transmission of status Real time request to printer Cancel print data in page mode Print page mode data Set right space amount of character Universal print mode designation... - Page 16 Define download bit image Print download bit image Start/finish macro definition Designate/cancel reverse printing Select print position of HRI characters Printer ID transmission Set left margin Set basic calculated pitch Paper cut Set print range Designate the relative position of vertical characters when...
- Page 17 TABLE DES MATIÈRES 1. MISE EN PLACE DU PAPIER ... 15 1-1. Mise en place du papier ... 15 1-2. Changement de rouleau de papier ... 17 1-3. Bourrages de papier ... 18 2. TABLEAU DE COMMANDE ... 19 2-1. Mise sous tension ... 19 2-2.
-
Page 18: Mise En Place Du Papier
1. MISE EN PLACE DU PAPIER 1-1. Mise en place du papier Préparer un rouleau de papier. S’assurer que le bord du papier est coupé à angle droit par rapport à la direction d’avance du papier. Rouleau de Roll paper papier Paper roll holder 1 Ouvrir le capot. - Page 19 4 Chargement automatique Insérer le bord du papier dans l’ouverture. S’assurer que le papier est correctement inséré en vérifiant s’il ressort du mécanisme d’impres- sion. Le papier doit ressortir de 15 à 20 cm du mécanisme d’impression. Si la portion de papier ressortant du mécanisme d’impression est infé- rieure ou égale à...
-
Page 20: Changement De Rouleau De Papier
1-2. Changement de rouleau de papier 5 Tenir le bord du papier et appuyer ce dernier contre la tête et effectuer la découpe. Prudence! Veiller à ne pas se couper les mains ou les doigts sur le bord tranchant du mécanisme de découpe automatique. -
Page 21: Bourrages De Papier
1-3. Bourrages de papier 1 Mettre l’imprimante hors tension et ouvrir le capot. 2 Si l’imprimante dispose d’un mécanisme de découpe automatique, déplacer ce dernier jusqu’à ce que le mécanisme soit verrouillé. (Ignorer cette étape si l’appareil ne dispose pas de mécanisme de découpe automatique.) 3 Couper le rouleau de papier juste avant l’ouverture pour le papier et retirer ce dernier. -
Page 22: Tableau De Commande
2. TABLEAU DE COMMANDE 2-1. Mise sous tension Tableau de commande Papier chargé POWER ON LINE FEED 1 2 3 Pas de papier chargé POWER ON LINE FEED Lorsque l’imprimante est mise sous tension, les témoins d’alimentation POWER et ON LINE (en ligne) s’allument. Si l’imprimante ne contient pas de papier, le témoin POWER clignote à... -
Page 23: Erreurs
2-2. Erreurs 1) Erreurs à correction automatique (témoin POWER clignotant; témoin ON LINE allumé) Description de l’erreur Cycle de clignotement du témoin POWER T anormale de la Environ 1 sec. Approx. 1 Sec tête 2) Erreurs corrigibles (témoin POWER clignotant; témoin ON LINE éteint) Description de l’erreur Cycle de clignotement du témoin POWER Pas de papier... -
Page 24: Precautions
3-1. Précautions relatives à l’utilisation 1 La durée de vie de la tête d’imprimante thermique ne peut être garantie si tout autre papier que celui recommandé est employé. Si le papier utilisé contient du Na+, K++, CI–, la durée de vie de l’élément thermique de la tête d’impression sera considérablement réduite. -
Page 25: Resume Des Commandes
4. RESUME DES COMMANDES 4-1. Mode Star Commandes de sélection de caractères Codes Code de contrôle hexadécimaux <ESC> “R” n 1B 52 n <ESC> “/” “1” 1B 2F 31 <ESC> “/” <1> 1B 2F 01 <ESC> “/” “0” 1B 2F 30 <ESC>... - Page 26 Codes Code de contrôle hexadécimaux <ESC> “4” 1B 34 <ESC> “5” 1B 35 <SI> <DC2> <ESC> “ E ” 1B 45 <ESC> “ G ” 1B 47 <ESC> “ F ” 1B 46 <ESC> “ H ” 1B 48 Commandes de réglage du format de page Codes Code de contrôle hexadécimaux...
- Page 27 Commandes d’impression de graphiques en points Codes Code de contrôle hexadécimaux <ESC> “K” n <0> 1B 4B n 00 m1 m2 m1 m2 ... <ESC> “L” n1 n2 1B 4C n1 n2 m1 m2 m1 m2 ... <ESC> “k” n <0> m1 ... 1B 6B n 00 m1 ...
- Page 28 Autres commandes Codes Code de contrôle hexadécimaux <CAN> <DC3> <DC1> <RS> <ESC> “#N, n1 n2 n3 n4” 1B 23 N 2C n1 n2 n3 n4 <LF> <NUL> 0A 00 <ESC> “@” 1B 40 <ENQ> <ESC> “?” <LF> <NUL> 1B 3F 0A 00 Fonction Annulation de la dernière ligne et initialisation de l’imprimante...
-
Page 29: Mode Esc/Pos
4-2. Mode ESC/POS Code de Code hexadécimal commande DLE EOT DLE ENQ ESC FF ESC SP ESC ! ESC # ESC $ ESC % ESC & ESC - ESC 2 ESC 3 ESC = ESC ? ESC @ ESC D ESC E ESC G ESC J... - Page 30 Code de Code hexadécimal commande ESC u ESC v ESC { GS ! 1D 21 GS $ 1D 24 1D 2A GS / 1D 2F GS : 1D 3A GS B 1D 42 GS H 1D 48 GS I 1D 49 GS L 1D 4C GS P...
- Page 31 INHALTSVERZEICHNIS 1. PAPIER EINLEGEN ... 29 1-1. Papier einlegen ... 29 1-2. Papier wechseln... 31 1-3. Papierstau ... 32 2. BEDIENFELD ... 33 2-1. Einschalten ... 33 2-2. Fehlermeldungen ... 34 3. BEHANDLUNG DES DRUCKERS ... 35 3-1. Vorsichtsmaßregeln zum Betrieb ... 35 3-2.
-
Page 32: Papier Einlegen
1-1. Papier einlegen Eine Papierrolle vorbereiten. Sicherstellen, daß die Einzugkante des Papier in geradem Winkel zur Einzugrichtung abgeschnitten ist. Roll paper Papierrolle Papierrollenhalter Paper roll holder 1. PAPIER EINLEGEN 1 Druckerabdeckung öffnen. 2 Wenn das Gerät eine Abschneider hat, diesen in Pfeilrichtung bewe- gen, bis die Sperre einrastet. - Page 33 4 Automatisches Einlegen Die Kante des Papiers in die Papier- schlitz einführen. Der Drucker er- kennt automatisch das Papier und schiebt es 15 - 20 cm vor. Wenn es weniger als 15 cm herausragt, die Vorschubtaste drücken, um es wei- ter zu bewegen.
-
Page 34: Papier Wechseln
1-2. Papier wechseln 5 Überschüssiges Papier an der Metallkante des Druckkopfes ab- reißen. 6 Den Abschneider schließen. (Die- ser Schritt ist nicht erforderlich, wenn kein Abschneider vorhanden ist.) 7 Die Druckerabdeckung schließen, und die On Line-Taste drücken. Die On Line-LED leuchtet auf. 1 Wenn der Papiervorrat-Sensor an- spricht und noch Papier auf der Rolle vorhanden ist, das Papier kurz vor... -
Page 35: Papierstau
1-3. Papierstau 1 Das Gerät ausschalten, und die Druckerabdeckung öffnen. 2 Wenn das Gerät einen Abschneider hat, diesen nach vorne ziehen, bis die Sperre einrastet. (Dieser Schritt ist nicht erforderlich, wenn kein Abschneider vorhanden ist.) 3 Die Papierrolle kurz vor der Papierschlitz abschneiden, und das Papier entnehmen. -
Page 36: Bedienfeld
2-1. Einschalten Bedienfeld Papier - Ja POWER ON LINE FEED 1 2 3 Papier - Nein POWER ON LINE FEED Wenn der Netzschalter eingeschaltet wird, leuchten die Betriebs-LED und die On Line-LED. Wenn kein Papier vorhanden ist, blinkt die Betriebs-LED in Interval- len von etwa einer Sekunde. -
Page 37: Fehlermeldungen
2-2. Fehlermeldungen 1) Automatische Fehlerbehebung (Betriebs-LED: Blinkt; On Line-LED: Ein) Fehlerbeschreibung Blinkmuster der Betriebs-LED Anormale Ca. 1 s Approx. 1 Sec Kopftemperatur 2) Behebbare Fehler (Betriebs-LED: Blinkt; On Line-LED: Aus) Fehlerbeschreibung Blinkmuster der Betriebs-LED Kein Papier Ca. 1 s Approx. 1 Sec Kopf angehoben Approx. -
Page 38: Behandlung Des Druckers
3. BEHANDLUNG DES DRUCKERS 3-1. Vorsichtsmaßregeln zum Betrieb 1 Die Lebensdauer des Thermo-Druckkopfs kann nicht garantiert werden, wenn anderes als das empfohlene Papier verwendet wird. Besonders wenn das verwendete Papier (Na+, K++, Cl-) enthält, tritt eine merkbare Verkürzung der Lebensdauer ein. 2 Niemals drucken, wenn Wasser oder Feuchtigkeit, wie etwa Kondensation, auf der Oberfläche des Druckkopfes vorhanden ist. -
Page 39: Zusammenfassung Der Befehle
4. ZUSAMMENFASSUNG DER BEFEHLE 4-1. Star-Betriebsart Befehle zum Ändern der Zeichendarstellung Hexadezimal- Steuerbefehle Codes <ESC> “R” n 1B 52 n <ESC> “/” “1” 1B 2F 31 <ESC> “/” <1> 1B 2F 01 <ESC> “/” “0” 1B 2F 30 <ESC> “/” <0> 1B 2F 00 <ESC>... - Page 40 Hexadezimal- Steuerbefehle Codes <ESC> “ E ” 1B 45 <ESC> “ G ” 1B 47 <ESC> “ F ” 1B 46 <ESC> “ H ” 1B 48 Befehle zum Festlegen der Seitengröße Hexadezimal- Steuerbefehle Codes <ESC> “C” n 1B 43 n <ESC>...
- Page 41 Befehle zum Druck von Rastergrafiken Hexadezimal- Steuerbefehle Codes <ESC> “K” n <0> 1B 4B n 00 m1 m2 m1 m2 ... <ESC> “L” n1 n2 1B 4C n1 n2 m1 m2 m1 m2 ... <ESC> “k” n <0> m1 ... 1B 6B n 00 m1 ...
- Page 42 Weitere Befehle Hexadezimal- Steuerbefehle Codes <CAN> <DC3> <DC1> <RS> <ESC> “#N, n1 n2 n3 n4” 1B 23 N 2C n1 n2 n3 n4 <LF> <NUL> 0A 00 <ESC> “@” 1B 40 <ENQ> <ESC> “?” <LF> <NUL> 1B 3F 0A 00 Funktion Letzte Zeile löschen und Drucker initialisieren Drucker deaktivieren...
-
Page 43: Esc/Pos Betrieb
4-2. ESC/POS Betrieb Steuerbefehle Hexadezimal-Codes DLE EOT DLE ENQ ESC FF ESC SP ESC ! ESC # ESC $ ESC % ESC & ESC - ESC 2 ESC 3 ESC = ESC ? ESC @ ESC D ESC E ESC G ESC J ESC L ESC R... - Page 44 Steuerbefehle Hexadezimal-Codes ESC u ESC v ESC { GS ! 1D 21 GS $ 1D 24 1D 2A GS / 1D 2F GS : 1D 3A GS B 1D 42 GS H 1D 48 GS I 1D 49 GS L 1D 4C GS P 1D 50...
- Page 45 1. CARICAMENTO DELLA CARTA ... 43 1-1. Caricamento della carta ... 43 1-2. Sostituzione della carta ... 45 1-3. Inceppamento della carta ... 46 2. PANNELLO DI CONTROLLO ... 47 2-1. Accensione ... 47 2-2. Errori ... 48 3. PRECAUZIONI ... 49 3-1.
-
Page 46: Caricamento Della Carta
1. CARICAMENTO DELLA CARTA 1-1. Caricamento della carta Preparare un rotolo di carta. Accertarsi che il bordo d’entrata della carta sia tagliato perpendicolarmente rispetto alla direzione di avanzamento. Rotolo di carta Roll paper Supporto del rotolo di carta Paper roll holder 1 Aprire il coperchio. - Page 47 4 Caricamento automatico Inserire il bordo della carta nella fessura. La carta è inserita corretta- mente quando fuoriesce dal mecca- nismo della stampante. Verificare che la carta sporga per circa 15-20 centimetri dal meccanismo della stampante. Se la carta sporge per meno di 15 centimetri, premere il tasto Feed per far avanzare più...
-
Page 48: Sostituzione Della Carta
1-2. Sostituzione della carta 5 Prendere il lembo della carta, pre- merlo contro la testina e tagliarlo. Fare attenzione a non ferirsi le mani o le dita sul bordo della taglierina automatica. 6 Chiudere la taglierina automatica (questa operazione non è necessaria se la taglierina automatica non è... -
Page 49: Inceppamento Della Carta
1-3. Inceppamento della carta 1 Spegnere la stampante ed aprire il coperchio. 2 Se nella stampante è installata la taglierina automatica, spostare la taglierina nella direzione indicata dalla freccia fino al suo arresto (questa operazione non è necessaria se la taglierina automatica non è presente). 3 Tagliarla il rotolo di carta immediatamente prima dell’uscita dalla fessura della carta e rimuovere la carta. -
Page 50: Pannello Di Controllo
2. PANNELLO DI CONTROLLO 2-1. Accensione Pannello comandi Carta caricata POWER ON LINE FEED 1 2 3 Carta non caricata POWER ON LINE FEED Quando si accende l’interruttore di alimentazione, le spie Power e On-Line si illuminano. Se non vi è carta, la spia Power lampeggerà ad intervalli di circa un secondo. - Page 51 2-2. Errori 1) Ripristino automatico (spia Power: lampeggiante; spia On-Line: accesa) Descrizione Frequenza di lampeggiamento spia Power dell’errore Temperatura della Circa 1 sec. Approx. 1 Sec testina troppo elevata 2) Errori risolvibili (spia Power: lampeggiante; spia On-Line: spenta) Descrizione Frequenza di lampeggiamento spia Power dell’errore La carta è...
-
Page 52: Precauzioni D'uso
3-1. Precauzioni d’uso 1 La durata prevista della testina di stampa termica non può essere garantita se si utilizza carta diversa da quella raccomandata. Se il tipo di carta utilizzato contiene (Na+, K++, Cl-), si avrà una sensibile diminuzione della durata dell’elemento termico della testina di stampa. -
Page 53: Elenco Dei Comandi
4. ELENCO DEI COMANDI 4-1. Modo Star Comandi di selezione caratteri Codici di controllo Codici esadecimali <ESC> “R” n 1B 52 n <ESC> “/” “1” 1B 2F 31 <ESC> “/” <1> 1B 2F 01 <ESC> “/” “0” 1B 2F 30 <ESC>... - Page 54 Codici di controllo Codici esadecimali <DC2> <ESC> “ E ” 1B 45 <ESC> “ G ” 1B 47 <ESC> “ F ” 1B 46 <ESC> “ H ” 1B 48 Comandi di impostazione del formato pagina Codici di controllo Codici esadecimali <ESC>...
- Page 55 Comandi di stampa di grafica a matrice di punti Codici di controllo Codici esadecimali <ESC> “K” n <0> 1B 4B n 00 m1 m2 m1 m2 ... <ESC> “L” n1 n2 1B 4C n1 n2 m1 m2 m1 m2 ... <ESC>...
- Page 56 Altri comandi Codici di controllo Codici esadecimali <CAN> <DC3> <DC1> <RS> <ESC> “#N, n1 n2 n3 n4” 1B 23 N 2C n1 n2 n3 n4 <LF> <NUL> 0A 00 <ESC> “@” 1B 40 <ENQ> <ESC> “?” <LF> <NUL> 1B 3F 0A 00 Funzione Annulla l’ultima riga e inizializza la stampante Deseleziona la stampante...
-
Page 57: Modo Esc/Pos
4-2. Modo ESC/POS Codice di controllo Codice esadecimale DLE EOT DLE ENQ ESC FF ESC SP ESC ! ESC # ESC $ ESC % ESC & ESC - ESC 2 ESC 3 ESC = ESC ? ESC @ ESC D ESC E ESC G ESC J... - Page 58 Codice di controllo Codice esadecimale ESC u ESC v ESC { GS ! 1D 21 GS $ 1D 24 1D 2A GS / 1D 2F GS : 1D 3A GS B 1D 42 GS H 1D 48 GS I 1D 49 GS L 1D 4C GS P...
-
Page 59: Appendix
Bar codes ... JAN, EAN, UPC, Code 39, ITF, Code 128, Character matrix ... 12 24 dots Interfaces ... RS-232C, Parallel Dimensions ... TSP212: 158(W) 234(D) Weight ... TSP212: 2.8kg Power ... (50/60Hz) AC120V, AC230V Power consumption ... Max. 43 W Avg. 19W (During continuous print- Operating environment ... - Page 60 Memory Switch Each memory switch is a 16-bit word stored in EEPROM. The printer is shipped with the factory setting which is made in accordance with its product type. For the detailed functions and the settings of the Memory switches, please refer to “Programmer’s Manual”.
-
Page 61: Paper Specifications
Paper Specifications Recommended paper-roll types: NIPPON PAPER INDUSTRIES Many paper types are available. Please use paper that meets the following criteria. 1. Paper type 2. Paper width 3. Paper thickness 4. Paper rolls 5. Print area TF50KS-E2C General high-sensitivity thermal paper General thermal paper: 67 m Internal diameter: ø12 mm... - Page 62 4 Push the two head open levers for the printer mechanism to the rear to release the set cover lock. Leave the head up lever towards the rear at this time.
- Page 63 Cautions * Never use sharp tools or abrasive materials, such as a knife or sandpaper, to clean the thermal element of the print head. Serious damage will result. * Always wait until the alcohol has completely dried before printing. * Always wait until the thermal element of the print head has cooled before cleaning.
- Page 64 MEMO P 1996.10 P 1996.12...
- Page 66 ELECTRONIC PRODUCTS DIVISION STAR MICRONICS CO., LTD. 536 Nanatsushinnya, Shimizu, Shizuoka, 424 Japan Tel: 0543-47-0112, Fax: 0543-48-5271 OVERSEAS SUBSIDIARY COMPANIES STAR MICRONICS AMERICA, INC. 70-D Ethel Road West, Piscataway, NJ 08854 U.S.A Tel: 908-572-9512, Fax: 908-572-5095 STAR MICRONICS DEUTSCHLAND GMBH Westerbachstraße 59, D-60489 Frankfurt, Germany...