
Related Manuals for ION 7KW32TAS


Summary of Contents for ION 7KW32TAS
- Page 1 Tech Home EV Charger Operation Manual This Manual Covers Models 7KW32TAS - 7KW Single Phase AC 32A 11KW32TAS - 11KW 3 Phase AC 3 x 16A 22KW32TAS - 22KW 3 Phase AC 3 x 32A Touch screen interface and pairing PIN: 888888...
-
Page 2: Table Of Contents
Content 1. Safety notices` ................1 2. Product Overview ................2 2.1.Parameters ................2 2.2. Brief Description ..............3 2.3. Appearance` ................3 2.4. Inside details ................4 3. Installation ..................5 3.1. xternal installation ............... 5 3.2. Internal connection..............6 4. - Page 3 Installation must be undertaken by a registered electrician. 1. introduction Thank you for purchasing the iON™ Home Electric Vehicle Charging Station for use with your electric vehicle. This User Guide shows how to use the Charging Dock with installation instructions for an electrician.
- Page 5 Charging 1. Connect charger: Take down the charging gun from the pile and insert it into the charging socket of the electric car. Please carefully check whether it is inserted in place to ensure reliable connection.
- Page 6 2. Use the swipe card enclosed with your charger to simply tap to start charging 3. Download the app to controller the charger compatible with Smart life APP or Tuya Smart APP. 4. 0. Wi-Fi Operations Open the smart home application and use the add device. Follow the instructions and add you home Wi-Fi by selecting the SSID and entering your Wi-Fi password.
- Page 7 4) Make sure that the emergency stop button is in the pop-up state. If it has been pressed, rotate the knob in the direction indicated by the knob arrow to return to the pop-up state. 4.2 Online version: 1) Download the "Smart Life" APP on mobile phone, as shown in the following figure. 2) After the download is complete, start the APP, select Add Device, and follow the operation instructions to add the new device, as shown in the following figure, then you can start charging and know the state of charge.
-
Page 8: Safety Notices
Please read the operation instruction carefully before operation in order to familiarize yourself with the correct operation of the equipment. WARNING The input and output voltage of this equipment is high voltage. This will endanger people's life & safety. Please strictly follow all warnings and operating instruction on machine and manual. -
Page 9: Product Overview
(8) KEEP AWAY FROM CHILDREN! (9) Forbidden to drive the vehicle during charging, only can charge when at static situation, ensure the charger plug is safely stowed before starting the car and driving. 2. Product Overview 2.1 Parameters Item Specification Name AC EV Charger APP/Wi-Fi/RFID -30°C~+55°C... -
Page 10: Brief Description
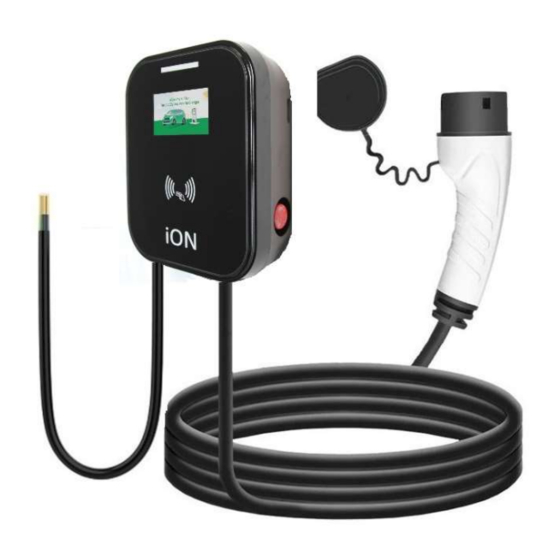
FUNCTION 2.2 Brief Description This product is outdoor single gun AC charging station, multi-function WIFI/APP/Bluetooth/RFID, which provides AC charging power to Type 2 EV’s, and provides a friendly easy to use computer interaction touch screen, card reader with APP controller. 2.3 Appearance:... -
Page 11: Installation
3 . Installation 3.1. External installation: Installation Method Accessories: Mounting plate: 1 piece Screw M5*10MM: 4pcs Screw M4*8MM: 3pcs Steps: ①4 holes by M5*10MM to fix mounting plate on the wall; ②Install 2 pieces M4*8MM screws at the side hole of the charger. ③Install 1 piece M4*8MM screws at the bottom hole of the charger... -
Page 12: Internal Connection
3.2. Internal connection (1) Normal connection (2) connection by External metering (3)Connection by Load Balancing ① by CT ② by electric meter ③ by Wireless (Under Developing) -
Page 13: Operations
Installation method (2)-no need mounting piece: Installation method (1) Accessories Accessories: Expansion screw M6 * 40MM: one piece Mounting plate: 1piece Expansion Screw M4*8MM: 2pcs Screw M5*10MM: 2pcs Expansion screws M8*80MM: 4pcs Installation method: Screw M4*8MM: 2pcs ①install one expansion screw M6 * 40MM, and Installation method: extend out of the wall for 3MM-4MM;... -
Page 14: Homepage Introduction
3) Ensure proper maintenance of equipment 4) Make sure that the emergency stop button is in the pop-up state. If it has been pressed, rotate the knob in the direction indicated by the knob arrow to return to the pop-up state. 4.2 Homepage Introduction 4.3 Remind gun insert interface It will stay at user insert gun page after charging pile start, but user not connect to charge. -
Page 15: System Settings
4.4 System Settings 4.4.1 Enter the password 888888 4.4.2 Three charging configurations (1) First, “basic parameter ”, users can set the charging pile number, installation time, rated current and load balancing current by themselves (2) Middle, “Communication data configuration”, User need input: Network port Protocol Wifi name... -
Page 16: Four Charging Mode Operation
(3) Third, “basic function configuration”: ①4 charging modes: Online version /single mode-Card /reservation mode/plug and charge ②Metering mode: internal meter/external meter ③Ground detection and PEN protection: use/prohibition 4.5 Four charging mode operation Select the required charging mode firstly, then connect the charging gun. Note: The charging mode will be set according to customer’s need before leaving the factory. -
Page 17: Single Mode-Charge By Card
4.5.2 S ingle mode-Charge by card: User connect the charging gun, the interface prompts to charge by card, please do it vvvv Charging Please swipe the card to end charging... -
Page 18: Reservation Charging Mode
.4.5.3 Reservation charging mode To set-up a time for auto start stop charging follow these steps. 1. enter the time you want to start charging in the scheduled charging screen 2. enter number of hours to charge for in reservation time screen Charge according to the power. - Page 19 Charge according to time. If you need to customize the charging time, you can manually enter the required charging time Scheduled charging. If you need to customize the charging time, you can manually enter the required charging time Click the charging mode you need, confirmed it, then you will be making an appointment for charging, and not draw the gun.
-
Page 20: Plug And Charge
4.5.4 Plug and charge Insert the charging gun, start to charge. 4.6 Failure page (1) The equipment will jump to failure page when occur failure, and remind the failure reason (2) The equipment occur failure then can’t charge, only can jump to normal charging interface till failure recovered, Find helpful support follow the support link from our website: www.iontech.ltd...