Table of Contents
Advertisement
Available languages
Available languages
Quick Links
Condizionatore d'aria Split Type
Manuale Utente
Serie Maestrale
CF-ABW09A IU
CF-ABW12A IU
NOTA IMPORTANTE:
Leggere attentamente questo manuale e il MANUALE DI
SICUREZZA (se presente) prima di installare o far
funzionare il vostro nuovo
condizionatore d'aria. Assicuratevi di conservare questo
manuale per riferimenti futuri.
Si prega di controllare i modelli applicabili, i dati tecnici
dati tecnici, F-GAS (se presente) e informazioni sul
produttore dal "Manuale del proprietario - Scheda del
prodotto " nell'imballaggio dell'unità esterna (solo per i
prodotti dell'Unione Europea) o nell'imballaggio dell'unità
interna (a seconda del modello).
Advertisement
Chapters
Table of Contents

Related Manuals for Midea Comfee CF-ABW09A IU


Summary of Contents for Midea Comfee CF-ABW09A IU
- Page 1 Condizionatore d'aria Split Type Manuale Utente Serie Maestrale CF-ABW09A IU CF-ABW12A IU NOTA IMPORTANTE: Leggere attentamente questo manuale e il MANUALE DI SICUREZZA (se presente) prima di installare o far funzionare il vostro nuovo condizionatore d'aria. Assicuratevi di conservare questo manuale per riferimenti futuri.
- Page 3 Sommario Manuale Utente O Precauzioni di sicurezza ..........04 1 Specifiche e funzionalità delle unità ..06 Sicurezza • • • • primo • • posto • • • • • • • □ □ • • F . unzio . n � mento Manuale (Telecomando non (=:)(=:) d1sponib1le/operativo) (=:)(=:)
- Page 5 Precauzioni di sicurezza Leggere queste indicazioni prima di utilizzare il prodotto La non corretta installazione del prodotto può essere causa di danni o lesioni. La gravità di potenziali danni e lesioni è classificata come segue: À Questo simbolo indica la possibilità di morte o lesioni gravi. Pericolo Questo simbolo indica la possibilità...
- Page 6 Lampada UV-C (Applicabile solo all'unità che contiene una lampada UV-C) Questo apparecchio contiene una lampada UV-C. Leggere le istruzioni di manutenzione prima di aprire l'apparecchio. 1. Non mettere in funzione le lampade UV-C al di fuori dell'apparecchio. 2. Gli apparecchi palesemente danneggiati non devono essere messi in funzione. 3.
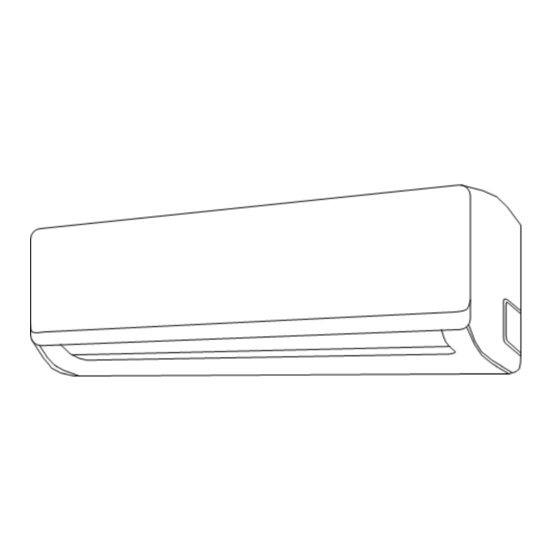
- Page 7 Funzionalità e specifiche delle unità Componenti delle unità Pannello anteriore Cavo di alimentazione (per alcune unità) Porta telecomando (per alcune unità) Telecomando Alette Filtro funzionale (sul retro del filtro principale - su alcune unità) Finestra del display L'unità è dotata di un rilevatore di illuminazione incorporato in grado di rilevare la luminosità...
- Page 8 Prestazioni ottimali Le prestazioni ottimali del condizionatore possono essere raggiunte entro le temperature di funzionamento indicate sotto. Se il prodotto viene utilizzato al di fuori di queste condizioni, alcune protezioni di sicurezza dell'unità potrebbero entrare in funzione e causare una riduzione di prestazioni o codici guasto.
- Page 9 Una guida sull'uso del telecomando a Modalità di funzionamento Sleep • The La funzione SLEEP viene utilizzata infrarossi non è inclusa in questo manuale. per diminuire il consumo di energia Non tutte le funzioni sono disponibili per il durante le ore notturne (quando non condizionatore d'aria, controllare sempre il sono necessarie le stesse impostazioni display interno e il telecomando dell'unità...
- Page 10 Orientamento verticale deflettore • All'avvio del prodotto il deflettore aria si posiziona nell'ultima posizione utilizzata. • Premere il pulsante SWING sul telecomando per modificare l'orientamento del deflettore. • Ad ogni pressione del pulsante SWING sul telecomando, deflettore modifica ° orientamento di circa 6 percorrendo tutto il campo di oscillazione.
- Page 11 Funzionamento Manuale (Telecomando non operativo) Utilizzo del prodotto senza telecomando Attenzione • La funzione TEST deve essere impiegata al Se il telecomando del unita è guasto o è stato primo avvio del prodotto e successivamente smarrito, Il prodotto può essere controllato manualmente tramite pulsante...
- Page 12 Cura e Manutenzione Pulizia del prodotto • Durante le operazioni di rimozione dei filtri non toccare le parti metalliche dell'unità interna ci sono • Per la pulizia del prodotto utilizzare soltanto un parti affilate che potrebbero provocare tagli o panno soffice e pulito. lesioni.
- Page 13 Pericolo In caso di inutilizzo prolungato Prima di eseguire qualunque operazione sui • In caso di lunghi periodi di inattività, operare come prodotti, arrestarli e disconnettere l'alimentazione segue: elettrica. • Durante le operazioni di rimozione dei filtri non ® toccare le parti metalliche dell'unità interna. All'interno di essa sono presenti parti affilate che potrebbero provocare tagli o lesioni.
- Page 14 Guida alla soluzione dei problemi Precauzioni di sicurezza Qualora una qualsiasi delle seguenti condizioni dovesse verificarsi spegnere l'unità immediatamente e disconnettere l'alimentazione elettrica. • I cavi di alimentazione si surriscaldano. • Si avvertono odori anormali odore di bruciato. • L'unità emette suoni acuti e anormali. •...
- Page 15 Smaltimento del prodotto a fine vita Pulizia del prodotto • Questo prodotto contiene refrigeranti HFC ad effetto serra da cui dipende il suo funzionamento, ed altre sostanze pericolose. • Quando questa unità deve essere smaltita al termine della sua vita operativa, le norme impongono speciali meccanismi di trattamento e di smaltimento dell'apparecchiatura ..
- Page 17 Midea Italia S.r.l. a socio unico Viale Luigi Bodio 29/37 20158 Milano (MI) -Italy-...
-
Page 19: Table Of Contents
SOMMARIO 1 Precauzioni di sicurezza 2 Accessori 3 Schema di installazione - Unità interna 4 Componenti dell'unità • • • • • • • • • • • • • • • • • 5 Installazione unità interna Selezionare la posizione di installazione Fissare la piastra di installazione alla parete Foro nella parete per il passaggio tubazioni Preparazione tubazioni refrigerante... - Page 20 SOMMARIO 7 Collegamento tubazioni del circuito frigorifero Nota sulla lunghezza delle tubazioni Istruzioni di collegamento delle tubazioni del refrigerante Tagliare le tubazioni Rimuovere le bave Flangiatura dell'estremità delle tubazioni Collegamento delle tubazioni Attenzione: Rischio di incendio • • • • • •...
-
Page 21: Precauzioni Di Sicurezza
1 Precauzioni di sicurezza Leggere le istruzioni sulla sicurezza prima dell'installazione La non corretta installazione dovuta alla mancata osservanza delle istruzioni può causare gravi danni o lesioni. La gravità del danno o delle lesioni è classificata come PERICOLO o ATTENZIONE. Questo simbolo indica che la mancata osservazione delle istruzioni può... -
Page 25: Accessori
2 Accessori Il prodotto è fornito con i seguenti accessori a corredo. Utilizzare le parti fornite e gli accessori per l'installazione. La non corretta installazione può causare scosse elettriche, incendio, oppure danneggiare il dispositivo. Descrizione Immagine Quantità Piastra di installazione �-�... - Page 26 2 Accessori Descrizione Immagine Quantità Manuale utente/Manuale di installazione/Manuale telecomando Pericolo L'unità deve essere conservata in ambienti ben ventilati il cui volume corrisponde a quello previsto per il funzionamento. Le unità che impiegano fluido refrigerante R32 devono essere conservate ed installate poste in esercizio in ambienti con superficie superiore a 4m •...
-
Page 27: Schema Di Installazione - Unità Interna
3 Schema installazione - Unità interna - 15cm �-- - -·--·--·--·--·--- - -·--·--·--·--·--·--·--·--·--·--- - .., . k Y . . , 12c� ..\ \�------/ ../ V "-ftf--- --- -�! L•••••••••••••••••••••••••••••••••••••••••••••••••••••• 2.3m Definizione della posizione sulla Selezione del luogo di parete installazione , ., I... - Page 28 3 Schema installazione - Unità interna - Tubazione Collegamenti elettrici Collegamento delle scarico tubazioni Coibentazione tubazioni Aggancio unità...
-
Page 29: Componenti Dell'unità
4 Componenti delle unità Piastra di installazione Pannello frontale ---11-- Deflettore aria Scarico condensa Filtri purificatori (Opzionali) -----Cavo di connessione Telecomando □ r-------- .. Alimentazione elettrica NOTA SULLE ILLUSTRAZIONI I disegni e le illustrazioni riportate nel presente manuale hanno carattere illustrativo. La forma, le dimensioni o l'aspetto delle unità... - Page 30 5 Installazione unità interna Installazione unità interna Non installare l'unità in queste condizioni: • Nei pressi di una fonte di calore, vapore o gas combustibile Prima di installare l'unità interna, fare • Nei pressi di oggetti combustibili, come riferimento all'etichetta sulla scatola del tende o tessuti prodotto.
- Page 31 5 Installazione unità interna Mantenere le seguenti distanze di rispetto dal prodotto ad eventuali ostacoli Oltre 150 mm Oltre 120 mm t----1 t----1 Oltre 120 mm \-\ �, -------�7--17 Oltre 2,3 m Montaggio della piastra Foro nella parete per passaggio installazione tubazioni La piastra di installazione è...
- Page 32 5 Installazione unità interna Parete Interno Esterno Dimensioni della piastra installazione Assicurarsi di avere spazio sufficiente per assemblare l'unità interna; gli schemi a destra mostrano la piastra di montaggio con le seguenti dimensioni annotate: • Larghezza della piastra di montaggio •...
- Page 33 5 Installazione unità interna Preparazione tubazioni refrigerante Utilizzare delle forbici per tagliare la guaina isolante per il lungo, in modo da esporre circa Le tubazioni del refrigerante si trovano 15cm di tubazioni del refrigerante. Questa all'interno di una guaina isolante fissata al operazione ha due scopi: retro dell'unità.
- Page 34 5 Installazione unità interne Collegare il tubo di scarico Alla consegna del prodotto, il tubo di scarico è collegato al lato sinistro dell'unità (vista posteriore). garantire drenaggio adeguato, collegare il tubo di scarico alla presa su uno dei due lati della vaschetta. Se necessario, prolungare la tubazione di scarico con un tubo di scarico di tipo adatto (Da reperire localmente).
- Page 35 5 Installazione unità interne Nota sui collegamenti elettrici • Tutti i cablaggi elettrici devono essere realizzati in conformità alle normative vigenti nel luogo di installazione e devono essere realizzati da personale qualificato. • Tutti i collegamenti elettrici devono essere eseguiti seguendo lo Schema dei collegamenti elettrici posizionato sui pannelli delle unità...
- Page 36 5 Installazione unità interne Cablaggio elettrico Le unità contengono fusibili di protezione per sovracorrenti varistori contro Il cavo di collegamento mette in comunicazione sovratensioni. le unità interna ed esterna. È necessario Utilizzare capicorda forchetta scegliere un cavo di dimensione corretta prima collegamento dei conduttori alle morsettiere.
- Page 37 5 Installazione unità interne Bendaggio dei cavi e tubi Posizionare le tubazioni del refrigerante, il tubo scarico cavo collegamento Prima di inserire le tubazioni, il tubo di scarico opportunamente avvolti nel reto dell'unità. e il cavo di collegamento attraverso il foro nella Agganciare la parte superiore dell'unità...
-
Page 38: Installazione Unità Esterna
6 Installazione unità esterna Selezione della posizione installazione Prima dell'installazione dell'unità esterna, è necessario scegliere una posizione appropriata. Le condizioni elencate di seguito sono utili per scegliere la posizione appropriata per l'unità. La posizione di installazione dell'unità esterna deve soddisfare queste condizioni. •... - Page 39 6 Installazione unità esterna AVVERTENZE SPECIALI prodotti reversibili, oltre raffreddamento operano anche in modalità CONDIZIONI CLIMATICHE ESTREME riscaldamento, necessitano di una condotta di scarico condensa per il drenaggio del liquido La direzione del vento non deve opporsi al prodotto a seguito dell'esecuzione dei cicli di flusso d'aria espulso dall'unità.
- Page 40 6 Installazione dell unità esterna Schemi dimensionali Di seguito le dimensioni della intera gamma di unità esterne disponibili. L'aspetto dei disegni a lato è puramente indicativo e non si riferisce agli specifici ◊ prodotti disponibili. -T-- 1--- -:...;...- ----, Dimensioni unità (W-H-D mm) (mm) (mm)
-
Page 41: Installazione Unità Interna
6 Installazione unità esterna In caso di installazione dell'unità esterna su La morsettiera per i collegamenti elettrici è staff e di sospensione, considerare quanto posizionata sotto il coperchio del quadro segue: elettrico dell'unità esterna, accessibile • Assicurarsi che la parete di ancoraggio sia asportando la vite di fissaggio. - Page 42 7 Collegamento tubazioni refrigerante -------------------------- ----------------------------------------------------- - ------1-----t NOTA: Lunghezza delle tubazioni del circuito frigorifero La lunghezza delle tubazioni del circuito frigorifero influenza le prestazioni e il consumo energetico dell'apparecchio. I dati di prestazione del prodotto indicati nelle specifiche tecniche, fanno riferimento a condizioni di prova in cui la lunghezza ed il dislivello delle tubazioni sono predefinite.
- Page 43 7 Collegamento tubazioni refrigerante Le tubazioni utilizzate per il collegamento delle Flangiatura delle tubazioni due parti del prodotto devono essere di tipologia e dimensioni idonee. Dalla corretta flangiatura delle tubazioni dipende la tenuta del circuito frigorifero e Taglio delle tubazioni l'affidabilità...
- Page 44 7 Collegamento tubazioni refrigerante Collegamento delle tubazioni Serrare il raccordo utilizzando due chiavi a forchetta contrapposte, fino alla coppia di (Unità Interna) torsione indicata in tabella. Durante il posizionamento delle tubazioni non schiacciare o deformare la tubazione. Raggio di curvatura Non realizzare sulle tubazioni curve con raggio inferiore a 100 mm Dimensione...
- Page 45 7 Collegamento tubazioni refrigerante Collegamento delle tubazioni Durante le operazioni di serraggio, utilizzare due chiavi a forchetta contrapposte. (Unità Esterna) La prima deve far ruotare il dado, la seconda deve tenere in posizione il corpo del rubinetto. Accedere alle valvole del refrigerante poste sull'unità...
- Page 46 8 Evacuazione Precauzioni Schema delle connessioni L'evacuazione serve a rimuovere aria ed Gruppo umidità dal circuito frigorifero prima di porre in manometrico circolazione il refrigerante. Ma noi metro presenza aria, umidità altri Lato Bassa contaminanti può causare malfunzionamenti e pressione Valvola Valvola danneggiare il prodotto.
- Page 47 8 Evacuazione Immissione del refrigerante Dopo che l'evacuazione del circuito è stata completata, isolare le tubazioni del gruppo manometrico. Successivamente aprire Raccordo valvole del refrigerante per immettere il fluido flangiato nel circuito Utilizzare una chiave a brugola di dimensione adeguata; iniziare questo processo dalla valvola lato liquido (La più...
- Page 48 9 Controllo perdite □□ □□□ Controlli e verifiche IL CABLAGGIO ELETRICO DEL PRODOTTO DEVE ESSERE REALIZZATO IN CONFORMITA' ALLE NORMATIVE IN VIGORE NEL LUOGO DI Al termine dell'installazione, assicurarsi che INSTALLAZIONE E DEVE ESSERE REALIZZATO DA tutti i cavi siano stati installati in conformità PERSONALE QUALIFICATO ED AUTORIZZATO.
- Page 49 10 Test di funzionamento Prima eseguire test funzionamento Eseguire il test di funzionamento solo dopo aver completato i seguenti passaggi: • Controlli elettrici di sicurezza: assicurarsi che il sistema elettrico dell'unità sia stato correttamente installato, che sia sicuro e che Tasto di comando manuale funzioni correttamente.
- Page 50 11 Smaltimento del prodotto • Questo prodotto contiene refrigeranti HFC ad effetto serra da cui dipende il suo funzionamento, ed altre sostanze pericolose. • Quando questa unità deve essere smaltita al termine della sua vita operativa, le norme impongono speciali meccanismi di trattamento e di smaltimento dell'apparecchiatura. •...
- Page 51 12 Informazioni sull'assistenza Questo prodotto contiene fluido refrigerante classificato come infiammabile. Prima svolgere qualunque riparazione su di un prodotto che contiene refrigeranti infiammabili, assicurarsi che siano verificate tutte le misure di sicurezza finalizzate a ridurre il rischio di incendio. Per le riparazioni che coinvolgono il circuito frigorifero le precauzioni elencate in seguito devono essere verificate prima di eseguire qualunque altra operazione.
- Page 52 11 Informazioni sull'assistenza Verifica dei componenti elettrici In caso di sostituzione dei componenti elettrici o elettronici utilizzare esclusivamente parti originali e con le corrette specifiche proposte dal produttore. Seguire sempre le indicazioni del produttore per la riparazione e la manutenzione del prodotto. In caso di dubbi consultare il produttore o un centro assistenza tecnica autorizzato per le informazioni del caso.
- Page 53 12 Informazioni sull'assistenza Tutte le parti e le componenti da utilizzare durante le riparazioni devono essere originali o autorizzate dal costruttore. ATTENZIONE L'utilizzo di alcuni sigillanti a base siliconica può impedire la corretta operatività di alcuni rilevatori di perdite di refrigerante. Riparazione dei componenti a sicurezza implicita Non applicare, in maniera permanente, nessun carico induttivo o capacitivo, tale da eccedere le specifiche predefinite in termini di tensione e corrente, ai circuiti del prodotto.
- Page 54 12 Informazioni sull'assistenza Il personale deve essere informato delle accortezze e delle cautele da adottare in caso di operazioni da svolgersi su circuiti frigoriferi che contengono refrigeranti infiammabili. Le verifiche sulla tenuta del circuito frigorifero devono essere eseguite utilizzando azoto anidro immesso nel sistema sino al raggiungimento delle pressioni di prova previste per l'apparecchiatura.
- Page 57 Midea Italia S.r.l. a socio unico Viale Luigi Bodio 29/37 20158 Milano (MI) -Italy-...
- Page 58 Manuale Telecomando RG10B1(D)BGEF Nota Importante Leggere con attenzione questo manuale prima di utilizzare il prodotto e conservarlo per la consultazione futura.
- Page 59 SOMMARIO • Specifiche del telecomando pag. 3 • Funzione dei pulsanti pag. 4 • Utilizzo del comando pag. 5 • Display LED pag. 6 • Utilizzo delle funzioni di base pag. 7 • Utilizzo delle funzioni avanzate pag.10...
- Page 60 Specifiche del telecomando Tipologia RG10(D) Alimentazione elettrica 3.0 VCC (2 batterie AAA/R03/LR03) Portata segnale 8m in campo libero Temperature di utilizzo -5°C / +60°C...
- Page 61 Funzione dei pulsanti Prima di iniziare ad utilizzare il vostro nuovo condizionatore ad aria, assicuratevi di familiarizzare con il suo telecomando. Quella che segue è una sintetica introduzione al telecomando stesso. Per le istruzioni su come utilizzare il condizionatore ad aria, fare riferimento alla sezione “Come usare le funzioni di base di questo manuale”.
- Page 62 Utilizzo del telecomando Se non si è sicuri delle funzionalità è possibile fare riferimento alla sezione funzioni di base e funzioni avanzate descrizione dettagliata del utilizzo delle funzionalità del condizionatore. NOTE • La presenza o l'aspetto dei vari pulsanti sul telecomando del prodotto può...
- Page 63 Indicatori dello schermo remoto Le informazioni sono visualizzate quando il telecomando è acceso. Visualizzazione della funzione Fresh (alcune unità) (Nessun display quando la funzione Fresh è attivata) Indicatore di trasmissione Display della modalità Sleep Si accende quando il Display della funzione Follow me telecomando invia il segnale Display della funzione di controllo wireless all'unità...
- Page 64 Utilizzo delle funzioni di base IMPOSTAZIONE TEMPERATURA L'intervallo di temperatura per le unità è 17°C - 30°C (62-86°F)/20-28°C. è possibile aumentare diminuire temperatura impostata ad intervalli di 1°C (1°F). MODALITÀ AUTOMATICA modalità AUTO prodotto decide automaticamente se raffreddare, ventilare o alla riscaldare l’ambiente,...
- Page 65 Utilizzo delle funzioni di base MODALITÀ DEUMIDIFICAZIONE 1. Premere MODE sino a selezionare DRY 2. Selezionare la temperatura desiderata con i pulsanti ˄ e ˅ 3. Avviare il prodotto In modalità DRY non è possibile regolare la velocità del ventilatore. MODALITÀ...
- Page 66 Utilizzo delle funzioni di base MODALITÀ RISCALDAMENTO (Disponibile solo su modelli reversibili) 1. Premere MODE sino a selezionare HEAT 2. Selezionare la temperatura desiderata con i pulsanti ˄ e ˅ 3. Regolare la velocità del ventilatore tra AUTO e 100% 4.
- Page 67 Utilizzo delle funzioni avanzate FUNZIONE TIMER Il prodotto dispone di due funzioni Timer: TIMER ON per attivazione differita del prodotto TIMER OFF per spegnimento differito del prodotto TIMER ON Questa funzione permette di attivare il prodotto dopo che è trascorso un periodo di tempo predeterminato.
- Page 68 Utilizzo delle funzioni avanzate FUNZIONE DI OSCILLAZIONE Premere il tasto Swing Swing Swing La feritoia di ventilazione orizzontale Mantenendo premuto questo tasto per più di 2 oscillerà su e giù automaticamente secondi, la funzione di oscillazione della feritoia premendo il tasto Swing. Premere di nuovo di ventilazione verticale si attiva.
- Page 69 FUNZIONE ECO Premere il tasto ECO (per alcune unità) Premere il tasto ECO per entrare nella modalità di risparmio energetico. Nota: Questa funzione è disponibile solo in modalità COOL (RAFFR). Funzionamento ECO: In modalità raffreddamento, premendo questo tasto, il telecomando regolerà la temperatura automaticamente a 24°C/75°F, velocità...
- Page 70 FUNZIONE SHORTCUT Premere il tasto SHORTCUT (alcune unità) Premere questo tasto quando il telecomando è acceso, il sistema automaticamente tornerà alle impostazioni precedenti, compresa la modalità di funzionamento, l'impostazione della temperatura, il livello di velocità della ventola e la funzione Sleep (se attivata). Se si tiene premuto per più...
- Page 71 FUNZIONE SET Premere il tasto SET per accedere all'impostazione delle funzioni, quindi premere il tasto SET o TEMP o TEMP per selezionare la funzione desiderata. Il simbolo selezionato lampeggerà sull'area del display, premere il tasto OK per confermare. Per annullare la funzione selezionata, basta eseguire le procedure appena descritte. Premere il tasto SET per scorrere le funzioni di funzionamento come segue: )...
- Page 72 Midea Italia S.r.l. a socio unico Viale Luigi Bodio 29/37 20158 Milano (MI) -Italy- Tel. 02 96193015 midea.com/it...
- Page 73 SPLIT-TYPE ROOM AIR CONDITIONER Owner’s Manual & Installation Manual CF-ABW09A IU CF-ABW12A IU CS001UI-AB(C) IMPORTANT NOTE: Read this manual and SAFETY MANUAL(if any) carefully before installing or operating your new air conditioning unit. Make sure to save this manual for future reference. Please check the applicable models, technical data, F-GAS(if any) and manufacturer information from the “Owner's Manual - Product Fiche ”...
- Page 74 Table of Contents Safety Precautions ................03 Owner’s Manual Unit Specifications and Features ............07 1. Indoor unit display.........................07 2. Operating temperature........................09 3. Other features ..........................10 4. Setting angle of airflow.........................11 5. Manual operation (without Remote)....................11 Care and Maintenance ..............12 Troubleshooting .................14...
- Page 75 Installation Manual Accessories ..................17 Installation Summary - Indoor Unit ..........18 Unit Parts ....................19 Indoor Unit Installation ..............20 1. Select installation location......................20 2. Attach mounting plate to wall......................20 3. Drill wall hole for connective piping....................21 4. Prepare refrigerant piping......................22 5. Connect drain hose........................22 6.
-
Page 76: Safety Precautions
Safety Precautions Read Safety Precautions Before Operation and Installation Incorrect installation due to ignoring instructions can cause serious damage or injury. The seriousness of potential damage or injuries is classified as either a WARNING or CAUTION. CAUTION WARNING This symbol indicates the possibility of This symbol indicates the possibility property damage or serious consequences. - Page 77 CAUTION Turn off the air conditioner and disconnect the power if you are not going to use it for a long time. • Turn off and unplug the unit during storms. • Make sure that water condensation can drain unhindered from the unit. •...
-
Page 78: Owner's Manual
Before opening doors and access panels bearing the ULTRAVIOLET RADIATION hazard symbol for the conducting USER MAINTENANCE, it is recommended to disconnect the power. 5. The UV-C lamp can not be cleaned, repaired and replaced. 6. UV-C BARRIERS bearing the ULTRAVIOLET RADIATION hazard symbol should not be removed. WARNING This appliance contains an UV emitter. - Page 79 WARNING for Using R32/R290 Refrigerant When flammable refrigerant are employed, appliance shall be stored in a well -ventilated area where the room size corresponds to the room area as specifiec for operation. For R32 frigerant models: Appliance shall be installed, operated and stored in a room with a floor area larger than 4m . For R290 refrigerant models, appliance shall be installed, operated and stored in a room with a floor area larger than: <=9000Btu/h units: 13m...
-
Page 80: Unit Specifications And Features
Unit Specifications and Features Indoor unit display NOTE: Different models have different front panel and display window. Not all the indicators describing below are available for the air conditioner you purchased. Please check the indoor display window of the unit you purchased. Illustrations in this manual are for explanatory purposes. - Page 81 Power Cable (Some Units ) Front Panel Remote Control Holder (Some Units) Remote Control Louver Functional Filter (On Back of Main Filter - Some Units) Display window The unit has a build-in light sensor to detect the ambient brightness. When the Display window light is turned off, the display will be off after 7 seconds, saving energy and offering...
-
Page 82: Operating Temperature
Operating temperature When your air conditioner is used outside of the following temperature ranges, certain safety protection features may activate and cause the unit to disable. Inverter Split Type FOR OUTDOOR UNITS COOL mode HEAT mode DRY mode WITH AUXILIARY 17°C - 32°C 0°C - 30°C 10°C - 32°C... -
Page 83: Other Features
Sleep Operation • A guide on using the infrared remote is not The SLEEP function is used to decrease included in this literature package. Not all energy use while you sleep (and don’t the functions are available for the air need the same temperature settings to conditioner, please check the indoor display stay comfortable). -
Page 84: Setting Angle Of Airflow
Setting Angle of Air Flow • Setting vertical angle of air flow While the unit is on, use the SWING/DIRECT button on remote control to set the direction (vertical angle) of airflow. Please refer to the Remote Control Manual for details. NOTE ON LOUVER ANGLES When using COOL or DRY mode, do not set NOTE: Do not move louver by hand. -
Page 85: Care And Maintenance
Care and Maintenance Rinse the filter with fresh water, then shake Cleaning Your Indoor Unit off excess water. BEFORE CLEANING OR Dry it in a cool, dry place, and refrain from exposing it to direct sunlight. MAINTENANCE When dry, re-clip the air freshening filter to ALWAYS TURN OFF YOUR AIR CONDITIONER the larger filter, then slide it back into the SYSTEM AND DISCONNECT ITS POWER SUPPLY... - Page 86 Maintenance – CAUTION Long Periods of Non-Use Before changing the filter or cleaning, • If you plan not to use your air conditioner for an turn off the unit and disconnect its power extended period of time, do the following: supply.
-
Page 87: Troubleshooting
Troubleshooting SAFETY PRECAUTIONS If ANY of the following conditions occurs, turn off your unit immediately! The power cord is damaged or abnormally warm • You smell a burning odor • The unit emits loud or abnormal sounds • A power fuse blows or the circuit breaker frequently trips •... - Page 88 Issue Possible Causes The outdoor unit The unit will make different sounds based on its current operating mode. makes noises Dust is emitted from The unit may accumulate dust during extended periods of non-use, which will be either the indoor or emitted when the unit is turned on.
- Page 89 Problem Possible Causes Solution Wait for the power to be restored Power failure The power is turned off Turn on the power The unit is not The fuse is burned out Replace the fuse working Replace batteries Remote control batteries are dead The Unit’s 3-minute protection Wait three minutes after restarting has been activated...
-
Page 90: Accessories
Accessories The air conditioning system comes with the following accessories. Use all of the installation parts and accessories to install the air conditioner. Improper installation may result in water leakage, electrical shock and fire, or cause the equipment to fail. The items are not included with the air conditioner must be purchased separately. -
Page 91: Installation Summary - Indoor Unit
Installation Summary - Indoor Unit 15cm (5.9in) 12cm 12cm (4.75in) (4.75in) 2.3m (90.55in) Attach Mounting Plate Select Installation Location Determine Wall Hole Position Drill Wall Hole Connect Piping Connect Wiring (not applicable for some locations in North America ) Wrap Piping and Cable Prepare Drain Hose (not applicable for some locations in North America) STEP... -
Page 92: Unit Parts
Unit Parts NOTE: The installation must be performed in accordance with the requirement of local and national standards. The installation may be slightly different in different areas. Air-break switch (1) (2) Functional Filter (On Back of Remote Controller Wall Mounting Plate Main Filter - Some Units) Remote controller Holder Front Panel... -
Page 93: Indoor Unit Installation
Indoor Unit Installation NOTE ABOUT WALL HOLE: Installation Instructions – Indoor unit If there is no fixed refrigerant piping: PRIOR TO INSTALLATION While choosing a location, be aware that you Before installing the indoor unit, refer to the should leave ample room for a wall hole (see label on the product box to make sure that the Drill wall hole for connective piping step) model number of the indoor unit matches the... -
Page 94: Drill Wall Hole For Connective Piping
Step 3: Drill wall hole for connective piping 1. Determine the location of the wall hole based on the position of the mounting plate. Refer to Mounting Plate Dimensions. 2. Using a 65mm (2.5in) or 90mm(3.54in) Type B Type A (depending on models )core drill, drill a 348.4mm (13.7in) hole in the wall. -
Page 95: Prepare Refrigerant Piping
Step 5: Connect drain hose Step 4: Prepare refrigerant piping By default, the drain hose is attached to the left- The refrigerant piping is inside an insulating hand side of unit (when you’re facing the back sleeve attached to the back of the unit. You of the unit). -
Page 96: Connect Signal And Power Cables
WARNING BEFORE PERFORMING ANY ELECTRICAL WORK, READ THESE BEFORE PERFORMING ANY ELECTRICAL REGULATIONS OR WIRING WORK, TURN OFF THE MAIN POWER TO THE SYSTEM. 1. All wiring must comply with local and national electrical codes, regulations and must be Step 6: Connect signal and power cables installed by a licensed electrician. -
Page 97: Wrap Piping And Cables
pen front panel of the indoor unit. 1. O NOTE ABOUT WIRING Using a screwdriver, open the wire box cover THE WIRING CONNECTION PROCESS MAY on the right side of the unit. This will reveal DIFFER SLIGHTLY BETWEEN UNITS AND the terminal block. -
Page 98: Mount Indoor Unit
Step 8: Mount indoor unit Connect drain hose and refrigerant piping (refer to Refrigerant Piping Connection If you installed new connective piping to the section of this manual for instructions). outdoor unit, do the following: Keep pipe connection point exposed to If you have already passed the refrigerant perform the leak test (refer to Electrical piping through the hole in the wall, proceed... -
Page 99: Outdoor Unit Installation
Outdoor Unit Installation Install the unit by following local codes and install unit in the following locations: DO NOT regulations , there may be differ slightly between different regions. Near an obstacle that will block air inlets and outlets Near a public street, crowded areas, or where noise from the unit will disturb others Near animals or plants that will be harmed by hot air discharge... -
Page 100: Install Drain Joint
Step 3: Anchor outdoor unit Step 2: Install drain joint(Heat pump unit only) The outdoor unit can be anchored to the Before bolting the outdoor unit in place, you must ground or to a wall-mounted bracket with install the drain joint at the bottom of the unit. Note that there are two different types of drain bolt(M10). - Page 101 Outdoor Unit Dimensions (mm) Mounting Dimensions W x H x D Distance A (mm) Distance B (mm) 681x434x285 (26.8”x 17.1”x 11.2”) 460 (18.1”) 292 (11.5”) 700x550x270 (27.5”x 21.6”x 10.6”) 450 (17.7”) 260 (10.2”) 450 (17.7”) 260 (10.2”) 700x550x275 (27.5”x 21.6”x 10.8”) 720x495x270 (28.3”x 19.5”x 10.6”) 255 (10.0”) 452 (17.8”)
-
Page 102: Connect Signal And Power Cables
Step 4: Connect signal and power cables 7. Insulate unused wires with PVC electrical tape. Arrange them so that they do not touch any The outside unit’s terminal block is protected by electrical or metal parts. an electrical wiring cover on the side of the unit. 8. -
Page 103: Refrigerant Piping Connection
Refrigerant Piping Connection When connecting refrigerant piping, do not let substances or gases other than the specified refrigerant enter the unit. The presence of other gases or substances will lower the unit’s capacity, and can cause abnormally high pressure in the refrigeration cycle. This can cause explosion and injury. -
Page 104: Remove Burrs
PIPING EXTENSION BEYOND FLARE FORM Step 2: Remove burrs Burrs can affect the air-tight seal of refrigerant Outer Diameter of A (mm) piping connection. They must be completely Max. Pipe (mm) Min. Max. removed. Ø 6.35 (Ø 0.25”) 0.7 (0.0275”) 1.3 (0.05”) Hold the pipe at a downward angle to prevent Ø... - Page 105 Tighten the flare nut as tightly as possible by hand. Using a spanner, grip the nut on the unit tubing. While firmly gripping the nut on the unit tubing, use a torque wrench to tighten the flare nut according to the torque values in the Torque Requirements table below.
-
Page 106: Air Evacuation
Air Evacuation If there is a change in system pressure, refer Preparations and Precautions to Gas Leak Check section for information Air and foreign matter in the refrigerant circuit can on how to check for leaks. If there is no cause abnormal rises in pressure, which can damage change in system pressure, unscrew the cap from the packed valve (high pressure valve). -
Page 107: Note On Adding Refrigerant
Note on Adding Refrigerant Some systems require additional charging depending on pipe lengths. The standard pipe length varies according to local regulations. For example, in North America, the standard pipe length is 7.5m (25’). In other areas, the standard pipe length is 5m (16‘). The refrigerant should be charged from the service port on the outdoor unit’s low pressure valve. -
Page 108: Electrical And Gas Leak Checks
Electrical and Gas Leak Checks Before Test Run WARNING – RISK OF ELECTRIC SHOCK Only perform test run after you have completed ALL WIRING MUST COMPLY WITH LOCAL the following steps: AND NATIONAL ELECTRICAL CODES, Electrical Safety Checks – Confirm that •... -
Page 109: Test Run
Test Run DOUBLE-CHECK PIPE CONNECTIONS Test Run Instructions During operation, the pressure of the You should perform the Test Run for at least 30 refrigerant circuit will increase. This may minutes. reveal leaks that were not present during your Connect power to the unit. initial leak check. -
Page 110: Packing And Unpacking The Unit
Packing and unpacking the unit Instructions for packing and unpacking the unit: Unpacking: Indoor unit: 1.Cut the sealing tape on the carton with a knife, one cut on the left, one cut in the middle and one cut on the right. 2.Use the vice to take out the sealing nails on the top of the carton. - Page 111 Impedance Information (Applicable to following models only) This appliance MST2ABD-18CR-QB9 can be connected only to a supply with system impedance no more than 0.163 . In case necessary, please consult your supply authority for system impedance information. This appliance MST2ABE-22CR-QB9 can be connected only to a supply with system impedance no more than 0.186 .
- Page 112 The design and specifications are subject to change without prior notice for product improvement. Consult with the sales agency or manufacturer for details. Any updates to the manual will be uploaded to the service website, please check for the latest version. CS001UI-AB(C)
- Page 113 SAFETY MANUAL IMPORTANT NOTE: Read this manual carefully before installing or operating your new air conditioning unit. Make sure to save this manual for future reference.
- Page 114 Safety Precautions Read Safety Precautions Before Operation and Installation Incorrect installation due to ignoring instructions can cause serious damage or injury. WARNING Installation (Space) - That the installation of pipe-work shall be kept to a minimum. - That pipe-work shall be protected from physical damage. - Where refrigerant pipes shall be compliance with national gas regulations.
- Page 115 The maximun charge in a room shall be in accordance with the following: (5/4) = 2,5 x (LFL) x h x (A) or the required minumum floor area to install an applicance with refrigerant charge M(kg) shall be in accordance with following: = (M/(2,5 x (LFL) x h )) (5/4)
- Page 116 NOTE 1 This formula cannot be used for refrigerants lighter than 42 kg/kmol. NOTE 2 Some examples of the results of the calculations according to the above formula are given in Tables 1-1 and 1-2. NOTE 3 For factory sealed appliances, the nameplate on the unit itself marked the refrigerant charge can be used to calculate A NOTE 4 For field charged products, calculation of A can be based on the installed refrigerant...
- Page 117 Information Servicing 1. Checks to the area Prior to beginning work on systems containing flammable refrigerants, safety checks are necessary to ensure that the risk of ignition is minimised. For repair to the refrigerating system, the following precautions shall be complied with prior to conducting work on the system. 2.
- Page 118 8. Checks to the refrigeration equipment Where electrical components are being changed, they shall be fit for the purpose and to the correct specification. At all times the manufacturer s maintenance and service guidelines shall be followed. If in doubt consult the manufacturer s technical department for assistance. The following checks shall be applied to installations using flammable refrigerants: the charge size is in accordance with the room size within which the refrigerant containing ...
- Page 119 11. Repair to intrinsically safe components Do not apply any permanent inductive or capacitance loads to the circuit without ensuring that this will not exceed the permissible voltage and current permitted for the equipment in use. Intrinscially safe components are the only types that can be worked on while live in the presence of a flammable atmosphere.
- Page 120 The refrigerant charge shall be recovered into the correct recovery cylinders. For appliances containing FLAMMBLE REFRIGERNATS, the system shall be “flushed” with OFN to render the unit safe. This process may need to be repeated several times. Compressed air or oxygen shall not be used for puring refrigerant systems.
- Page 121 d) Pump down refrigerant system, if possible. e) If a vacuum is not possible, make a manifold so that refrigerant can be removed from various parts of the system. f) Make sure that cylinder is situated on the scales before recovery takes place. g) Start the recovery machine and operate in accordance with manufacturer s instructions.
- Page 122 20. Venting of HC Refrigerant (R290) Venting may be carried out as an alternative to recovering the refrigerant. Because HC refrigerants have no ODP and negligible GWP, under certain circumstances it may be considered acceptable to vent the refrigerant. However, if this is to be considered, it should be done in accordance with the relevant national rules or regulations, if they permit.
- Page 123 21. Transportation, marking and storage for units 1. Transport of equipment containing flammable refrigerants Compliance with the transport regulations 2. Marking of equipment using signs Compliance with local regulations 3. Disposal of equipment using flammable refrigerants Compliance with national regulations 4.
- Page 124 The design and specifications are subject to change without prior notice for product improvement. Consult with the sales agency or manufacturer for details. Any updates to the manual will be uploaded to the service website, please check for the latest version. SAFETY MANUAL-R32(R290)-B...
- Page 125 REMOTE CONTROLLER OWNER’S MANUAL IMPORTANT NOTE: Thank you for purchasing our air conditioner. Please read this manual carefully before operating your new air conditioning unit. Make sure to save this manual for future reference.
- Page 126 Table of Contents Remote Controller Specifications ............02 Handling the Remote Controller ............03 Buttons and Functions ..............04 Remote Screen Indicators ..............07 How to Use Basic Functions ............08 How to Use Advanced Functions ..........11...
-
Page 127: Remote Controller Specifications
Remote Controller Specifications RG10B(D)/BGEF, RG10B(D1)/BGEFU1, RG10B1(D)/BGEF, RG10B2(D)/BGCEF, RG10B10(D)/BGEF, RG10A4(D)/BGEF, RG10A4(D1)/BGEFU1, RG10A5(D)/BGEF, RG10A5(D1)/BGEFU1, RG10A5(D1)/BGCEFU1, RG10A5(D)/BGCEF, RG10A11(D)/BGEF, 3.0V( Dry batteries R03/LR03×2) -5°C~60°C(23°F~140°F) Quick Start Guide AUTO COOL HEAT FIT BATTERIES SELECT MODE SELECT TEMPERATURE SELECT FAN SPEED PRESS POWER BUTTON POINT REMOTE TOWARD UNIT NOT SURE WHAT A FUNCTION DOES? Refer to the How to Use Basic Functions and How to Use Advanced Functions sections of this manual for a detailed description of how to use your air conditioner. -
Page 128: Handling The Remote Controller
Handling the Remote Controller Inserting and Replacing Batteries NOTES FOR USING REMOTE CONTROL Your air conditioning unit may come with two The device could comply with the local national batteries(some units). Put the batteries in the regulations. remote control before use. In Canada, it should comply with •... -
Page 129: Buttons And Functions
Buttons and Functions Before you begin using your new air conditioner, make sure to familiarize yourself with its remote control. The following is a brief introduction to the remote control itself. For instructions on how to operate your air conditioner, refer to the How to Use Basic Functions section of this manual. - Page 130 ON/OFF MODE Turns the unit on or off. Scrolls through operation modes as follows: AUTO COOL TEMP HEAT FAN Increases temperate in DRY 1°C increments. NOTE: HEAT mode is not supported Max. temperature is by the cooling only appliance. 30°C.
- Page 131 ON/OFF MODE Turns the unit on or off. Scrolls through operation modes as follows: AUTO COOL TEMP DRY HEAT FAN Increases temperature in 1 C(1 F) increments. NOTE: HEAT mode is not supported Max. temperatur e is by the cooling only appliance.
-
Page 132: Remote Screen Indicators
Remote Screen Indicators Information are displayed when the remote controller is power up. Fresh feature display(some units) (No displays when Fresh feature is activated) Sleep mode display Follow me feature display Wireless control feature display Transmission Indicator Low battery detection display(If flashes) Lights up when remote sends signal to indoor MODE display... -
Page 133: How To Use Basic Functions
How to Use Basic Functions Basic operation ATTENTION! Before operation, please ensure the unit is plugged in and power is available. SETTING TEMPERATURE The operating temperature range for units is 17-30°C (62-86°F)/20-28 C. You can increase or decrease the set temperature in 1°C (1°F) increments. - Page 134 DRY Mode (dehumidifying) 1. Press the MODE button to select DRY. 2. Set your desired temperature using the TEMP or TEMP button. 3. Press the ON/OFF button to start the unit. NOTE: FAN SPEED cannot be changed in DRY mode. FAN Mode Press the MODE button to select FAN mode.
- Page 135 Setting the TIMER TIMER ON/OFF - Set the amount of time after which the unit will automatically turn on/off. TIMER ON setting Press TIMER button to initiate Press Temp. up or down button for Point remote to unit and wait 1sec, the ON time sequence.
-
Page 136: How To Use Advanced Functions
How to Use Advanced Functions Swing function Press Swing button Swing Swing The horizontal louver will swing up and down Keep pressing this button more than 2 seconds, automatically when pressing Swing button. the vertical louver swing function is activated. Press again to make it stop. - Page 137 ECO function Press ECO button(some units) Press ECO button to enter the energy efficient mode. Note:This function is only available under COOL mode. ECO operation: Under cooling mode, press this button, the remote controller will adjust the temperature automatically to 24 C/75 F, fan speed of Auto to save energy (only when the set temperature is less than 24 C/75 F).
- Page 138 SHORTCUT function Press SHORTCUT button(some units) Push this button when remote controller is on, the system will automatically revert back to the previous settings including operating mode, setting temperature, fan speed level and sleep feature (if activated). If pushing more than 2 seconds, the system will automatically restore the current operation settings including operating mode, setting temperature, fan speed level and sleep feature (if activated ).
- Page 139 SET function Press the SET button to enter the function setting, then press SET button or TEMP or TEMP button to select the desired function. The selected symbol will flash on the display area, press the OK button to confirm. To cancel the selected function, just perform the same procedures as above.
- Page 140 The design and specifications are subject to change without prior notice for product improvement. Consult with the sales agency or manufacturer for details. CR275-RG10(D) Midea Italia S.r.l. a socio unico Viale Luigi Bodio 29/37 20158 Milano (MI) -Italy-...