Table of Contents
Advertisement
Quick Links
Advertisement
Table of Contents

Related Manuals for Braun KF 90 Series


Summary of Contents for Braun KF 90 Series
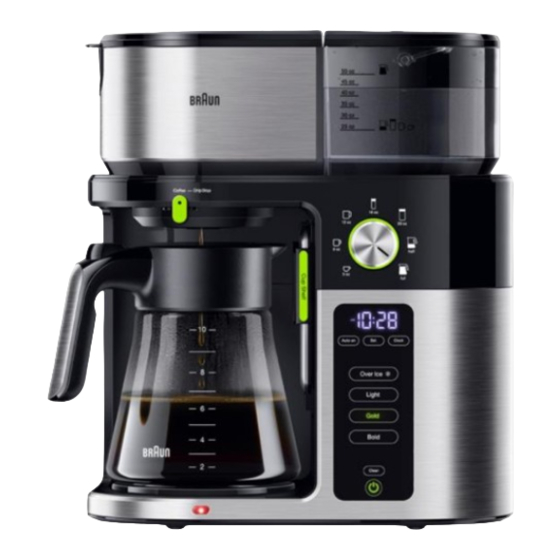
- Page 1 BRAUN Coffee Maker KF 90xx / 91xx...
-
Page 2: Table Of Contents
Contents Introduction Technical Data Key Features Clock Setting Water Hardness Level Altitude Setting Stength Setting Service Mode Materials Wiring Diagram Hydraulic Diagram Troubleshooting... -
Page 3: Introduction
Introduction This document is aimed to provide useful technical informations about BRAUN appliances to authorized engineers. Is always required to operators, to follow these preliminary steps before proceed any other operation: 1. Switch OFF the Coffee Maker before working! Caution! CM could be hot! 2. -
Page 4: Technical Data
Technical data KF 90xx (Glass) Power 1.750 Auto shut off Product dimensions (LxWxH) 33 x 18 x 38 Product weight KF 91xx (Glass) Power 1.750 Auto shut off Product dimensions (LxWxH) 33 x 18 x 38 Product weight... -
Page 5: Key Features
Key Features KF 90xx BrewChoice Plus system MultiServe Dial ExactBrew provides great tasting coffee in includes 7 brewing sizes from Precise water flow to provide any size selected including over single cup to full carafe. you with the exact amount of ice coffee. - Page 6 Key Features KF 91xx BrewChoice Plus system MultiServe Dial ExactBrew provides great tasting coffee in includes 7 brewing sizes from Precise water flow to provide any size selected including over single cup to full carafe. you with the exact amount of ice coffee.
-
Page 7: Clock Setting
Clock Setting When the coffee maker is plugged in the first time, or when the power is restored after an interruption, the display starts flashing 2:00 AM and you hear an acoustic signal. - Page 8 Clock Setting 1. Switch on => press and hold CLOCK for 2 seconds. 2. Press and hold SET to scroll through the hours. Release it once the desired hour is displayed. 3. To set the minutes, press CLOCK. The minutes start flashing. 4.
-
Page 9: Water Hardness Level
Water Hardness Level Set the water hardness level on the coffee maker to the water hardness level for your local area. 1. Switch on the appliance and press and hold Calc for 2 seconds. 2. The default setting (h3) is flashing. 3. - Page 10 Water Hardness Level The flowmeter counts basically the brewed liter. The settings are: Setting Liters Calciumcarbonat [mmol/l] less than 1,5 1,5 till 2,5 more than 2,5 After brewing the declared liter, the Clean button will glow.
-
Page 11: Altitude Setting
Altitude Setting To ensure your coffee maker works properly at higher altitudes, enable the altitude setting. This setting avoids that the coffee maker develops steam rather than boiling at the standard boiling Temperature (100°C/212°F) = Parameter A1. 1. Switch on the appliance. Press and hold SET (yellow sing) for 2 seconds. - Page 12 Altitude Setting 3. Press SET to scroll through the following options: For better understanding: City Altitude (meter) Setting Germany - Berlin France - Gavarnie 1.365 Peru - Lamay 2.940 Norway - Rauland 4. Press and hold SET for 2 seconds to save the desired altitude.
- Page 13 Strength Setting The differece for the three buttons are the Brewing temperature-target and the pump speed. If the temperature and the pump-speed will change, the coffee flavor extraction is different too. During the brewing, the heatplate temperature is around 80°C. While during keep warm, the temperature is 110°C.
- Page 14 Strength Setting The Over Ice function is a feature for a coffee brew with Ice Cubes in the carafe. During the Over-Ice selection, the Heat-Plate shutted off Each size could be used. For Full Carafe, only a Half Carafe will be filled, due to Overfilling-Risk because of the Ice Cube volume.
-
Page 15: Service Mode
Service Mode To switch in to the service mode: Lever to Drip Stop Selector Full Carafe Press Timer + Strong button for 3 sec Use the Set button to switch LED indication help to understand which value is showen. - Page 16 Service Mode Data Display Show LED on Number of total cycles Hexadecimal value «Over Ice» Consumed water quantity Hexadecimal liter «Mild» Water Hardness Setting H1 or H2 or H3 «Gold» Descaling cycles perfomed Hexadecimal value «Strong» Cycles from the last descaling Hexadecimal value «Strong + Calc»...
-
Page 17: Materials
Materials Material fron the main foodcontaced parts Outlet Waterfilter Mesh Showerhead Carafe Cover / Lid Spoon Housing Water Tank Silicone Tubes SGCC Heater... -
Page 18: Wiring Diagram
Wiring Diagram KF 9172... - Page 19 Wiring Diagram KF 9070...
-
Page 20: Hydraulic Diagram
Hydraulic Diagram... -
Page 21: Troubleshooting
Diagnostic & Troubleshooting Problem Cause Solution Display does not show a time The appliance is unplugged Plug unit in • Initial operation Display flashes “2:00 AM” Set clock • There was a power outage • AUTO ON timer has not been set •... - Page 22 Diagnostic & Troubleshooting Problem Cause Solution Remove the insert from the middle of The coffee maker is overflowing The coffee flow through the lid is blocked the lid Rinse the lid properly under running water The filter basket spring popped out during Reattach the spring to the filter basket cleaning There are coffee grounds at the bottom...
- Page 23 Diagnostic & Troubleshooting For each of the following Error-Code, please unplug the appliance, wait 5 minutes and plug In again. If a solution is written, try to proceed.
- Page 24 Diagnostic & Troubleshooting Problem / Errorcode Cause Solution / Note E 21 Tank Water level error Fill water in the reservoir. Switch on and off If the total amount of brewed Coffee or Water is aigain. less than ¼ of selected quantity (read from flux meter) E 02 Timeout error...
- Page 25 Diagnostic & Troubleshooting Problem / Errorcode Cause Solution / Note E 09 Perform a decalcification. FLOW temperature error Flow target temperature not reach E 10 PLATE NTC open status Plate NTC is open or disconnected (resistance higher than…) E 11 PLATE NTC short status Plate NTC is in short circuit (resistance lower than…)
- Page 26 Diagnostic & Troubleshooting Problem / Errorcode Cause Solution / Note E 16 BOILER NTC overheat status Perform a decalcification. Boiler NTC is in over-temperature status ( max temp defined value is pass) E 17 BOILER temperature error Perform a decalcification. Boiler doesn`t reach temperature at pre heat E 18 BOILER over-temperature...