Craftsman 247.29934 Operator's Manual
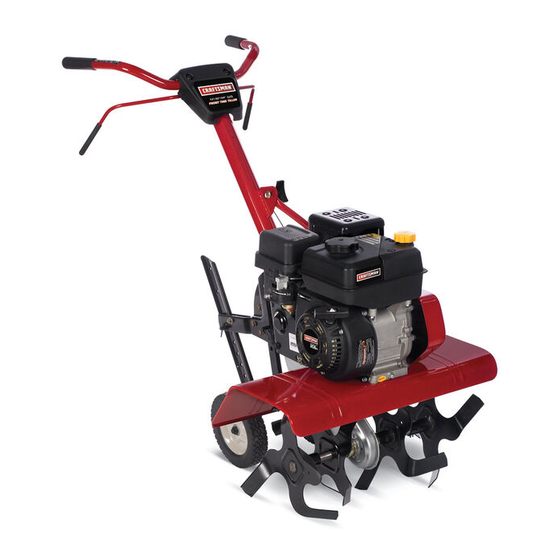
208cc engine front tine tiller
Hide thumbs
Also See for 247.29934:
- Operator's manual (68 pages) ,
- Operator's manual (64 pages) ,
- Operator's manual (68 pages)
Table of Contents
Advertisement
Available languages
Available languages
Quick Links
Operator's Manual
208cc Engine
Front Tine Tiller
Model No. 247.29934
CAUTION: Before using
this product, read this
manual and follow all
safety rules and operating
instructions.
Sears Brands Management Corporation, Hoffman Estates, IL 60179, U.S.A.
®
Visit our web site: www.craftsman.com
• SAFETY
• ASSEMBLY
• OPERATION
• MAINTENANCE
• PARTS LIST
• ESPAÑOL
FORM NO. 769-05511
11/23/2009
Advertisement
Table of Contents

Related Manuals for Craftsman 247.29934


Summary of Contents for Craftsman 247.29934
- Page 1 CAUTION: Before using • MAINTENANCE this product, read this • PARTS LIST manual and follow all • ESPAÑOL safety rules and operating instructions. Sears Brands Management Corporation, Hoffman Estates, IL 60179, U.S.A. Visit our web site: www.craftsman.com FORM NO. 769-05511 11/23/2009...
-
Page 2: Table Of Contents
CRAFTSMAN FULL WARRANTY When operated and maintained according to all supplied instructions, if this Craftsman product fails due to a defect in material or workmanship within two years from the date or purchase, call 1-800-4-MY-HOME® to arrange for free repair (or replacement if repair proves impossible). - Page 3 SAFETY INSTRUCTIONS Warning Danger This machine was built to be operated according to the safe opera- This symbol points out important safety instructions which, if not tion practices in this manual. As with any type of power equipment, followed, could endanger the personal safety and/or property of carelessness or error on the part of the operator can result in yourself and others.
-
Page 4: Safe Operation Practices
SAFETY INSTRUCTIONS Safe Handling of Gasoline: • Look down and behind and use care when in reverse or pulling machine towards you. To avoid personal injury or property damage use extreme care in handling gasoline. Gasoline is extremely flammable and the vapors are •... - Page 5 SAFETY INSTRUCTIONS noTice regarDing eMiSSionS • Do not change the engine governor settings or over-speed the engine. The governor controls the maximum safe operating speed Engines which are certified to comply with California and federal of engine. EPA emission regulations for SORE (Small Off Road Equipment) are •...
- Page 6 SAFETY INSTRUCTIONS SafeTy SyMbolS This page depicts and describes safety symbols that may appear on this product. Read, understand, and follow all instructions on the machine before attempting to assemble and operate. Symbol Description READ THE OPERATOR’S MANUAL(S) Read, understand, and follow all instructions in the manual(s) before attempting to assemble and operate WARNING—...
-
Page 7: Safety Labels
SAFETY LABELS... -
Page 8: Assembly
ASSEMBLY IMPORTANT: This unit is shipped without gasoline or oil in the engine. Be certain to service engine with gasoline and oil as instructed in the Operation section of this manual before operating your machine. NOTE: Reference to right and left hand side of the Tiller is observed from the operating position. - Page 9 ASSEMBLY Tighten the bolt securely after securing the handle brace. See Figure 4. Locate the carriage bolt, bell washer and hand knob packed with your tiller. tail Bracket Insert the carriage bolt through the welded bracket on the handle, bell washer, handle brace and into the hand knob. See Figure 4. Select one of the three handle height positions (three notches in the welded handle bracket) and tighten the hand knob to secure Clevis...
- Page 10 ASSEMBLY aDjUSTMenTS Warning Prior to operating your tiller, carefully read and follow all instructions below. Perform all adjustments to verify your tiller is operating safely and properly. Hex nut Check the adjustment of the wheels: The tiller is shipped with the wheels adjusted so that the machine sits level.
-
Page 11: Operation
STOP position. Meets anSi Safety Standards Craftsman Tillers conform to the safety standard of the American National Standards Institute (ANSI). - Page 12 OPERATION air filTer DePTh STake The air filter is a device on the engine air intake that prevents dust and The depth stake controls the tilling depth. See Figure 12. dirt entering the engine. See Figure 12. hanDlebar heighT aDjUSTMenT MUffler The handle height may be adjusted.
- Page 13 OPERATION gaS anD oil fill-UP caUTion (one bottle shipped with unit) Alcohol blended fuels (called gasohol or using ethanol or methanol) First Time Use can attract moisture which leads to separation and formation of acids Remove oil fill dipstick. during storage. Acidic gas can damage the fuel system of an engine With the tiller on level ground, use a funnel to empty entire while in storage.
- Page 14 OPERATION Pull the rope with a rapid, continuous, full arm stroke. Keep a firm grip on the starter handle. Let the rope rewind slowly. Repeat, if necessary, until engine starts. When engine starts, move choke control gradually toward the RUN position..
- Page 15 OPERATION aDjUSTing The hanDle heighT The handle should be adjusted so that when the tiller is digging 3-4” into the soil, the handle falls to about waste-high. To adjust handle, simply loosen the handle knob, move the handle to the desired height and retighten the handle knob.
- Page 16 OPERATION choosing the correct Tine Speed With experience, you will find the tilling depth and tilling speed combination that is best for your garden. Set the engine throttle lever at a speed to give the engine adequate power and yet allow it to operate at the slowest possible speed until you have achieved the maximum tilling depth you desire.
- Page 17 OPERATION Terrace gardening To create a terrace, start at the top of the slope and work down Go back and forth across the first row. See Figure 22. Each succeeding lower terrace is started by walking below the UPhill terrace you are preparing. For added stability of the tiller, always keep the uphill wheel in the soft, newly tilled soil.
-
Page 18: Service And Maintenance
SERVICE AND MAINTENANCE MainTenance ScheDUle Warning Follow the maintenance schedule given below. This chart describes Before performing any type of maintenance/service, disengage all service guidelines only. Use the Service Log column to keep track of controls and stop the engine. Wait until all moving parts have come to completed maintenance tasks. - Page 19 SERVICE AND MAINTENANCE Remove the spark plug boot and use a spark plug wrench to remove the plug. See Figure 23. Visually inspect the spark plug. Discard the spark plug if there is apparent wear, or if the insulator is cracked or chipped. Clean the spark plug with a wire brush if it is to be reused.
- Page 20 SERVICE AND MAINTENANCE check engine oil Check oil before each use. Stop engine and wait several minutes before checking oil level. With the tiller on level ground, the oil must be to FULL mark on dipstick. Remove oil fill dipstick and wipe clean with cloth. Replace dipstick into the oil filler neck, but do not screw it in.
- Page 21 SERVICE AND MAINTENANCE lUbricaTion After every 10 operating hours, oil or grease the lubrication points. Use clean lubricating oil (#30 weight motor oil is suitable) and clean general purpose grease (grease containing a metal lubricant is preferred, if available). • Remove the tines and clean the tine shaft.
- Page 22 SERVICE AND MAINTENANCE TineS The tines will wear with use and should be inspected at the beginning of each tilling season and after every 30 operating hours. The tines can be replaced. Refer to the Parts List section of this manual for part Clevis Pin numbers.
-
Page 23: Off-Season Storage
OFF-SEASON STORAGE Warning Never store tiller with fuel in tank indoors or in poorly ventilated areas where fuel fumes may reach an open flame, spark, or pilot light as on a furnace, water heater, clothes dryer, or gas appliance. PreParing The Tiller Warning When the tiller won’t be used for an extended period, prepare it for Never leave engine unattended while it is running. -
Page 24: Troubleshooting
TROUBLESHOOTING Warning Before performing any type of maintenance/service, disengage all controls and stop the engine. Wait until all moving parts have come to a complete stop. Disconnect spark plug wire and ground it against the engine to prevent unintended starting. Always wear safety glasses during operation or while performing any adjustments or repairs. Problem cause remedy... - Page 25 NOTES...
-
Page 26: Parts List
PARTS LIST craftsman Tiller — Model no. 247.29934... - Page 27 PARTS LIST craftsman Tiller — Model no. 247.29934 Ref. No. Part No. Description Ref. No. Part No. Description 720-0274 Grip, Handle 686-0081A-0637 Wheel Bracket Assembly 731-06253A Handle Cover 911-0415 Clevis Pin, .375 x 1.75 931-1645A Clutch Bail Holder 714-04043 Bow Tie Cotter Pin 936-0140 Flat Washer, .385 x .62 x .063...
- Page 28 PARTS LIST craftsman Tiller — Model no. 247.29934 39 31...
- Page 29 PARTS LIST craftsman Tiller — Model no. 247.29934 Ref. No. Part No. Description Ref. No. Part No. Description 710-3005 Hex Head Screw, 3/8-16 x 1.25 986-0091 Chain Case Assembly 711-1036A Hex Nut, 5/16-18 642-0002-0637 Inner Tine Assembly, RH 712-0266A Jamlock Nut, 3/8-16...
- Page 30 PARTS LIST craftsman engine Model ZS170-V0a for Model 247.29934 23 23...
- Page 31 PARTS LIST craftsman engine Model ZS170-V0a for Model 247.29934 Ref. Part No. Description Ref. Part No. Description 951-11012 Bolt 710-04932 Bolt 951-11054A Valve Cover 951-11577 O-Ring 731-07059 Breather Hose 951-11578 Oil Seal 726-04101 Breather Hose Clamp 736-04440 Oil Drain Plug Washer...
- Page 32 PARTS LIST craftsman engine Model ZS170-V0a for Model 247.29934 Ref. Part No. Description Qty. Ref. Part No. Description Qty. — 951-10798A Short Block — — 951-10799 Cylinder Head Assembly — 951-11565 Valve Cover Gasket 951-11565 Valve Cover Gasket — Exhaust Pipe Gasket...
- Page 33 PARTS LIST craftsman engine Model ZS170-V0a for Model 247.29934 Ref. Part No. Description Qty. Ref. Part No. Description Qty. 951-10797 Carburetor Assembly — — 951-10647 Valve Kit — 951-11177 Choke Control Lever — Exhaust Valve — Choke Shaft — Intake Valve —...
-
Page 34: Label Map
Parts List craftsman Tiller Model no. 247.29934 777D14195 777I23174 777I23259 777S33498 777D14194 777D13770 777D14196 777S33382 777I20358 777I22502... - Page 35 (This page applicable in the U.S.A. and Canada only.) Sears, roebuck and co., U.S.a. (Sears), the california air resources board (carb) and the United States environmental Protection agency (U.S. ePa) emission control System Warranty Statement (owner’s Defect Warranty rights and obligations) EMISSION CONTROL WARRANTY COVERAGE IS APPLICABLE TO CERTI- YEAR 1997 AND LATER ENGINES WHICH ARE PURCHASED AND USED FIED ENGINES PURCHASED IN CALIFORNIA IN 1995 AND THEREAF-...
- Page 36 look for relevant emissions Durability Period and air index information on your engine emissions label Engines that are certified to meet the California Air Resources Board (CARB) Tier 2 Emission Standards must display information regarding the Emissions Durability Period and the Air Index. Sears, Roebuck and Co., U.S.A. makes this information available to the consumer on our emission labels.
-
Page 37: Repair Protection Agreement
REPAIR PROTECTION AGREEMENT Congratulations on making a smart purchase. Your new Craftsman® Once you purchase the Agreement, a simple phone call is all that it product is designed and manufactured for years of dependable opera- takes for you to schedule service. You can call anytime day or night, or tion. -
Page 38: Español
GARANTÍA COMPLETA CRAFTSMAN En condiciones normales de funcionamiento y mantenimiento conforme a las instrucciones suministradas, si este producto Craftsman falla debido a defectos en los materiales o en la mano de obra dentro de los dos años de la fecha de compra, comuníquese con 1-800-4-MY-HOME®... - Page 39 INSTRUCCIONES DE SEGURIDAD Peligro aDVerTencia Esta máquina está diseñada para ser utilizada respetando las normas La presencia de este símbolo indica que se trata de instrucciones de de seguridad contenidas en este manual. Al igual que con cualquier tipo seguridad importantes que se deben respetar para evitar poner en peligro de equipo motorizado, un descuido o error por parte del operador puede su seguridad personal y/o material y la de otras personas.
- Page 40 INSTRUCCIONES DE SEGURIDAD Manejo seguro de la gasolina: • Si golpea algún un objeto extraño o si la máquina comienza a emitir un sonido poco común o a vibrar, apague el motor de inmediato. Para evitar lesiones personales y daños materiales tenga mucho cuidado al Desconecte el cable de la bujía, póngalo haciendo masa contra el motor manipular la gasolina.
- Page 41 INSTRUCCIONES DE SEGURIDAD aViSo referiDo a eMiSioneS • Observe la reglamentación y las normas respecto a la eliminación correcta de gasolina, aceite, etc. para proteger el medio ambiente. Los motores que están certificados y cumplen con las regulaciones de • Según la Comisión de Seguridad de Productos para el Consumidor de emisiones federales EPA y de California para SORE (Equipos Small Off Road los Estados Unidos (CPSC) y la Agencia de Protección Ambiental de los...
- Page 42 INSTRUCCIONES DE SEGURIDAD SíMboloS De SegUriDaD En esta página se presentan y describen los símbolos de seguridad que pueden aparecer en este producto. Lea, entienda y cumpla todas las instrucciones incluidas en la máquina antes de intentar armarla y utilizarla. Símbolo Descripción LEA LOS MANUALES DEL OPERADOR...
- Page 43 MONTAJE IMPORTANTE: Esta unidad se envía sin gasolina ni aceite en el motor. Antes de operar la máquina cargue el motor con gasolina y aceite como se indica en la sección Funcionamiento de este manual. NOTA: Las referencias a los lados derecho e izquierdo de la cultivadora se hacen observando la máquina desde la posición de operación.
- Page 44 MONTAJE Asegure el perno después de ajustar la traba de la manija. Vea la Figura 4. Ménsula Ubique el perno de carro, la arandela de campana y la perilla de posterior mano empaquetados con su cultivadora. Inserte el perno de carro a través del soporte soldado de la manija, la arandela campana, la traba de la manija, y dentro de la perilla de mano.
- Page 45 MONTAJE ajUSTeS aDVerTencia Antes de operar su cultivadora, lea atentamente y cumpla todas las instrucciones que aparecen a continuación. Realice todos los ajustes para verificar que la unidad está operando con seguridad y correctamente. tuerca hexagonal Verifique el ajuste de las ruedas: La cultivadora se entrega con las ruedas ajustadas de modo que la máquina esté...
- Page 46 Regula la velocidad del motor, y lo apaga cuando se lo coloca en la posición STOP (detención). cumple con los estándares de seguridad de anSi Las cultivadoras Craftsman cumplen con las normas de seguridad del Instituto Nacional Americano de Normalización (ANSI).
- Page 47 FUNCIONAMIENTO filTro De aire llenaDo De gaSolina y aceiTe El filtro de aire es un dispositivo de la toma de aire del motor que aceite (se envía una botella con la unidad) impide la entrada de polvo y suciedad en el motor. Vea la Figura 12. Primer uso Saque la varilla del nivel de aceite.
- Page 48 FUNCIONAMIENTO Para encenDer el MoTor gasolina Saque la tapa del combustible del depósito del mismo. Conecte el cable de la bujía y la manga de goma a la misma. Verifique que el recipiente del que va a verter la gasolina esté Llene el depósito con no más de 1/2 pulgada por debajo de la limpio y libre de óxido o de objetos extraños.
- Page 49 FUNCIONAMIENTO Para DeTener el MoTor Para detener las ruedas y los dientes, suelte el gancho del embrague de marcha directa. Mueva la palanca de control del regulador hasta la posición SLOW (lento, representado por una tortuga) . Siempre que sea posible, reduzca gradualmente la velocidad del motor antes de detenerlo.
- Page 50 FUNCIONAMIENTO estaca de profundidad La estaca de profundidad funciona como un freno de la cultivadora y controla la profundidad y la velocidad a la cual funciona la máquina. Retire el pasador de horquilla para subir o bajar la estaca de profundidad.
- Page 51 FUNCIONAMIENTO elección de la velocidad correcta para los dientes Con experiencia, podrá encontrar la combinación de profundidad y velocidad de labranza más adecuada a las necesidades de su jardín. Ajuste la palanca del regulador del motor a una velocidad que dé al motor adecuada potencia y que al mismo tiempo le permita funcionar a la menor velocidad posible hasta que haya alcanzado la máxima profundidad de labranza deseada.
- Page 52 FUNCIONAMIENTO labranza cuesta arriba y cuesta abajo Para mantener la erosión del suelo al mínimo, asegúrese de agregar suficiente materia orgánica al suelo para que mantenga CUESTA un nivel de humedad adecuado, y trate de evitar dejar pisadas o ARRIBA marcas de ruedas.
- Page 53 SERVICIO Y MANTENIMIENTO PrograMa De ManTeniMienTo aDVerTencia Siga el cronograma de mantenimiento que se presenta a continuación. Antes de realizar cualquier tipo de mantenimiento o servicio, Esta tabla sólo describe pautas de servicio. Utilice la columna Registro desenganche todos los controles y detenga el motor. Espere a que se de Servicio para hacer el seguimiento de las tareas de mantenimiento detengan completamente todas las piezas móviles.
- Page 54 SERVICIO Y MANTENIMIENTO Retire la funda de bujía y utilice una llave para bujías para extraer la bujía. Vea la Figura 23. Inspeccione visualmente la bujía. Elimine la bujía si presenta mucho desgaste, o si el aislante está agrietado o astillado. Limpie la bujía con un cepillo de alambre si se va a reutilizar.
- Page 55 SERVICIO Y MANTENIMIENTO inspeccione el aceite del motor Controle el aceite antes de cada uso. Detenga el motor y espere varios minutos antes de verificar el nivel de aceite. Con la cultivadora sobre una superficie pareja, el aceite debe alcanzar la marca FULL (lleno) de la varilla del nivel de aceite.
- Page 56 SERVICIO Y MANTENIMIENTO lUbricación Después de cada 10 horas de funcionamiento, aceite o engrase los puntos de lubricación- Use aceite lubricante limpio (es adecuado el aceite para motores de peso #30) y grasa de uso general limpia (es preferible grasa que contenga un lubricante de metal, si hay disponible).
- Page 57 SERVICIO Y MANTENIMIENTO DienTeS Los dientes se desgastan con el uso y se los debe inspeccionar al Pasador de comienzo de cada temporada de labranza y a intervalos de 30 horas horquilla de funcionamiento. Los dientes se pueden reemplazar. Consulte el número de pieza en la sección Lista de piezas de este manual.
- Page 58 ALMACENAMIENTO FUERA DE TEMPORADA aDVerTencia Nunca almacene la cultivadora con combustible en el tanque en un espacio cerrado o en áreas poco ventiladas donde los gases del combustible puedan llegar a una llama expuesta, una chispa o un piloto como el que tienen algunos hornos, calentadores de agua, secadores de ropa o algún artefacto a gas.
- Page 59 SOLUCIÓN DE PROBLEMAS aDVerTencia Antes de realizar cualquier tipo de mantenimiento o servicio, desenganche todos los controles y detenga el motor. Espere a que se detengan completamente todas las piezas móviles. Desconecte el cable de la bujía y póngalo haciendo masa contra el motor para evitar que se encienda accidentalmente. Utilice siempre anteojos de seguridad durante la operación o mientras realiza ajustes o reparaciones.
- Page 60 (Esta página se aplica sólo en EE.UU. y Canadá). Sears, roebuck and co., U.S.a. (Sears), el consejo de recursos ambientales de california (carb) y la agencia de Protección ambiental de los estados Unidos (ePa) Declaración de garantía del sistema de control de emisiones (derechos y obligaciones de la garantía de defectos del propi- etario) LA COBERTURA DE LA GARANTÍA DE CONTROL DE EMISIONES ES Y PARA LOS MODELOS CERTIFICADOS DEL AÑO 1997 Y POSTERIORES,...
- Page 61 busque el período de duración de emisiones importantes yla información de clasificación de aire en la etiqueta de emisiones de su motor Los motores cuyo cumplimiento con los estándares de emisión Tier 2 de la Comisión de Recursos Ambientales de California (CARB) esté...
- Page 62 Felicitaciones por haber realizado una adquisición inteligente. El Una vez adquirido el Acuerdo, puede programar el servicio con producto Craftsman® que ha adquirido está diseñado y fabricado tan sólo realizar una llamada telefónica. Puede llamar en cualquier para brindar muchos años de funcionamiento confiable. Pero como momento del día o de la noche o programar un servicio en línea.
- Page 63 NOTAS...
- Page 64 Get it fixed, at your home or ours! Your Home For troubleshooting, product manuals and home solutions advice: www.managemyhome.com For repair – in your home – of all major brand appliances, lawn and garden equipment, or heating and cooling systems, no matter who made it, no matter who sold it! For the replacement parts, accessories and owner’s manuals that you need to do-it-yourself.