Advertisement
Quick Links
T
ASMAN
I
G
NTEGRATION
UIDE
P/N 95B-6156-00 (July 2023)
© 2023 Teledyne RD Instruments, Inc. All rights reserved.
https://www.teledynemarine.com
Information included herein is controlled by the Export Administration Regulations
(EAR) and may require an export license, license exception or other approval from the
appropriate U.S. Government agency before being exported from the United States or
provided to any foreign person. Diversion contrary to U.S. law is prohibited.
Advertisement

Related Manuals for Teledyne TASMAN


Summary of Contents for Teledyne TASMAN
- Page 1 NTEGRATION UIDE P/N 95B-6156-00 (July 2023) © 2023 Teledyne RD Instruments, Inc. All rights reserved. https://www.teledynemarine.com Information included herein is controlled by the Export Administration Regulations (EAR) and may require an export license, license exception or other approval from the appropriate U.S.
-
Page 2: Table Of Contents
(this can take up to 24 hours). Once you have secured an account, use the Teledyne Marine software portal to access this data with your unique username and password. -
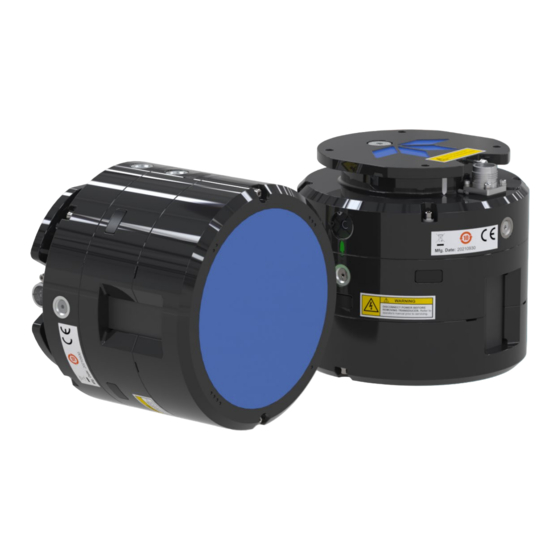
Page 3: Asman
The DVL Power/Comm pigtail 3-meter cable allows you to build custom cable to 73B-6085-003 Power/Comm Pigtail Cable connect the Tasman to your vehicle/platform. It provides all the leads for serial and Ethernet COM, Power, and Trigger. Tasman Getting Started Guide A printed quick start card showing test setup is included. - Page 4 2. Software is available on https://tm-portal.force.com/TMsoftwareportal. Install TRDI Toolz and NavUI. https://www.teledynemarine.com/support/RDI/technical-manuals 3. Use our online customer portal at to download manuals or other Teledyne RDI documentation. Download the Tasman DVL Guide. Page 2 EAR-Controlled Technology Subject to Restrictions Contained on the Cover Page.
-
Page 5: Connecting To The Tasman
Power Overview The 600 kHz Tasman requires a DC supply between 10.7 to 36 VDC (24 VDC typical) and the 300 kHz Tasman uses 12 to 36 VDC. Either an external DC power supply or battery can provide this power. - Page 6 P/N 95B-6156-00 (July 2023) Tasman DVL Integration Guide Using the Optional Test Cable Tasman Connections for Bench Test [Optional Test Cable kit] The Optional Test Cable Kit 75BK6141-00 includes the 73B-6094-00 RS-232 test cable and the USB adapter. If you purchase your own USB adapter, TRDI recommends: sales@connectiveperipherals.com...
- Page 7 The command-and-control port can be Serial or Ethernet, but NOT both. The last port used to send a break is the command-and-control port. To establish communications with the Tasman: 1. Connect the system and apply power. 2. Start the TRDI Toolz software.
- Page 8 ® ® 3. Enter the Tasman’s DHCP server IP address 10.20.230.17 into the address bar. 4. On Network Configuration, choose STATIC or DHCP. Use Dynamic Host Configuration Pro- tocol (DHCP) server protocol when the network automatically provides an Internet Protocol (IP) host with its IP address and other related configuration information such as the subnet mask and default gateway.
- Page 9 To test the Tasman: 1. Interconnect the system as described in Setting Up the Tasman System. 2. Place the Tasman transducer in water (at least 2 to 4 cm to cover the transducer face). 3. Apply power to the system.
- Page 10 Pinging in air is not recommended. Although this will not damage the Tasman, the Peak Current when operating in air may be up to twice the values shown in the Tasman DVL Guide Table 2, page 26. The transducer is pinged by sending a CS, PA, PT3, or PT5 command or if the Tasman system is started for collecting data.
-
Page 11: Mechanical Integration
This improves error rejection, reduces the effect of ringing, and increases the Tasman’s effective velocity range by a factor of 1.4. If Beam 3 is aligned at an angle other than zero, use the EA command to describe the rotation between instrument Y-axis (beam 3) and ship forward axis. -
Page 12: Electrical Integration
EMI is also caused by unwanted differences in potential on signal or ground electronic lines. For more information, see the Tasman Guide, Chapter 2 – System Integration, Identifying EMI. -
Page 13: Acoustic Integration
Tasman DVL Integration Guide P/N 95B-6156-00 (July 2023) Acoustic Integration The following items must be taken into consideration when using the Tasman DVL. Flow Noise – Water flowing over the transducer faces increases the acoustic noise level, which in turn de- creases the operational range of the DVL. -
Page 14: Ntegration
Ping once and then go back to waiting for Trigger. The input trigger voltage is 3.3VDC to 5VDC. For more information, see the Tasman Guide, Chapter 2 – System Integration and Chapter 7 - Commands. Page 12... - Page 15 Files in the Tasman DVL Guide). 3. Cycle power to the Tasman (wait 30 seconds between power off and power on) and monitor the output via Wireshark. The user can also command the DVL to start (as an alternative to waiting for Turn Key timeout) by sending a CS command to the DVL TCP Command and Control Port (192.168.1.100, port 1033).
- Page 16 • PD0 – PD0 is Teledyne RD Instrument’s standard format. PD0 is a binary output format. It pro- vides the most information possible including a header, fixed and variable leader, bottom track, and water profile information. The fixed and variable leader is a recording of time, DVL setup, orientation, heading, pitch, roll, temperature, pressure, and self-test diagnostic results.
-
Page 17: Want To Know More
Use this chapter to create a command file that will be used to collect data. Chapter 4 – Maintenance This chapter covers Tasman DVL maintenance. Use this section to make sure the Tasman is ready for a deployment. Chapter 5 – Returning Systems to TRDI for Service Use this information to obtain a Return Material Authorization (RMA) number if the Tasman DVL needs to be re- turned to TRDI. - Page 18 P/N 95B-6156-00 (July 2023) Tasman DVL Integration Guide Page 16 EAR-Controlled Technology Subject to Restrictions Contained on the Cover Page.
- Page 19 Tasman DVL Integration Guide P/N 95B-6156-00 (July 2023) Page 17 EAR-Controlled Technology Subject to Restrictions Contained on the Cover Page.
- Page 20 P/N 95B-6156-00 (July 2023) Tasman DVL Integration Guide Page 18 EAR-Controlled Technology Subject to Restrictions Contained on the Cover Page.
- Page 21 Tasman DVL Integration Guide P/N 95B-6156-00 (July 2023) Page 19 EAR-Controlled Technology Subject to Restrictions Contained on the Cover Page.
- Page 22 P/N 95B-6156-00 (July 2023) Tasman DVL Integration Guide Page 20 EAR-Controlled Technology Subject to Restrictions Contained on the Cover Page.
- Page 23 Tasman DVL Integration Guide P/N 95B-6156-00 (July 2023) Page 21 EAR-Controlled Technology Subject to Restrictions Contained on the Cover Page.
- Page 24 P/N 95B-6156-00 (July 2023) Tasman DVL Integration Guide Page 22 EAR-Controlled Technology Subject to Restrictions Contained on the Cover Page.
- Page 25 Tasman DVL Integration Guide P/N 95B-6156-00 (July 2023) Page 23 EAR-Controlled Technology Subject to Restrictions Contained on the Cover Page.
- Page 26 P/N 95B-6156-00 (July 2023) Tasman DVL Integration Guide OTES Page 24 EAR-Controlled Technology Subject to Restrictions Contained on the Cover Page.