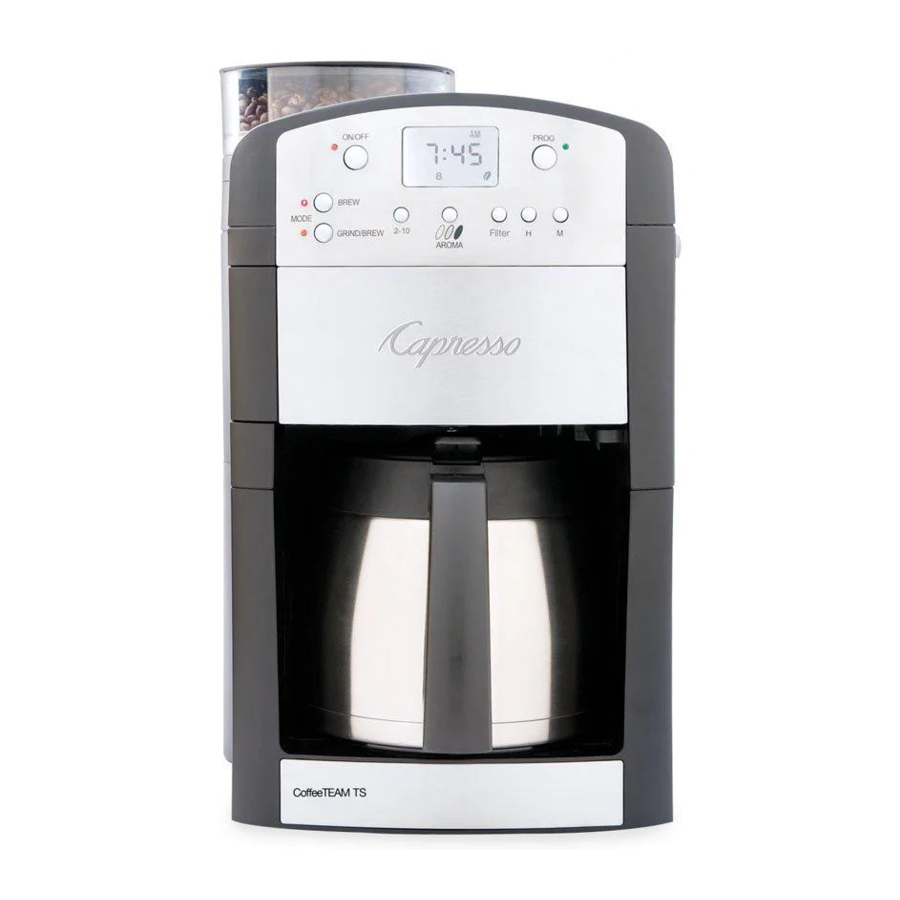
Capresso CoffeeTEAM TS 465 - 10-Cup Digital Coffee Maker Manual
- Operating instructions manual (15 pages)
Advertisement
- 1 OVERVIEW OF THE DEVICE
- 2 COFFEE BEANS AND THE BUILT-IN BURR GRINDER
- 3 THE WARRANTY
- 4 EQUIPMENT
- 5 FEATURES AND BENEFITS OF THE COFFEETEAM
- 6 BEFORE INITIAL USE
- 7 PREPARING THE COFFEETEAM
- 8 GRINDING AND BREWING COFFEE NOW
- 9 BREWING COFFEE WITHOUT THE GRINDER
- 10 CLEANING
- 11 Decalcifying
- 12 Frequently Asked Technical Questions
- 13 Frequently Asked Coffee Questions
- 14 HOW TO CONTACT JURA-CAPRESSO
- 15 CUSTOMER SERVICE
- 16 Documents / Resources
OVERVIEW OF THE DEVICE


- GoldTone filter
- Filter insert with drip stop
- Filter holder
- Charcoal filter holder (Fig. 12)
- Bean container lid
- Bean container
- Water tank lid
- Feeder channel (Fig. 6 & 7)
- Water tank
- User panel (Fig. 2)
- Charcoal Filter button
- Filter release button
- Scoop
COFFEE BEANS AND THE BUILT-IN BURR GRINDER
Grinding the beans just before brewing will maximize the flavor and aroma of your coffee. Conical burr grinders are considered the best way of grinding beans. The slower grinding speed of the conical burrs creates less heat thus preserving more aroma of the ground coffee. Following the recommendations below will make your coffee taste better and your machine last longer.
- Storing Coffee Beans in the Freezer?
Coffee Stores do not store beans in the freezer or refrigerator! Coffee will act like baking soda, absorbing all odors and tastes surrounding it. Coffee beans will stay fresh for several weeks as long as you keep them in a dry, dark container. (It's the ground coffee which will lose aroma rapidly!) If you must store coffee beans in the freezer, take them out the day before use. This way they will absorb less odors and have time to thaw.
![]()
If you fill beans from the freezer directly into the grinder, moisture will seep into the burrs and the feeder channel. The moisture makes the ground coffee stick in the feeder channel and will clog it up over time. - Finer or Coarser Grind?
The five grind settings (Fig. 4) of your CoffeeTEAM are calibrated for grinding drip coffee. Choose the coarser settings for darker, oilier beans. Choose the finer settings for light or medium roasts.
![]()
- Dark Beans versus Light Beans
Your CoffeeTEAM burr grinder is calibrated to work with all different kinds of roasts. Dark, oily beans will leave some oil residue in the feeder channel. Over time this can slow down the flow of ground coffee. - Flavored beans, liquid flavorings, syrups

- Do not use sugar or powder coated beans in the grinder (e.g.cinnamon, chocolate, vanilla etc). Coated beans can pit the bean container. The coating might stick to the burrs and, over time, will reduce the performance of the grinding mechanism.
- Do not add any liquid flavorings or syrups to the beans.
- If you like flavored coffee we recommend buying liquid flavoringsat your local coffee store. Add a few drops into the carafe before or after brewing.
- Stones And Beans
Every coffee specialty store will tell you that occasionally small stones can be found in between coffee beans. Very small stones will be processed through the burr grinder without any harm (the stone will end up in your filter - not in your brewed coffee). However, larger stones can block the burr grinder permanently. If this happens, the grinder will make a loud noise. Push the On/Off button to stop grinding and call our customer service toll free number: 1-800-767-3554. Here is how you can avoid stones entering the bean container:
- Shake your bean bag thoroughly so that a stone will fall tothe bottom of the bag.
- Before emptying the bottom half of the bag of beans into the bean container, check to see whether there are any particles that look like stones, and remove them.
THE WARRANTY
PLEASE, NEVER... (the following voids )
- Never fill instant coffee into the bean container; it can damage the functioning of the grinder and the machine.
- Never fill coated coffee beans into the bean container.
- Never fill water or any other liquid into the bean container.
- Never fill anything other than coffee beans into the beancontainer (no chocolate, no nuts, no spices).
- Never fill anything but fresh, cold clean water into the watercontainer.
- Never remove or attempt to disassemble the bean container.
- Never grind into the GoldTone filter unless it is empty of previously used coffee grounds.
- Never operate the machine when the feeder channel cover isremoved.
EQUIPMENT
The CoffeeTEAM TS comes with:
- instruction book (includes warranty and product registration)
- order form for parts and accessories
- one measuring scoop*
- one thermal stainless steel carafe with lid (model #465)
- one GoldTone filter
- filter holder insert
- charcoal filter holder and one charcoal filter cartridge
* If any of these parts are missing, please call toll-free: 1-800-767-3554.
* The scoop and the cartridge are located inside the carafe. Empty carafe before using.
FEATURES AND BENEFITS OF THE COFFEETEAM
- After grinding, the CoffeeTEAM automatically starts the brewing process.
- Drip-stop function lets you pull out carafe and serve a cup or two before brewing is finished.
- CoffeeTEAM TS, #465 (thermal carafe): Brews through closed lid into a stainless steel thermal carafe and keeps coffee hot for up to 4 hours.
- Easy to read LCD display with AM/PM clock and auto-on programming.
- Machine can be used with or without grinder to accommodate pre-ground coffee.
- Heavy duty, conical burr grinder delivers slow, precise and no-heat grinding to preserve natural coffee bean aroma.
- Grinds directly into filter holder.
- 150 gram bean container holds enough beans for up to two pots of coffee.
- Set to grind for 2, 4, 6, 8 or 10 cups (Indicator in LCD display).
- Fine-tune for mild, regular or strong coffee (Indicator in LCD display).
- Turn the bean container from left to right to change the grind settings from finer to coarser in five steps.
- Charcoal filter removes chlorine and other impurities in the water before brewing.
BEFORE INITIAL USE
- Carefully unpack your machine and remove packing materials.
- Wipe the machine with a damp cloth.
- Push the filter holder button (fig. 2), remove the goldtone filter and the filter insert and clean.
- Make sure the drip stop of the filter insert is working properly.
- Open the water container lid and remove the charcoal holder.
- Remove the charcoal cartridge and measuring scoop from the carafe.
Please note:
The filter holder and the basket are dishwasher safe (upper rack, away from any heating element).
Please note:
The thermal stainless steel carafe (Model #465) and the bean container lid are not dishwasher safe.

Do not immerse the machine in water or any other liquid.

- CoffeeTEAM TS (thermal stainless steel carafe): when brewing coffee, always use with the lid closed.
- Let some water brew through the machine without any coffee as follows.
- Plug in machine and make sure the GoldTone filter and filter insert are in place.
- Fill the water tank with approx. 20 oz. of water and place the carafe with lid in the machine.
- Push the BREW button, then the ON/OFF button (Fig. 2). The machine starts processing the water into the carafe.
- After all water has passed through, push the ON/OFF button again to turn off machine.
- Empty carafe
PREPARING THE COFFEETEAM
CLOCK AND GRINDER SETTINGS
Plug in machine. The display shows "0:00" blinking and either the "BREW" or the "GRIND/BREW" light is illuminated (Fig. 2).
Please note:
You must set the actual time before you can operate the coffee maker.
- Setting the Actual Time
- The display shows "0:00" blinking
- Push and hold the H button until the actual hour is displayed. The display will also show AM or PM.
- Push and hold the M button until the minutes are displayed. The time is now set.
Please note: You must change the clock when the time changes (Standard time/Daylight Savings time).
- Setting the Auto-On Time
You can only set the Auto-On Time after the actual time is set.
- Push and hold the PROG button until the display shows AUTO and a random number is blinking.
- Keep the PROG button depressed.
- Push and hold the H, then the M button to set Auto-On time.
- Release the PROG button. The display reverts to the actual time.
- To change the Auto-On Time
- Push and hold the PROG button until the display shows AUTO.Keep the PROG button depressed.
- Push and hold the H and then the M button to set a new Auto-On time.
- Release the PROG button. The display reverts to the actual time.
- Checking the Auto-On Time
- Push and hold the PROG button. The display shows the word "AUTO" and the Auto-On time.
- Release the PROG button. The display reverts to the actual time.
- Activating the Auto-On Time
- Push the PROG button briefly. The display shows "AUTO" and the green Auto-On light illuminates, indicating the Auto-On setting is active. The machine will show the actual time. At the preprogrammed time the machine starts grinding and brewing (or brewing only).
- Grind Volume Setting: the "2-10" button
Please note: the CoffeeTEAM lets you set two different grinder settings: one for immediate use and one for Auto-On use. For both uses the default setting is "10".
For immediate use: Push the "2-10" button repeatedly to select from 2, 4, 6, 8, 10.
For Auto-On use: Push and hold the PROG button until the word "AUTO" is displayed. Keep the PROG button depressed and then push the "2-10" button to select from 2, 4, 6, 8, 10. - Strength Setting: the "AROMA" button.
the CoffeeTEAM lets you set two different "Aroma" settings: one for immediate use and one for Auto-On use.
Please note:
The display shows the "middle" bean (default setting). You can select a lighter or darker bean by pushing the "AROMA" button. The lighter bean will reduce the grinding time by one second, the darker bean will increase the grinding time by one second.
The result will be a somewhat milder or stronger coffee.
For Auto-On use: Push and hold the PROG button until the word "AUTO" is displayed. Keep the PROG button depressed and then push the AROMA button to make your selection.
COFFEE STRENGTH RECOMMENDATION
In setting "10" with "AROMA" set to the dark bean, the machine will grind for about 40 seconds (producing the maximum amount of coffee). In setting "2" and "AROMA" set to the light bean, the machine grinds for about 7 seconds.
- For 10 cups of strong coffee we recommend the setting 10 andthe middle bean.
- If the coffee tastes too strong, change the grinder setting to the number 8 or lower.
- If the coffee is not strong enough, set the aroma setting to the darker bean. If the coffee is still not strong enough, reduce the amount of water.
POWER INTERRUPTION
Flashing Display!
If you unplug the coffee maker for more than 60 seconds or if you have a power failure, you will lose the current time and program settings.
SETTING THE GRINDER FINENESS / FILLING THE BEANS
- Select the fineness setting (Fig. 4) by turning the bean containeruntil the white triangle matches up with one of the five dots in front of the bean container. The largest dot to the right indicates the coarsest grind setting.
- For first time use, use the coarsest setting – the largest dot.
- For dark oily beans use the coarsest setting. For light, dry beans use the finer settings.
Fill the bean container (Fig. 1.6) with beans. Make sure that the water container lid is closed to prevent beans from spilling into the water container.
The bean container will hold approximately 150 grams of beans, good for two full pots of coffee in grinder setting 10.
Note:
Never fill the bean container with frozen or coated beans.
FILLING THE WATER CONTAINER
Open the water container lid (Fig. 1.7) and fill the water container with the desired amount of fresh, cold water.
Please note:
Never fill water above the 10-cup marking. The water container has an overflow opening in the back.
CHARCOAL WATER FILTRATION
CoffeeTEAM comes with one charcoal cartridge and a charcoal filter holder. You can brew coffee with or without the water filtration system.
Note:
If you use distilled, spring or bottled water or if your water has little or no chlorine you may not find a difference in taste in your coffee when using the water filtration system. However, most tap water is treated with chlorine. The water filter cartridge removes up to 82% of the chlorine found in your tap water.
Initial Preparation:
- Open the water container lid and remove the charcoal filter holder.
- Remove the charcoal filter from poly bag.
- Soak the filter in a glass with cold water for a few minutes. This will activate the filter.
- Insert the cartridge into the charcoal filter holder (Fig. 12).
- Place the charcoal filter holder back into the water tank. reminder. The symbol
![]() will appear
will appear - Press the "Filter" button (Fig. 2) to activate the change filter
Please note:
The filter reminder only functions when machine is plugged in and time has been set.
When to replace the cartridge:
After 60 pots of coffee or 6 weeks after first use, the filterindicator button symbol  will blink, indicating it is time to change the filter. Unused cartridges can be stored indefinitely.
Replacement cartridges are available through your local Capresso dealer or by using the enclosed mail order form or through the website: www.capresso.com.
GOLD TONE FILTER AND FILTER INSERT
- Push the Filter Release button (Fig. 1.11). The filter holder swings open. The Goldtone filter and the filter insert can be removed.
- Before grinding/brewing coffee always make sure that the GoldTone filter is empty and placed into the filter insert.

- Never use the coffee maker without the filter insert and GoldTone filter. Extremely hot water can overflow onto the warming plate and counter. If this occurs, turn the machine off and wait until the brewing stops.
- Then push the Filter Release button, add the filter insert and the GoldTone filter and close the filter holder. Place the carafe underneath and continue brewing until the water tank is empty.
MODEL #465: USING THE STAINLESS STEEL CARAFE
For best coffee temperature pre-warm the carafe by rinsing it with hot water. Always make sure carafe is completely empty before brewing. Place the lid onto the carafe as shown in Fig. 8 and turn lid clockwise until the pouring release lever is aligned with the handle (Fig. 9). Insert carafe into the machine.

Please note: If you lose the lid, you cannot brew coffee. Use the enclosed mail order form or call 1-800-767-3554 to order a new lid.
Please note:
Always make sure that the carafe is transported in an upright position.


If you turn the carafe on its side or upside down with its lid closed, hot coffee may escape (Fig. 10).

Do not try to remove the stainless steel bottom. Do not place the carafe on any hot surfaces since this can loosen the vacuum seal inside the bottom. This can cause the carafe to lose its thermal function. Do not place carafe in dishwasher microwave, oven or stove.
GRINDING AND BREWING COFFEE NOW
- Coffee maker is plugged in and the time, auto-on time are set.
- Beans are in the bean container.
- Fill the water tank with the desired amount of water.
- Make sure the filter insert and GoldTone filter are in place and the GoldTone filter is empty.
- Make sure the Filter holder is closed.
- Insert the carafe with lid into the machine. Stainless Steel carafe: make sure the lid is closed (Fig. 9).
- Make sure the "GRIND/BREW" button is illuminated.
- Push the ON/OFF button (Fig. 2). The red ON/OFF light illuminates. The grinder will start grinding and the ground coffee will push into the GoldTone Filter. Through the window in the feeder channel cover, you can see the ground coffee move forward. Once grinding is finished, the brewing process starts.
As long as the grinder is in operation, do not open the bean container lid and do not insert your finger or any other object into the grinder.
CoffeeTEAM TS (stainless steel carafe):
- After brewing is finished the ON/OFF red indicator light will turnoff. For the next 1 to 2 minutes hot coffee will still pass from the filter into the carafe.
- To serve coffee, remove the carafe from the platform.
- Push and hold the pouring lever to serve coffee.
DRIP STOP / STOP AND SERVE
- While the coffee is brewing you can remove the carafe to pour a cup or two. The drip stop will close automatically.
- To avoid any overflow, replace the carafe within 20 seconds.
The drip stop might not close completely allowing coffee to drip onto the platform. In this case immediately place carafe back into the machine and let all the coffee flow into the carafe.
- After brewing is finished, check the GoldTone filter for any clogging and rinse the filter insert to remove any coffee particles from the drip stop (Fig. 5).
![]()

GRINDING AND BREWING LATER ("AUTO")
- Coffee maker is plugged in and the time and auto-on time are set.
- Beans are in the bean container.
- Fill the water tank with the desired amount of water.
- Make sure the Filter Insert and GoldTone filter are in place and the GoldTone filter is empty.
- Make sure the Filter holder is closed.
- Insert the carafe with lid into the machine, making sure the lid is closed (Fig. 9).
- Make sure the "GRIND/BREW" light is illuminated.
- Push the PROG button briefly. The green light turns on and the display shows "AUTO". At the preprogrammed time, the green light will turn off, the red ON/OFF light will illuminate and the grinding and brewing will start.
Recommendation: If you want your coffee ready by 7:30, set the auto-on time to 7:15.
BREWING COFFEE WITHOUT THE GRINDER
You can use your CoffeeTEAM like a regular drip coffee maker with pre-ground coffee (without using the grinder).
- Open the water container lid (Fig.1.7) and fill the desired amount of cold water into the water container.
- Push the Filter Release button to open and fill ground coffee into the GoldTone filter. Close the Filter Holder.
- Insert the carafe with lid into the machine, making sure the lid is closed (Fig. 9).
- Push the "BREW" button. The red "BREW" light illuminates.
- Push the ON/OFF button. The red ON/OFF light illuminates and the brewing process starts immediately.
BREWING PREGROUND COFFEE LATER ("AUTO")
- Coffee maker is plugged in and the time, auto-on time are set.
- Fill the water tank with the desired amount of water.
- Push the Filter Release button to open and fill ground coffee into the GoldTone filter. Close the Filter Holder.
- Insert the carafe with lid into the machine, making sure the lid is closed (Fig. 9).
- Push the "BREW" button. The red "BREW" light illuminates.
- Push the PROG button briefly. The green light turns on and the display shows "AUTO". At the preprogrammed time, the green light will turn off, the red ON/OFF light will illuminate and the brewing will start.
CLEANING
Make sure machine is turned off and cooled down. Never use scouring agents. Never immerse the machine in any liquid. Never clean machine under running water. Dishwasher safe (upper rack): GoldTone Filter and Filter Insert.
Special Cleaning Tips:
- GoldTone Filter
Clean after brewing. Do not let used coffee sit for hours in the filter. Coffee oils will clog the mesh, causing the coffee to overflow the next time you brew coffee. - Filter Insert /Drip Stop
Clean the Filter Insert and the drip stop under running water. Test that the drip stop closes completely under running water (Fig 5). - Bean Container
When the bean container is empty, use a dry cloth to wipe off any oil deposits. Never pour any liquid into the bean container. Never try to disassemble the bean container. - The Feeder Channel
Periodically check the feeder channel for oil and coffee build-up. As long as you can see coffee flowing freely through the feeder channel window there is no need to open the cover. The feeder channel should be cleaned in any of the following situations:
- moisture or heavy oil build-up has caused the ground coffeeto block the feeder channel, or
- you do not plan on using the grinder for more than a week. For cleaning, please follow this sequence:
- Make sure the GoldTone filter is inserted in the Filter Insert.
- With a pointed tip push the small pin in the window down and slide the plastic cover forward (fig. 6 & 7).
- Wipe the inside clean with a dry cloth.
- Replace the feeder channel cover.
Decalcifying
When the brewing process slows down, it is time to decalcify your CoffeeTEAM. If you use your CoffeeTEAM daily we recommend to descale at least twice a year. If you use hard water, it might be necessary to descale more often.
Before decalcifying, remove the Goldtone Filter and Charcoal Filter.
Decalcifying with DURGOL
Capresso recommends DURGOL for drip coffee makers. Durgol removes any calcium deposit up to 20 times faster than vinegar.
Durgol is available through www.frieling.com.
- Remove GoldTone Filter and Charcoal Filter.
- Fill water container with 18 oz. of cold water and add 6 oz. Durgol.
![]()
Make sure the Filter Insert is in place and the carafe is empty.- Place the carafe with the lid closed into the machine.
- The BREW light is illuminated. Push the ON/OFF button.
- When the solution has run through, remove the carafe, empty and rinse thoroughly.
![]()
let the machine cool down for 5 minutes. - Fill 20 oz. of fresh cold water into the water tank and brew through the machine.
Using other Decalcifying Agents
- All decalcifying agents are acidic and must be handled carefully. Check the information on the packaging before using. Only use decalcifying agents suitable for drip coffee makers and follow the instructions which come with the agent.
- When the solution has run through, remove the carafe, empty and rinse thoroughly.
![]()
let the machine cool down for 5 minutes. - Fill 20 oz. of fresh cold water into the water tank and brew through the machine.
Frequently Asked Technical Questions
Q1. There is no coffee coming out of the grinder. It seems as though the coffee is completely clogged inside the grinder. What do I do?
A. Please follow the steps outlined in chapter CLEANING.
Q2. Can the grinder run without beans in the bean container?
A.Yes.
Q3. Can I have different grind amount settings for the current and the programmed mode?
A.Yes! See chapter CLOCK AND GRINDER SETTINGS-F
Q4. How long does the machine keep the grinding and brewing settings?
A. As long as the machine is plugged in. If the machine loses power you have to reset the time and personal settings.
Q5. How do I know if the display shows the current or the programmed setting?
A. The display always shows the current setting. To view the programmed setting push and hold the PROG button. The display will show "AUTO" and all settings for the Auto-On function.
Q6. Beans spilled into the water container. What do I do?
A. Unplug the machine, remove the carafe, empty the bean container (as well as you can), remove the filter holder insert and GoldTone filter, open the water container lid and turn the machine upside down over a sink. After replacing all parts, reset the time and program the machine again.
Frequently Asked Coffee Questions
Q1. How much coffee should I use?
A.The grinder grinds approximately between 7 seconds (setting "2, mild") and 40 seconds (setting "10, strong").
Q2. I want a full pot of coffee at 8:00 AM. What time should I program the grinder to start?
A. Set the timer 15 minutes earlier (in this case at 7:45 AM).
Q3. The grinder makes a loud noise? No coffee is processed.
A. A stone blocks the grinder. Please call 1-800-767-3554.
HOW TO CONTACT JURA-CAPRESSO
Should you require further information or if particular problems occur that are not covered in this manual, please
- CALL our toll free HELP LINE: 1-800-767-3554 Monday Thursday 8:30AM to 9PM, Friday 8:30AM to 8PM and Saturday 9AM to 5PM Eastern Standard Time. Feel free to call at any time. If you are connected to our voicemail, PLEASE DO NOT HANG UP. Leave your name, telephone number and time to call back. Please leave the model number of your Jura-Capresso product, in this case it is #465/464.
- FAX us at 1-201-767-9684
- E-MAIL us at contact@capresso.com
- VISIT our website at www.capresso.com
- WRITE to Jura-Capresso Inc., Customer Service, P.O. Box 775, Closter, NJ 07624
CUSTOMER SERVICE
If you require any assistance, please call our toll free number 1-800-767-3554 or email us at contact@capresso.com or fax us at 201-767-9684. During the warranty period (12 months) our Customer Service provides the following free of charge (within the Continental United States):
- Free repair or replacement of your CoffeeTEAM including free UPS ground shipping both ways. We will send you a UPS ARS (authorized return service) label, so you don't have to pay for the UPS shipping when you send the product for repair. (For faster service, UPS 2nd day air both ways is possible for an extra charge of $33.50)

Documents / Resources
References

Download manual
Here you can download full pdf version of manual, it may contain additional safety instructions, warranty information, FCC rules, etc.
Download Capresso CoffeeTEAM TS 465 - 10-Cup Digital Coffee Maker Manual
Advertisement
Thank you! Your question has been received!


Need Assistance?
Do you have a question about the CoffeeTEAM TS that isn't answered in the manual? Leave your question here.