
Related Manuals for Brother RuggedJet RJ-4030Ai


Summary of Contents for Brother RuggedJet RJ-4030Ai
- Page 1 USER’S GUIDE RJ-4030/RJ-4040 RJ-4030 RJ-4030Ai RJ-4040 Before using this printer, be sure to read this User's Guide. Version E We suggest that you keep this manual in a handy place for future reference. US ENG...
- Page 2 Introduction Thank you for purchasing the Brother RuggedJet RJ-4030/RJ-4030Ai/RJ-4040 mobile printer. The RJ-4030/RJ-4030Ai/RJ-4040 (hereafter referred to as “the printer”) is a mobile thermal printer. Be sure to read the User’s Guide, Product Safety Guide, Quick Reference Guide, Software User’s Guide and Network User’s Guide (RJ-4040 only) before using the printer. We suggest that you keep these documents in a handy place for future reference.
-
Page 3: Table Of Contents
Table of Contents Setting Up the Printer General Description ....................1 Connecting the Printer to External Power.............. 2 Connecting to an AC Power Outlet (Optional)..........2 Connecting to a DC Power Outlet (Optional)...........2 Using the Rechargeable Li-ion Battery (Optional) ..........3 Installing the Rechargeable Li-ion Battery............3 Charging the Rechargeable Li-ion Battery ............ - Page 4 Parameters ....................32 Communication Settings (RJ-4040 only) Overview......................38 Using the Communication Settings..............38 Starting the Communication Settings ............38 Changing the Settings Related to Communications ........40 Applying Setting Changes to Multiple Printers ..........40 Menu Bar .......................41 Connected Printer’s Status ................43 Network Settings ...................43 Other Functions Mass Storage.......................45 Description.....................45...
-
Page 5: Setting Up The Printer
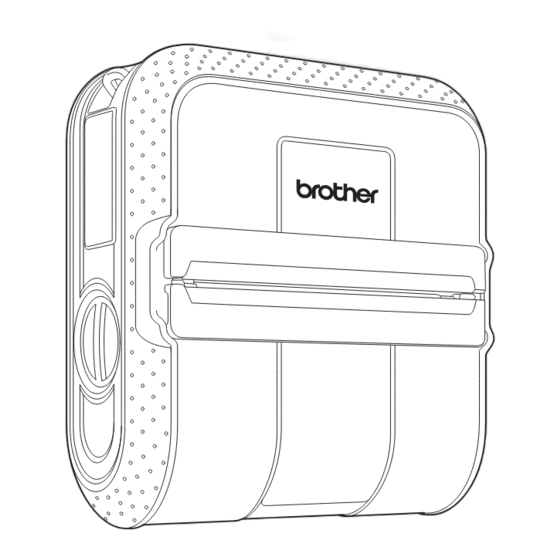
Setting Up the Printer General Description 1 AC/DC connector 2 Serial port 3 USB port Front 4 Cover open lever 5 RD Roll compartment cover 6 Paper outlet (Power) button (Feed)button 9 POWER indicator 10 STATUS indicator 11 BATT (Battery) indicator (Bluetooth) indicator (RJ-4030/RJ-4030Ai)/ (Wi-Fi) indicator (RJ-4040) -
Page 6: Connecting The Printer To External Power
Chapter 1 Connecting the Printer Connecting to a DC Power Outlet (Optional) to External Power Connect the printer to your vehicle’s 12 V DC Connecting to an AC Power power outlet (cigarette lighter, etc.) to power the printer or charge the rechargeable battery Outlet (Optional) using the vehicle’s DC power. -
Page 7: Using The Rechargeable Li-Ion Battery (Optional)
Setting Up the Printer Using the Insert the battery into the battery compartment. Rechargeable Li-ion Battery (Optional) Installing the Rechargeable Li-ion Battery Open the battery cover by pressing the cover latch. Confirm that the hooks on the edge of the battery cover are inserted correctly, and then reattach the cover. -
Page 8: Tips On Using The Rechargeable Li-Ion Battery
• You can print about 2,000 labels (when Tips on Using the connected by USB, and using a new, fully Rechargeable Li-ion Battery charged battery.) Tested using Brother’s print test data (7% coverage 4×6 inches) Charge the rechargeable Li-ion battery at 73.4 °F (23 °C). -
Page 9: Inserting The Rd Roll
Setting Up the Printer Inserting the RD Roll Rechargeable Li-ion Battery Characteristics Understanding the properties of the Press and hold the (Power) button to rechargeable Li-ion battery will allow you to turn the printer off. optimize its usage. Turn and hold the cover open lever, and Using or storing the rechargeable Li-ion open the RD Roll compartment cover. - Page 10 4.16 inches turn the printer on. (105.6 mm). Note When using die cut label, press the (Feed) button after inserting the RD Roll. The printer will position the label to the correct starting position. Use genuine Brother media.
-
Page 11: Cutting Roll Paper
Setting Up the Printer Attaching the Belt Clip Cutting Roll Paper Roll paper can be cut using the printer's tear When using the printer outside the office, you bar. Pull one edge of the ejected paper up can attach the included belt clip to the printer and toward the other edge diagonally. -
Page 12: Installing The Printer Driver And The Software For Rj-4030
Chapter 1 Installing the Printer Make sure that the screw is Driver and the Software tightened securely. There is a risk of injury if the screw is loose and the for RJ-4030 printer falls. Make sure that the belt clip is The procedure for installing the software attached securely to the printer. -
Page 13: Installing The Printer Driver And The Software For Rj-4030Ai
Software, Printer Setting Tool. 4 Brother Support When the screen for the online user registration is displayed, click [OK] or Displays the link to Brother Developer [Cancel]. Center and Brother Solutions Center. If you choose [OK], you will go to the •... -
Page 14: Installing The Printer Driver And The Software For Rj-4040
Chapter 1 Visit our website If you are going to connect the (www.brother.com/inst/) and download printer to your network, we the installer for the software and recommend that you contact your documents. system administrator prior to installation. You must know your Double-click the downloaded .exe file... -
Page 15: Infrastructure Mode
“MEMO” and write down your wireless network settings in the area 1 Access point/router below. 2 Your printer Please do not contact Brother 3 Wireless capable computer connected to Customer Service for assistance the access point/router without the wireless security 4 Wired computer connected to the access information. -
Page 16: Installation Procedure (Using Usb Cable/Wireless Network)
Chapter 1 3 If you do not know the security ® Windows 7 is used in the following example. information, please consult the router manufacturer, your system Insert the installer CD-ROM into your administrator, or internet provider. CD-ROM drive. If the model name screen appears, choose your printer. - Page 17 Setting Up the Printer 5 Brother Support Note Displays the link to Brother Developer When configuring multiple printers for Center, Brother Solutions Center. wireless network connection: • You can use the Printer Setting Tool to After using a USB connection to install the...
- Page 18 Chapter 1 Choose [Yes, I have a USB cable to Do one of the following: use for installation], and then click If the Installation confirmation screen [Next]. appears, check the box and click [Next], then go to e. Otherwise, go to f. Check [Yes] if you want to connect with the listed SSID.
- Page 19 Setting Up the Printer • If your access point is set to not broadcast • If you want to manually assign an IP the SSID, you can enter the SSID address to the printer, click [Change IP manually by clicking the [Advanced] Address] and enter an IP address that is button.
-
Page 20: One Push Configuration Using Wps And Installation
Chapter 1 If you choose [Cancel], installation Note continues. ® ® For Windows Vista and Windows Click [Finish]. users, when the [Windows Security] The installation is now complete. screen appears, click the check box and click [Install] to complete the installation correctly. - Page 21 Installs BRAdmin Light utility. and the software. 5 Brother Support Insert the installer CD-ROM into your Displays the link to Brother Developer CD-ROM drive. If the model name Center, Brother Solutions Center. screen appears, choose your printer. If the language screen appears, choose •...
- Page 22 Chapter 1 When the following screen appears, Choose the printer from the list, and choose [Wireless Network then click [Next]. Connection] and click [Next]. Note When the [Firewall/AntiVirus • If your wireless settings fail, the [Wireless detected] screen appears, choose Device Setup Wizard] screen appears.
-
Page 23: Web Based Management (Web Browser)
Web Based Management (web browser) The Brother print server is equipped with a web server that allows you to monitor its status or change some of its settings using HTTP (Hyper Text Transfer Protocol). -
Page 24: Connecting The Computer And Printer
Chapter 1 Connecting the Bluetooth Connection (RJ-4030/RJ-4030Ai) Computer and Printer Note The printer can be connected to your computer via USB cable, Bluetooth Follow the recommendations of the (RJ-4030/RJ-4030Ai), Wi-Fi (RJ-4040 only) manufacturer of your Bluetooth-equipped and the serial cable. computer or Bluetooth adapter and install any necessary hardware and software. -
Page 25: Wi-Fi Connection (Rj-4040 Only)
The latest version is available for and the Printer Setting Tool (see download at: support.brother.com Installing the Printer Driver and the Choose your product. - [Manuals] Software for RJ-4040 uu page 10). -
Page 26: Using The Printer
Using the Printer Operation Panel The operation panel consists of the following buttons and indicators. RJ-4030/RJ-4030Ai RJ-4040 2 3 4 5 6 7 1 2 3 4 5 6 7 (Power) button (Feed) button 3 POWER indicator 4 STATUS indicator 5 BATT (Battery) indicator (Bluetooth) indicator (RJ-4030/RJ-4030Ai)/... -
Page 27: Button Functions
Using the Printer Button Functions Operation (Power) button function Turn the printer on While the printer is turned off, press and hold the (Power) button until the POWER indicator turns on. Turn the printer off While the printer is turned on, press and hold the (Power) button until the STATUS indicator blinks 1 time in red, and the POWER indicator turns off. -
Page 28: Indicators
Chapter 2 Operation (Bluetooth) button function (RJ-4030Ai only) Enable or disable the Bluetooth Confirm that the Bluetooth function is turned on. Auto re-pairing function. Press and hold the (Bluetooth) button for 5 seconds. If the function is turned off, the (Bluetooth) indicator turns off, and then the printer turns off. -
Page 29: Printing Solutions
The latest software can be downloaded from Make sure that the printer is properly the Brother Solutions Center website powered. Use a charged battery, or (support.brother.com). We recommend that connect the printer to an AC or DC you visit the website to make sure that you power outlet. -
Page 30: Making Prints Lighter Or Darker
Chapter 2 Printer Driver Options Click [Print] in the computer program’s menu. You can configure various settings in the The POWER indicator blinks in green to printer driver screen, such as paper size, indicate that the printer is receiving data, number of copies, print quality, etc. -
Page 31: Setting Paper Size
/ Windows ® Windows Server 2008 / Windows ® Server 2008 R2: From the Start menu, click [All Programs] - [Brother] - [Label & Mobile Printer] - [Printer Setting Tool]. ® ® For Windows 8 / Windows 8.1 / 1 Energy Rank ®... - Page 32 Chapter 2 To save the selected paper format with the new settings, click [Overwrite]. To These settings commands are only add a paper format with the new settings, intended for use for applying to printer change the name in the [Paper Size settings.
-
Page 33: Distributing Paper Formats
Using the Printer Distributing Paper Enter the settings for the paper to be used, and then click [Add]. Formats A new paper format is created. Click [Exit]. The paper formats exported from the [Currently Registered Paper Sizes] list can Note be distributed to other computers. - Page 34 Chapter 2 At the sender's computer, specify the paper format settings, and then click [Export Paper Size List...]. (See Setting Paper Size uu page 27.) The following files are created. RJ-4030: BSR403ed.txt, BSR403ed.ptd, pdt3137.bin RJ-4040: BSR404ed.txt, BSR404ed.ptd, pdt3237.bin Insert the CD-ROM into the CD-ROM drive of the sender's computer.
-
Page 35: Rj Utility
For Windows print a document, print settings are specified From the Start button, select all applications, and then click [Brother] - in the printer driver's dialog box and then the [Label & Mobile Printer] - [Printer data is sent to the printer. This utility can be used to adjust settings that are more Setting Tool]. -
Page 36: Parameters
Chapter 3 Parameters Main Window 1 Printer Note Displays the printer selected in the Printer This setting can also be changed using the Setting Tool. printer driver, however, in this case the setting 2 Command Mode is erased when the printer is turned off. If the Sets the printer’s command format. - Page 37 RJ Utility Available settings: [All], [Usage Log], [Printer 19 Maintenance Settings], [Printer Transfer Data] Displays the [Maintenance] screen. (See Printing the Printer Set-up Information (See Maintenance uu page 36.) uu page 52.) 20 Save Command Settings 8 Align Paper Leading Edge when the Cover Saves the content of the selected (checked) is Closed items as a command-format “.bin”...
- Page 38 Chapter 3 Bluetooth Settings (RJ-4030 only) 1 Bluetooth PIN code Note Allows you to select whether a Bluetooth PIN The PIN code and the device name must use code (passkey) is required, change the alphanumeric characters (A-Z, a-z, 0-9) only. printer's Bluetooth PIN code, and select The device name can contain a space whether Bluetooth communication is...
- Page 39 RJ Utility Bluetooth Settings (RJ-4030Ai only) 1 Bluetooth PIN code PIN code Specify the PIN code that will be used when pairing with devices that are compliant with Bluetooth 2.0 or earlier. Request Secure Simple Pairing (SSP) settings during pairing If this check box is selected, pairing can be performed using the printer buttons for devices that are compliant with Bluetooth 2.1 or later.
- Page 40 Chapter 3 Maintenance 1 Print Printer Information Click to print a report containing the following types of information. Program version Printer usage history Missing dot test pattern RJ Utility setting information List of transferred data Network setting information Wi-Fi setting information See the print sample on the next page.
- Page 41 RJ Utility Printer Information printing sample *Labels are for illustrative purposes only.
-
Page 42: Communication Settings (Rj-4040 Only)
® and the Software for RJ-4040 Server 2008 R2: From the Start menu, click [All uu page 10) Programs] - [Brother] - [Label & Mobile Printer] - [Printer Setting Tool]. To start the Communication ® ® Settings, you must be logged on... - Page 43 Communication Settings (RJ-4040 only) Main Window 1 Disable these settings 6 Settings Tabs Click the tab containing the settings to be When this check box is clicked, appears specified or changed. in the tab, and the settings can no longer be appears in the tab, the settings in that specified or changed.
-
Page 44: Changing The Settings Related To Communications
Chapter 4 Changing the Settings Select the newly connected printer from the [Printer] combo box. Related to Communications Note Make sure that the computer with the If [Automatically detects the connected Communication Settings installed is printer, and retrieves the current connected via USB to the printer that settings.] check box on the [Option you want to change the settings for. -
Page 45: Menu Bar
Communication Settings (RJ-4040 only) Menu Bar 1 Apply Settings to the Printer The saved communication settings Applies the settings to the printer. commands are only intended to be 2 Save Settings in Command File used for applying settings to a Saves the specified settings in a command file. - Page 46 Chapter 4 5 Automatically restart the printer after Note applying new settings • Only personal security authentication settings If this check box is selected, the printer (open system, public key authentication and automatically restarts after communication WPA/WPA2-PSK) can be imported. Enterprise settings are applied.
-
Page 47: Connected Printer's Status
Communication Settings (RJ-4040 only) Connected Printer’s Status TCP/IP (Wireless) 1 Boot Method 1 Current Network Status Select [STATIC], [AUTO], [BOOTP], [DHCP] Displays network status on the right side of the or [RARP]. screen in the settings display/change area. 2 IP Address/Subnet Mask/Gateway Click the [Refresh] button to update the view. - Page 48 Chapter 4 3 Channel Authentication Encryption Mode Select from the displayed options. Method 4 Authentication Method/Encryption Mode WPA-PSK TKIP The supported encryption modes for the various authentication methods are as shown WPA2-PSK in Communication Mode and Authentication/Encryption Methods WPA/WPA2-PSK TKIP uu page 44.
-
Page 49: Other Functions
Other Functions Mass Storage Connect the computer or device to the printer via USB. The printer’s mass storage area is Description displayed on the computer or device’s screen. The mass storage feature allows you to Note execute commands and perform JPEG printing by sending data from a computer or If the mass storage area is not displayed other device to the printer via USB. -
Page 50: Jpeg Printing
Chapter 5 JPEG Printing When the printer is turned off, mass storage mode is deactivated and Image data (JPEG) can be printed without any files in the mass storage area using the printer driver. are deleted. This feature supports “.bin”, “.blf”, Note and “.jpg”... -
Page 51: Maintaining The Printer
Maintaining the Printer Roller Maintenance Maintenance of the printer may be carried out as required. However, some environments require that maintenance must be done more Use a piece of cellophane tape to remove dirt frequently (e.g. in dusty conditions). from the roller. Print Head Maintenance Use a cotton swab and wipe the head. -
Page 52: Paper Outlet Maintenance
Chapter 6 Paper Outlet Maintenance If glue accumulates on the paper outlet and the printer becomes jammed, disconnect the printer from the external power outlet and clean the paper outlet with a cloth dipped in isopropyl alcohol. 3 Paper outlet... -
Page 53: Reference
Reference Indicators The indicators light and blink to indicate the printer’s status. The following symbols are used in this section to explain the meaning of the different indicator colors and patterns. Indicator is lit in the color shown Indicator is blinking in the color shown Indicator blinks 1 or 2 times in each color, then turns off Indicator is lit or blinking in any color or pattern Indicator is off... - Page 54 Chapter 7 BATT (Bluetooth) POWER STATUS Description (BATTERY) (Wi-Fi) Wireless on, not connected* (Once every 3 seconds) Wireless or Bluetooth on, connected Now setting WPS* Pairing with Bluetooth (Once every second) Connecting to an Apple device (iPad, iPhone, or iPod touch) (Once every 2 seconds) Now resetting...
-
Page 55: Indicator Warnings
Printer is in boot mode The AC adapter was unplugged while the firmware was being updated, and the printer started up in boot mode the next time it was started. Contact your reseller or Brother Customer Service for assistance. -
Page 56: Printing The Printer Set-Up Information
Chapter 7 Printing the Printer Set-up Information You can use the (Feed) button to print a report that lists the following printer settings: Program version Printer usage history Missing dot test pattern RJ Utility setting information List of transferred data Network setting information Wi-Fi setting information Note... -
Page 57: Troubleshooting
Has a print error or transmission error occurred? Turn off the printer and on again. If the problem still occurs, contact Brother Customer Service at 1-800-255-0415. Is the roll guide not touching the side of the RD Roll? Move the roll guide against the side of the RD Roll. - Page 58 Chapter 8 Problem Solution A data transmission error appears on Is the correct port selected? your computer. Check that the correct port is selected. Is the printer in cooling mode (the POWER indicator is flashing in orange)? Wait until the indicator stops flashing and then try printing again.
- Page 59 Troubleshooting Problem Solution Printed barcodes cannot be read. Align the label with the print head as shown below. 1 Label exit slot 2 Print head 3 Recommended print direction Some types of scanners are not able to read the barcodes. Try using another scanner.
- Page 60 Chapter 8 Problem Solution I want to reset the printer/delete the data To reset the printer, perform the following procedure; transferred from the computer. 1 Press and hold the (Power) button to turn the printer off. 2 Press and hold the (Feed) button and the (Power) button until the POWER, STATUS and BATTERY...
-
Page 61: Technical Information
Battery Rechargeable Li-ion battery:14.4 V Battery Yield 2,000 labels (when connected by USB, and using a new, fully charged battery.) Tested using Brother’s print test data (7% coverage 4×6 inches) at 73.4 °F (23 °C). Adapter AC adapter (15 V) - Page 62 Label: 1" (25.4 mm) Media sensor Transmissive/Gap, Reflective/Bar Compatible operating systems See support.brother.com for a complete and updated list of software. RJ-4030Ai Compatible List Made for: iPod touch (6th generation), iPod touch (5th generation), iPhone 6s Plus, iPhone 6s, iPhone 6...