Roland A-37 Owner's Manual
Roland a-37: owners manual
Hide thumbs
Also See for A-37:
- Owner's manual (28 pages) ,
- Midi implementation manual (6 pages) ,
- Features (1 page)
Table of Contents
Advertisement
r
A-37
MIDI Controller
Owner's Manual
Thank you, and congratulations on your choice of the Roland A-37 MIDI Controller. The A-37 is a powerful, easy-to-oper-
ate, dedicated keyboard controller for MIDI sound modules (whether or not they are GM2/GM/GS compatible). Please take
the time to read through this Owner's Manual. That way, you can feel assured that you understand every feature the A-37
offers, and will enjoy many years of trouble-free operation.
The Roland A-37 is a MIDI keyboard controller. It does not contain any sound-generating circuitry. It is designed to trans-
mit note messages, program changes, bank select messages as well as a variety of other MIDI messages (such as Reverb
and Chorus Send levels) to an external sound module.
To avoid confusion, let's agree to...
• ...use the word "button" for all keys on the front panel, and only use "key" when referring to the A-37's keyboard.
• ...say "sequencer" when referring to both hardware sequencers (like the Roland MC-80) and computers with
sequencer software.
• ...talk about "MIDI instruments" to signify both isolated ("monotimbral") instruments and parts/timbres/voices/multi
channels of a multitimbral module or synth.
The contents of the illustrations appearing in this manual may differ slightly from what you see when you start using your
instrument.
Before using this instrument, carefully read the sections entitled "Using the unit safely" and "Important notes". These sec-
tions provide important information concerning the proper operation of the A-37. Be sure to keep this manual in a safe
place for future reference.
No part of this publication may be reproduced in any form without the written permission of Roland Europe s.p.a.
Copyright ©2001 ROLAND EUROPE. All rights reserved.
r A-37
1
Advertisement
Table of Contents

Related Manuals for Roland A-37


Summary of Contents for Roland A-37
- Page 1 To avoid confusion, let’s agree to… • …use the word “button” for all keys on the front panel, and only use “key” when referring to the A-37’s keyboard. • …say “sequencer” when referring to both hardware sequencers (like the Roland MC-80) and computers with sequencer software.
- Page 2 Roland Service Center, or an authorized Roland distributor, as listed on the “Information” page. • Never use or store the A-37 in places that are: • Subject to temperature extremes (e.g., direct sun- light in an enclosed vehicle, near a heating duct, on top of heat-generating equipment);...
-
Page 3: Table Of Contents
3.2 Connecting an optional AC adaptor....6 3.3 Connecting the A-37 ......6 3.4 Powering up . -
Page 4: The A-37 In A Nutshell
The A-37’s semi-weighted 76-note keyboard can be used in Layer, Split, and Whole modes. Perfect control The A-37 puts you in control of all things MIDI in your keyboard rig. Velocity sensitivity, Aftertouch, Modulation, and Pitch Bend are built in – and can be set for the Upper and Lower sections independently. -
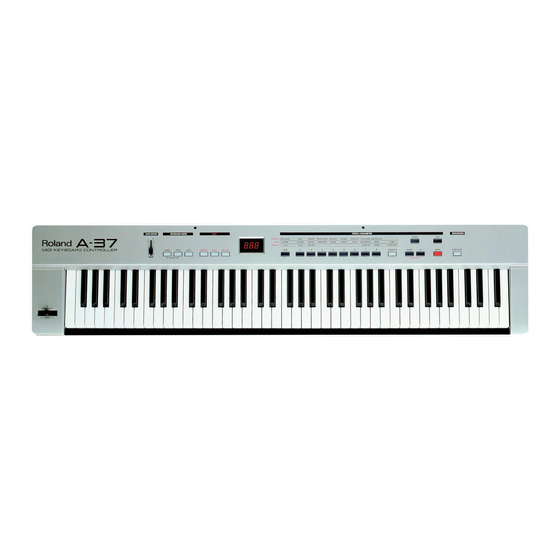
Page 5: Panel Descriptions
P DC IN socket This is where you can connect an optional ACA adaptor. Q POWER switch Set this switch to the ON position to switch the A-37 on. Select the OFF position to power off your A-37. -
Page 6: The Basics
The A-37 can be powered either by batteries or an AC adaptor. Battery replacement Six AA batteries are required to run the A-37 on bat- tery power. We recommend the use of alkaline bat- teries because they will provide a more stable, long- lasting source of power. -
Page 7: Powering Up
(See the sequencer’s/soft- ware’s manual for details.) Note: The MIDI channel you set on the A-37 (see p. 11) may be changed to another number by the sequencer. If that is not the case, be sure to set at least one of the A-37’s zones to the MIDI channel the module (not the... -
Page 8: Keyboard Modes
4. Keyboard modes Owner’s Manual Your A-37 has three buttons that allow you to select one of four Keyboard modes. The KEYBOARD MODE determines how many zones and/or MIDI channels can be used simultaneously. Whole Upper Upper section assigned to all keys This mode means that the Upper section is assigned to the entire keyboard. -
Page 9: Configuring The A-37
5. Configuring the A-37 Your A-37 comes with a great many MIDI parameters, or message types that can be transmitted so as to control your MIDI rig to your liking. Most of the following parameters can be set for the Upper and Lower sections independently – and most of them can be saved to a Patch memory (see p. -
Page 10: Control Parameters
5.2 CONTROL parameters As stated earlier, this is where you will find all parameters that are related to the A-37’s on-board or optional perfor- mance functions. This level also contains a parameter that allows you to check the state of the batteries. -
Page 11: Data Parameters
(or “shift”) the Upper part in octave steps, which may be useful in Layer mode. The setting range is –2, –1, 0, 1, 2 octaves (down or up). Note that the A-37’s keyboard can also be transposed in semitone steps. See page 16. [6] aft (Aftertouch) The A-37’s keyboard transmits channel Aftertouch... - Page 12 SysEx data chunks. In most instances, the recipient will be a sequencer. Here is what you need to do in order to archive the Upper, Lower A-37’s settings: (1) Switch off the A-37 and the sequencer. Upper, Lower Upper, Lower Upper, Lower...
- Page 13 first archive them on the sequencer (see above). (4) Start playback on the sequencer. As soon as the A-37 receives the first Bulk data, the rH (RX) message appears. (5) Wait until the rH message disappears, then stop playback on the sequencer.
-
Page 14: Prg Chg Parameters
As can be inferred from the assigned buttons ([3]~[6] have no function), this EDIT level in fact consists of two groups: the first three parameters can be set for both zones independently, while the last three apply to the A-37 as a whole. - Page 15 0n. [9] syp (Sync Port) This parameter allow you to specify which MIDI OUT socket to use for the transmission of MIDI Start/ Stop ([START/STOP] button) and MIDI Clock mes- sages. The possibilities are: -A-, -B-, and A-B. r A-37...
-
Page 16: Miscellaneous
fine-tuning your set- tings, you should definitely store them before switching off the A-37. It would also be a good idea to save all settings your are satisfied with, even though you may have to change them (or others) at a later stage. -
Page 17: Restoring The Factory Settings
Power on the A-37 while holding down the [WRITE] button. The display will read factory Setup (scrolling message) as soon as the factory settings have been loaded. See page 109 for a list of the A-37’s factory settings. 6.5 Specifications Keyboard: 76 keys, velocity sensitive, with channel... - Page 18 Owner’s Manual...