KRUPS PREP EXPERT KB790 - Blender 1.75 liters Manual
- Instructions manual (50 pages)
Advertisement
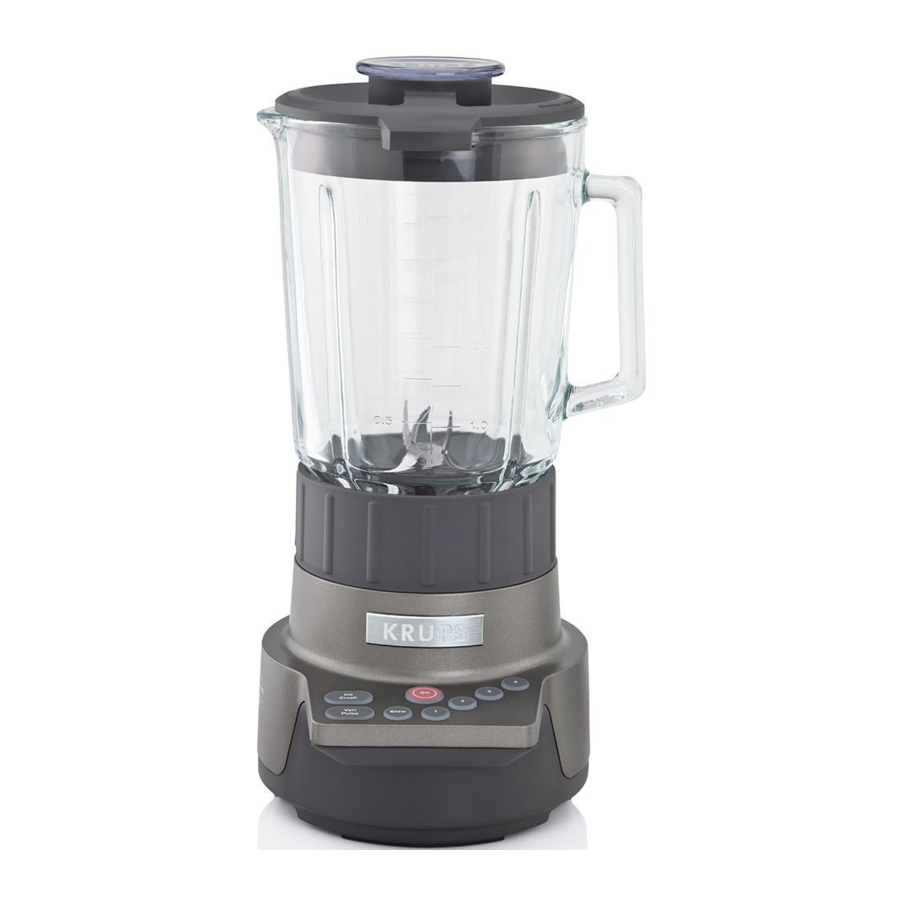
DESCRIPTION

- Die cast base
- Control panel
b1 - Stop button
b2 - Slow speed
b3 - speed 1
b4 - speed 2
b5 - speed 3
b6 - speed 4
b7 - Ice crush function
b8 - Vari-Pulse function - Cord storage
- Blender jar assembly
d1 - Locking ring base
d2 - Removable blade assembly
d3 - Seal
d4 - Graduated 60oz glass jar - Blender jar lid
- Blender jar stopper, 2,5 oz
- Food chopper accessory (available in limited KRUPS Service Centers)
USING YOUR APPLIANCE
- Before first use, wash the blender jar, lid, and lid stopper in warm soapy water. Rinse and dry carefully. Never immerse the base of the appliance in water or put it under running water.
- The blender jar is made of borosilicate glass, which is thermal-shock and scratch resistant. As a result, both hot and cold foods can be prepared in the blender jar. However, when blending hot foods, always ensure that the lid stopper is loosened to allow steam to escape. Always double-check that the lid is correctly locked in place before processing to prevent injury, and allow boiling hot liquids to cool before blending. Temperature should not exceed 212°F
- Place the ring seal (d3) onto the base of the removable blade carrier (d2).
![]()
- Press the assembly (d2 + d3) down into the locking ring base (d1).
It will click into place. - Hold this assembly upside down (locking ring base + blade assembly + seal) and place it onto the glass jar, which has to be held upside down too. Take care to ensure that the glass knobs of the jar (there are two of them) fit into the grooves in the locking ring base.

- Hold the locking ring base (d1) firmly and give the glass jar a quarter turn to lock it in place. For your safety, the setting up and dismantling of the base (d2 + d3) on the bowl (d4) are possible only in the inverted position.
- Place the assembled blender jar (D) onto the metal base (A). There are two possible positions: the jar handle can be in the left or right of the control panel (B). For your own safety, the blender will not start unless it is correctly assembled and positioned on the metal base.
- Place the ingredients to be blended in the jar. Take note of the following maximum levels:
- 60 oz for thick mixtures
- 50 oz for very liquid mixtures
- 6 to 8 large (1/3L or 3 cups max) ice cubes for ice crush.
- Insert the lid stopper in the lid. Place the lid on the jar and twist counter-clockwise to lock the lid in place.
![]()
- Plug in the appliance. To begin blending, choose a function or speed.
To stop blending at any time, press OFF.


Blending speed options are Slow – 1 – 2 – 3 – 4. (Slow is the lowest speed, 4 is the highest speed).
Start on Slow (b2) and then gradually increase to the desired speed. The selected speed button will light up. To stop processing at any time, press OFF (the indicator light for the speed selected will go out).
 NOTE: The Slow speed can also be used to mix in solid ingredients that you do not wish to process, such as adding chocolate chips or nuts after blending a batter.
Always ensure the lid is securely locked in place while the blender is in use. To add ingredients while blending, carefully remove the lid stopper from the center of the lid and add ingredients through the opening. Replace the lid stopper once ingredients have been added.
Always stop blending and unplug the appliance before removing the blender lid. Never remove the blender jar from the base until the blades have come to a complete stop.
SPEED - SUGGESTED FOODS
| Slow To foam milkshakes or smoothies after fruits have been | blended. Blending powdered drink mixes with water. Folding liquid ingredients such as homemade mayonnaise. Mixing solid ingredients into a liquid without processing (e.g. adding chocolate chips to a pancake mix) |
| V1 | Blending softer foods such as chickpeas for hummus. Mixing vegetable dips, preparing salad dressings |
| V2 | Chopping small quantities of foods such as onions or nuts, crushing graham crackers |
| V3 | Blending batters for pancakes or waffles, preparing fresh guacamole or salsa, puree cooked fruits or vegetables. |
| V4 | Pureeing raw, uncooked fruits and vegetables into liquids. |
VARI-PULSE FUNCTION
The Vari-Pulse function allows for more precise control over the degree of blending.
- Vari-Pulse can be selected for any speed from Slow to 4.
- Note that Vari-Pulse cannot be used with Ice Crush as it is already a pulsing function.
- To use Vari-Pulse, push the Vari-Pulse button first. The button will blink to show it has been selected. Then push the button for the desired speed (select from Slow – 1 – 2 – 3 – 4) and hold it down.
Blending will continue as long as the button is pushed, release the button to stop blending.
- To turn off the Vari-Pulse function, press OFF (the indicator light will go out).
- Always stop blending and unplug the appliance before removing the blender lid. Never remove the blender jar from the base until the blades have come to a complete stop.
ICE-CRUSH FUNCTION
This function is designed to automatically pulse to prepare crushed ice.
- To crush ice, add 6 to 8 large ice cubes (1/3L or 3 cups max) into the jar and lock on the lid.
- There is no need to add water.
- Press the Ice Crush button to start. For finely crushed ice, use less ice cubes (maximum 6-8 large ice cubes). When the ice is ready, stop the blender by pressing OFF.
- Always stop blending and unplug the appliance before removing the blender lid. Never remove the blender jar from the base until the blades have come to a complete stop.
IMPORTANT GUIDELINES
- Always ensure that the blender lid and stopper are locked in place before blending. For your safety, the blender will not start unless the blender jar is correctly assembled and positioned on the metal base.
- Always stop blending and unplug the appliance before removing the blender lid. Never remove the blender jar from the base until the blades have come to a complete stop.
- When blending solid ingredients, cut them into smaller pieces (1/2 – 1" long) before adding to the blender jar. When blending a mixture of liquid and solid ingredients, always pour the liquid ingredients into the blender jar first, then add the solid ingredients.
- When blending hot foods, always ensure that the lid stopper is loosened to allow steam to escape. Always double-check that the lid is correctly locked in place before processing to prevent injury, and allow boiling hot liquids to cool before blending.
- To add ingredients while blending, carefully remove the lid stopper from the center of the lid and add ingredients through the opening. Replace the lid stopper once ingredients have been added.
- If you wish to scrape down the slides of the jar, press OFF and unplug the appliance before removing the blender jar from the base. Never reach into the blender jar with the jar still on the base. Unlock the lid and use a plastic spatula to scrape down the sides. The blades at the bottom of the blender jar are very sharp, take care when scraping the jar to not damage your tools.
- Never put hands or fingers into the glass jar or close to the blade.
- Always start blending on the lowest speed then increase to the desired speed.
- Remove the blender jar from the metal base only when it has come to a standstill.
- Cord storage: The power cord can be shortened by feeding back into the metal base through the opening in the rear.
![]()

CLEANING
- Always turn the blender off and unplug, then remove the blender jar from the base before cleaning.
- Wipe the metal base with a damp cloth and dry before using.
- Never immerse the base in water or place under running water.
- Do not clean base with harsh or abrasive chemical cleaners or sponges.
- The blender jar and lid can be washed in the dishwasher. The blender lid should be washed on the top rack only to prevent deformation.
- When washing by hand, use warm water and a gentle dishwashing liquid.
- Always remove the blade assembly from the bottom of the blender jar before washing.
- To clean the blade assembly, empty the jar and hold upside down, with the locking ring base on top, then release the locking ring base, and carefully remove the blade assembly and seal from the locking ring base.

USE EXTREME CAUTION WHEN HANDLING BLADE ASSEMBLY. BLADES ARE EXTREMELY SHARP!!
- Wash the locking ring base, blade assembly, and seal carefully by hand with warm water and gentle dishwashing liquid, then dry before re-assembling to the blender jar.
TROUBLESHOOTING
| Problem: | Cause: | Solution: |
Unit does not work | Blender is unplugged | Plug in the blender |
| The blender jar is not properly assembled or positioned on the base | Confirm that the blade assembly is properly assembled to the blender jar, and that the jar is correctly positioned in the base. | |
Excessive vibration | The blender is placed on an uneven surface. | Place on a flat surface. |
| The blender jar is not properly positioned on the base. | Confirm that the jar is correctly assembled and positioned in the base. | |
Blender jar contents leaking from lid | Maximum capacity exceeded | Note maximum levels as follows
|
| Blender lid is not properly locked in place. | Lock the blender lid in place before blending. | |
Leaking from bottom of blender jar | Silicone seal missing or incorrectly assembled. | Check that the seal is in place and correctly positioned. |
| Seal deformed or damaged. | Replace seal. Replacement seals are available from KRUPS certified service centers. | |
Blades are jammed | Pieces of food are too big or too hard. | Reduce size of pieces of food, blend in smaller quantities, or blend with liquids. |
DISPOSING OF YOUR APPLIANCE

 Your appliance contains valuable materials which can be recycled.
 Consult your local waste collection center for correct disposal procedure and recycling options.

Documents / ResourcesDownload manual
Here you can download full pdf version of manual, it may contain additional safety instructions, warranty information, FCC rules, etc.
Download KRUPS PREP EXPERT KB790 - Blender 1.75 liters Manual
Advertisement
Thank you! Your question has been received!


Need Assistance?
Do you have a question about the PREP EXPERT KB790 that isn't answered in the manual? Leave your question here.