Table of Contents
Advertisement
Quick Links
Advertisement
Table of Contents

Related Manuals for Synology RackStation RS2418RP+


Summary of Contents for Synology RackStation RS2418RP+
- Page 1 Synology RackStation RS2418+/RS2418RP+ Hardware Installation Guide...
-
Page 2: Table Of Contents
Table of Contents Chapter 1: Before You Start Package Contents Synology RackStation at a Glance Safety Instructions Chapter 2: Hardware Setup Tools and Parts for Drive Installation Install Drives Add a RAM Module on RackStation Attach Network Interface Cards to the RackStation... -
Page 3: Package Contents
Chapter Before You Start Thank you for purchasing this Synology product! Before setting up your new RackStation, please check the package contents to verify that you have received the items below. Also, make sure to read the safety instructions carefully to avoid harming yourself or damaging your RackStation. -
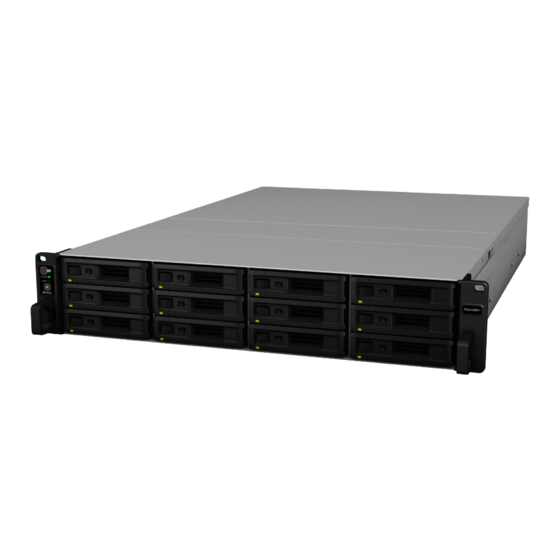
Page 4: Synology Rackstation At A Glance
Synology RackStation at a Glance RS2418+ RS2418RP+ Article Name Location Description 1. Press to power on the RackStation. Power Button and 2. To power off the RackStation, press and hold until you hear a beep Indicator sound and the Power LED starts blinking. - Page 5 RackStation to “Not Installed” status so that DiskStation Manager (DSM) can be reinstalled. For more information about Synology Expansion Unit supported by your RackStation, please visit www.synology.com. 5 Chapter 1: Before You Start...
-
Page 6: Safety Instructions
Safety Instructions Keep away from direct sunlight and away from chemicals. Make sure the environment does not experience abrupt changes in temperature or humidity. Place the product right side up at all times. Do not place near any liquids. Before cleaning, unplug the power cord. Wipe with damp paper towels. Do not use chemical or aerosol cleaners. -
Page 7: Chapter 2: Hardware Setup
Tools and Parts for Drive Installation • A screwdriver • At least one 3.5” or 2.5” SATA drive (please visit www.synology.com for compatible drive models.) Warning: If you install a drive that contains data, the system will format the drive and erase all existing data. Please back up any important data before installation. - Page 8 3 Insert the loaded drive tray into the empty drive bay. Make sure the tray is pushed in all the way. Otherwise, the drive might not be able to function properly. Note: 4 Push the handle inward to secure the drive tray. 5 Push the switch on the drive tray handle to the left to lock the drive tray.
-
Page 9: Add A Ram Module On Rackstation
Add a RAM Module on RackStation The optional Synology RAM module is designed for RackStation memory expansion. Follow the steps below to install, check, or remove a RAM module on your RackStation. To install the RAM module: 1 Shut down your RackStation. Disconnect all cables connected to your RackStation to prevent any possible damage. - Page 10 3 Insert the new memory module in the slot: a Push the retaining clips on the slot out to the sides. b Align the notch on the gold edge of the module with the notch in the memory slot. c Push down on the memory module with firm and even pressure. The retaining clips will snap into position as the module is correctly inserted.
- Page 11 To remove the RAM Module: 1 Follow step 1 and 2 of the “To install the RAM module” section to shut down your RackStation, disconnect the cables, and then remove the rear top cover. 2 Push the levers on the sides of the memory module in an outward direction to release the module from the memory card slot.
-
Page 12: Attach Network Interface Cards To The Rackstation
Make sure the connector is fully inserted. Otherwise, the network interface card might not be able to function Note: properly. 4 Put back the rear top cover by following step 4 of Add a RAM Module on RackStation. For more information about supported 10GbE or Gigabit network interface cards, please visit www.synology.com. 12 Chapter 2: Hardware Setup... -
Page 13: Replace System Fan
Replace System Fan If a system fan malfunctions, please see the instructions below to open the RackStation and replace the malfunctioning fan. 1 Press the small buttons located on the sides of the RackStation. 2 Lift to remove the fan cover. 3 Fans are numbered as indicated below: 4 Find the malfunctioning fan. -
Page 14: Replace Redundant Psu
5 Prepare a new fan, and slide it into the RackStation. Make sure the fan is aligned properly as illustrated below. 6 Put back the fan cover you removed in step 2. Replace Redundant PSU on RackStation If a PSU or its fan malfunctions, please see the instructions below to replace the malfunctioning PSU. -
Page 15: Start Up Your Rackstation
Start Up Your RackStation 1 Connect one end of each power cord to the power ports located on the back of the RackStation and the other end to a power outlet. 2 Connect at least one LAN cable to one of the LAN ports and the other end to your switch, router, or hub. 3 Make sure the Power Supply On/Off Switch is turned on (“─”). -
Page 16: Chapter 3: Install Dsm On Rackstation
Chapter Install DSM on RackStation After hardware setup is finished, please install DiskStation Manager (DSM) – Synology’s browser-based operating system – on your RackStation. Install DSM with Web Assistant Your RackStation comes with a built-in tool called Web Assistant that helps you download the latest version of DSM from the Internet and install it on your RackStation. - Page 17 • Basic • JBOD • RAID 0 • RAID 1 Supported RAID Type • RAID 5 • RAID 6 • RAID 10 • Synology Hybrid RAID (Up to 2-Disk Fault Tolerance) Agency Certification • FCC Class A • CE Class A • BSMI Class A...
- Page 18 Please try to restart your RackStation or re-insert the drive(s), and then run the HDD/SSD manufacturer's diagnostic tool to check the health status of the drive(s). If you can log into DSM, please run the built-in S.M.A.R.T. test to scan the drive(s). If the problem remains unresolved, please contact Synology Technical Support for help.
- Page 19 Section 5. License Limitations. The license set forth in Sections 1, 2 and 3 applies only to the extent that you have ordered and paid for the Product and states the entirety of your rights with respect to the Software. Synology reserves all rights not expressly granted to you in this EULA.
- Page 20 Arbitration Law and related enforcement rules of the country in which Synology Inc. was organized. In such cases, the arbitration will be limited solely to the dispute between you and Synology. The arbitration, or any portion of it, will not be consolidated with any other arbitration and will not be conducted on a class-wide or class action basis.
- Page 21 Section 3. Limited Warranty and Remedies 3.1 Limited Warranty. Subject to Section 3.6, Synology warrants to the Customer that each Product (a) will be free of material defects in workmanship and (b) under normal use will perform substantially in accordance with Synology's published specifications for the Product during the Warranty Period.
- Page 22 Section 4. Limitations of Liability 4.1 Force Majeure. Synology will not be liable for, or be considered to be in breach of or default under this Warranty on account of, any delay or failure to perform as required by this Warranty as a result of any cause or condition beyond its reasonable control (including, without limitation, any act or failure to act by Customer).
- Page 23 Arbitration Association, except as otherwise provided below. The arbitration will be conducted before a single arbitrator, and will be limited solely to the dispute between Customer and Synology. The arbitration, or any portion of it, will not be consolidated with any other arbitration and will not be conducted on a class-wide or class action basis. The arbitration shall be held in King County, Washington, U.S.A.
- Page 24 5.9 Entire Agreement. This Warranty constitutes the entire agreement, and supersedes any and all prior agreements, between Synology and Customer related to the subject matter hereof. No amendment, modification or waiver of any of the provisions of this Warranty will be valid unless set forth in a written instrument signed by the party to be bound thereby.
- Page 25 FCC Declaration of Conformity This device complies with Part 15 of the FCC Rules. Operation is subject to the following two conditions: (1) this device may not cause harmful interference, and (2) this device must accept any interference received, including interference that may cause undesired operation.