
Related Manuals for Synology 406 Series


Summary of Contents for Synology 406 Series
- Page 1 Synology 406 Series Server User’s Guide Syno406Series_UG_20060814_enu (Based on DS2.0 Ver. 2.0363)
- Page 2 LIMITED WARRANTY AND LIABILITY Synology provides a limited warranty for its Products only to the initial person or entity that originally purchased the Products from Synology or its authorized distributor or retailer. Synology warrants that every hardware portion of the...
- Page 3 (ii) the related order for, purchase, delivery, receipt or use of any product or service from Synology, or iii) any other dispute arising out of or relating to the relationship between You and Synology; the term “Synology” means Synology,...
- Page 4 Synology reserves all rights to revise or update its Products, other products, software, or related documentation without further notice. Synology Inc. reserves the right to revise this publication and to make changes in the content hereof without the obligation to notify any person of such revision...
-
Page 5: Table Of Contents
Index Safety Warnings and Instructions....................6 About this User’s Guide......................7 Getting to know your Synology Server ..................8 Introduction ......................... 8 File Server ..........................8 Backup Server .........................8 FTP Server ..........................8 Entertainment Application.......................8 USB Printer Server........................8 Specification ........................8 Limitations ......................... 10 Appearance........................ - Page 6 Photo Station........................36 Enabling Photo Station ......................36 Photo Station’s detail description ..................36 Mail Notification......................... 36 Firmware Update....................... 37 Expanding HDD Capacity ......................38 External USB HDD......................38 Troubleshooting ........................39 Appendix..........................40 Recommended Peripherals ....................40 Recommended SATA HDD ....................40 Recommended USB Printer....................40 Recommended UPS ......................42 Recommended NTP Server ....................
-
Page 7: Safety Warnings And Instructions
Safety Warnings and Instructions Please read this safety warnings and instructions carefully before use, and keep it well for your future reference. Do not place the product in direct sunlight or near chemicals. Make sure that the environment does not experience abrupt changes in temperature or humidity. -
Page 8: About This User's Guide
About this User’s Guide This user's guide covers all the functions of Synology 406 series server. Some of the functions may only be available on specific models. -
Page 9: Getting To Know Your Synology Server
Getting to know your Synology Server Introduction Congratulations on your purchase of Synology 406 series server (“Synology Server”). Synology Server is specially designed for SMB & Enterprise users with multiple functions: File Server Windows and Mac users can easily share files within Intranet or through Internet. - Page 10 Item CS-406e CS-406 RS-406 LAN Port RJ-45 RJ-45 RJ-45 10/100/1000Mbps 10/100/1000Mbps 10/100/1000Mbps Windows User Windows 98 Windows 98 Windows 98 onward onward onward Mac User Mac OS 9 onward Mac OS 9 onward Mac OS 9 onward Maximum 1,024 1,024 1,024 User Accounts Maximum...
-
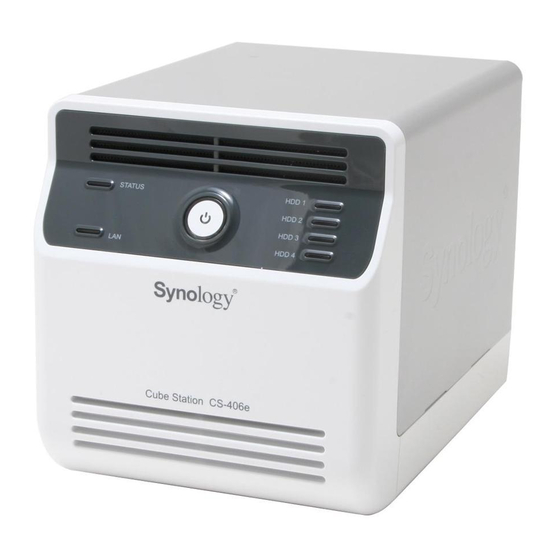
Page 11: Limitations
Operating Altitude Operating Altitude Operating Altitude 10,000 feet 10,000 feet 10,000 feet Limitations Supports up to 1 USB printer. Supports up to 2 USB disks. For Mac users, Synology Server supports only USB printers with PostScript. Appearance CS-406/CS-406e Front View... - Page 12 DC in 12V RESET Article Name Location Description Power Button Front Panel The Power Button is used to turn Synology Server On or Off. It will take approximately 30 seconds to 1 minute to turn on Synology Server. To turn Off Synology Server, press the Power Button until you hear a "beep"...
- Page 13 LAN Port Back Panel The LAN port is where you connect RJ-45 cable to Synology Server. DC IN 12V Back Panel The DC IN 12V Port is where you connect the AC Port Power Adapter.
-
Page 14: Rs-406
Power LAN USB Console Article Name Location Description Power Button Front Panel The Power Button is used to turn Synology Server On or Off. It will take approximately 30 seconds to 1 minute to turn on Synology Server. To turn Off Synology Server, press the Power Button until you hear a "beep"... -
Page 15: Led Indication Descriptions Table
"beep" every 1 second. Console port Back Panel The console port is where you connect Synology Server directly to a computer. RESET Back Panel To restore IP, DNS, passwords for the Button "admin" account to default value, and reset the “guest” account to the “enabled” status. -
Page 16: Managing Synology Server
There are two options for you to enter the management UI: Using Setup Utility [Windows User] Insert the Installation CD into CD/DVD-Rom Drive. Choose “Synology Assistant” at the Autoup Menu. Follow the steps to complete installation. After installation, double click on the desktop icon to execute the program. - Page 17 Choose the server you want to manage and click “Manage” to enter the Web Management UI. Choose “login as system administrator (admin)”, input password and click “Enter”. [Mac OSX User] Insert the Installation CD into CD/DVD-Rom Drive. Double-Click CD-Rom Drive thumbnail. Double-Click "MacOSX" thumbnail. Double-Click "Synology Assistant-SYNOLOGY.dmg" thumbnail.
-
Page 18: Accessing Web Management Ui Manually
Double-Click "Synology Assistant" thumbnail to run setup wizard. Choose a Synology Server and click "Manage" to enter the Web Management UI. Choose "login as system administrator (admin)", input password and click "Enter". Please note: To ensure flawless management process, please use the following browsers:... -
Page 19: Managing Synology Server
Managing Volume You can combine hard disks on Synology Server to create different types of volumes, and find the data protection level of your need. The Synology Server provides you various volume types as follows:... -
Page 20: Repairing Volume By Hot Swapping
Joining Windows Domain You can add Synology Server to Windows domain and let the domain users access Synology Server. Synology Server supports both Active Directory Service (ADS) and NT4 domain. After being added to a Windows domain, the domain users only need to enter their domain account and password when trying to access the Synology Server. -
Page 21: Assigning Access Right For Domain Users
“guest” account to the “enabled” status. Reinstalling Synology Server If for any reason you have to reinstall the Synology Server, you can press the RESET button on the back panel twice, and the Synology Server will be reinstalled. -
Page 22: Accessing Synology Server Data
Accessing Synology Server Data File sharing service is Synology Server's major function. Administrator can set up access rights for users either with Windows or Mac to access shared folders. Shared Folders System Built-in Name Description The shared folder “web” is for storing web pages. When Web Station is enabled, users can browse the constructed website through browser. -
Page 23: Setting Access Control
Folder” of the Web Management UI and set access rights for different users by selecting the shared folder and clicking “View/Edit”. If Synology Server has been added to the Windows domain, you will see the domain users listed under the “User” list. You can also grant access right for the... -
Page 24: Setting Encoding
Setting Encoding Synology Server uses Unicode to manage files. The benefit of using Unicode is to avoid file inaccessibility between users who use different languages. However, for users without Unicode support on their PC, Administrator can set the encoding method of the files to overcome the problem. Please go to the page... -
Page 25: Accessing Shared Folders
Windows users can access Synology Server’s shared folders by using Setup Utility to map Network Drive Synology Assistant, which is included in the Installation CD, not only helps Administrator manage Synology Server, but also provides users with the following steps to map Network Drive: Run Synology Assistant. -
Page 26: Mac User
Upon completion, user can access the mapped shared folder in Windows Explorer. Mac User Mac user can use ”Go > Connect to Server” to choose a Synology Server and access the shared folder on the server. -
Page 27: Through Ftp
“Network > FTP Service” page of the Web Management UI. Windows users and Mac users can thus access data in Synology Server by FTP Protocol. To prevent data from being access while transferring, users can also use “FTP over SSL”... - Page 28 Administrator has the option to adjust FTP Bandwidth or enable Anonymous login. FTP Service does not support Unicode. Before enabling FTP Service, please go to “Network > Win/Mac OS” page and setup codepage according to user’s client PC.
-
Page 29: Server Backup And Pc Backup Solutions
By using “Network Backup”, Administrator can backup Synology Server’s data to another Synology Server. By installing Synology Data Replicator II software on the client PC, Windows users can backup data from PC to Synology Server. Administrator can also backup Synology Server’s User, Group, and Shared folders (see details below). -
Page 30: Network Backup
Backup Personal Data Windows users can install “Synology Data Replicator II” backup software which can be found on the installation CD. They can backup client PC data to Synology Server to maintain a good copy of data whenever needed. Using Synology Data Replicator II, users can:... -
Page 31: Before Starting
Synology Data Replicator II is the next generation of Synology Data Replicator. It can only restore backup data on Synology Server generated by itself. If users have backed up data on Synology Server using Synology Data Replicator, we recommend restoring data on Synology Server to PC first before using Synology Data Replicator II. -
Page 32: Using Synology Data Replicator Ii
After installation, double click on the software icon to execute the program. Click on “Help” for detail description. Backing up Synology Server Settings There are two options for you to backup Synology Server’s “User”, “Group”, “Shared Folder” settings for easy maintenance and restoration. Synology Server to PC Client Go to the page “System >... -
Page 33: Synology Server To Another Synology Server
Synology Server to another Synology Server The data backed up to another Synology Server using “Network Backup” automatically includes the “User”, “Group”, “Shared Folder” settings. When you recover the data, you can choose if you want to recover these settings. -
Page 34: Sharing Usb Printer
Sharing USB Printer Synology Server supports Windows 98 and above users, and Mac OS 9 and above users to share USB Printer. For the detailed settings on different platforms, please refer to the page “Device > USB Printer” of the Web Management UI. -
Page 35: Extra Features
Extra Features Multimedia Service When “Multimedia Service” is enabled, users who have UPnP DMA (Digital Media Adapter) can browse multimedia files on Synology server. Please go to “Network > Multimedia Service” page for further setup. Download Station Synology server can download files from Internet through BitTorrent, FTP, and HTTP. -
Page 36: Web Station
Web Station Personal or corporate website can be easily setup using “Web Station.” By integrating with PHP and MySQL, users can also setup online shop. PHP support is turned on by default, MySQL requires manually enabling. Enabling Web Station and MySQL Go to the “Network >... -
Page 37: Photo Station
Photo Station’s detail description Please click on “Here” link under “Enable Photo Station”. Mail Notification Administrator can enter email address on the page “Network > Mail”. Synology Server will send email to the address whenever an important event occurs to notify Administrator. -
Page 38: Firmware Update
Firmware Update To keep your Synology Server up to date, Administrator can go to “Tools > Update” page to upgrade firmware. -
Page 39: Expanding Hdd Capacity
HDD. External USB HDD When connecting an external USB HDD to Synology Server’s USB port, “usbshare1” shared folder will be created automatically. Upon disconnecting external USB HDD, the shared folder will be removed. For more than 1 external USB HDD is connected, “usbshare1”, “usbshare2”... -
Page 40: Troubleshooting
Troubleshooting For any questions about managing your Synology Server, please refer to the “Help” button at every page of the Web Management UI. For any questions other than that, please visit Synology Inc. website (www.synology.com) for further assistant. -
Page 41: Appendix
Appendix Recommended Peripherals Recommended SATA HDD Brand Model Capacity Seagate ST3120026AS 120GB Seagate ST3300831AS 300GB Seagate ST3500641AS 500GB Seagate ST3400832AS 400GB Hitachi HDS725050KLA360 500GB Hitachi HDS722525VLSA80 250GB Maxtor 6H400F0 400GB Maxtor 6H500F0 500GB Maxtor 6V250F0 250GB Maxtor 6V300F0 300GB Maxtor 7H500R0 500GB Maxtor... - Page 42 Brand Model Remark LP-2500 LP-6100 LP-8800C LP-9100 LP-9100PS3 PM-3700C PM-4000PX PM-760C PM-970C PM-D750 Printer function only. PM-G700 PM-G800 PX-G900 PX-V500 PX-V600 DESKJET5160 DESKJET5650 DESKJET5850 LaserJet 2300n Also supports Mac OFFICEJET5510 OFFICEJET6150 PSC1350 PSC2450 PSC2550 Photosmart 1100c Also supports Mac i320 Canon PIXMA iP 1500 PIXMA iP 3000...
-
Page 43: Recommended Ups
Recommended UPS Brand Model Remark Back-UPS Series USB interface Recommended NTP Server The main purpose of Network Time Protocol (NTP) is for synchronizing clocks of computer system over data network. We have provided a few recommended NTP servers. For more information about NTP Server, please visit http://www.eecis.udel.edu/~mills/ntp/servers.html Below are few recommended NTP server: time.apple.com...