Fluke VT02, VT04 - Visual IR Thermometer Manual
- User manual (40 pages) ,
- Quick manual (2 pages) ,
- Quick reference manual (2 pages)
Advertisement
- 1 Introduction
- 2 How to Contact Fluke
- 3 Safety Information
- 4 Before You Start
- 5 Power On and Off
- 6 Rechargeable Battery
- 7 Features and Controls
- 8 Button Operation
-
9
Menu Functions
- 9.1 Basic Navigation
- 9.2 Review Memory
- 9.3 Emissivity
- 9.4 Temperature Measurement
- 9.5 Color Palette
- 9.6 Reflected Background Temperature
- 9.7 Spot Temperature Markers
- 9.8 Temperature Units
- 9.9 Date and Time
- 9.10 Hi/Lo Temperature Alarm (VT04)
- 9.11 Time-Lapse Image Capture (VT04)
- 9.12 Auto-Monitor (VT04)
- 10 Measurements
- 11 Smartview Software
- 12 Maintenance
- 13 Specifications
- 14 Documents / Resources
Introduction
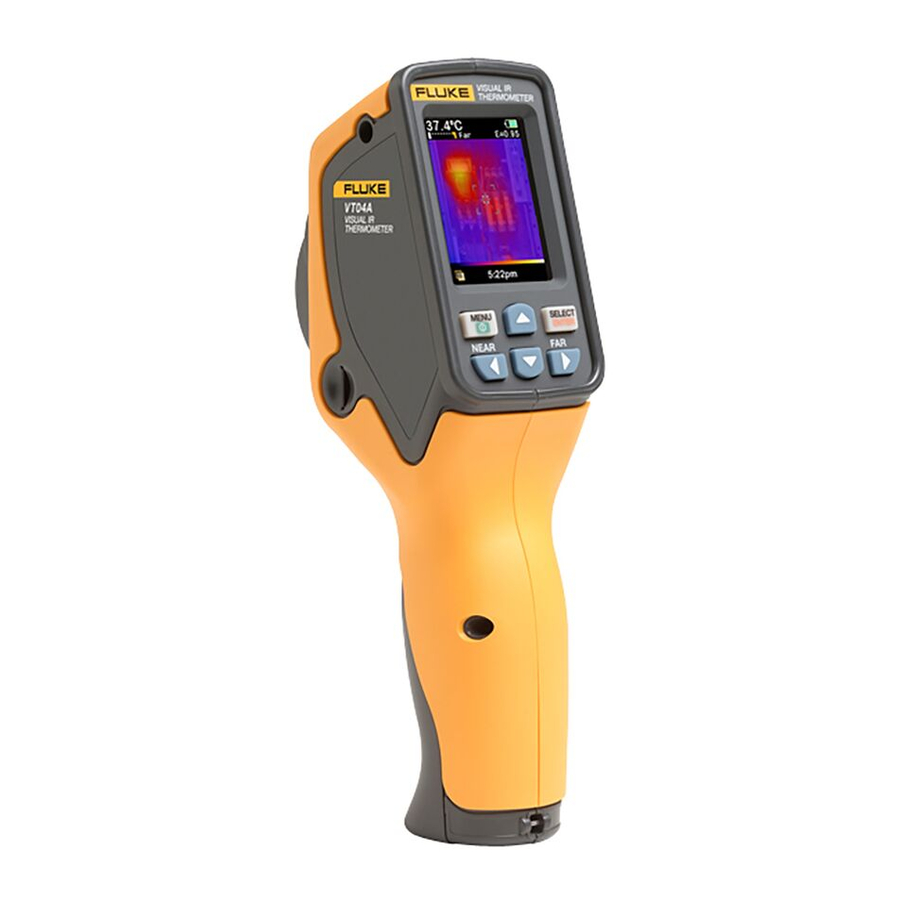
The VT Series (the Product) are Visual IR Thermometers that combine surface temperature measurement with real-time thermal and visual images. The thermal image removes the time necessary for component-by-component measurement associated with a traditional spot thermometer (radiometer). The Product is ideal for electrical, HVAC, and facility maintenance applications.
The recommended use model is:
- Scan a broad area with the blended thermal and visual image to quickly identify temperature anomalies that need more inspection.
- Use the wide field-of-view to move closer to the target for a temperature measurement with more detail.
- Capture both thermal and visual images with a single trigger pull.
- Create a report with Fluke SmartView® software.
The Product is easy to use. Turn on and within seconds it provides an image with no training needed. Several features increase the accuracy and usability of the Product:
- Adjustable emissivity and reflected background compensation improves measurement accuracy on semi-reflective surfaces
- Hot and cold spot temperature markers that guide the user to the hottest and coldest regions in the thermal image
- Selectable color palettes
- Visual/Thermal image alignment
The VT04 includes these additional features:
- Hi/Lo Temperature Alarms
- Time-Lapse Image Capture
- Auto-Monitor
How to Contact Fluke
To contact Fluke, use one of these telephone numbers:
- USA: 1-800-760-4523
- Canada: 1-800-36-FLUKE (1-800-363-5853)
- Europe: +31 402-675-200
- Japan: +81-3-6714-3114
- Singapore: +65-6799-5566
- Anywhere in the world: +1-425-446-5500
Or, visit Fluke's website at www.fluke.com.
To register your Product, visit http://register.fluke.com.
To view, print, or download the latest manual supplement, visit http://us.fluke.com/usen/support/manuals.
Safety Information
A Warning identifies hazardous conditions and procedures that are dangerous to the user. A Caution identifies conditions and procedures that can cause damage to the Product or the equipment under test.

To prevent possible electrical shock, fire, or personal injury:
- Read all safety information before you use the Product.
- Carefully read all instructions.
- Use the Product only as specified, or the protection supplied by the Product can be compromised.
- Replace or recharge the batteries when the low battery indicator shows to prevent incorrect measurements.
- Do not use the Product around explosive gas, vapor, or in damp or wet environments.
- Do not use the Product if it operates incorrectly.
- Do not use the Product if it is damaged.
- See emissivity information for actual temperatures.
Reflective objects result in lower than actual temperature measurements. These objects pose a burn hazard. - Remove the batteries if the Product is not used for an extended period of time, or if stored in temperatures above 50 °C. If the batteries are not removed, battery leakage can damage the Product.
- Follow all battery care and charging instructions in this manual.
- Use only specified replacement parts.
- Use only the Fluke supplied power adapter to charge the VT04 battery.
Table 1 is a list of symbols used on the Product or in this manual.
Table 1. Symbols
| Symbol | Description |
 | Important information. See manual. |
 | Hazardous voltage. Risk of electrical shock. |
 | Conforms to relevant Australian standards. |
 | Conforms to requirements of European Union and European Free Trade Association. |
 | Conforms to relevant South Korean EMC standards. |
 | This camera contains a Lithium-ion battery. Do not mix with the solid waste stream. Spent batteries should be disposed of by a qualified recycler or hazardous materials handler per local regulations. Go to Fluke's website for recycling information. |
 | This product complies with the WEEE Directive (2002/96/EC) marking requirements. The affixed label indicates that you must not discard this electrical/electronic product in domestic household waste. Product Category: With reference to the equipment types in the WEEE Directive Annex I, this product is classed as category 9 "Monitoring and Control Instrumentation" product. Do not dispose of this product as unsorted municipal waste. Go to Fluke's website for recycling information. |
Before You Start
Table 2 is a list of all items included with the Product.
Table 2. Packing List
| Description | Part Number | Model | |
| VT02 | VT04 | ||
| VT02 Visual IR Thermometer | 4253599 | • | |
| VT04 Visual IR Thermometer | 4366444 | • | |
| AA Alkaline Batteries (QTY. 4) | 1560231 | • | |
| Rechargeable Battery | 4365971 | • | |
| Micro SD Memory Card and conversion adapter to standard SD Memory Card[1] | 4269849 | • | • |
| Transport/Storage Case | 4272528 | • | • |
| Micro USB Charger/Power Supply | 4366918 | • | |
| VT Series Quick Reference Card[2] | 4257700 | • | • |
| CD-ROM with Users Manual | 4253607 | • | • |
| SmartView® Software on CD-ROM | 2814474 | • | • |
| [1] Fluke recommends the micro SD memory card that is supplied with the Product. Fluke does not warrant the use or reliability of aftermarket SD memory cards of different brands or capacities. [2] Printed in English, Spanish, French, German, and Simplified Chinese. See the CDROM for additional languages. To request a printed Quick Reference Card in a language not supplied with your product, email Fluke at TPubs@fluke.com. Specify the product name and language preference in the subject line. | |||
Power On and Off
To turn on the Product, push and hold  for 2 seconds. A start-up screen shows on the display and an indicator bar shows the status, see Figure 1. The indication bar increases on power up and decreases on power down. After the start-up screen, the Product is ready to use. To turn off the Product, push and hold for 2 seconds.

Figure 1. Start-Up Screen and Status Indicator
The Auto Off feature turns off the Product after 10 minutes of inactivity.
For the first time use, or when the batteries are removed for more than a few hours, the Date and Time menu opens. See later sections for more information about how to set the date and time.
Note
All visual IR thermometers need sufficient warm-up time for the most accurate temperature measurements. This time can often vary by model and by environmental conditions. Although most visual IR thermometers are fully warmed up in 3 to 5 minutes, it is always best to wait a minimum of 10 minutes if the most accurate temperature measurement is very important to your application. When you move a visual IR thermometer between environments with large differences in ambient temperature, more adjustment time can be required.
Rechargeable Battery
The VT04 has a rechargeable Li-ion battery.
Note
New batteries are not fully charged. Two to ten normal charging/discharging cycles may be required before the battery charges to its maximum capacity.
Before using the VT04 for the first time, charge the battery:
- Plug the ac power supply into an ac wall outlet.
- Connect the micro-USB connector to the VT04. See Figure 2.
While the battery is charging,![]() shows on the display and the status LED is red. When charged,
shows on the display and the status LED is red. When charged, ![]() shows on the display and the status LED is green. The typical charge time from 100% discharged to 100% charge is 5 to 6 hours.
shows on the display and the status LED is green. The typical charge time from 100% discharged to 100% charge is 5 to 6 hours.
 shows on the display and the status LED is red. When charged,
  shows on the display and the status LED is green. The typical charge time from 100% discharged to 100% charge is 5 to 6 hours.
Figure 2. Rechargeable Battery
Note
Make sure the Product is near room temperature before you connect it to the charger. See the charging temperature specification. Do not charge in hot or cold places. Charging in extreme temperatures reduces the battery pack's ability to hold a charge.
Features and Controls
Table 3 is a list of the Product features with the location of each control.
Table 3. Features

| Item | Description |
 | LCD Display |
 | Power On/Off and Menu |
 | Micro SD Memory Card Slot |
 | Lanyard |
 | Tripod Mount |
 | Select/Enter |
 | Infrared Lens |
 | Rotating Lens Cover (VT02) |
 | Visual Camera |
 | Trigger for Image Capture |
 | Battery Cover |
 | Micro USB Connector (Input 2.5 W, 0.5 A at 5 V) |
 | Battery Charge Status LED |
Button Operation
Two functions are accessed directly from the buttons: Blending/Capture and Save. The arrow buttons are used for menu navigation.
Image Blending
Image blending makes it easier to understand infrared images through the use of an aligned visible image and infrared image. The Product captures a visible image with each infrared image to exactly show the target area and more effectively share it with others.
To use the blending function:
- Push
![]() until
until ![]() shows in the bottom left-hand corner of the screen.
shows in the bottom left-hand corner of the screen. - Use
![]() to adjust the blending from 0% to 100%.
to adjust the blending from 0% to 100%.
 shows in the bottom left-hand corner of the screen.
The blend options are shown in Figure 3.

Figure 3. Blend Options
Visual Image Alignment Control
The image blending overlay and the visual camera are positioned above each other in the VT Series. This vertical parallax will change with distance to your object. To correct the parallax for a near or far distance you have a visual image alignment control. See Figure 4.

Figure 4. Visual Image Alignment
To toggle the control between a near object or far object:
- Push NEAR (
![]() ) for a measurement distance from 15 cm to 23 cm (6 in to 9 in).
) for a measurement distance from 15 cm to 23 cm (6 in to 9 in). - Push FAR (
![]() ) or a measurement distance further than 23 cm/9 in.
) or a measurement distance further than 23 cm/9 in.
The Near or Far icon shows in the upper left corner of the display.
 ) for a measurement distance from 15 cm to 23 cm (6 in to 9 in).
 ) or a measurement distance further than 23 cm/9 in.
Capture and Save
The Product saves up to 10,000 images/GB on the Micro SD memory card.
To capture the image and save it to memory:
- Push
![]() until
until ![]() shows in the bottom right-hand corner of the screen.
shows in the bottom right-hand corner of the screen. - Point the Product at the object or area of interest.
- Pull the trigger to capture the image.
The image remains frozen for about 4 seconds. Next, a dialog box prompts you to save or discard the image. - Push
![]() to save or
to save or ![]() to discard the image.
to discard the image.
 shows in the bottom right-hand corner of the screen.
The display has an icon that shows the current status of the micro SD memory card, see Figure 5.
![]()
Figure 5. Micro SD Memory Card Warning Icons
- No Micro SD Memory Card in slot
- Micro SD Memory Card card error
- Micro SD Memory Card empty
- Micro SD Memory Card full
Note
A routine file back-up procedure is recommended for the Micro SD Memory Card to store these files in a safe location.
Menu Functions
To open the display menu, push . The menu has options for memory, emissivity, background temperature, spot temperature markers, date, and time.
Basic Navigation
The basic functions of the Product are accessible with the six buttons and color display. Only five options show on the display at one time. The  buttons scroll through the display menu. The middle option is always highlighted in yellow. See Figure 6.
![]()
Figure 6. Menu Navigation and Battery Icon
Push  to select the menu option and edit the value. The buttons change the value of the menu selection. After adjustments are made, push to accept a new value and exit the edit mode. See Figure 7.

Figure 7. Parameter Adjustment
Table 4 is a list of the menu icons and their descriptions.
Table 4. Menu Icons
| Icon | Description |
 | View Stored images |
 | Emissivity |
 | Color Palette |
 | Background Temperature |
 | Temperature Markers |
 | Temperature Units |
 | Clock |
 | Hi/Lo Temperature Alarm (VT04) |
 | Auto-Monitor (VT04) |
 | Time-Lapse Image Capture (VT04) |
Review Memory
The Memory mode lets you view the stored images. You can also delete images in this menu.
- Push
![]() to open the Memory mode.
to open the Memory mode. - Push
![]() to scroll through and review the stored images.
to scroll through and review the stored images. - Push
![]() to delete image.
to delete image.
Emissivity
The emissivity is adjustable in 0.01 steps from 0.10 to 01.00. The default value is set at 0.95.
The correct emissivity values are important for you to make the most accurate temperature measurements. Emissivity of a surface can have a large effect on the apparent temperatures that the Product observes. Understanding the emissivity of the inspection surface can, but not always, allow you to obtain more accurate temperature measurements.
Go to http://www.fluke.com/Fluke-Thermal-Imaging-and-Thermal-Imagers for more information on emissivity and how to get the most accurate temperature measurements.
Temperature Measurement
All objects radiate infrared energy. The quantity of energy radiated is based on the actual surface temperature and the surface emissivity of the object. The Product senses the infrared energy from the surface of the object and uses this data to calculate an estimated temperature value. Many common objects and materials such as painted metal, wood, water, skin, and cloth are very good at radiating energy and it is easy to get relatively accurate measurements. For surfaces that are good at radiating energy (high emissivity), the emissivity factor is ≥90% (0.90). This simplification does not work on shiny surfaces or unpainted metals as they have an emissivity of <60% (0.60). These materials are not good at radiating energy and are classified as low emissivity. To more accurately measure materials with a low emissivity, an emissivity correction is necessary. Adjustment to the emissivity value will usually allow the Product to calculate a more accurate estimate of the actual temperature.
Note
Surfaces with an emissivity <0.60 make reliable and consistent determination of actual temperatures problematic. The lower the emissivity, the more potential error is associated with the temperature measurement calculations of the Product, even when emissivity and reflected background adjustments are attempted and performed properly.
To prevent personal injury, see emissivity information for actual temperatures. Reflective objects result in lower than actual temperature measurements. These objects pose a burn hazard.
Table 5 shows the distance to area ratio (D:S) for measurement accuracy.
Table 5. Temperature Measurement Accuracy

| Model | D:S | A | B | C |
| VT02 | 6:1 | 38 mm @ 230 mm | 60mm @ 360 mm | 100 mm @ 600 mm |
| 1.5 in @ 9 in | 2.4 in @ 14.5 in | 4 in @ 24 in | ||
| VT04 | 9:1 | 26 mm @ 230 mm | 40 mm @ 360 mm | 67 mm @ 600 mm |
| 1 in @ 9 in | 1.6 in @ 14.5 in | 2.7 in @ 24 in |
Figure 8 shows how the D:S ratio compares on-screen for both models. The higher the ratio, the smaller the target area needs to be for an accurate measurement. Figure 9 illustrates the detection ability.

Figure 8. On-Screen Comparison of D:S Ratio

Figure 9. Detection Ability
Color Palette
The Palette menu changes the false-color presentation of the infrared images that are on the display or captured. A variety of palettes are available. Some palettes are more suitable for specific applications and are set as required.
Grayscale Palettes offer an equal, linear presentation of colors that allow for best presentation of detail.
The High Contrast palette offers a weighted presentation of colors. This palette is best in situations with high thermal contrast for increased color contrast between the high temperatures and low temperatures.
The Ironbow and Rainbow palettes offer a mixture of the High Contrast and Grayscale palettes.
| Palette | VT02 | VT04 | |
 | Grayscale (White hot) | • | • |
 | Grayscale (Black hot) | • | • |
 | High Contrast | • | • |
 | Ironbow | • | • |
 | Rainbow | • | • |
 | Hot Metal | • | |
Reflected Background Temperature
The background temperature can be set between -10°C and +100°C.
Compensation for reflected background temperature is set in the Background tab. Very hot objects or very cold objects can affect the apparent temperature and measurement accuracy of the target or object of interest, especially when surface emissivity is low. Adjustment of the reflected background temperature can make the temperature measurement better in many situations. For more information, see Emissivity.
Spot Temperature Markers
The spot temperature markers turn on and off. When turned on, the marker is an indication of a hot or cold spot in the scene that may require additional evaluation. When turned off, the user is able to concentrate on the single measurement pixel.
Temperature Units
The Product displays temperatures in °C or °F.
Date and Time
In the Clock menu the user can set the time and the date.
Push to select the Clock.

- Push
![]() again to select the date type. Move through the menu selections with the
again to select the date type. Move through the menu selections with the ![]() buttons.
buttons.
Selections are:- DD/MM/YYYY
- MM/DD/YYYY
- Move down to the date.
- Use
![]() to select each date item. Use
to select each date item. Use ![]() to change the value.
to change the value. - Push
![]() to set the value.
to set the value. - Move down to 12/24 hour clock. Push
![]() to edit the option.
to edit the option. - Use the
![]() to move through the selections.
to move through the selections. - Push
![]() to set the selection as:
to set the selection as: - 12 hr
- 24 hr
- Move down to time.
- Push
![]() to edit the option.
to edit the option. - Use
![]() to move through individual time items.
to move through individual time items. - Use
![]() to change the value.
to change the value. - Push
![]() to set the value.
to set the value. - Push
![]() to exit the Clock menu and go to the live image.
to exit the Clock menu and go to the live image.
 to select each date item. Use
 Hi/Lo Temperature Alarm (VT04)
High temperature and low temperature alarms are available on the VT04. The temperature threshold is set for either the high or low alarm. When an alarm is set, you can quickly scan the scene and find objects that are above or below the threshold. An alarm condition is clearly shown on the screen as a flashing red/black band (Hi) or blue/black band (Lo). See Figure 10. In accordance with the D:S ratio (see Table 5), the object size should be large enough to cover the area defined by the 4 corner markers.

Figure 10. VT04 Hi/Lo Temperature Alarm
Note
The Auto Off feature is disabled in the Alarm mode.
To turn on the alarm:

To turn off the alarm:

To set an alarm:

Time-Lapse Image Capture (VT04)
The VT04 has time-lapse feature that monitors equipment with captured images at a user-set time interval. The user selects from a menu of preset values for both the time interval and duration.
By default, the file name for these captured images includes an S, for example, XXXS.is2.
To set the time-lapse:

Note
The time duration must be longer than the time interval.
To stop the time-lapse image capture:

Note
- The Auto Off feature is disabled in the Time-Lapse Image Capture mode.
- The Time-Lapse Image Capture feature is disabled when the Product is connected to power.
Auto-Monitor (VT04)
The Auto-Monitor feature is similar to the alarm feature. The difference is that instead of a flashing warning, the VT04 saves an image. When the temperature of an object in the scene goes above or below the threshold value, the VT04 saves the image.
By default, the file name for these captured images includes an A, for example, XXXA.is2.
Note
Measurements are the scene temperature (area shown inside the markers).
To set the Auto-Monitor:

To stop the Auto-Monitor:

Note
- The Auto Off feature is disabled in the Auto-Monitor mode.
- The Auto-Monitor feature is disabled when the Product is connected to power.
To prevent too many images being saved, there is a 10-minute delay between saved images. The delay applies only when a temperature threshold is breached and stays breached. When the scene temperature goes below (or above for low alarm) the threshold temperature, the delay is reset to zero. See Figure 11 for typical scenarios.

Figure 11. Image Capture Scenarios for Auto-Monitor
Measurements
The temperature measurement of the center area is shown at the top of the display. The emissivity setting also shows at the top of the display. When the hot/cold temperature markers are turned on, move the Product until the hot or cold spot coincides with the middle measurement area. Point the Product at an object that is likely to be hotter or colder than its surroundings for best results. The value of the hot/cold point shows at the top of the screen. This example shows a measurement on the VT04 display.

Smartview® Software
Smartview® software is supplied with the Product. This software contains features to analyze images, organize data and information, and make professional reports.
Smartview includes a function to export IR and visible images as.is2 files.
Maintenance
Maintenance is not necessary for this Product.

To prevent possible electrical shock, fire, or personal injury, use only specified replacement parts.

To prevent damage to the Product, do not leave the camera exposed to a heat source or high-temperature environments, such as an unattended vehicle in the sun.
How to Clean
Clean the case with a damp cloth and a weak soap solution. Do not use abrasives, isopropyl alcohol, or solvents to clean the case or lens/window. If used and stored properly, the infrared lens on your Product should require only occasional cleaning.
When necessary, to clean the lens:
- Use a hand-squeeze air pump to gently blow off any dust or debris from the lens surface.
- If the lens surface requires additional cleaning, use a clean, fine-fiber or micro-fiber cloth, dampened with a mild, soapy water solution. Gently wipe surface of lens to remove smudges and debris.
- Dry with an absorbent, clean fine-fiber or micro-fiber cloth.
Note
Minor smudges and dirt should not significantly affect the performance of the Product. However, large scratches or the removal of the protective coating on the infrared lens can affect both image quality and the temperature measurement accuracy.
Battery Care
To prevent personal injury and for safe operation and maintenance of the Product:
- Batteries contain hazardous chemicals that can cause burns or explode. If exposure to chemicals occurs, clean with water and get medical aid.
- Be sure that the battery polarity is correct to prevent battery leakage.
- Do not short the battery terminals together.
- Keep cells and battery packs clean and dry. Clean dirty connectors with a dry, clean cloth.
- Do not disassemble or crush battery cells and battery packs.
- Do not put battery cells and battery packs near heat or fire. Do not put in sunlight.
- Use only Fluke supplied power adapters to charge the VT04 battery.
 Do not incinerate the Product and/or battery. Go to Fluke's website for recycling information.
VT02
To replace the batteries:

Figure 12. VT02 Battery Replacement
- Remove the battery cover from the handle.
- Remove the discharged batteries.
Note
Do not charge the batteries included with the VT02. - Install new batteries with the correct polarity, see Figure 12.
- Slide battery cover into place on the handle.
VT04
To get the best performance from the Li-Ion battery, use these guidelines:
- Do not store the Product on the charger for more than 24 hours as reduced battery life may result.
- Charge the Product for a 2-hour minimum at least every six months to maximize battery life.
- Without use, the battery will self-discharge in approximately 6 months. Batteries stored for long periods may require two to ten charging cycles before it reaches full capacity.
- Always operate the Product within the operating temperature range in the specifications.
Specifications
Temperature
Temperature Measurement Range: -10°C to +250°C
Temperature Measurement Accuracy: ±2°C or ±2% as tested (at 25°C), whichever is the greater
On-Screen Emissivity Correction: Yes
On-Screen Reflected Background Temperature Compensation: Yes
Image Performance
Image Capture Frequency: 8 Hz
Detector Type: Uncooled pyroelectric ceramic
Thermal Sensitivity (NETD): ≤250 mK
Infrared Spectral Band: 6.5 µm to 14 µm
Visual Camera: 11025 pixels
Field of View
VT02: 20° X 20°
VT04: 28° X 28°
Focus Mechanism: Fixed Focus
Image Presentation
Palettes
VT02: Ironbow, Rainbow, Rainbow High Contrast, Grayscale (white hot) and Grayscale (black hot)
VT04: Hot Metal, Ironbow, Rainbow, Rainbow High Contrast, Grayscale (white hot) and Grayscale (black hot)
Level and Span: Auto
Blending Information
Parallax Correction of Visual and IR Blending: Fixed with Near/Far User Selection
Near <23 cm
Far >23 cm
View Options: Blending of the visual and the infrared from full infrared to full visual in 25% steps
Hot Spot and Cold Spot Tracking: Yes
Image capture and data storage
Image Capture: Image available for review before a save
Storage Medium: Micro SD memory card, stores up to 10,000 images/GB
File Format: .is2
Memory Review: Scroll through all saved images and view on-screen
Operating Temperature: -5°C to +45°C
Storage Temperature: -20°C to +60°C
Relative Humidity: 10% to 90% non-condensing
Operating Altitude: 2,000 meters
Display: 2.2 in diagonal
| Controls and Adjustments | VT02 | VT04 |
| Select Color Palette | • | • |
| User-Selectable Temperature Scale (°F/°C) | • | • |
| Time/Date Set | • | • |
| Emissivity Selection | • | • |
| Reflected Background Temperature Compensation | • | • |
| Hi/Lo Temperature Alarm | • | |
| Time-Lapse Image Capture | • | |
| Auto-Monitor | • |
Software: Smartview®
Batteries
Type
VT04: Li-Ion Rechargeable, 3.6 V, 2250 mAh, 8.1 Wh
VT02: 4 AA, LR6 1.5 V
Battery Life: 8 hrs
Power Save: Power down after 10 minutes of inactivity
Standards
Electromagnetic Environment: EN 61326-1: Portable
US FCC: CFR47: Class A. Part 15 subpart B.
Electromagnetic Compatibility: Applies to use in Korea only. Class A Equipment (Industrial Broadcasting & Communication Equipment) [1]
[1] This product meets requirements for industrial (Class A) electromagnetic wave equipment and the seller or user should take notice of it. This equipment is intended for use in business environments and is not to be used in homes.
Safety Compliance: IEC/EN 61010-1 Pollution Degree 2
Drop
VT02: MIL-PRF-28800F; Class 2 section 4.5.5.4.2; 30 cm
VT04: 2 meter
Size (H x W x L): 21 cm x 7.5 cm x 5.5 cm (8.3 in x 3 in x 2.2 in)
Weight (Battery Included): <300 gm (10.5 oz)
Warranty: 2 years
Recommended Calibration Cycle: 2 years
info@Fluke-Direct.com Fluke-Direct.com 1.888.475.5235
© 2012-2013 Fluke Corporation. All rights reserved.
Specifications are subject to change without notice.
All product names are trademarks of their respective companies.

Documents / Resources
References
![www.fluke.com]() Fluke Corporation: Fluke Electronics, Calibration and Networks
Fluke Corporation: Fluke Electronics, Calibration and NetworksFluke Registration
![us.fluke.com]() Fluke Manuals: Discontinued Legacy and Current Product Manuals | Fluke
Fluke Manuals: Discontinued Legacy and Current Product Manuals | Fluke![www.fluke.com]() Best Thermal Cameras | Infrared Thermal Imaging Camera | Fluke
Best Thermal Cameras | Infrared Thermal Imaging Camera | FlukeFluke - Test & Measurement Tools
Download manual
Here you can download full pdf version of manual, it may contain additional safety instructions, warranty information, FCC rules, etc.
Advertisement
Thank you! Your question has been received!


Need Assistance?
Do you have a question about the VT02 that isn't answered in the manual? Leave your question here.