Char-Broil 16102041 Assembly Instructions Manual
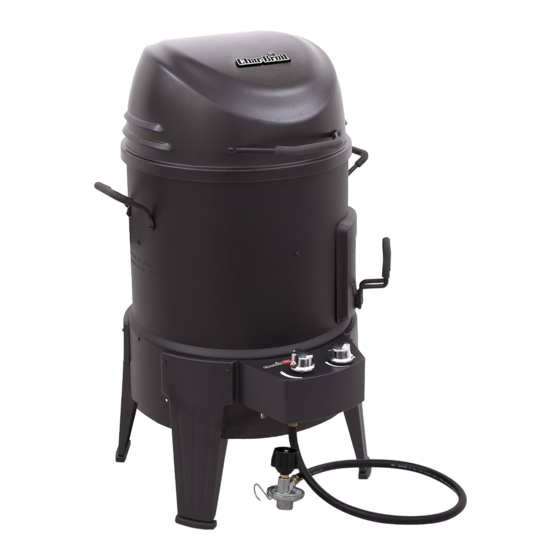
Smoker, roaster & grill
Hide thumbs
Also See for 16102041:
- Operating instructions manual (52 pages) ,
- Assembly instructions manual (24 pages)
Advertisement
Quick Links
GRILL NAME
Smoker, Roaster & Grill
MODEL NUMBER
16102040
16102041
16102041-CH
IE
GB
CH
FR
AT
CH DE
CH
IT
LU
BE NL
SE
FI
DK
NO
SK
IS
CZ
© 2015 Char-Broil, LLC • Columbus, GA 31902 • Printed in China • Assembly Instructions © 2015
Assembly Instructions
Instructions d'assemblage
Montageanweisungen
Istruzioni per il montaggio
Montage-instructies
Montering
Kokoamisohjeet
Monteringsvejledning
Imontering
Návod na montáž
Smalamálsskipana
Montážní návod
0845-15
0845 CQ 0031
42805212• 10/15/2015
Advertisement

Related Manuals for Char-Broil 16102041


Summary of Contents for Char-Broil 16102041
- Page 1 Istruzioni per il montaggio Montage-instructies BE NL Montering Kokoamisohjeet Monteringsvejledning Imontering Návod na montáž Smalamálsskipana Montážní návod 0845-15 0845 CQ 0031 42805212• 10/15/2015 © 2015 Char-Broil, LLC • Columbus, GA 31902 • Printed in China • Assembly Instructions © 2015...
-
Page 2: Parts List
Parts List Description OUTER BODY INNER BODY BODY TOP RING BURNER HEAT SHIELD IGNITION KIT LOGO PLATE COOKING CHAMBER ROASTER BASKET SIDE HANDLE CONTROL PANEL IGNITOR KNOB CONTROL KNOB TOP LID LEG ASSEMBLY GREASE TRAY GREASE TRAY RAIL CONTROL VALVE ASSEMBLY HEAT SHIELD, CONTROL PANEL LIFT HOOK MEAT THERMOMETER... -
Page 3: Parts Diagram
Parts Diagram NOTE: Some appliance parts shown in the assembly steps may differ slightly in appearance from those on your particular model. However, the method of assembly remains the same. -
Page 4: Assembly Steps
ASSEMBLY STEPS Model 16102041 & 16102041-CH Countries HOLD... - Page 5 Model 16102040 Countries...
- Page 6 Model 16102041 & 16102041-CH HOLD Model 16102040...
- Page 8 #10x3/8” Self-Tap Screw • Bottom Hole Proper Valve to Burner Tube installation Screw hole for leg-use later.
- Page 10 #10-24X1” Screw Install legs by engaging leg tabs over bottom edge of the appliance body. Ÿ Once the leg is in place, attach two #10-24x1" screws through the leg and into the appliance body. Ÿ Repeat for the remaining legs. DO NOT Tighten the screws at this point. Ÿ...
- Page 11 #10-24X1/2” Screw...
- Page 12 #10-24 Keps nut Fiber washer #10-24X3/8” Screw...
- Page 13 #10-24X3/8” Screw #10-24X1” Screw Fiber washer #10-24 Keps nut...
- Page 14 • Slide the cooking chamber into the appliance. Note that an alignment pin is located on the cooking pot. This pin ensures that the cooking chamber is installed correctly. The pin fits into a slot on the body top ring above the smoker box. There are arrows located on the body top ring and cooking chamber to aid in alignment.
- Page 15 Accessory Use and Storage NOTE: Before cooking on your appliance for the first time, refer to the separate Cooking Guide on how to prepare the appliance for cooking. It is recommended that you season your appliance prior to cooking. • Once seasoning is complete, the appliance is now ready for use. The cooking chamber will continue to darken with use. This will inhibit rusting along with improving the performance of the infrared cooking system.
- Page 16 Accessory Use and Storage • When using the Roaster Basket, insert it into the Roaster Chamber as shown. • Roaster Basket Assembling your Wire Grate into the cooking basket is very easy. Just insert the Wire Grate through the side of the cooking basket at the desired level. Allow the Wire Grate legs to rest securely on the cooking basket wire.
- Page 17 Accessory Use and Storage All accessories properly stored. Smoker Box The smoker box fits on board the Smoker, Roaster, & Grill in the location provided. • Hole • Hanging hooks • Cooking Grate Storage Accessory storage Accessory items such as the cooking grate, smoker box and wire grates can be stored on board •...
- Page 18 Model 16102041 & 16102041-CH Countries Gas Cylinder (not included) Model 16102040 Countries Gas Cylinder (not included)
- Page 19 Überprüfen der Ventile, des Schlauchs und des Leak Testing Valves, Hose and Regulator Reglers auf GasaustritteFühren Sie eine Leak test before first use, at least once a year, and every time Überprüfung auf Gasaustritten mindestens einmal im the cylinder is changed or disconnected. Jahr und jedes Mal, wenn der Gasbehälter 1.
- Page 20 fi Lektest Kleppen, Slang en Regelaar Venttiilien, letkun ja säätimen vuototesti Lektest voor eerste gebruik, minstens een keer per jaar, en Vuototesti ennen ensimmäistä käyttöä, mutta vähintään kerran elke keer als de gasfles verwisseld of losgekoppeld is. vuodessa, ja joka kerta kun sylinteri vaihdetaan tai sen kytkentä 1.
- Page 21 Teste de vazamentos de válvulas, mangueira e Lekaprófun loka, slöngu og þrýstijafnara regulador Framkvæmið lekaprófun fyrir fyrstu notkun, að minnsta Faça um teste para verificar se não há vazamentos pelo kosti árlega, og í hvert sinn sem skipt er um hylki eða það menos uma vez por ano e sempre que o cilindro for trocado ou er aftengt.
- Page 22 Zkouška těsnosti ventilů, hadice a regulátoru Lekaprófun loka, slöngu og þrýstijafnara Framkvæmið lekaprófun fyrir fyrstu notkun, að minnsta Proveďte zkoušku těsnosti před prvním použitím, minimálně jednou za rok a při každé výměně nebo odpojení zásobníku. kosti árlega, og í hvert sinn sem skipt er um hylki eða 1.
- Page 24 ¸ ¸ ´ szczególnych specyfikacji dealera. Kriswell A/S Knudstrupvej 10C DK- 8870 Langaa Tel. +45 8773 6000 info@dancook.dk © 2015 Char-Broil, LLC Columbus, GA 31902, U.S.A. charbroil.com I charbroil.de...