
Related Manuals for ECA CONFEO PREMIX P 14 HM


Summary of Contents for ECA CONFEO PREMIX P 14 HM
- Page 1 CONFEO PREMIX CONDENSING BOILER CONFEO PREMIX P 14/20/24/28/30/35 HM-HCH-HST SERVICE MANUAL...
-
Page 2: Table Of Contents
INTRODUCTION......................3 DEFINITION OF SYMBOLS..................4 TOUCH BUTTON FUNCTIONS................. 5 ENTERING THE SERVICE MENU................6 4.1. Entering The Parameter Menu................7 ENTERING THE INQURY MENU................11 ENTERING THE HISTORY MENU................12 7. ERROR CODES (DEFINITIONS-SOLUTIONS) AND PREDICTIVE MAINTENANCE WARNINGS ......................... 12 AP MODE......................... -
Page 3: Introduction
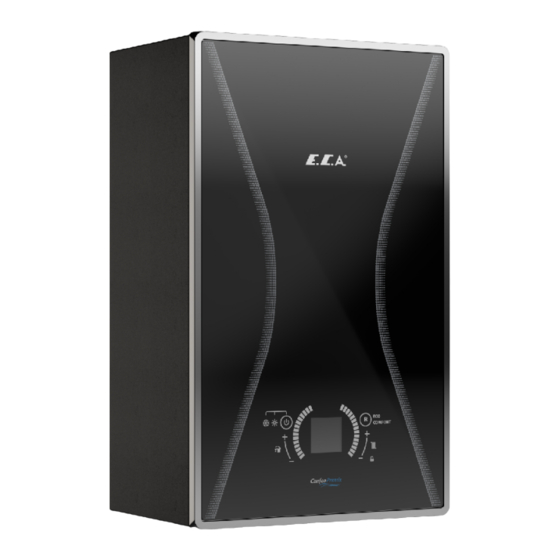
1.INTRODUCTION First of all, we would like to thank you for choosing E.C.A brand. E.C.A. Confeo Premix condensing boilers have been designed to meet for an efficient, safe and comfortable central heating and hot water requirement. The Confeo Premix condensing boilers can possibly use natural gas or LPG according to the desired fuel preference. There is no standard LPG models. -
Page 4: Definition Of Symbols
2.DEFINITION OF SYMBOLS SYMBOL DEFINITION SYMBOL DEFINITION Ø Domestic Hot Water Diameter Gas Supply Liquid Petroleum Gas Parameter Adjustment Domestic Hot Water Negative Temperature Reset Coefficient (sensor) Winter Mode Residual Current Device Emergency Control Summer Mode Valve Solar Panel Mode Seasonal Efficiency of SEDBUK ECO Mode... -
Page 5: Touch Button Functions
3. TOUCH BUTTON FUNCTIONS Figure 1 Button No 1:Reset Button Main functions: • Removing the permanent error state (EXX) • Activating ECO mode • Activating Comfort mode When your device malfunctions, the error code and description will be displayed on the screen. Additio-nally, your device will sound a periodic warning alarm. -
Page 6: Entering The Service Menu
Button No 4: Domestic Hot Water Temperature Decrease Button The domestic water temperature decrease button allows you to decrease the domestic water tempe- rature down to 30°C. Button No 5: Central Heating Temperature Decrease Button Central heating temperature decrease button allows you to decrease the temperature of the heating water in the central heating down to 30°C. -
Page 7: Entering The Parameter Menu
All three menus are accessed by pressing the reset button no 1. 1. The Parameter Menu allows you access to the service parameters. 2. The Inqury Menu allows you to display values such as sensor temperature, fan speed, ionization current in real time. 3. - Page 8 Parameter 00 - 65 saved Figure 5 Then you can return to the previous menu by pressing the Reset button no 1 for 5 seconds and to the main screen by pressing the Off button no 6. You can access the following parameters on the Parameter Menu: “P00, P01, P03, P26, P35, P38, P39, P40, P41, P44, P45, P46, P47, P48, P49, P50”...
- Page 9 0- 24kW V1 capacity 1- 24kW V2 capacity 2- 28kW V1 capacity System 3-28kW V2 capacity System P39 Num. Configura�on 4- 30kW V1 capacity 5- 30kW V2 capacity 6- 35kW V1 capacity 7- 35kW V2 capacity Hea�ng system 0- Radiator hea�ng Num.
- Page 10 Parameter Descriptions P00: Device type selection (HM/HM+Solar/HST/HST+Solar/HCH) P01: Gas type selection (Natural/LPG) P03: Water filling selection (inactive/active/automatic) P26: When the CH set temperature reaches the closing value (hysteresis off), the boiler stops burning. Even if the temperature drops below the device opening value (hysteresis on), the boiler does not reac-tivate until the time set by this parameter has expired.
-
Page 11: Entering The Inqury Menu
P44: This is the parameter used to set the off temperature of the domestic water when it is active. P45: This is the parameter used to activate the room thermostat. Default value is "1=active". P46: This is the parameter used to set the time for the display light to go off if no button is pressed on the device. -
Page 12: Entering The History Menu
6. ENTERING THE HISTORY MENU You can see the device data in this menu during operation in the following order. 1. Number of Hours with Main Power Supply ON (total number of hours with main power supply ON) 2. Error history (last 8 errors) 3. - Page 13 This occurs when flame is detected in 1- Press the reset button. Check if the error continues. False Flame Signal the burner while the 2- If the error continues, replace the mainboard. gas valve is on. 1. Ensure that the boiler’s water valves are on. If not, turn on the valves and reset the device. 2.
- Page 14 This occurs when 1- Press the reset button. Check if the error continues. flame is detected in False Flame Signal 2- If the error continues, replace the mainboard. the burner while the gas valve is on. 1. Ensure that the boiler’s water valves are on. If not, turn on the valves and reset the device. 2.
- Page 15 1- Set the P50 parameter to “2”. Gas valve on error The gas valve may 2- If the problem persists, replace the gas valve. be defective. 3- Replace the motherboard as last resort. Specific hardware 1- Turn the device off and on. Hardware error 1 error 2- If the problem persists, replace the mainboard.
- Page 16 1- Turn the device off and on. Hardware error 4 Specific hardware error 2- If the problem persists, replace the mainboard. 1- Check the connections of the fan cable (both mainboard and fan connections). If there is a problem, replace the fan cables. Fan feedback error Fan or fan cable problem 2- If the problem persists, replace the fan.
- Page 17 9- Remove the connectors on the water pressure sensor and measure the DC voltage values while the boiler is connected to power supply. Check whether the measurement is within the 4.9-5.1 V DC range. If the value is out of this range, replace the pressure sensor. 10- If the problem persists, replace the mainboard.
- Page 18 1- Make sure that the boiler is installed with boiler system and that the P00 parameter is set to 3 or 4. The boiler 2- Check the connection and conductivity of the boiler sensor cables. If there is a problem, replace the cables. Boiler Sensor sensor may be 3- Check the resistance of the sensor by measuring it.
-
Page 19: Ap Mode
Figure 8 Figure 9 8. AP MODE The device switches to AP mode under four different conditions. Figure 10 1. When the device is plugged and operated for the first time; 2. When the E03 (extreme temperature warning) error is reset manually; 3. -
Page 20: Maintenance Reminder (Ase)
9. MAINTENANCE REMINDER (ASE) From the moment the device is plugged for the first time, it starts to count the number of hours with main power supply on. Once 7500 hours have been reached, a warning appears on the screen to re- mind annual periodic maintenance, as shown in the image below. -
Page 21: Gas Conversion
10. GAS CONVERSION The gas conversion process (Natural Gas-LPG) involves replacing the gas adjusting washer, adjusting gas pressure settings (capacity settings), and ad- justing the P01 service parameter. Natural gas and LPG parameter values are given below. The diameter information and the last 3 digits of stock code will be specified on the gas adjusting washer as marking (if there is no marking, it should be specified with a colored pen). - Page 22 Adjusting the maximum outlet pressure: • Remove the front panel of the device and tilt the the control panel forward. • Put the device to the maximum operating position (test mode). (Test mode is activated by pressing the CH temperature increase and decrease buttons (no 4 and 6 on the control panel) for 5 seconds.) •...
-
Page 23: Controller Connection
11. CONTROLLER CONNECTION MAİNBOARD DETAIL A DETAIL B MAİNBOARD Connect the boiler tank connection cables to the terminal points shown. Connect the Connect the solar Connect the Connect the Remove the cables of the system connection thermostat cables to timer connection bridge shown in external cables to the... -
Page 24: Electrical Diagram
12. ELECTRICAL DIAGRAM Figure 15... -
Page 25: Flue Accessories
13. FLUE ACCESSORIES 7006990071 Ø80-125 (WHITE) 7006991677 Ø60-100 (BLACK) CCB Extra 45° Elbow CCB 60/100 Herme�c Flue (Plume) 7006991744 Ø80-125 (BLACK) PCB Extra 45° Elbow 7006990059 Ø60-100 - 100 cm (WHITE) 7006990072 Ø80-125 (WHITE) CCB Inser�on and Flue Extansion CCB Ver�cal Flue Kit 7006991734 Ø60-100 - 100 cm (BLACK) 7006991745 Ø80-125 (BLACK) PCB Inser�on and Flue Extansion... -
Page 26: Definitions Of Assembly/Disassembly Of The Parts
14. DEFINITIONS OF ASSEMBLY/DISASSEMBLY OF THE PARTS • Removing the front cover: Remove the 2 screws connecting the front glass panel, side sheets, and bottom chassis and open the front glass panel. Torque:4 ± 0.4 Nm Figure 17 Then, remove the MMI cable that connects the mainboard box and the MMI card box from its connec- tors. - Page 27 Figure 20 Figure 21 Step 3 Step 4 Figure 22 Figure 23 Step 1 Step 2 NOTE: When inserting the MMI cable into the gasket, it should be noted that it is fully seated as shown in figure 23.
- Page 28 Remove the rope that functions as a stopper from the hook on the same side with the frame as shown in the figure 25 below. Figure 24 Figure 25 WARNING: Do not forget to attach the stopper to the point shown in the image before clo- sing the front panel.
- Page 29 • Removing the side panel: Remove the side covers and 4 screws connecting the bottom chassis and body. Open the side lids. Torque:4 ± 0.4 Nm Figure 27 • Removing the mainboard box: Open the cover by removing the tabs of the control panel. Figure 28 NOTE: Make sure that the ignition cable passes through the tabs on the back side of the mainboard box.
- Page 30 Remove the the ignition and ionization cables attached to the mainboard passing through the seal shown in the figure 29. Figure 29 Open the cover by removing the tabs of the control panel. Figure 30...
- Page 31 • Mainboard connections: Each socket on the mainboard that needs to be installed is shown in the figure 31 below. Figure 31 Solar Connector Assembly-Disassembly: The gasket shown in the image below is removed and the solar connector is attached to the empty section CN21 on the mainboard. The gasket on the cable is replaced with the gasket we removed.
- Page 32 After removing the cables on the mainboard, remove the 4 screws shown in the figure by pulling the card tabs. Torque: 0.5 ± 0.1 Nm Figure 34 • Removing-installing the flue gas sensor: Place the flue gas sensor into the port shown in the figure Figure 35...
- Page 33 • Removing-installing the ignition and ionization electrode: Connect the electrode and the groun- ding cable as shown in the figure 36. Figure 36 Figure 37 • Removing-installing the fan cables: Connect the fan modulation and fan supply cables as shown in the figure 38.
- Page 34 Low Voltage: FAN PWM CABLE Figure 39 • Removing-installing the pump cable: Figure 40...
- Page 35 • Removing-installing the flow sensor and its cable: The flow sensor (the hall effect sensor) in the domestic water circuit shown in the figure 41 and the connector attached to it can be easily removed and installed. Figure 41 • Removing-installing the gas valve cable: Figure 42...
- Page 36 • Removing-installing the surface-type NTC and its cable: There are 2 surface-type NTCs on the heater supply and return pipes of the boiler. Figure 43 Figure 44...
- Page 37 • Siphon, Siphon Hose Disassembly: Remove the clamps screw over the condensing hose on the siphon as shown in the figure 45. Torque: 1+ 0,1 Nm Figure 45 Figure 46...
- Page 38 Lift the siphon upwards and turn it counterclockwise. Then remove the siphon by pulling it down with a hand tool or by hand. Loosen the screw on the clamp and remove. Torque:0.5 ± 0.1 Nm. Figure 47 Figure 48 Remove the siphon hose by loosening the clamp.
- Page 39 Figure 49 Remove the 2 screws attached to the bottom chassis take out the siphon completely. Torque: 1 ± 0.1 Nm Figure 50...
- Page 40 • Removing-installing the motorized valve: Remove the clip that fixes the manifold and the motori- zed valve and then remove the motorized valve. Figure 51 Remove the slot of the cable case from the tab with the help of a hand tool to replace the cable of the motorized Valve.
- Page 41 • Removing-installing the water pressure sensor: Before removing the water pressure sensor, the siphon must be removed completely. Then remove the water pressure sensor cable. Figure 53 Remove the water pressure sensor using a wrench. When reassembling, make sure that there is a seal.
- Page 42 Figure 55 • Removing-installing the immersion-type NTC: Remove the NTC using a 18-inch wrench. Torque: 3 ± 0.3 Nm Figure 56...
- Page 43 • Removing-installing the 3-bar safety valve: Loosen the bolt on the manifold using an Allen wrench and remove the safety valve. (the alternative safety valve model does not have an Allen screw.) Figure 57 • Removing-installing the plate heat exchanger: Loosen the bolt on the manifold using an Allen wrench and remove the plate heat exchanger.
- Page 44 • Removing-installing the gas valve: Loosen the 2 bolts that secure the gas valve to the bottom chassis. Torque: 3 ± 0.3 Nm Figure 59 Loosen the brass nut connecting the gas valve and the gas pipe using an Allen wrench. Torque: 30 ±...
- Page 45 • Removing-installing the venturi: Remove the clip that secures the V gas pipe and the venturi. Lo- osen the bolt that secures the silencer to the combustion body. After removing the silencer, turn and remove the venturi. Torque: 2 ± 0.1 Nm Figure 61 Figure 62...
- Page 46 Expansion tank brackets are removed. Figure 63 After removing the silencer, turn and remove the venturi. Figure 64...
- Page 47 • Removing-installing the expansion tank: Remove the clip where the flex hose connects to the pump using a hand tool to remove the expansion tank. Figure 65 The connection nut of the expansion tank and the flex hose using an Allen wrench. Torque: 10 ±...
- Page 48 Remove the tank holder brackets of the expansion tank. Torque: 4 ± 0.4 Nm Figure 67 • Removing-installing the main heat exhanger assembly: Remove the screws that connect the fan and the manifold using an Allen wrench. Remove the clips of the inlet-outlet pipes. Torque: 1.8 ±...
- Page 49 Figure 69 Remove the screws that connect the fan and the manifold using an Allen wrench. Torque: 3 ± 0.5 Nm Figure 70...
- Page 50 Remove the ignition-ionization screws using an Allen wrench. Torque: 1 ± 0.2 Nm (Torx 4 mm) Figure 71 Figure 72 Remove the 4 cover screws of the heat exchanger. When removing and installing the heat exchanger cover, perform the operations according to the order written on the cover. Torque: 5 ±...
- Page 51 Remove the duroboard as shown in the image. Figure 74 Remove the 4 bolts that connect the burner and the cover using an Allen wrench. Torque: 3 ± 0.3 Nm Figure 75...
- Page 52 Figure 76 Figure 77...
- Page 53 Controller connections: Remove the transition rubber on the bottom chassis. Figure 78 Cut off the tip of the transition rubber and attach it to the thermostat cable. Figure 79 Figure 80 Figure 81...
- Page 54 Installing the room thermostat: Connect the phase and neutral ends of the thermostat cable to the terminal ports (bridged end) shown in the figure 83. Figure 82 Figure 83...
- Page 55 Opening the MMI board box cover: The MMI board on the touch screen panel is attached to the glass surface with double-sided tape. Therefore, do not try to remove the board box from the window. You can open the cover of the board box by pressing the tabs. All of the front panel group will be supplied as spare parts.This section is given only in cases where the MMI board box cover should be opened in the field.
- Page 56 Removing-installing the 3-way shaft assembly: Remove the assembly part located on the outlet manifold using an Allen wrench. Torque: 5 ± 0.5 Nm Figure 87 Removing-installing the filling tap: Remove using a screwdriver as shown in the figure 88. Torque: 0.5 ± 0.1 Nm Figure 88...
- Page 57 Removing-installing the pump: Remove the boiler inlet pipe nut using a nut wrench. Torque: 25 ± 2.5 Nm Figure 89 Remove the inlet manifold. Torque: 3 ± 0.3 Nm Figure 90...
- Page 58 Remove the bolt that connects the pump and bottom chassis. Torque: 3 ± 0.3 Nm Figure 91 Removing-installing the flow sensor: Remove the sensor using an Allen wrench. Torque: 5 ± 0.5 Nm Figure 92...
- Page 59 Removing the domestic water filter: Remove the filter on the water inlet pipe using a thin hand tool. Figure 93 Placing the gas adjusting washer: Place the gas adjusting washer between 2 gaskets and install it in the gas valve. Figure 94...
-
Page 60: Confeo Premix P Component Definitions
13.CONFEO PREMIX P COMPONENT DEFINITIONS • Siphon Subject Description The component that allows the discharge of condensing water and rainwater Part’s Function without allowing the discharge of waste gas. Impact in Case of Water rises in the siphon due to siphon clogging. Malfunction The siphon discharges waste gas to the external environment. - Page 61 • Mainboard Subject Description Controls all electronic-electromechanic components. Part’s Function Displays the general operating status of the combi boiler and sensor data. Impact in Case of 1- In general, the error code is displayed on the LCD screen in case of Malfunction PCB failures and heating is not provided.
- Page 62 • MMI Board Subject Descrip�on It provides communication with the mainboard, it shows the boiler data on the LCD screen and enables the boiler settings to Part's Function be adjusted on the screen via touch. 1- Touch functionality is not working and the boiler settings are not made.
- Page 63 • Burner Subject Descrip�on It is the component on which the gas + air mixture exits and on Part's Function which flame is formed. 1- Irregularity in the boiler emissions Impact in Case of 2- Explosive burning Malfunction 3- Flame loss Main Associated Error E01, E82, "Flame Loss Risk"...
- Page 64 • Main Heat Exchanger Subject Descrip�on The main element that allows heat transfer to the water in the central heating circuit. It Part’s Function transfers the heat generated as a result of combustion in the burner to the water pipes, allowing the system to heat up.
- Page 65 • Plate Heat Exchanger Subject Descrip�on 1- The component that transfers the heat from the hot water from the main heat exchanger to the domestic water installation in order to meet domestic water demands. Part’s Function 2- The water circulation is maintained through this componen (internal by-pass) when all radiator valves are closed.
- Page 66 • Gas Valve Subject Defini�on Part’s Function 1- Adjusts the amount of gas required for combustion and transmits it to the venturi. The boiler does not burn. Impact in Case of Malfunction Gas regulation does not work properly. Main Associated Error E01,E02, E08, E12, E21, E82 Codes Visual Inspection and Testing:...
- Page 67 • Pump Subject Descrip�on 1- Enables water circulation within the central heating circuit. Part’s Function 2- Discharges the air in the central heating system thanks to the built -in air purger. 1- The boiler gives overheating error or “temperature sensor does not read detect temperature”...
- Page 68 Test Descrip�on Test Method 1- For a standard pump, open the plug indicated by "A" and check for movement in the interior. If there is no movement, you can try to unblock it by turning counterclockwise. 2- Energy efficient pumps have auto- blockage function. When the pump is blocked, it automatically tries to work at maximum torque every 1.5 seconds and resolve the blockage Pump Blockage Check issue.
- Page 69 • Fan Subject Descrip�on 1- Sends the gas-air mixture in the venturi to the burner for combustion. Part’s Function 1- The boiler does not burn. 2- The fan does not perform its modulation function. The fan works at maximum Impact in Case of Malfunction speed at all times.
- Page 70 • Silencer Subject Descrip�on The component where the fresh air flow required for combus�on is regulated and air is Part’s Func�on taken in and transmi�ed to the venturi. Combus�on emission values deteriorate. Impact in Case of Malfunc�on The device load may be higher or lower. The device may produce noise (whistle) when opera�ng.
- Page 71 • Surface-type NTC Subject Descrip�on 1 - The component that measures the inlet and outlet temperature of the Part’s Function water in the central heating circuit. 1- It may lead to inconvenience since the temperature set by the user and the Impact in Case of Malfunction actual temperature will be different.
- Page 72 • Immersion-type NTC Subject Descrip�on 1- The component that measures the outlet temperature of the water in the domestic Part’s Function water circuit. 1- It may lead to water temperature fluctuation as well as inconvenience since the temperature set by the user and the actual temperature will be different. Impact in Case of Malfunction 2- The device does not work.
- Page 73 • Exhaust Gas Sensor Subject Defini�on 1- The component that protects the device from overheating by measuring the exhaust gas Part’s Function temperature. 1- If the surface -type NTC sensors work incorrectly, the device may continue to run without giving an overheating warning, causing deformation in the heat exchanger. Impact in Case of Malfunction 2- The device does not work.
- Page 74 • Water Pressure Sensor Subject Defini�on 1- The component that measures the water pressure in the central heating circuit. Part’s Function 1- The device gives a low or high water pressure error. 2- The user sees a different water pressure value than the actual value. Impact in Case of Malfunction 3- The user may not see an increase in the pressur e even after filling the system with water.
- Page 75 • 3-Way Valve Motor Subject Descrip�on Used to f orward the water to the central heating and domestic water circuits. Part’s Function 1- The boiler stays only in the central heating state or only in the domestic water state. 2- The radiator cores may heat up while in the summer mode. Impact in Case of Malfunction 3- The motor may produce noise while the motorized valve position is changing.
- Page 76 Test Descrip�on Test Method Turn on the domes�c water while the device is plugged in. Measure the voltage on the 3-way Motorized Valve motorized valve connector at the part between A-B in the domes�c water hea�ng mode. Voltage and Position Check Ensure the value is in the 215-240 VAC range.
- Page 77 • Ignition-Ionization Electrode Subject Descrip�on Ignites the gas+air mixture from the burner and starts combustion. Part’s Function 2- Detect if there is flame in the burner. 1- There may be no ignition or combustion due to excessively i ncreased or decreased distance between the ends of the electrode.
- Page 78 • Expansion Tank Subject Descrip�on The cold water filled into the central heating system expands as it is heated up. The tank Part’s Function prevents the expanding water from increasing the water pressure. Impact in Case of Malfunction The pressure in the central heating circuit may increase and there may be water discharge from the safety valve.
- Page 79 • Flow Sensor Subject Descrip�on The component that enables the domestic water demand to be received by the combi boiler. Part’s Function Impact in Case of 1- The device cannot receive the domestic water demands and works in the central heating Malfunction state even if there is a domestic water demand.
- Page 80 • Flow Turbine Subject Descrip�on When there is a domestic water demand, the turbine starts to turn and creates the magnetic Part’s Function field that the flow sensor detects. Impact in Case of Malfunction 1- The device cannot receive the domestic water demands and works in the central heating state even if there is a domestic water demand.
- Page 81 • WRAS APPROVED FILLING LOOP Subject Description It is used for filling water to the central heating system. Part Function 1- No water is filled into combi boiler. 2- It cannot be turned off when filling water to boiler, and it causes water discharge by opening safety valve.
-
Page 82: Solar Connection
14. SOLAR CONNECTION 14.1. Pressurized Solar System Installation with Single Serpentine Boiler: Applicable Combi Boiler Model:Confeo Premix HM Models Mode of Operation: The boiler domestic water line inlet is directly connected to the boiler. The boiler’s mainboard manages the PT 1000 sensor and the Solar pump connected to it. It is connected to the terminal “C”... - Page 84 PRODUCTION EMAS MAKİNA SANAYİ A.Ş Organize Sanayi Bölgesi 3. Kısım Mustafa Kemal Bulvarı No:13 45030 MANİSA/TURKEY Phone: + 90 236 213 00 21 Fax: + 90 236 213 08 59 E-mail: emas@emas.com.tr www.emas.com.tr SALES & TECHNICAL SUPPORT Call Center Tel : +44 800 640 9988 Office Tel : +44 20 3978 1212 Adress...