ViewSonic Pro8300 User Manual
3000 lumen full hd
Hide thumbs
Also See for Pro8300:
- Specifications (2 pages) ,
- Brochure & specs (2 pages) ,
- Specifications (2 pages)
Table of Contents
Advertisement
Pro8300
DLP Projector
User Guide
IMPORTANT: Please read this User Guide to obtain important information on installing
and using your product in a safe manner, as well as registering your product for future
service. Warranty information contained in this User Guide will describe your limited
coverage from ViewSonic Corporation, which is also found on our web site at http://www.
the upper right corner of our website. "Antes de operar su equipo lea cu idadosamente
las instrucciones en este manual"
Model No. VS13648
Advertisement
Table of Contents

Related Manuals for ViewSonic Pro8300


Summary of Contents for ViewSonic Pro8300
-
Page 1: User Guide
Warranty information contained in this User Guide will describe your limited coverage from ViewSonic Corporation, which is also found on our web site at http://www. the upper right corner of our website. “Antes de operar su equipo lea cu idadosamente las instrucciones en este manual”... -
Page 2: Compliance Information
Compliance Information FCC Statement This device complies with part 15 of FCC Rules. Operation is subject to the following two conditions: (1) this device may not cause harmful interference, and (2) this device must accept any interference received, including interference that may cause undesired operation. This equipment has been tested and found to comply with the limits for a Class B digital device, pursuant to part 15 of the FCC Rules. -
Page 3: Important Safety Instructions
Important Safety Instructions Read these instructions. Keep these instructions. manufacturer’s instructions. third grounding prong. The wide blade and the third prong are provided for your safety. If obsolete outlet. located near the unit so that it is easily accessible. manufacturer, or sold with the unit. When a cart is used, use caution when unit does not operate normally or has been dropped. -
Page 4: Declaration Of Rohs Compliance
Declaration of RoHS Compliance as shown below: Substance Cadmium (Cd) Polybrominated biphenyls (PBB) Polybrominated diphenyl ethers lead). Proposed Maximum Concentration Actual Concentration... -
Page 5: Copyright Information
The lamp in this product contains mercury which can be dangerous to you and the environment. Please use care and dispose of in accordance with local, state or federal laws. For Your Records Pro8300 ViewSonic DLP Projector VS13648 Pro8300_UG_ENG Rev. 1A 04-13-12 ______________________________ ______________________________ ®... - Page 6 Notes on the AC power cord AC Power Cord must meet the requirement of countries where you use this projector. Please confirm your AC plug type with the graphics below and ensure that the proper AC Power Cord is used. If the supplied AC Power Cord does not match your AC out- let, please contact your sales dealer.
-
Page 7: Table Of Contents
Table of contents Introduction ... 1 Projector Features ... 1 Package Contents ... 2 Projector Overview ... 3 Using the Product ... 5 Control Panel ... 5 Connection Ports ... 6 Remote Control ... 8 Installing the Batteries ... 10 Remote Control Operation ... -
Page 8: Introduction
Introduction Projector Features The projector integrates high-performance optical engine projection and a user - friendly design to deliver high reliability and ease of use. The projector offers the following features: • Single chip 0.65" Texas Instruments DLP • 1080p (1920 x 1080 pixels) ®... -
Page 9: Package Contents
AC Power Cord Remote Control (IR) & batteries HDMI Cable ViewSonic DVD Wizard RS232 cable RGB to component adapter Quick Start... -
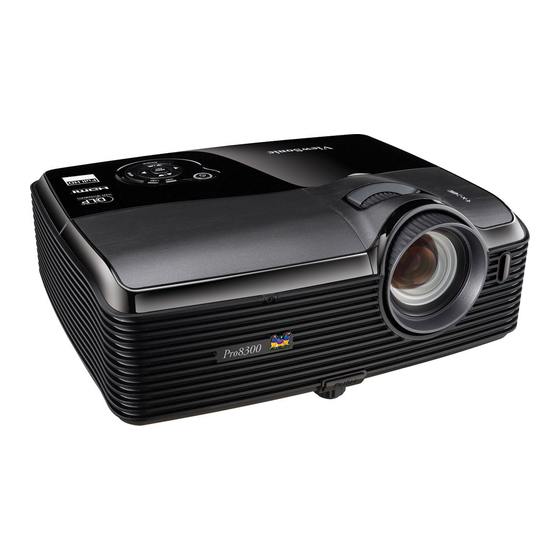
Page 10: Projector Overview
Projector Overview Front View 1. Lens cap 2. Elevator button 3. Elevator foot 4. Lens cap strap 5. Projection lens 6. Front IR remote control sensor 7. Ventilation holes (intake) 8. Filter cover 9. Speaker 10. Focus ring 11. Zoom ring 12. -
Page 11: Rear View
Rear View 1. Connection ports 2. AC power socket 3. Kensington lock Bottom View 1. Ceiling mount holes (M4*8) 2. Tilt-adjustment feet 3. Security bar Note • This projector can be used with a ceiling mount for support. The ceiling mount is not included in the package. -
Page 12: Using The Product
Using the Product Control Panel Power (Power LED indicator) Refer to “LED Indicator Messages”. 2. TEMP (Temperature LED indicator) Refer to “LED Indicator Messages”. 3. LAMP (Lamp LED indicator) Refer to “LED Indicator Messages”. 4. Keystone/Arrow keys ( /Up, Manually correct distorted images resulting from an angled projection. 5. -
Page 13: Connection Ports
Connection Ports 1. RS-232 When operating the projector via a computer, connect this to the controlling com- puter's RS-232C port. 2. Monitor Out Connect to a computer display, etc. 3. Component (Y Cb/Pb Cr/Pr) Connect Y Cb/Pb Cr/Pr output from video equipment to this jack. 4. - Page 14 Connect composite video output from video equipment to this jack. 15. Computer in 2 Connect image input signal (analog RGB or component) to this jack. 16. Computer in 1 Connect image input signal (analog RGB or component) to this jack.
-
Page 15: Remote Control
Remote Control 1. Power Turn the projector on or off. 2. HDMI 1 Display HDMI 1 signal. 3. Source Display the source selection bar. Up/Volume +, Down/Volume - When On-Screen (OSD) menu is not activated, adjust the projector’s sound level. Left/Mute When On-Screen... - Page 16 19. ESC Leave current page or items or to close OSD. 20. Keystone Manually correct distorted images resulting from an angled projection. 21. Swap Swap input source in PIP or POP image. 22. Aspect Select the display aspect ratio. 23. Freeze Press “Freeze”...
-
Page 17: Installing The Batteries
Installing the Batteries 1. Open the battery cover in the direction shown. 2. Install batteries as indicated by the diagram inside the compartment. 3. Close the battery cover into position. Caution • Risk of explosion if battery is replaced by an incorrect type. •... -
Page 18: Remote Control Operation
Remote Control Operation Point the remote control at the infrared remote sensor and press a button. • Operating the projector from the front • Operating the projector from the rear Note • Do not point the laser directly to the people's eyes (especially small children). There is a danger of injury to the eyes. -
Page 19: Connection
Connection When connecting a signal source to the projector, be sure to: 1. Turn all equipment off before making any connections. 2. Use the correct signal cables for each source. 3. Ensure the cables are firmly inserted. 1. VGA cable (D-Sub to D-Sub) 2. -
Page 20: Connecting A Computer Or Monitor
Connecting a computer or monitor Connecting a computer The projector provides two VGA input sockets that allow you to connect them to both ® compatibles and Macintosh connecting legacy version Macintosh computers. To connect the projector to a notebook or desktop computer: 1. -
Page 21: Connecting Video Source Devices
Connecting Video source devices You can connect your projector to various Video source devices that provide any one of the following output sockets: • Component Video • S-Video • Video (composite) You need only connect the projector to a Video source device using just one of the above connecting methods, however each provides a different level of video quality. -
Page 22: Connecting A Component Video Source Device
Also check that the signal cables have been connected correctly. • RGB to component adapter (ViewSonic P/N: J2552-0212-00) Connecting an S-Video source device Examine your Video source device to determine if it has an unused S-Video output socket available: •... -
Page 23: Connecting A Composite Video Source Device
• If you have already made a Component Video connection between the projector and this S-Video source device using Component Video connections, you need not connect to this device using an S-Video connection as this makes an unnecessary second connection of poorer picture quality. See for details. -
Page 24: Operation
Operation Powering On/Off the Projector Powering On the Projector: 1. Remove the projector lens cap. 2. Complete the AC power cord and peripheral signal cable(s) connections. 3. Press to turn on the projector. The projector takes a minute or so to warm up. 4. -
Page 25: Adjusting The Projector Height
Adjusting the Projector Height Tilt-adjustment feet The projector is equipped with an elevator foot to adjust the image height. To raise or lower the image: 1. To raise or lower the image, press the elevator button and raise or lower the front of the projector. -
Page 26: Adjusting Projection Image Size
Adjusting Projection Image Size Refer to the graphic and table below to determine the screen size and projection distance. Minimum zoom Maximum zoom Screen size Diagonal Projection distance [inch (m)] [inch (cm)] (min. zoom) 30 (76) 35 (0.89) 40 (102) 48 (1.21) 50 (127) 60 (1.52) -
Page 27: Locking Control Keys
Locking control keys With the control keys on the projector locked, you can prevent your projector settings from being changed accidentally (by children, for example). When the Panel Key Lock is on, no control keys on the projector will operate except 1. -
Page 28: Menu Operation
Menu Operation The projector has multilingual on-screen display menus that allow you to make image adjustments and change a variety of settings. Color Mode Video Setting Video/Audio Noise Reduction Audio Setting Microphone Volume Speaker Volume Setting Auto Keystone Keystone Aspect Ratio Filter Mode*2 High Altitude Quick Power On... - Page 29 OSD Setting Others Function*3 Display Type Swap Green Mode Information Input Source Filter Hours*2 Filter Hours Reset*2 Equivalent Lamp Hours Equivalent Lamp Hours Reset Factory Default *1 Adjustable range and default setting vary depending on signal type. *2 This function is only available when the projector is installed an optional filter cover. *3 The selectable Function list includes Color Mode, Gamma, Overscan, Noise Reduction, Keystone and Filter Mode.
-
Page 30: How To Operate
How to operate 1. Press MENU on the projector or Menu on the remote control to open the OSD menu. 2. When OSD is displayed, use 3. After selecting the desired main menu item, press setting. 4. Use to select the desired item and adjust the settings with 5. - Page 31 User Color provides six sets (RGBCMY) of colors to be adjusted. When you select each color, you can independently adjust its range and saturation according to your preference. Gamma Effect the represent of dark scenery. With greater gamma value, dark scenery will look brighter.
- Page 32 Microphone Volume Adjust the microphone’s volume level. Speaker Volume Adjust the projector’s volume level. Mute Cut off the sound temporarily. Setting Auto Keystone Automatically correct distorted images resulting from an angled projection. Keystone Manually correct distorted images resulting from an angled projection. •...
- Page 33 • Auto: Automatically detect the input signal type from Computer in 1 and Computer in 2 terminals. • RGB: For VGA signal • YCbCr:For component signal ECO Mode Use this function to dim the projector lamp light output which will lower power consumption and increase lamp life.
- Page 34 Closed Caption Enable or disable closed captions by selecting CC1 (closed caption1, the most common channel), CC2, CC3, CC4, T1, T2, T3, T4 or OFF. Others Allow you to enter the Others menu. • Status Message: Enable or disable the message box at the right bottom of the screen. •...
- Page 35 Filter Hours Reset Reset the filter Hour to 0 hours. Equivalent Lamp Hours Display the lamp’s elapsed operating time (in hours). Equivalent Lamp Hours Reset Reset the lamp Hour to 0 hours. Factory Default Restore settings to factory default. The following settings will still remain: Language, Projection, High Altitude, Filter Mode, Password, Lamp Hours, Filter Hours, Auto Keystone, Keystone.
-
Page 36: Maintenance
Maintenance The projector needs proper maintenance. You should keep the lens clean as dust, dirt or spots will project on the screen and diminish image quality. If any other parts need replacing, contact your dealer or qualified service personnel. When cleaning any part of the projector, always switch off and unplug the projector first. -
Page 37: Cleaning The Filter Cover
Cleaning the Filter Cover The filter cover, which is located at the side of the projector, should be cleaned after every 100 hours of use. If it is not cleaned periodically, it can become clogged with dust and prevent the projector from being ventilated properly. This can cause over heating and damage the projector. -
Page 38: Replacing The Lamp
Replacing the Lamp As the projector operates over time, the brightness of the projector lamp gradually decreases and the lamp becomes more susceptible to breakage. We recommend replacing the lamp if a warning message is displayed. Do not attempt to replace the lamp yourself. - Page 39 1. Turn off the projector. 2. If the projector is installed in a ceiling mount, remove it 3. Unplug the power cord. 4. Loosen the screw in the side of the lamp cover and remove the cover. 5. Remove the screws from the lamp module, raise the handle, and lift out the module. 6.
-
Page 40: Specifications
Specifications Display system Single 0.65" DLP panel Resolution 1080p (1920 × 1080 pixels) Zoom 1.5X F/No. 2.41 - 2.97 Focal length 20.72 - 31mm Screen size 30” - 300” Lamp 230W Input terminal D-Sub 15-pin x 2, S-Video x 1, Video x 1, Audio signal input (3.5 mm stereo mini jack) x 2, HDMI x 2, Component RCA jack x 1, RCA audio jack (L/R) x 1, 3.5 mm Mic input x1, USB A type x1 (supports firmware update) -
Page 41: Dimensions
Dimensions 335 mm (W) x 267 mm (D) x 132 mm (H) Ceiling mount installation 64.5 Ceiling mount screws: M4 x 8 (Max. L = 8 mm) Unit: mm 84.9... -
Page 42: Appendix
Appendix LED Indicator Messages LED type Color Power LED Blue Lamp LED Temp LED Power LED Blue Lamp LED Temp LED Power LED Blue Lamp LED Temp LED Power LED Blue Lamp LED Temp LED Power LED Blue Lamp LED Temp LED Power LED Blue... -
Page 43: Compatibility Modes
Compatibility Modes Computer: Compatibility Resolution SVGA 1024 x 768 SXGA 1280 x 1024 UXGA 1600 x 1200 Mac 13 Mac 16 Mac 19 1024 x 768 1080i30 1920 x 1080 1080i25 1920 x 1080 480p 576p 720p60 1280 x 720 720p50 1280 x 720 1080p60... - Page 44 Video: Compatibility Resolution 1080p 1920 x 1080 1080p 1920 x 1080 1080i 1920 x 1080 1080i 1920 x 1080 720p 1280 x 720 720p 1280 x 720 576p 720 x 576 576i 720 x 576 480p 720 x 480 480i 720 x 480 H-Sync [KHz] V-Sync [Hz]...
-
Page 45: Troubleshooting
Troubleshooting Refer to the symptoms and measures listed below before sending the projector for repairs. If the problem persists, contact your local reseller or service center. Please refer to "LED Indicator Messages" as well. Start-up problems If no lights turn on: •... -
Page 46: Rs-232 Command And Configuration
RS-232 Command and Configuration D-Sub 9 pin 1 CD Baud Rate 19200 bps Data Length 8 bit Parity Check None Stop Bit 1 bit Flow Control None POWER ON / POWER OFF POWER ON POWER OFF SOURCE SELECT Computer 1 Computer 2 COMPONENT COMPOSITE... - Page 47 BLANK SOURCE OTHER FUNCTION DCR ON DCR OFF ECO ON ECO OFF VOLUME INC VOLUME DEC KEYSTONE INC KEYSTONE DEC FACTORY RESET LAMP HOURS RESET FILTER HOURS RESET LAMP HOURS FILTER HOUR BE,EF,02,06,00,08,D9,41,00,00,00,00,00 BE,EF,02,06,00,7F,D6,06,00,00,00,00,00 BE,EF,02,06,00,EA,D8,43,00,00,00,00,00 BE,EF,02,06,00,5D,D9,44,00,00,00,00,00 BE,EF,02,06,00,8C,D8,45,00,00,00,00,00 BE,EF,02,06,00,BF,D8,46,00,00,00,00,00 BE,EF,02,06,00,6E,D9,47,00,00,00,00,00 BE,EF,02,06,00,91,D9,48,00,00,00,00,00 BE,EF,02,06,00,40,D8,49,00,00,00,00,00 BE,EF,02,06,00,73,D8,4A,00,00,00,00,00 BE,EF,02,06,00,A2,D9,4B,00,00,00,00,00...
-
Page 48: Ir Control Code
IR Control Code System Code: 83F4 Format : NEC... -
Page 49: Customer Support
Customer Support For technical support or product service, see the table below or contact your reseller. Note : You will need the product serial number. Country/Region Web Site www.viewsonic.com.au land Canada www.viewsonic.com www.viewsoniceurope. Hong Kong www.hk.viewsonic.com India www.in.viewsonic.com www.viewsoniceurope. Korea www.kr.viewsonic.com... -
Page 50: Limited Warranty
Who the warranty protects: What the warranty does not cover: instructions supplied with the product. Operation of the product for other than the normal intended use or not under normal conditions. Removal or installation of the product. Limited Warranty ® VIEWSONIC PROJECTOR... - Page 51 and tear. How to get service: number. 2. To obtain warranted service, you will be required to provide (a) the original dated sales slip, (b) your name, (c) your address, (d) a description of the problem, and (e) the serial number of the product.
-
Page 52: Mexico Limited Warranty
To obtain warranty service, you will be required to provide (a) the original dated sales slip, (b) your name, (c) your address, (d) a description of the problem, and (e) the serial number of the product. Limitation of implied warranties: Exclusion of damages: relationships, or other commercial loss, even if advised of the possibility of such damages. ® VIEWSONIC PROJECTOR... - Page 53 Contact Information for Sales & Authorized Service (Centro Autorizado de Servicio) within Mexico: Name, address, of manufacturer and importers: NÚMERO GRATIS DE ASISTENCIA TÉCNICA PARA TODO MÉXICO: 001.866.823.2004 Hermosillo: Puebla, Pue. (Matriz): Chihuahua Chihuahua, Chih. Distrito Federal: Guerrero Acapulco MERIDA: Tijuana: Villahermosa: Veracruz, Ver.:...