Table of Contents
Advertisement
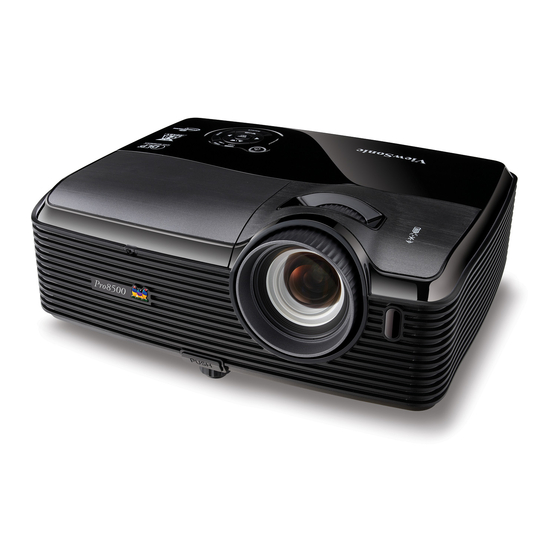
ViewSonic
Pro8500
DLP Projector
IMPORTANT: Please read this User Guide to obtain important
information on installing and using your product in a safe
manner, as well as registering your product for future service.
Warranty information contained in this User Guide will describe
your limited coverage from ViewSonic Corporation, which is
also found on our web site at http://www.viewsonic.com in
box in the upper right corner of our website.
"Antes de operar su equipo lea cuidadosamente las
instrucciones en este manual"
®
- User Guide
- Guide de l'utilisateur
- Bedienungsanleitung
- Guía del usuario
- Guida dell'utente
- Guia do usuário
- Användarhandbok
- Käyttöopas
-
-
-
-
Model No. : VS13645
Advertisement
Table of Contents

Related Manuals for ViewSonic VS13645


Summary of Contents for ViewSonic VS13645
- Page 1 Warranty information contained in this User Guide will describe your limited coverage from ViewSonic Corporation, which is also found on our web site at http://www.viewsonic.com in box in the upper right corner of our website. “Antes de operar su equipo lea cuidadosamente las instrucciones en este manual”...
-
Page 2: Compliance Information
Compliance Information FCC Statement This device complies with part 15 of FCC Rules. Operation is subject to the following two conditions: (1) this device may not cause harmful interference, and (2) this device must accept any interference received, including interference that may cause undesired operation. -
Page 3: Important Safety Instructions
Important Safety Instructions Read these instructions. Keep these instructions. the manufacturer’s instructions. A grounding type plug has two blades and a third grounding prong. The wide blade and the third prong are provided for your safety. If the replacement of the obsolete outlet. unit. -
Page 4: Declaration Of Rohs Compliance
Declaration of RoHS Compliance Technical Adaptation Committee (TAC) as shown below: Substance Cadmium (Cd) Polybrominated biphenyls (PBB) Polybrominated diphenyl ethers or more lead). weight. Pro8500 Proposed Maximum Concentration Actual Concentration... -
Page 5: Copyright Information
Product Registration To meet your future needs, and to receive any additional product information as it becomes available, please register your product on the Internet at: www.viewsonic.com. The ® Product Name: Model Number:... - Page 6 Please ensure that your outlet fits the plug. Do not defeat the safety purpose of this grounding type plug. We highly recommend using a video source device also equipped with a grounding type AC line plug to prevent signal interference due to voltage fluctuations. Ground ViewSonic Pro8500...
-
Page 7: Table Of Contents
Controlling the projector through a web browser ... 42 Displaying images through vsPresenter ... 49 Displaying pictures with a USB storage device ... 54 Maintenance ...58 Cleaning the Lens ... 58 Cleaning the Projector Housing ... 58 Cleaning the Filter Cover ... 58 ViewSonic Pro8500... - Page 8 Replacing the Lamp ...59 Specifications ... 61 Dimensions ...62 Ceiling mount installation ...62 Appendix ... 63 LED Indicator Messages ...63 Compatibility Modes ...64 Troubleshooting ...66 RS-232 Command and Configuration 67 IR Control Code ...69 ViewSonic Pro8500...
-
Page 9: Introduction
Less than 1 W power consumption in standby mode The information in this manual is subject to change without notices. The reproduction, transfer or copy of all or any part of this document is not permitted without express written consent. ViewSonic Pro8500... -
Page 10: Package Contents
When you unpack the projector, make sure you have all these components: Projector with Lens Cap AC Power Cord Remote Control (IR) & batteries VGA Cable (D-SUB to D- ViewSonic DVD Wizard Quick Start Guide SUB) Optional accessories Filter cover... - Page 11 Save the original shipping carton and Packing material; they will come-in handy if you ever to ship your unit. for maximum protection, repack your unit as it was originally packed at the factory. ViewSonic Pro8500...
-
Page 12: Projector Overview
Projector Overview Front View Lens cap Elevator button Elevator foot Lens cap strap Projection lens Front IR remote control sensor Ventilation holes (intake) ViewSonic Pro8500 Filter cover Speaker Focus ring Zoom ring Control panel Lamp cover... -
Page 13: Rear View
Ceiling mount holes (M4*8) Tilt-adjustment feet Security bar This projector can be used with a ceiling mount for support. The ceiling mount is not included in the package. Contact your dealer for information to mount the projector on a ceiling. ViewSonic Pro8500... -
Page 14: Using The Product
Enter to sub-menu and confirm the menu selection. SOURCE Display the source selection bar. MENU/EXIT Display or exit the on-screen display menus. Power Turn the projector on or off. Right/Panel key Activate panel key lock. Left/Blank Hide the screen picture. ViewSonic Pro8500 /Up, /Down) -
Page 15: Connection Ports
This connector supports USB flash drive display and wireless dongle for USB display. For LAN display/network control and web server. HDMI Connect HDMI output from video equipment to this jack. DC 12V Out 12V DC out MIC in Microphone input jack. ViewSonic Pro8500... - Page 16 Connect composite video output from video equipment to this jack. Computer in 2 Connect image input signal (analog RGB or component) to this jack. Computer in 1 Connect image input signal (analog RGB or component) to this jack. ViewSonic Pro8500...
-
Page 17: Remote Control
Switch between the normal and mouse modes. Blank Cut off the screen temporarily. Press again to cancel the Blank Screen function. ViewSonic Pro8500 Laser Aim the remote at the viewing screen, press and hold this button to activate the laser pointer. Video Switch input source to Composite/S- Video/component by sequence. -
Page 18: Using The Remote Mouse Control
Press again to cancel the freeze function. Light Enable backlight functions of the remote control’s buttons. ViewSonic Pro8500 Using the remote mouse control The capability of operating your computer with the remote control gives you more flexibility when delivering presentations. -
Page 19: Installing The Batteries
Batteries should not be in or near to fire or water, keep batteries in a dark, cool and dry place. If suspect battery leakage, wipe out the leakage and then replace new batteries. If the leakage adheres to your body or clothes, rinse well with water immediately. ViewSonic Pro8500... -
Page 20: Remote Control Operation
Do not drop the remote control or jolt it. Keep the remote control out of locations with excessively high temperature or humidity. Do not get water on the remote control or place wet objects on it. Do not disassemble the remote control. ViewSonic Pro8500... -
Page 21: Connection
The connection illustrations above are for reference only. The rear connecting jacks available on the projector vary with each projector model. For detailed connection methods, see pages 18-21. ViewSonic Pro8500 S-Video cable Composite Video cable Audio cable HDMI cable Microphone 3.5 mini jack cable... -
Page 22: Connecting A Computer Or Monitor
Important The Monitor Out output only works when Computer in 1 or Computer in 2 is made to the projector. ViewSonic Pro8500 ® computers. A Mac adapter is needed if you are “Using the remote mouse control” on page 14 for details. -
Page 23: Connecting Video Source Devices
“Connecting a composite Video source device” on page 21 projector to a composite Video device. ViewSonic Pro8500 for how to connect for how to connect the for how to connect the... -
Page 24: Connecting A Component Video Source Device
Also check that the signal cables have been connected correctly. RGB to component adapter (ViewSonic P/N: J2552-0212-00) Connecting an S-Video source device Examine your Video source device to determine if it has an unused S-Video output socket available: If so, you can continue with this procedure. -
Page 25: Connecting A Composite Video Source Device
You need only connect to this device using a composite Video connection if Component Video and S-Video inputs are unavailable for use. See “Connecting Video source devices” on page 19 ViewSonic Pro8500 “Connecting Video source devices” on page 19 for details. - Page 26 To ensure a quality use of the wireless microphone, it is recommended that your microphone conforms to the specifications listed in the table below. Signal Parameter Microphone Transducer Principle Impedance Frequency response ViewSonic Pro8500 Type Dynamic...
-
Page 27: Operation
Press again to confirm. When the Power LED begins flashing, the projector has entered stand-by mode. Disconnect the AC power cord from the electrical outlet and the projector. Do not turn on the projector right after power off ViewSonic Pro8500... -
Page 28: Adjusting The Projector Height
Adjusting the Projector Zoom and Focus Focus the image by rotating the focus ring. A still image is recommended for focusing. Adjust the image size by sliding the zoom ring. ViewSonic Pro8500 Tilt-adjustment feet Focus ring Elevator foot Elevator button... -
Page 29: Adjusting Projection Image Size
This will help you determine the exact mounting position so that it best suits your installation location. ViewSonic Pro8500 Vertical offset Projection distance 4 : 3 Screen (max. -
Page 30: Locking Control Keys
Creating your own startup screen In addition to selecting the projector preset startup screen from ViewSonic logo or User screen, you can make your own startup screen that is an image projected from your computer or video source. -
Page 31: Setting The Presentation Timer
On and press ENTER on the projector or Enter on the remote control. To cancel the timer, perform the following steps: Go to the Setting > Presentation Timer > Presentation Timer menu and highlight Off. ViewSonic Pro8500 Top-Right Bottom-Right . The... -
Page 32: Menu Operation
Menu Operation The projector has multilingual on-screen display menus that allow you to make image adjustments and change a variety of settings. Video/Audio Microphone Volume ViewSonic Pro8500 Color Temp. Red Gain Green Gain Blue Gain Color Saturation Gain Auto Keystone... - Page 33 Setting ViewSonic Pro8500 Top-Left, Top-Right, Center, Bottom-Left, Bottom-Right Front-Table, Front-Ceiling, Rear-Table, Rear-Ceiling 0 - 60 Filter Mode*2 High Altitude OSD Transparency 0, 10, 20, 30, 40, 50, 60, 70, 80, 90 Presentation Timer Presentation Timer Timer Period Display Timer Timer Position...
- Page 34 Test Pattern. *4 Saturation is supported under Component, Video and S-Video modes. *5 Sharpness is supported under HDMI, Component, Video and S-Video modes. *6 Tint is supported under Component, Video and S-Video modes. ViewSonic Pro8500 Status Wired LAN Default Gateway...
-
Page 35: How To Operate
Automatically correct distorted images resulting from an angled projection. Keystone Manually correct distorted images resulting from an angled projection. When adjusting the Keystone, Auto Keystone will be set at "Off" automatically. ViewSonic Pro8500 to select any feature in the main menu. select feature setting. - Page 36 Adjust the phase of the projector relative to the computer. H Position (Horizontal Position) Adjust the image left or right within the projection area. V Position (Vertical Position) Adjust the image up or down within the projection area. Overscan Remove noise around the image. Noise Reduction ViewSonic Pro8500...
- Page 37 Signal Type Specify the source to the Computer in 1/Computer in 2 terminal that you wish to project. Auto : Automatically detect the input signal type from Computer in 1 and Computer in 2 terminals. : For VGA signal ViewSonic Pro8500...
- Page 38 Start up Screen: Select start up screen when the projector is powered on or when no signal is input. "User" is the screen that you captured. Screen Capture: Capture the current projection screen as a start up screen. ViewSonic Pro8500...
- Page 39 On: The projector will directly shut down without cooling procedure. Off: The projector will shut down following normal cooling procedure. Network Wired LAN Allow you to configure the wired LAN settings. Status: Display the projector’s status. DHCP: Abbreviation for Dynamic Host Configuration Protocol. This protocol ViewSonic Pro8500...
- Page 40 Connection Mode: Methods for connecting to wireless networks with Wi-Fi enabled devices. Network Restart Restore network settings to default. The password for web administrator and vsPresenter will be reset to default “admin”. Information Input Source Display the current input source. Resolution ViewSonic Pro8500...
- Page 41 Factory Default Restore settings to factory default. The following settings will still remain: MAC Address, Language, Projection, High Altitude, Filter Mode, Password, Lamp Hours, Filter Hours, Auto Keystone, Keystone. Language Select the language used by the on-screen menu. ViewSonic Pro8500...
-
Page 42: Controlling The Projector Through A Lan Environment
If you are in a non-DHCP environment: Repeat steps 1-4 above. Press to highlight DHCP and press Contact your ITS administrator for information on the IP Address, Subnet Mask, Default Gateway, and DNS settings. ViewSonic Pro8500 Internet IP Router to select On. to select Off. - Page 43 If you wish to connect to the projector in its standby mode, be sure you have selected RJ45 and obtained the IP Address, Subnet Mask, Default Gateway, and DNS information when the projector is on. ViewSonic Pro8500...
-
Page 44: Wireless Connection
Wireless connection ViewSonic wireless dongle To connect to the projector wirelessly, you have to plug a ViewSonic wireless dongle (optional) to the USB Type A connector on the projector, and then only a few OSD configuration steps are required. Make sure the projector is turned on. - Page 45 The following diagram describes how to access the Internet in AP and Infrastructure modes. (Modo AP) Important If you need more information about AP and Infrastructure modes, please refer to user documentations for Wireless Routers which are usually available on 3C stores. ViewSonic Pro8500 (Modo Infrastructure) Internet Internet...
-
Page 46: Controlling The Projector Through A Web Browser
Enter the address of the projector in the address bar of your browser and press Enter. The main page of the ViewSonic webpage control system appears. To change the language for the web pages, click the down arrow to reveal a drop down list and select a desired language. - Page 47 Alert Setup/Mail Setup: Allows you to setup the mail server and send system error messages to your ITS administrator. Network Setup: Provides wired and wireless network settings. Reset to Default: Allows you to restore the device to the factory default settings. ViewSonic Pro8500 “Menu Operation” on page 28 for details.
- Page 48 The source list varies according to the connectors available on the projector. When you use the projector control panel or remote control to change the OSD menu settings, it may take a while for the web browser to synchronize these changes with the projector. ViewSonic Pro8500...
- Page 49 To prevent errors, only input the English alphabet and digits on the tools page. After making the adjustments, press the Send button and the data will be saved for the projector. Press Exit to go back to the remote network operation page. ViewSonic Pro8500 viii...
- Page 50 Please pay attention to the limitation of input length (including space and other punctuation keys) in the list blow: Category Item Crestron Control Projector Network Configuration User Password Admin Password ViewSonic Pro8500 Input Length IP Address IP ID Port Projector Name Location Assigned To...
- Page 51 You will be able to deliver messages to RoomView software administrators/ users who connect to the same local area network. Important Please only deliver the messages in English letters and digits. For more information, visit ViewSonic Pro8500 http://www.crestron.com & www.crestron.com/getroomview. Press Exit to go back to the...
- Page 52 On the "Edit Room" page, enter the IP Address (or hostname) as shown on the projector's on-screen display (OSD) menu, and "05" for IPID, "41794" for the reserved Crestron control port. About Crestron RoomView setting and command method, please access below website to get RoomView User Guide and more information: http://www.crestron.com/features/ roomview_connected_embedded_projectors_devices/resources.asp ViewSonic Pro8500...
-
Page 53: Displaying Images Through Vspresenter
Search. iii. You can link to the ViewSonic webpage control system on If you are the first time user, choose your identity as a Normal user or Administrator. Both require no password. But if you choose to be an... - Page 54 To display a partial screen, click FixedSize. A square appears on your screen. You can place it where you want to project. iii. If you wish to change the square, click Alterable. The Basic Setting page allows you to configure vsPresenter. ViewSonic Pro8500 . Any further is pressed.
- Page 55 444 provides better effect but may slow the transport and playing speed. Click Apply after your selections. To adjust the capture rate, move the slide bar. The network bandwidth may also affect the performance. iii. Network port setting for fixed or manual type. ViewSonic Pro8500...
- Page 56 You are the user of the projector. You are an administrator of the projector. Disconnect ViewSonic Pro8500 Icon Sets a display zone for the projector. Description Disconnects from the projector. Opens the web page of the Network Control.
- Page 57 To disconnect from the projector(s), click the Disconnect icon. Important Be sure to turn off other virtual network control programs before using vsPresenter. ViewSonic Pro8500...
-
Page 58: Displaying Pictures With A Usb Storage Device
ENTER or Enter. To obtain more functions, press Auto to open the menu. To leave the menu, press ENTER or Enter again. ViewSonic Pro8500 Maximum pixel size 8000 x 8000 1280 x 800... - Page 59 When viewing slide shows Stop: Stops the slide show. Fast/Medium/Slow: Sets the interval between the two images display. Slide Right/Slide Up/Right down/Random: Sets the way the slide show is displayed. Repeat On/Off: Sets whether to repeat the slide shows. ViewSonic Pro8500...
- Page 60 The projector can display the filenames up to 16 characters including the file extension. The application is best to display the filenames in English. If the files are named in other languages, the filenames may not show properly, but the content still can ViewSonic Pro8500...
- Page 61 : Folder F Response time may vary depending on image contents when switching pages, loading and playing files. ViewSonic Pro8500 File display priority in folder: A > B > C > D > E > F. Folder G: Cannot be displayed because it is in the 4th layer.
-
Page 62: Maintenance
Make sure the lens is cool before cleaning. Do not use detergents or chemicals other than those noted above. Do not use benzene or thinners. Do not use chemical sprays. Use a soft cloth or lens paper only. ViewSonic Pro8500... -
Page 63: Replacing The Lamp
Leave the area immediately if the lamp shatters while being operated and ventilate the area for at least 30 minutes in order to avoid the inhalation of mercury fumes. Otherwise it could be harmful to user’s health. ViewSonic Pro8500... - Page 64 Do not reuse the old lamp. This could cause the lamp to explode. Be sure to turn off the projector and unplug the AC power cord before replacing the lamp. Do not use the projector with the lamp cover removed. ViewSonic Pro8500...
-
Page 65: Specifications
AC 100-240 V, 50 - 60 Hz, 3.8A Power consumption 380 W Dimension (W x D x H) 335 x 267 x 132 mm Weight 3.86 kg (8.5 lbs) Note: Design and Specifications are subject to change without prior notice. ViewSonic Pro8500... -
Page 66: Dimensions
Dimensions 335 mm (W) x 267 mm (D) x 132 mm (H) Ceiling mount installation ViewSonic Pro8500 64.5 Ceiling mount screws: M4 x 8 (Max. L = 8 mm) 84.9 Unit: mm... -
Page 67: Appendix
Flash Flash Solid Flash Solid Flash Solid Solid Solid Solid ViewSonic Pro8500 Temp LED (Red) Standby mode when green mode is turned on. Standby mode when green mode is turned off. Lamp ignition fail Cooling mode Thermal error End of lamp lifetime... -
Page 68: Compatibility Modes
VGA (Expanded) DOS/Text mode visible SVGA (Expanded) XGA (Native) SXGA (Compressed) UXGA (Compressed) Mac 13 Mac 16 Mac 19 Others ViewSonic Pro8500 Resolution H-Sync [KHz] 640 x 480 24.69 800 x 600 30.99 1024 x 768 39.63 1280 x 1024... - Page 69 1920 x 1080 720p 1280 x 720 720p 1280 x 720 576p 720 x 576 576i 720 x 576 480p 720 x 480 480i 720 x 480 ViewSonic Pro8500 H-Sync [KHz] V-Sync [Hz] 67.5 56.3 33.8 28.1 37.5 31.3 15.6 31.5 15.8...
-
Page 70: Troubleshooting
Aim the remote control at the screen or at the front or back of the projector. Move the remote control so it is more directly in front of or behind the projector and not as far to the side. ViewSonic Pro8500... -
Page 71: Rs-232 Command And Configuration
POWER ON / POWER OFF POWER ON POWER OFF SOURCE SELECT Computer 1 Computer 2 COMPONENT COMPOSITE S-VIDEO HDMI USB A USB B ViewSonic Pro8500 SHELL 19200 bps 8 bit None 1 bit None BE,EF,10,05,00,C6,FF,11,11,01,00,01,00 BE,EF,03,06,00,DC,DB,69,00,00,00,00,00 BE,EF,03,19,00,19,29,01,47,02,CC,CC,00 BE,EF,03,19,1E,90,72,01,47,02,CC,CC,00 BE,EF,03,19,00,89,E8,01,47,02,CC,CC,00 BE,EF,03,19,00,78,A8,01,47,02,CC,CC,00... - Page 72 DCR ON DCR OFF ECO ON ECO OFF VOLUME INC VOLUME DEC KEYSTONE INC KEYSTONE DEC LAMP HOURS RESET FILTER HOURS RESET FACTORY RESET FIRMWARE VERSION ViewSonic Pro8500 BE,EF,02,06,00,DF,43,3A,00,00,00,00,00 BE,EF,02,06,00,E9,D3,30,00,00,00,00,00 BE,EF,02,06,00,6D,D2,34,00,00,00,00,00 BE,EF,02,06,00,0B,D2,32,00,00,00,00,00 BE,EF,02,06,00,DA,D3,33,00,00,00,00,00 BE,EF,02,06,00,38,D2,31,00,00,00,00,00 BE,EF,02,06,00,D5,6B,12,00,00,00,00,00 BE,EF,02,06,00,86,D1,2F,00,00,00,00,00 BE,EF,03,06,00,0D,DA,68,00,00,00,00,00 BE,EF,02,06,00,0E,DE,67,00,00,00,00,00 BE,EF,02,06,00,02,D0,2B,00,00,00,00,00 BE,EF,02,06,00,DF,DF,66,00,00,00,00,00...
-
Page 73: Ir Control Code
IR Control Code System Code: 83F4 Format : NEC ViewSonic Pro8500... -
Page 74: Customer Support
Renta y Datos, 29 SUR 721, COL. LA PAZ, 72160 PUEBLA, PUE. Tel: 01.222.891.55.77 CON 10 LINEAS Electroser, Av Reforma No. 403Gx39 y 41, 97000 Mérida, Yucatán. Tel: 01.999.925.19.16 Other places please refer to http://www.viewsonic.com/la/soporte/index.htm#Mexico Latin America (Peru) www.viewsonic.com/la/ Macau www.hk.viewsonic.com... -
Page 75: Limited Warranty
VIEWSONIC use, during the warranty period. If a product proves to be defective in material or workmanship a like product. Replacement product or parts may include remanufactured or refurbished parts or components. Limited Three (3) year General Warranty purchase. Limited One (1) year Heavy Usage Warranty: warranty information. - Page 76 Any other cause which does not relate to a product defect. number. To obtain warranted service, you will be required to provide (a) the original dated sales slip, (b) your name, (c) your address, (d) a description of the problem, and (e) the serial number of the product. Exclusion of damages: not be liable for: opportunity, loss of goodwill, interference with business relationships, or other commercial loss,...
-
Page 77: Mexico Limited Warranty
(d) a description of the problem, and (e) the serial number of the product. Exclusion of damages: business relationships, or other commercial loss, even if advised of the possibility of such damages. Any other damages, whether incidental, consequential or otherwise. Pro8500 ® VIEWSONIC PROJECTOR... - Page 78 Contact Information for Sales & Authorized Service (Centro Autorizado de Servicio) within Mexico: Name, address, of manufacturer and importers: NÚMERO GRATIS DE ASISTENCIA TÉCNICA PARA TODO MÉXICO: 001.866.823.2004 Hermosillo: Puebla, Pue. (Matriz): Chihuahua Chihuahua, Chih. Distrito Federal: Guerrero Acapulco MERIDA: Tijuana: Pro8500 Villahermosa:...