Advertisement
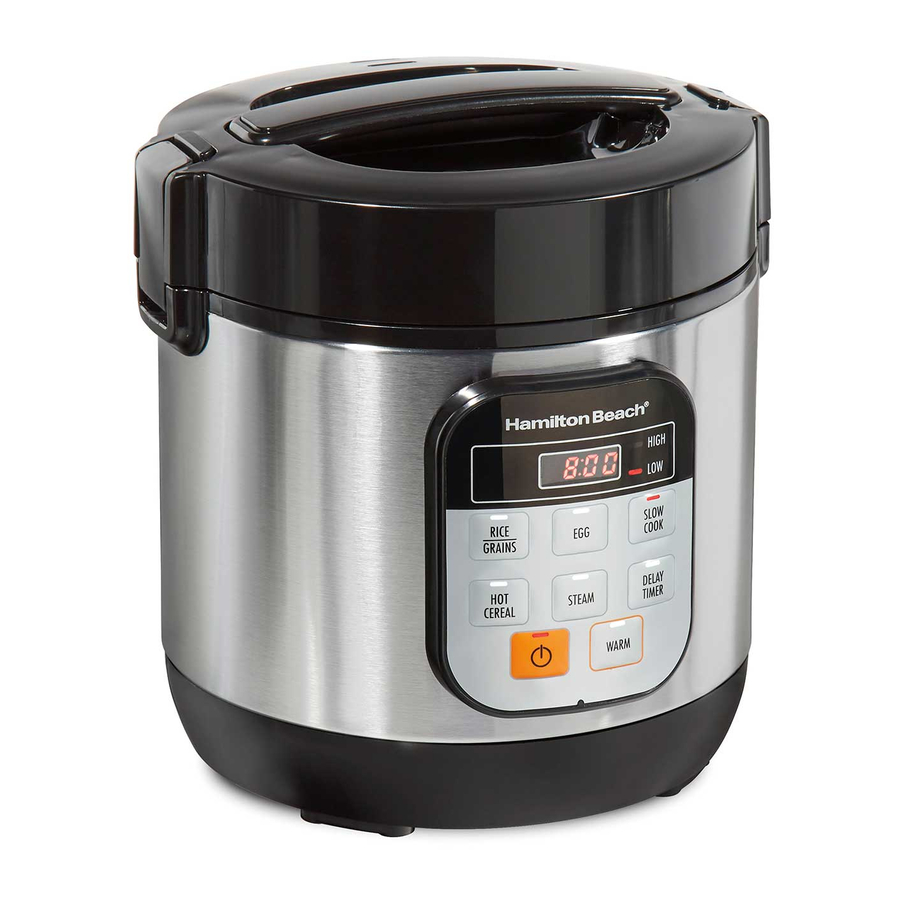
Parts and Features
Read before use.

- Steamer/Egg Tray
- Cooking Pot
- Removable Lid with Handle and Steam Vent
![warning]() NOTE: Steam Vent must always face toward back of Base
NOTE: Steam Vent must always face toward back of Base - Lid Release Buttons
- Removable Steam Vent Cover (bottom of Lid)
- Base with Lid Clips
- Control Panel
- Rice Measuring Cup, 6-ounce (177 ml)
- Rice Paddle
- Cord Storage (in bottom of Base)
To order parts:
US: 1.800.851.8900
www.hamiltonbeach.com
Canada: 1.800.267.2826
Mexico: 01 800 71 16 100

HOT SURFACE. The temperature of accessible surfaces may be high when the appliance is operating.
How to Use the Multi Cooker

Electrical Shock Hazard. Cook only in removable cooking pot. Never place water or food directly into the base.
Steam from steam vent can cause injury.
Before first use: Wash Cooking Pot following "Care and Cleaning" instructions; dry thoroughly.
To remove Lid: Press Lid Release Buttons and guide Lid Clips away from Multi Cooker.
To install Lid: Align Lid with Clips on Base. Place Lid straight down on Base with Steam Vent facing back of Multi Cooker. Push Lid Clips towards Multi Cooker until Clips snap into place.
 NOTE: Do not carry the Multi Cooker when full by the Lid Handle.
Cooking Rice
Rice Measuring Cup – Do not throw away the Rice Measuring Cup that comes with your unit. This is an important tool in using your Multi Cooker successfully as a rice cooker and its size is standard in the rice industry. One Rice Measuring Cup equals 6 oz. (177 ml) or approximately 3/4 cup (U.S. standard measuring cup).
Steamer/Egg Tray – Use to steam large eggs, vegetables, meat, poultry, seafood, and prepared foods such as dumplings or rice noodle rolls
Using Multi Cooker to Cook Rice, Cereal, or Grain:
- Add desired amount of uncooked rice to Cooking Pot; then fill with water to corresponding water line. Example: If you add 2 level Rice Measuring Cups of rice to the Cooking Pot, add water to the "2" line of the pot. DO NOT exceed 3-cup MAX.
- Place Cooking Pot straight down on Base. Make sure Cooking Pot is securely placed into Base.
![warning]() NOTE: Make sure bottom of Cooking Pot is not bent or warped, or it will not conduct heat correctly.
NOTE: Make sure bottom of Cooking Pot is not bent or warped, or it will not conduct heat correctly. - Plug into outlet. Press ON/OFF (
![]() ) to turn on Multi Cooker. Multi Cooker is in standby mode if display shows 4 dashes.
) to turn on Multi Cooker. Multi Cooker is in standby mode if display shows 4 dashes. - Press button for desired function; selected function and 4 dash lines will flash. Multi Cooker will start to heat automatically after 5 seconds.
![]()
- At the end of the cooking time, the Multi Cooker will automatically switch to WARM except when using EGG or STEAM functions. Multi Cooker will keep warm up to 12 hours, then sound an alarm and switch to standby mode. Use oven mitts if removing Cooking Pot from Base while still hot.


Program Functions
RICE/GRAINS and HOT CEREAL functions have preprogrammed cycles with a default cooking time that cannot be adjusted. Actual cooking time depends on the amounts of ingredients and water. Cooking will start and the display will show a rotating dash until the cooking process is almost complete. Then, the display time will jump to a time designated by the program and start counting down until finished cooking. The Multi Cooker automatically switches to WARM when done cooking and will keep warm up to 12 hours.
Time Functions
Five functions can be adjusted to the time you desire. After selecting function, press the function button again to adjust time. The display will show rotating dashes until the cooking temperature is reached, then the timer will begin counting down. The Multi Cooker automatically switches to WARM when done cooking and will keep warm up to 12 hours.
NOTE: The DELAY TIMER function can be used with RICE/GRAINS, HOT CEREAL, and STEAM.
| FUNCTION | TIME RANGE |
| EGG | 12 minutes is default time for hard-cooking 5 large eggs. Time can be adjusted by pressing EGG Button until desired time is reached. |
| SLOW COOK (LOW or HIGH) | Press SLOW COOK Button to alternate between LOW and HIGH. After function is selected wait 5 seconds to adjust time. Default is 6 hours for LOW and 4 hours for HIGH. To increase time, press SLOW COOK Button until desired cooking time is displayed. Timer will count up in 30-minute increments from 1 to 10 hours and 1-hour increments from 10 to 14 hours. |
| STEAM | 1-60 minutes; timer countdown begins when water boils. |
| WARM | Select to keep food warm for up to 12 hours. |
WARM
WARM function should be used for already-cooked food. Do not cook on WARM. Timer will count up to display the total amount of time on WARM.
DELAY TIMER
Delay Timer function can be used with RICE/GRAINS, HOT CEREAL, and STEAM. Place water and food items in Cooking Pot or food in Steamer/Egg Tray. Select function and cooking time. Once selected, press DELAY TIMER. DELAY TIMER can be set from 0–24 hours.
Care and Cleaning

Electrical Shock Hazard. Do not immerse base, cord, or plug in water or other liquid.
- Unplug Multi Cooker.
- Wash Lid in hot, soapy water. Rinse and dry. Cooking Pot, Steamer/Egg Tray, Rice Measuring Cup, and Rice Paddle are dishwasher-safe, top-rack only. DO NOT use the "SANI" setting when washing in the dishwasher. "SANI" cycle temperatures could damage your product.
- Wipe Base with a soft, damp cloth or sponge. To remove stubborn spots, use a mild, nonabrasive cleanser.
To remove Steam Vent Cover:
- Unplug and cool.
- Remove Lid and pull Steam Vent Cover straight out. Wash in hot, soapy water.
Rinse and Dry. To install, place pointed end of Steam Vent Cover in hole of Lid. Push to secure. Steam Vent Cover MUST be installed with any function.
Troubleshooting
 shows in display.
- Cooking Pot is dry. Add water.
 shows in display.
- Cooking Pot is too hot. Unplug and wait 20 minutes. Plug into outlet and try again.
 shows in display.
- Call Customer Service.
 shows in display.
- Call Customer Service.
IMPORTANT SAFEGUARDS
When using electrical appliances, basic safety precautions should always be followed to reduce the risk of fire, electric shock, and/or injury to persons, including the following:
- Read all instructions.
- This appliance is not intended for use by persons (including children) with reduced physical, sensory, or mental capabilities, or lack of experience and knowledge, unless they are closely supervised and instructed concerning use of the appliance by a person responsible for their safety.
- Close supervision is necessary when any appliance is used by or near children. Children should be supervised to ensure that they do not play with the appliance.
- Do not touch hot surfaces. Use handles or knobs. Use pot holders when removing hot containers.
- To protect against a risk of electrical shock, do not immerse cord, plug, or base in water or other liquid.
- Unplug from outlet when not in use and before cleaning. Allow to cool before putting on or taking off parts, and before cleaning.
- The use of accessory attachments not recommended by the appliance manufacturer may cause injuries.
- Do not operate any appliance with a damaged supply cord or plug, or after the appliance malfunctions or has been dropped or damaged in any manner. Supply cord replacement and repairs must be conducted by the manufacturer, its service agent, or similarly qualified persons in order to avoid a hazard. Call the provided customer service number for information on examination, repair, or adjustment.
- Do not use outdoors.
- Do not let cord hang over edge of table or counter or touch hot surfaces, including the stove.
- Do not place on or near a hot gas or an electric burner, or in a heated oven.
- Extreme caution must be used when moving an appliance containing hot oil, food, water, or other hot liquids.
- To disconnect, turn off (ON/OFF [
![]() ]); then remove plug from wall outlet. To unplug, grasp from the cord and pull from the outlet. Never pull from the power cord.
]); then remove plug from wall outlet. To unplug, grasp from the cord and pull from the outlet. Never pull from the power cord. - Do not use appliance for other than intended use.
- Lift and open cover carefully to avoid scalding, and allow water to drip into the cooker.
![]()
Risk of electric shock. Cook only in removable container.- Intended for countertop use only.
- Do not place the unit directly under cabinets when operating as this product produces large amounts of steam. Avoid reaching over the product when operating.
![]()
Spilled food can cause serious burns. Keep appliance and cord away from children. Never drape cord over edge of counter, never use outlet below counter, and never use with an extension cord.- Cooking pot may remain hot after unit is turned off.
SAVE THESE INSTRUCTIONS
Other Consumer Safety Information
This appliance is intended for household use only.
Electrical Shock Hazard: This appliance is provided with a polarized plug (one wide blade) to reduce the risk of electric shock. The plug fits only one way into a polarized outlet. Do not defeat the safety purpose of the plug by modifying the plug in any way or by using an adapter. If the plug does not fit fully into the outlet, reverse the plug. If it still does not fit, have an electrician replace the outlet.
A short power-supply cord is used to reduce the risk resulting from it being grabbed by children, becoming entangled in, or tripping over a longer cord.
To avoid an electrical circuit overload, do not use another high-wattage appliance on the same circuit with this appliance.
For questions and other information:
USA hamiltonbeach.com
1.800.851.8900

Documents / Resources
References
Download manual
Here you can download full pdf version of manual, it may contain additional safety instructions, warranty information, FCC rules, etc.
Advertisement
Thank you! Your question has been received!


Need Assistance?
Do you have a question about the 37524 that isn't answered in the manual? Leave your question here.