Table of Contents
Advertisement
Quick Links
Advertisement
Table of Contents

Related Manuals for JVC RX-201SUN


Summary of Contents for JVC RX-201SUN
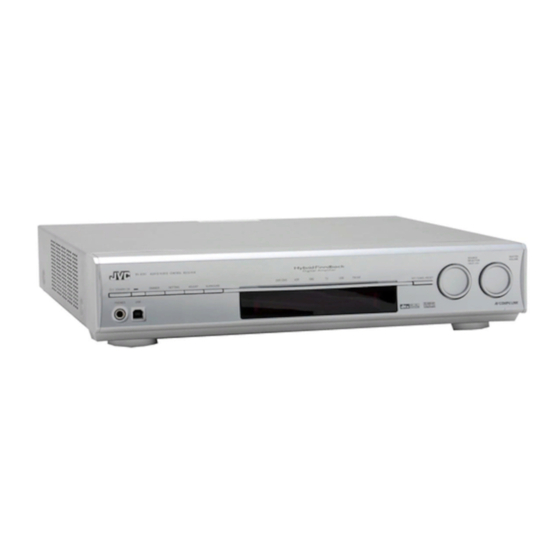
- Page 1 AUDIO / VIDEO CONTROL RECEIVER RX-D201S INSTRUCTIONS LVT1320-009A [US, UN]...
- Page 2 Warnings, Cautions, and Others Caution–– STANDBY/ON button! STANDBY/ON Disconnect the mains plug to shut the power off completely. STANDBY/ON button in any position does not disconnect STANDBY/ON the mains line. The power can be remote controlled. CAUTION To reduce the risk of electrical shocks, fire, etc.: 1.
-
Page 3: Table Of Contents
Introducing the DSP modes ..........29 Using the Surround/DSP modes ......... 30 Activating the Surround/DSP modes ........31 AV COMPU LINK remote control system ..32 Operating other JVC products ......34 Operating other manufacturers’ products ..36 Troubleshooting ..........39 Specifications ............40... -
Page 4: Parts Identification
VOLUME +/– button (13) o MUTING button (14) MENU TUNING/REW DIMMER FF/TUNING * These buttons can be used for operating a JVC DVD recorder or DVD player with the mode selector set to “DVR” or “DVD” MEMORY FM MODE SLEEP REC PAUSE (see page 35). - Page 5 See pages in parentheses for details. Front panel SOURCE MASTER SELECTOR VOLUME A U D I O / V I D E O C O N T R O L R E C E I V E R / MULTI JOG DVR / DVD FM/AM DIMMER...
-
Page 6: Getting Started
Putting batteries in the remote control Getting started Before using the remote control, put two supplied batteries first. Press and slide the battery cover on the back Before Installation of the remote control. General precautions Insert batteries. Make sure to match the polarity: (+) to (+) and (–) to (–). •... -
Page 7: Connecting The Fm And Am Antennas
Connecting the FM and AM antennas Do not connect the AC power plug to the wall outlet until all connections are completed. AM loop antenna (supplied) If FM reception is poor, connect an outdoor FM antenna (not supplied). Snap the tabs on the loop into the slots of the base to assemble the AM loop antenna. -
Page 8: Connecting The Speakers
Connecting the speakers Do not connect the AC power plug to the wall outlet until all connections are completed. Speaker Layout Diagram 220V 110V 230 - 127V 240V Center speaker (*SB) SUBWOOFER SURROUND BACK SURROUND CENTER FRONT SPEAKERS SPEAKERS SPEAKER SPEAKERS RIGHT LEFT... -
Page 9: Connecting Video Components
Connecting video components Do not connect the AC power plug to the wall outlet until all connections are completed. This receiver is equipped with the following video terminals— Turn off all components before making connections. composite video, S-video, and component video terminals. •... - Page 10 Do not connect the AC power plug to the wall outlet until all connections are completed. 7 Connecting a VCR Turn off all components before making connections. • When you connect other components, refer also to their manuals. Green COMPONENT VIDEO Component video cable (not supplied) Blue VCR(DBS)
- Page 11 Do not connect the AC power plug to the wall outlet until all connections are completed. 7 Connecting a DBS tuner Turn off all components before making connections. • When you connect other components, refer also to their manuals. Component video cable (not supplied) Green COMPONENT VIDEO White...
-
Page 12: Usb Connection
Digital connection USB Connection This receiver is equipped with two DIGITAL IN terminals—one digital coaxial terminal and one digital optical terminal. This receiver is equipped with a USB terminal on the front panel. To reproduce the digital sound, use the digital connection in You can connect your PC to this terminal and enjoy sound addition to the analog connection methods described on pages 7 reproduced through your PC. -
Page 13: Connecting The Power Cord
5. The USB drivers are installed automatically. Connecting the power cord • If the USB drivers are not installed automatically, install the USB drivers by following the instructions on the PC’s When all the audio/video connections have been made, connect monitor. -
Page 14: Basic Operations
Select the source to play Basic operations On the front panel: Turn SOURCE SELECTOR until the source name you want appears on the display. The source lamp corresponding to the selected source lights in red. • As you turn SOURCE SELECTOR, the source changes as follows: ANALOG AUTO SURR... -
Page 15: Adjust The Volume
DGTL AUTO (DIGITAL AUTO): Adjust the volume Select for the digital input mode. The receiver automatically detects the To increase the volume, turn MASTER VOLUME incoming signal format, then the digital control clockwise (or press VOLUME + on the signal format indicator (LINEAR PCM, remote control). -
Page 16: Turning Off The Sounds Temporarily
Basic adjustment of auto memory Turning off the sounds temporarily This receiver memorizes sound settings for each source: • when you turn off the power, and From the remote control ONLY: • when you change the source. Press MUTING to turn off the sound through all When you change the source, the memorized settings for the connected speakers and headphones. -
Page 17: Basic Settings
Turn MULTI JOG to select an appropriate Basic settings number of the connected speakers (speaker channel number). As you turn the jog, the speaker channel number changes as follows. • For the details of speaker channel number, see “ Speakers (channels) number and the size”... -
Page 18: Basic Setting Items
Speakers (channels) number and the size Basic setting items You can find how each of the speaker size is defined according to the number of connected speakers (speaker channel “ch” number) You can adjust the following items. See pages in parentheses for you select. -
Page 19: Operating Procedure
Operating procedure Setting the speakers To obtain the best possible surround effect from the Surround and DSP modes, register the setting about the speaker after all connections are completed. • If you have used Quick Speaker Setup on page 15, this setting is not required. -
Page 20: Activating The Ex/Es/Pliix Setting-Ex/Es/Pliix
Setting the speaker distance Activating the EX/ES/PLIIx setting— The distance from your listening point to the speakers is one of EX/ES/PLIIx the important elements to obtain the best possible sound effect from the Surround/DSP modes. By referring to the speaker distance, the receiver automatically Depending on this setting, available Surround modes for digital sets the delay time of the sound through each speaker so that multi-channel software vary—EX/ES/PLIIx (7.1-channel) -
Page 21: Selecting The Main Or Sub Channel-Dual Mono
Setting the crossover frequency—CROSSOVER Selecting the main or sub channel Small speakers cannot reproduce the bass sounds efficiently. If —DUAL MONO you use a small speaker in any position, this receiver automatically reallocates the bass sound elements assigned to the small speaker to the large speakers. You can select the playback sound (channel) you want while To use this function properly, set this crossover frequency level playing digital software recorded (or broadcasted) in Dual Mono... -
Page 22: Setting The Digital Input (Digital In) Terminals -Digital In 1/2
For the VCR (VCR VIDEO IN): Setting the digital input (DIGITAL IN) < > terminals—DIGITAL IN 1/2 Select when connecting the VCR to the composite video or S-video input jacks. < > When you use the digital input terminals, register what CMPNT Select when connecting the VCR to the components are connected to which terminals—DIGITAL IN 1/2... -
Page 23: Sound Adjustments
Operating procedure Sound adjustments On the front panel: Before you start, remember... You can make sound adjustment to your preference after There is a time limit in doing the following steps. If the setting is completing basic setting. canceled before you finish, start from step 1 again. Basic adjustment items Ex.: When adjusting subwoofer output level. -
Page 24: Adjusting The Speaker Output Levels
Adjusting the speaker output levels Adjusting the equalization patterns— D EQ 63Hz/250Hz/1kHz/4kHz/16kHz • SUBWFR LVL (subwoofer output level), • FRONT L LVL (left front speaker output level), You can adjust equalization patterns in five frequency bands • FRONT R LVL (right front speaker output level), (center frequency: 63 Hz, 250 Hz, 1 kHz, 4 kHz, 16 kHz) for the •... -
Page 25: Adjusting The Bass Sounds
Adjusting the bass sounds From the remote control: Reinforcing the bass—BASS BOOST Press SOUND, then EFFECT repeatedly to select the level you want to adjust. You can boost the bass level—Bass Boost. • Once you have made an adjustment, it is memorized for each source. - Page 26 Adjusting the center channel localization for Pro Adjusting the center tone—CENTER TONE Logic IIx Music and Pro Logic II Music—CENTER This setting is available when one of the Surround/DSP modes is WIDTH in use. To activate Surround/DSP mode, see page 31. •...
-
Page 27: Tuner Operations
Tuning in to stations manually Tuner operations From the remote control ONLY: Press FM/AM to select the band. The last received station of the selected band is tuned in. • Each time you press the button, the band alternates between FM and AM. ANALOG TUNED STEREO AUTO MUTING S.WFR... -
Page 28: Selecting The Fm Reception Mode
On the front panel: Press the numeric buttons (1 – 10, +10) to select a channel number while the channel 2 1,3 number position is flashing. • For channel number 5, press 5. • For channel number 15, press +10, then 5. •... -
Page 29: Creating Realistic Sound Fields
Introducing the Surround modes Creating realistic ■ Dolby Digital* sound fields Dolby Digital is a digital signal compression method, developed by Dolby Laboratories, and enables multi-channel encoding and decoding. • When Dolby Digital signal is detected through the digital input, indicator lights up on the display. - Page 30 < > “ ” in the speaker setting (see page 17), JVC’s original 3D-PHONIC processing (which has been developed to create DTS Digital Surround the surround effect through the front speakers only) is used. The DTS Digital Surround (DTS) is another discrete 5.1 channel...
-
Page 31: Introducing The Dsp Modes
” in the speaker The sound heard in a concert hall, club, etc. consists of direct setting (see page 17), JVC’s original 3D-PHONIC processing sound and indirect sound—early reflections and reflections from (which has been developed to create the surround effect behind. -
Page 32: Using The Surround/Dsp Modes
Using the Surround/DSP modes Available Surround/DSP modes vary depending on the speaker settings and the incoming signals. See the table below. • The numbers inside the parentheses following the incoming signal type indicate the number of the front channels and that of the surround channels. -
Page 33: Activating The Surround/Dsp Modes
On the front panel: Activating the Surround/DSP modes Available Surround/DSP modes vary depending on the speaker settings and the incoming signals. For details, see page 30. Activating one of the Surround/DSP modes automatically recalls the memorized settings and adjustments. Before you start, remember... •... -
Page 34: Av Compu Link Remote Control System
This receiver is equipped with the AV COMPU LINK-III, which has through the S-video terminals, connect this receiver to the added a function to operate JVC’s video components through the TV’s video input 1 terminal using S-video cables. component video jacks. To use this remote control system, you... - Page 35 Connecting procedure One-touch DVD play Simply by starting playback on the DVD player, you can enjoy the DVD playback without setting other switches manually. If you have already plugged your VCR, DVD • When the DVD player is connected through the analog input player, TV, and this receiver into the AC jacks on this receiver (and analog input is selected), the outlets, unplug their AC power cords first.
-
Page 36: Operating Other Jvc Products
“A” and “B.” This remote control can operate a VCR whose remote control code is set to “A.” – Some JVC DVD recorders can accept four types of the control signals. This remote control can operate a DVD recorder whose remote control code is set to the initial code. - Page 37 Enter recording pause. To start recording, press 3. recorder Some JVC DVD recorders can accept four types of the control signals. You can assign one of four codes to the remote Only for DVD player operations: control supplied with this receiver for operating your DVD recorder.
-
Page 38: Operating Other Manufacturers' Products
Manufacturers’ codes for TV Operating other Manufacturer Codes manufacturers’ Hitachi Magnavox products Mitsubishi Panasonic 04,11 Samsung Sanyo Sharp By changing the transmittable signals, you can use the Sony supplied remote control to operate other manufacturers’ Toshiba products. Zenith • Refer also to the manuals supplied with the other products. •... - Page 39 ❏ Changing the transmittable signals for operating Manufacturers’ codes for VCR a VCR Manufacturer Codes Press and hold STANDBY/ON VCR. 01, 02, 03 Press VCR. Emerson 10, 22 Gold Star Enter the manufacturer’s code using buttons Hitachi 1 – 9, and 0. Mitsubishi See “Manufacturers’...
- Page 40 Manufacturers’ codes for CATV converter/ When your DVD player turns on or off, you have entered the DBS tuner correct code. Manufacturers’ codes for DVD player Manufacturer Codes Manufacturer Codes Echostar (JVC) G.I. 02, 03 Hamlin 10 – 13 Panasonic Pioneer 08, 09 Philips...
-
Page 41: Troubleshooting
Troubleshooting Use this chart to help you solve daily operational problems. If there are any problems you cannot solve, contact your JVC’s service center. PROBLEM POSSIBLE CAUSE SOLUTION The power does not come on. The power cord is not plugged in. -
Page 42: Specifications
Video Specifications Video Input Sensitivity/Impedance: Composite video: DVR/DVD, VCR, DBS: 1 V(p-p)/75 Ω S-video: DVR/DVD, VCR, DBS: Y (luminance): 1 V(p-p)/75 Ω C (chrominance, burst): 0.3 V(p-p)/75 Ω Component: DVR/DVD, VCR (DBS): Y (luminance): 1 V(p-p)/75 Ω 0.7 V(p-p)/75 Ω Video Output Level/Impedance: Designs and specifications are subject to change without Composite video: DVR, VCR, MONITOR OUT:... - Page 43 Mains (AC) Line Instruction (not applicable for Europe, U.S.A., Canada, Australia, and U.K.) VOLTAGE AM LOOP ANTENNA SUBWOOFER SELECTOR 220V 110V DIGITAL IN 230 - 1(DVR/DVD) 2(DBS) FM 75 127V COMPU LINK- 240V AM EXT COAXIAL COMPONENT VIDEO SURROUND BACK SURROUND CENTER FRONT...
- Page 44 This file has been downloaded from: www.UsersManualGuide.com User Manual and User Guide for many equipments like mobile phones, photo cameras, monther board, monitors, software, tv, dvd, and othes.. Manual users, user manuals, user guide manual, owners manual, instruction manual, manual owner, manual owner's, manual guide, manual operation, operating manual, user's manual, operating instructions, manual operators, manual operator, manual product, documentation manual, user maintenance, brochure, user reference, pdf manual Downloaded from:...