Panasonic LQ-MD800 Operating Instructions Manual
Panasonic lq-md800: user guide
Hide thumbs
Also See for LQ-MD800:
- Specifications (4 pages) ,
- Operating instructions manual (31 pages)
Table of Contents
Advertisement
POWER
REC
BUSY
INHIBIT
PHONES
CH1/MIC
MIN
MAX MIN
MAX MIN
Before operating this product, please read the instructions carefully and save this manual for future use.
Operating Instructions
DVD VIDEO RECORDER LQ-MD800
CH1
CH2
CH2
STOP
REV
PAUSE
MAX
MODE LOCK
OFF
ON
DVD Video Recorder
LQ-MD800P
Model No.
LQ-MD800E
Model No.
OPEN/CLOSE
4.7
GB
REMAIN
MENU REPEAT
SEARCH
MARKER
PLAY
FWD
REC
ENTER
SHIFT
FUNCTION
STATUS
RETURN
ENGLISH
Advertisement
Table of Contents

Related Manuals for Panasonic LQ-MD800


Summary of Contents for Panasonic LQ-MD800
-
Page 1: Operating Instructions
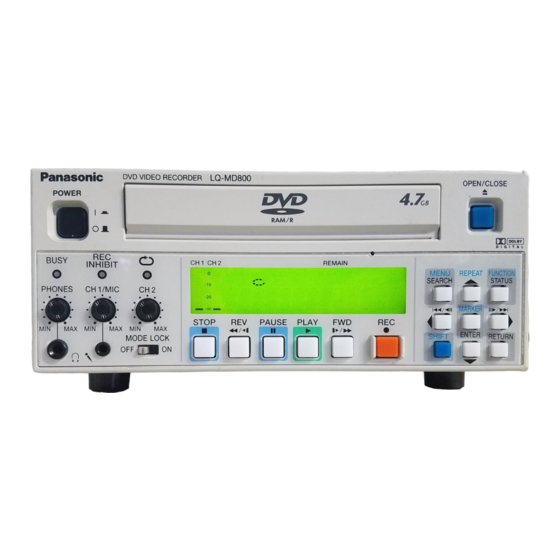
DVD VIDEO RECORDER LQ-MD800 POWER BUSY INHIBIT PHONES CH1/MIC MAX MIN MAX MIN MODE LOCK Before operating this product, please read the instructions carefully and save this manual for future use. Operating Instructions DVD Video Recorder Model No. Model No. -
Page 2: For Your Safety
For your safety WARNING: • TO REDUCE THE RISK OF FIRE OR SHOCK HAZARD, DO NOT EXPOSE THIS EQUIPMENT TO RAIN OR MOISTURE. • TO REDUCE THE RISK OF FIRE OR SHOCK HAZARD, KEEP THIS EQUIPMENT AWAY FROM ALL LIQUIDS-USE AND STORE ONLY IN LOCATIONS WHICH ARE NOT EXPOSED TO THE RISK OF DRIPPING OR SPLASHING LIQUIDS, AND... - Page 3 For your safety CAUTION: THIS PRODUCT UTILIZES A LASER. USE OF CONTROLS OR ADJUSTMENTS OR PERFORMANCE OF PROCEDURES OTHER THAN THOSE SPECIFIED HEREIN MAY RESULT IN HAZARDOUS RADIATION EXPOSURE. DO NOT OPEN COVERS AND DO NOT REPAIR YOURSELF. REFER SERVICING TO QUALIFIED PERSONNEL. NOTICE FOR LASER CLASS 1 LASER PRODUCT...
-
Page 4: Fcc Notice
FCC NOTICE Declaration of Conformity Model Number: LQ-MD800P Trade Name: PANASONIC Responsible Party: Matsushita Electric Corporation of America One Panasonic Way, Secaucus, NJ 07094 Support contact: Panasonic Digital Communications & Security Company 50 Meadowlands Parkway, Secaucus, NJ 07094 1-888-VISION (8474) This device complies with Part 15 of FCC Rules. -
Page 5: Caution For Ac Mains Lead
If you lose the fuse cover the plug must not be used until a replacement cover is obtained. A replacement fuse cover can be purchased from your local Panasonic Dealer. IF THE FITTED MOULDED PLUG IS UNSUITABLE FOR THE SOCKET OUTLET IN YOUR HOME THEN THE FUSE SHOULD BE REMOVED AND THE PLUG CUT OFF AND DISPOSED OF SAFELY. -
Page 6: Table Of Contents
Contents For your safety ...2 Features ...7 Accessories ...7 Control reference guide ...8 • Front Panel ...8 • The unit’s display ...9 • Rear Panel...10 Discs ...11 Connecting and Setting up...12 Recording programs ... 16 Playing discs ... 17 • Starting play from where you stopped it (Resume Function) ...17 •... -
Page 7: Features
Features This unit allows recording of high quality video on DVD-RAM, the compact and durable digital media with fast random access. This media also outperforms past tape formats in ease of operation. Exceptional sound and picture quality when recording Audio is recorded using Dolby Digital stereo, enabling high quality sound recordings. -
Page 8: Control Reference Guide
Control reference guide Front Panel POWER BUSY PHONES MAX MIN POWER on/off button (POWER) Main power switch. The display lights when the unit is on. NOTE: Do not switch the unit off during recording, play, or editing. Disc tray Open the try and put a disc on it. Emergency ejection hole Use the included emergency ejection pin to open the tray if you ever need to remove the disc manually (see page 40). -
Page 9: The Unit's Display
Control reference guide (continued) The unit’s display Audio Level Meter Shows the recording level. Adjust the recording level with Audio REC level control CH1/MIC, CH2 on the front panel so that the level meter does not exceed 0 The display mode of the main display section Shows disc structure. -
Page 10: Rear Panel
Control reference guide (continued) Rear Panel VIDEO VIDEO DV IN VIDEO IN (BNC) Composite signal input. VIDEO OUT 1/2 (BNC) Composite signal output. Y, P (Component Video output) (BNC) Component signal (Y, P ) output. S-VIDEO IN (4P) S-Video (Y/C) input. S-VIDEO OUT (4P) S-Video (Y/C) output. -
Page 11: Discs
Discs We recommend using discs manufactured by Panasonic as they have been tested to be compatible with this unit. In case of discs manufactured by other makers, play may be impossible in some cases due to the condition of the recording. -
Page 12: Connecting And Setting Up
Discs (continued) Types of disc for the type of connected monitor television When you use the discs recorded either PAL or NTSC, refer to this table. If you select the same TV system (PAL or NTSC) setting for this unit and your monitor television as the disc you want to play, the picture can be clearer. - Page 13 (Video will not be displayed correctly if connected to an incompatible monitor television.) • All Panasonic monitor televisions that have 480P input terminals are compatible. Consult the manufacturer if you have another brand of monitor television.
-
Page 14: Connecting A Microphone
Connecting and Setting up (continued) Connecting a Microphone If you record while a microphone is connected, microphone signal can be recorded in channel 1. DVD VIDEO RECORDER POWER BUSY INHIBIT PHONES CH1/MIC STOP MAX MIN MAX MIN MODE LOCK Notes: •... -
Page 15: Audio Mode
Connecting and Setting up (continued) Input Select After performing steps (1) to (3) of “TV Screen type”, perform the following steps: (4) Use [ ] to select the “Picture” and press ] or [ (5) Use [ ] to select “Input Select” and press [ENTER]. -
Page 16: Recording Programs
SP (Normal) LP (Long play) When using DVD-R • You can play DVD-R on compatible DVD players by finalizing them on this unit, effectively making them into DVD-Video. • The video is recorded in a 4:3 aspect irrespective of the video signal input. -
Page 17: Playing Discs
Playing discs (1) Press [OPEN/CLOSE ] to open the tray and insert a disc. • Insert label-up with the arrow facing in. (With double-sided discs, load so the label for the side you want to play is facing up.) • Insert inside the tray’s guides. •... -
Page 18: Skip Five Minutes Forward Or Backward (Time Slip)
Playing discs (continued) Skip five minutes forward or backward (Time slip) DVD-R During play, press [SHIFT + REV ] : to skip back five minutes ] : to skip forward five minutes • Repeat to skip in five-minute units. Note: •... -
Page 19: Status Displays
Status displays Changing the information displayed Displays appear on the monitor television when you operate the unit to let you know what operation was performed and what condition the unit is in. Press [STATUS] to change the information displayed. FUNCTION STATUS The display changes each time you press the button. -
Page 20: Using The Function Menus
Using the FUNCTION menus FUNCTION menus contain information about the disc or unit. These menus allow you to perform operations by changing this information. Common procedures (1) During play, press [FUNCTION (SHIFT + STATUS)]. Menu Item (2) Use [ ] to select the menu and press [ (3) Use [ ] to select the item and press [ (4) Use [... -
Page 21: Play Menu
Using the FUNCTION menus (continued) Play menu Repeat Play You can play a program, play list, chapter, title, group or track repeatedly. During play, use [ The display changes as illustrated. DVD-R PRG (PROGRAM) Chapter Title While playing a play list, use [ PL (PLAY LIST) Notes •... -
Page 22: Using The Menu Window
Using the MENU window About the MENU window Most of the features and functions of this unit can also be controlled with icons. The examples show the MENU window when a DVD- RAM is being used. Actual menus depend on the type of disc being used. -
Page 23: Disc Information
• You can erase all programs and play lists on DVD-RAM – Erase all programs • You can format DVD-RAM – Format • You can finalize DVD-R so they can be played on compatible DVD players – Finalize Enter Title DVD-R Each disc can be given a different title. -
Page 24: Format
Finalize - Creating DVD-Video DVD-R You can play DVD-R on compatible DVD players by finalizing them on this unit, effectively making them into DVD-Video. You can also use the menus created with this unit on compatible DVD players. -
Page 25: Using The Search Program
Using the SEARCH PROGRAM The following functions can be used for a disc you have recorded Selecting programs to play DVD-R A list of programs is created as you record them. You can use this list to find the programs you want to watch. (1) While played, stopped, or paused, press [SEARCH]. -
Page 26: Erasing Programs (Erase)
Using the SEARCH PROGRAM (continued) Erasing programs (Erase) DVD-R The program is erased completely when you use this procedure and cannot be retrieved. Check the program carefully before erasing it to ensure it isn’t one you want to keep. (1) Press [SEARCH]. (2) Use [ ] to select the desired program. -
Page 27: Erasing Parts Of A Program (Partial Erase)
Using the SEARCH PROGRAM (continued) Erasing parts of a program (Partial Erase) The specified parts of the program are erased completely when you use this procedure and cannot be retrieved. Check the program carefully to ensure it isn’t one you want to keep. -
Page 28: Using The Play List To Edit Programs
Using the PLAY LIST to edit programs The following function can be used for a disc you have recorded on, but the functions except “CREATE PLAY LIST” can be used only when play lists have been created on the disc. Displaying PLAY LIST (1) Press [MENU (SHIFT + SEARCH)] to show the MENU window. -
Page 29: Playing Play List
Using the PLAY LIST to edit programs (continued) Playing PLAY LIST (1) Press [MENU (SHIFT + SEARCH)] to show the MENU window. (2) Use [ ] to select the “PLAY LIST” and press [ENTER]. (3) Use [ ] to select the play list you want to play and press [ENTER]. -
Page 30: Moving A Scene (Move)
Using the PLAY LIST to edit programs (continued) Moving a Scene (Move) After performing steps (1) to (4) of “Adding Scenes to a PLAY LIST”, perform the following steps: (5) Use [ ] to select “Move” and press [ENTER]. (6) Use [ ] to select the scene you want to move and press [ENTER]. -
Page 31: Copying Play List (Pl Copy)
Using the PLAY LIST to edit programs (continued) Copying PLAY LIST (PL Copy) (1) Press [MENU (SHIFT + SEARCH)] to show the MENU window. (2) Use [ ] to select the “PLAY LIST” and press [ENTER]. (3) Use [ ] to select the desired play list and press [ (4) Use [ ] to select “PL Copy”... -
Page 32: Entering Titles
Entering titles DVD-R You can: • Title discs with the DISC INFORMATION in the MENU window. • Title programs with the SEARCH. • Title play lists with the PLAY LIST screen. (1) Insert a disc with something recorded on it and select the “DISC INFORMATION”, “SERCH PROGRAM”, or “PLAY LIST”... -
Page 33: Changing The Unit's Settings
[Even] [Odd] [None] Protocol Decide the protocol when using the RS-232C or USB terminal. [DVD] [VTR1] [VTR2] DVD: The standard LQ-MD800 protocol. VTR1: Protocol with high compatibility with AG-MD830. VTR2: Protocol with high compatibility with equipment manufactured by other companies. - Page 34 Changing the unit’s settings (continued) Picture Rec Mode (see page 15) [XP] [SP] [LP] Input Select Select the video input. [V(VIDEO)] [SV(S-VIDEO)] [DV] 3-D Y/C Separation (NTSC) [On] [Off] Y/C separation of three dimensions is performed. Off: Y/C separation of two dimensions is performed. Hybrid VBR Resolution Switch between automatic and fixed hybrid VBR resolution when recording.
- Page 35 Writing occurs at normal speed. Select this under normal conditions. This selection ensures a high level of compatibility with other DVD players. When recording on discs compatible with 4x speed, writing happens at 4x speed, thus shortening the time it takes for finalizing.
-
Page 36: Maintenance And Handling
Maintenance and Handling Maintenance The precision parts in this unit are readily affected by the environment, especially temperature, humidity and dust. Observe the following points to ensure continued listening and viewing pleasure. To clean this unit, wipe with a soft, dry cloth. •... -
Page 37: Glossary
Glossary Picture type (I/P/B) In order to efficiently record to discs, common data between frames is shared and only that data that differs is recorded for each frame. I-picture: This is the base picture and all data for it is recorded. P-picture: This picture is recreated based on past I-pictures or P- pictures. -
Page 38: Error Messages
Error messages On the monitor television Error messages No Disc. This is a non-recordable disc. Cannot record. This disc is not properly formatted. Formatting is necessary using DISC INFORMATION. This disc cannot be read. Please check write protect tab on the disc. - Page 39 Error messages (continued) On the unit’s display Error messages Unit status NO READ The disc is dirty or badly scratched. The disc isn’t on the tray correctly. It cannot be read for the disc which doesn’t cope with it. The DVD-RAM/PD lens cleaner has finished cleaning.
-
Page 40: Troubleshooting Guide
Troubleshooting guide Before requesting service, make the below checks. If you are in doubt about some of the check points, or if the remedies indicated in the chart do not solve the problem, consult your dealer for instructions. Power No power The unit switches to standby mode automatically. -
Page 41: Progressive Video
Troubleshooting guide (continued) Progressive video There is ghosting when you progressive output is on. There is no apparent change in picture quality when adjusted with the Video menu in the on-screen menus. Sound No sound. Low volume. Distorted sound. Cannot hear the desired audio type. Play Play fails to start even when [PLAY... -
Page 42: Connector Signals
Troubleshooting guide (continued) Remote control The remote control doesn’t work. Discs make sounds as they rotate. This does not indicate a malfunction. Connector signals RS-232C (Female) PAUSE REMOTE Regarding copyright Apparatus Claims of U.S. Patent Nos. 4,631,603, 4,577,216, and 4,819,098, licensed for limited viewing uses only. This product incorporates copyright protection technology that is protected by method claims of certain U.S. -
Page 43: Specifications
Specifications Power supply: AC 100 V–240 V, 50/60 Hz Current consumption: 0.51 A–0.28 A indicates safety information. General Recording System: DVD Video Recording Standards (DVD-RAM), DVD Video Standards (DVD-R) Recordable discs: DVD-RAM: 12 cm 4.7 GB 12 cm 9.4 GB DVD-R: 12 cm 4.7 GB (for General Ver.2.0) - Page 44 Panasonic Digital Communications & Security Company 50 Meadowlands Parkway, Secaucus, NJ 07094 1-800-880-8474 http://www.panasonic.com/medical Panasonic Marketing Europe GmbH Hagenauer Str. 43, 65203 Wiesbaden,Germany © 2003 Matsushita Electric Industrial Co., Ltd. All Rights Reserved. M1103N-1034...