Advertisement
Quick Links
Advertisement

Related Manuals for Blizzard 8611


Summary of Contents for Blizzard 8611
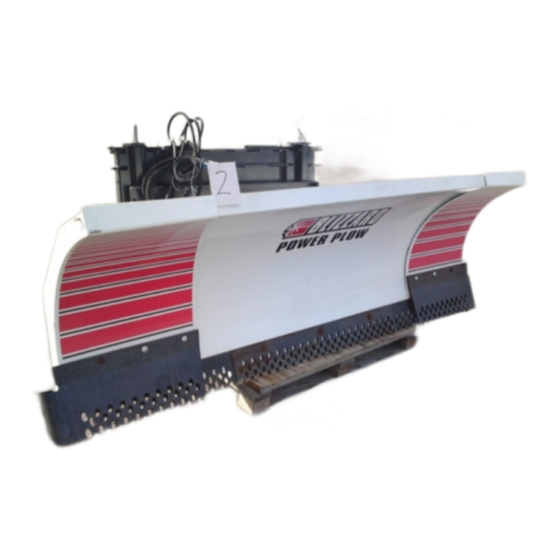
- Page 1 BLIZZARD ® P O W E R P L O W Assembly & Operation Manual Blizzard Power Plow Snowplow Model 8611...
- Page 2 Also, the independent wings can pivot forward to form our 9'-10" BucketBlade™ Plow Diagrams & Part Lists position. Now you can carry more snow Model 8611 Power Plow Snowplow Parts List even further. Safety features include full Notes moldboard trip action, enclosed hydrau- Model 8611 Power Plow Snowplow Assembly Schematic lics and automatic cylinder pressure relief.
- Page 3 All of the accessories pictured below are currently offered for your snow- See page 24 for additional Power plow. See your local Authorized Blizzard Dealer for pricing and availability. Plow snowplow accessories. Visit our web site at www.blizzardplows.com to view new snowplow accessories and our latest Blizzard snowplow wearables.
- Page 4 Calumet, MI 49913 The Blizzard Power Plow snowplow is protected by U.S. Patents 5,899,007; 5,638,618 and 6,276,076 B1. Other patents pending. BLZ 1005 Should the WARNING! label or any of the labels...
- Page 5 Snowplow Operation Your Blizzard Power Plow snowplow is the most advanced and versatile A. Compact Position (8'- 6" Blade Width) snowplow on the market. The easy to use controls allow you to automat- • Primary position when transporting ically adjust the plow blade and wings into an infinite number of plowing the snowplow positions.
- Page 6 Assembly Instructions Unpacking & Inspection Your Blizzard Power Plow snowplow has been packaged to withstand Date of Purchase transit and weather related damage. Fully inspect all components upon receipt of your plow. In the event of shipping damage or missing parts, immediately contact our Customer Service Department at 1-888-680-8600.
- Page 7 Moldboard & A-Frame Assembly 1. Begin the moldboard assembly by positioning the PIVOT BEAM and A-FRAME near the connecting points at the rear of the blade between the two center support ribs. Feed the right and left group of HYDRAULIC HOSES protruding from the SLIDE BOX through the 1-1/2"...
- Page 8 of the cylinder receives a 1/4" x 15" hose identified by part number 7/16" (P/N 60093). Tighten the 45˚ end of the hose to the hydraulic adapter on the cylinder. Both hoses should be routed through the triangular openings in the A-frame. Hydraulic A-Frame Lift / Lower...
- Page 9 Note: The gray arrows shown on the manifold illustration below indicate the direction the 90˚ adapters should face to receive the All of the hoses shipped with the 8611 snowplows contain a printed label (with a part number) hydraulic hoses.
- Page 10 Sequence Valve & Hydraulic Hose Identification Guide HYDRAULIC HOSES Port Function Right Angle - Left Cylinder Left Angle - Right Cylinder Raise - Lift Cylinder (Base) Lower - Lift Cylinder (Rod) Left Slide Box Retract Left Slide Box Extend Right Slide Box Extend Right Slide Box Retract RELIEF &...
- Page 11 10. Next, secure the manifold to the A-frame. Remove both 3/8" flat washers, 3/8" split lock washers and 3/8"-16 x 1" hex head cap screws from the manifold and align the mount holes with the A-frame brackets. Position the DIODE PACK MOUNT BRACKET against the outside of the A- frame bracket on the driver’s side.
- Page 12 Electrical Assembly - Plow Harness Draw Latch Toggle Switch 1. Begin the electrical assembly by connecting the RED POWER WIRE Mount Bracket from the PLOW ELECTRICAL HARNESS to the PUMP motor terminal stud using the hardware provided on the pump. 2.
- Page 13 Electrical Assembly - Vehicle Harness CAUTION: Always perform the vehicle wire harness assem- bly with the vehicle off and the keys out of the ignition. Use caution when testing the electrical wires for the vehicle’s headlight functions. 1. Begin the installation of the electrical harness under the hood. Insert the WHITE POWER CONNECTOR &...
- Page 14 (with Daytime Running Lights) 2002-Current Chevrolet Avalanche HEADLIGHT ADAPTER KIT. Due to differences in the construction of the adapter kits, and the various make and model vehicles Blizzard 62015 1989 Chevrolet snowplows are installed on (see list to the left), a headlight adapter...
- Page 15 13. Proceed to install the PLOW HEADLIGHTS. Align one HEADLIGHT BALL STUD MOUNT ADAPTER on the light tower tube with the mounting hole and insert the threaded stud through each. Secure the headlight with one 1/2" split lock washer and hex nut. Note: All snow- plows are shipped with two BLACK DOME PLUGS that install at either end of the light tower.
- Page 16 Testing The Snowplow 1. Fill the HYDRAULIC PUMP FLUID RESERVOIR with BLIZZARD SNOWPLOW RAPID ACTION HYDRAULIC OIL (P/N 63070) until it is approximately 3/4" from the top of the tank. Replace the cap on the reservoir. Proceed to remove the weather caps from each of the plow and vehicle wire harnesses and connect the plugs.
- Page 17 Congratulations on a successful assembly and installation! Once all of the blade and electrical functions have been tested your Blizzard Power Plow snowplow is ready for action. Should you need additional support during a plow assembly or undercarriage installation, contact your local authorized Blizzard Dealer.
- Page 18 Behind Undercarriage Push Beam BLZ 1023 Should the Mounting & Dismounting Instructions label or any of the labels that came with your snowplow become hard to read or wear off, contact your local Authorized Blizzard Dealer for replacements. Mounting & Dismounting Instructions...
- Page 19 Regular Maintenance Maintenance Performed Date Your Blizzard Power Plow snowplow has been designed for years of rugged, dependable service with low maintenance. To ensure proper working condition, follow the maintenance guidelines below and on the next page. CAUTION: Always follow the maintenance guidelines in a timely fashion.
- Page 20 A NLGI Grade 2 multipurpose lithium complex grease with molybdenum (MPGM) is recommended for lubrication. 6. Clean and cover deep scratches or exposed metal with Blizzard Snow- plow white (P/N 61219) or black (P/N 63073) touch-up paint. Contact your local Blizzard Dealer for availability.