Table of Contents
Advertisement
Quick Links
Advertisement
Table of Contents

Related Manuals for AT&T Cingular Flex 2


Summary of Contents for AT&T Cingular Flex 2
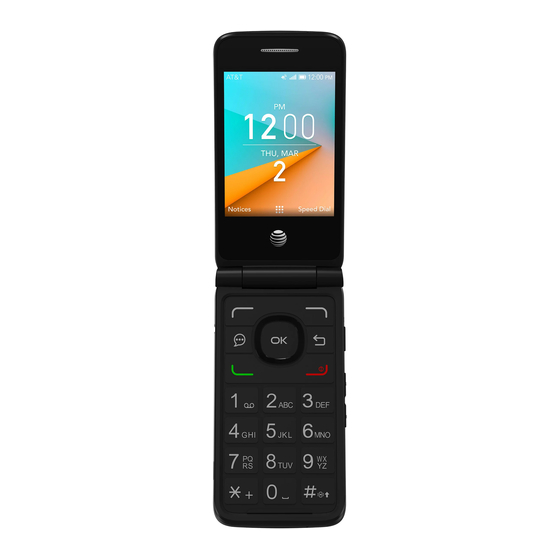
- Page 1 Teller U102AA User Guide AT&T Cingular Flex™ 2 User Guide...
-
Page 2: Table Of Contents
Contents Your phone . . . . . . . . . . . . . . . . . . . . . . . . . . . . . . . . . . . . . . . . . . . . . . . . . . . . . . . . . . . . 6 Keys and connectors . - Page 3 Writing and sending e-mails . . . . . . . . . . . . . . . . . . . . . . . . . . . . . . . . . . . . . . . . . . . . . . . 32 Camera .
- Page 4 Storage . . . . . . . . . . . . . . . . . . . . . . . . . . . . . . . . . . . . . . . . . . . . . . . . . . . . . . . . . . . . . . . . 55 Accessibility .
- Page 5 This product meets applicable national SAR limits 1 .6 W/kg . The specific maximum SAR values can be found in the radio waves section . When carrying the product or using it while worn on your body, either use an approved accessory such as a holster or otherwise maintain a distance of 15 mm from the body to ensure compliance with RF exposure requirements .
-
Page 6: Your Phone
Your phone Keys and connectors Left Select Right Select Messages Back/Clear Call/Answer End/Power OK/App Menu Navigation Ring (up, down, left, right) - Page 7 Camera Headset Camera key Jack Volume key Front screen Speaker USB Type-C Charging Port...
- Page 8 OK key • Press to confirm an option . • Press to access the App Menu from the Home screen . Navigation Ring From the Home screen, use the Navigation Ring to perform shortcut functions . • Press Up to access the Settings . • Press Down to access the Recent Apps .
- Page 9 Camera key • Press to access the Camera app . • Press to capture a photo or shoot video in the Camera app . • Press and hold along with the Volume Down key to capture a screenshot . Volume Up/Down key • Press to adjust the earpiece or headset volume during a call .
-
Page 10: Getting Started
Getting started Setup Removing or attaching the back cover 1 . Gently remove the back cover via the notch at the bottom left corner . 2 . Reattach the back cover, pressing firmly on the sides to ensure the cover snaps back into place . - Page 11 Removing or installing the battery 1 . Insert a fingernail into the small slot and gently pull up to remove the battery . 2 . Insert the battery, making sure the gold contacts align . Gently push down on the battery until it clicks into place . Removal slot Gold contacts...
- Page 12 Inserting or removing the Nano SIM card and microSD™ card 1 . To insert a Nano SIM or microSD card, push the Nano SIM or microSD card into the corresponding card slot with the gold-connectors facing down . 2 . To remove the Nano SIM or microSD card, push down the plastic clip and pull the Nano SIM or microSD card out .
- Page 13 Charging the battery Insert the Type-C USB cable into the phone’s charging port and plug the charger into an electrical outlet . To reduce power consumption and energy waste, disconnect your charger when the battery is fully charged and switch off Wi-Fi, Bluetooth, and other wireless connections when they are not in use .
- Page 14 Powering your phone on Press and hold the End/Power key until the phone powers on . If a SIM card is not installed, you will still be able to power your phone on, connect to a Wi-Fi network, and use some device features . You will not be able to make calls using your network without a SIM card .
- Page 15 5 . Use the Navigation Ring to select the network you prefer to use and press the OK key to confirm . Press the Right Select key to continue . This phone uses cellular data for certain services, applications and functions .
-
Page 16: Home Screen
Home screen Status & notification bar Display phone status and notification icons . Time Date Notifications Contacts Press the Left Select Press the Right Select key key to access to access Contacts app . Notification panel . App Menu Press the OK key to access the App Menu . - Page 17 Status & notification bar View phone status and notifications in the Status & notification bar at the top of the screen . Icon Status Bluetooth active ® Wi-Fi active ® Vibration mode on Silent mode on Network signal strength (full) Network signal roaming No network signal 4G LTE data service...
- Page 18 3G data service Airplane mode on Battery charging Battery status (full charge) Alarm set Notification icon Icon Status New notifications Note: When new notifications arrived, you can view notification details by pressing the Left Select key from the Home screen .
- Page 19 Quick settings and Notification panel To access the quick settings and notifications, press the Left Select from the Home screen . • Select a setting to enable or disable it . • Select a notification to view details and perform further operations . Changing Home screen wallpaper 7 .
-
Page 20: Using Navigation
Using Navigation The Navigation Ring is located above the number pad and frames the key . • Press Up, Down, Left, or Right on the Navigation Ring to navigate the screen . • From the Home screen, press the OK key to access the App Menu . -
Page 21: Entering Texts
Entering texts • When entering text, press the key to switch between Abc (Sentence case), ABC (Caps lock), abc (Lower case), 123 (Numbers), or Predictive (Predictive text mode) . • For normal text input, press a number key (2-9) repeatedly until the desired character is displayed . -
Page 22: Call Log
Call Log Making a call Dial a number using the keypad . Press the Back/Clear key to delete incorrect digits . Press the Call/Answer key to place the call . To hang up the call, press the End/Power key, or close the phone . Calling a contact To make a call from the Contacts app, select the contact you would... -
Page 23: Answering Or Declining A Call
Answering or declining a call Press the OK key or the Call/Answer key to answer . Press the Right Select key or the End/Power key to decline . To mute the ringtone volume of an incoming call, press up or down on the Volume key at the side of your device . -
Page 24: Call Waiting
Call waiting If you receive a call during another call, press the Call/Answer key to answer or the End/Power key to decline . You can also press the Right Select key to access Options and select Answer, Decline, or Quick message . -
Page 25: Using The Call Log
Using the Call Log • To access the Call Log, press the Call/Answer key from the Home screen . • Press the OK key to call a selected number . • From the Call Log screen, press the Right Select key to view the following options: • Call details: View more information about the call(s) from the selected... -
Page 26: Contacts
Contacts The Contacts app provides quick and easy access to your contacts . To access Contacts, press the Right Select key from the Home screen, or press the OK key from the Home screen and select Contacts from the App Menu . Press the Left Select Press the Right Select key in the Contact... -
Page 27: Adding A Contact
Adding a contact 1 . From the Contacts screen, press the Left Select key to add a new contact . 2 . You can choose to save your new contact to the Phone memory or SIM card memory . 3 . Use the Navigation Ring to select information fields and enter the contact information . -
Page 28: Sharing A Contact
Sharing a contact 1 . From the Contacts screen, select a contact you want to share . 2 . Press the Right Select key to access Options, then select Share . You can share the contact’s vCard via E-Mail, Messages, or Bluetooth . Contact settings From the Contacts screen, press the Right Select key to access options... -
Page 29: Messages
Messages Use the Messages app to send and receive text (SMS) and multimedia (MMS) messages . To access Messages, press the Messages key on the keypad or press the OK key from the Home screen and select Messages from the App Menu . -
Page 30: Sending A Multimedia (Mms) Message
Sending a multimedia (MMS) message MMS enables you to send video clips, images, photos, contacts, and sounds . 1 . When writing a message, press the Right Select key to access the options list and select Add attachment . 2 . Select to add an attachment from Camera, Gallery, Contact, or Recorder . 3 . - Page 31 Menu Description Group Enable or disable the ability to send MMS messages to messaging multiple recipients in a group . View the phone number on the SIM card . If the number Your phone cannot be retrieved from the SIM card, it will need to be number added manually .
-
Page 32: E-Mail
E-Mail Compose, send, and receive e-mails with the E-Mail app . Setting up an E-Mail account 1 . From the Home screen, press the OK key to access the App Menu and select E-Mail . The e-mail wizard will guide you through the steps to set up an e-mail account . - Page 33 3 . When in the Subject or Message field, press the Right Select to add CC/BCC, or add an attachment to the message . 4 . Enter the subject and the content of the message . 5 . Press the Left Select key to send the message immediately .
-
Page 34: Camera
Camera Take photos and record videos with the Camera app . App Permission Upon first use of the Camera, you will be asked for permission to know your location . Press the Right Select key for Allow or the Left Select key for Deny . -
Page 35: Taking A Photo
Taking a photo 1 . To access the Camera, press the OK key from the Home screen to access the App Menu and select Camera 2 . Position the camera so that the subject of the photo is in view . Press up or down on the Navigation Ring to zoom in or out . -
Page 36: Gallery
Gallery View and organize your photos in one location with the Gallery app . 1 . From the Home screen, press the OK key to access App Menu and select Gallery 2 . Select an album to view pictures or videos . Album name Press the OK Press the Right... - Page 37 Album options From the selected album screen, press the Right Select key to access the following options: • Share: Share the selected photo or video via E-Mail, Messages, or Bluetooth . • Select Multiple: Select multiple photos or videos in the album to delete or share .
-
Page 38: Music
Music Use the Music app to play music files stored on your phone . Music files can be downloaded from your computer to your phone using a USB cable . To access the your music, press the OK key from the Home screen and select Music from the App Menu . - Page 39 Icons Functions Description Play Play the current song . Pause Pause the current song . Previous song Switch to the previous song . Next song Switch to the next song . Playlists View songs in your playlists . Shuffer mode Shuffle your songs .
-
Page 40: Browser
Browser Use the Browser app to navigate the web . To access the Browser, press the OK key from the Home screen and select Browser from the App Menu . Browsing the web 1 . From the Browser screen, press the Left Select key to search . -
Page 41: Calendar
Calendar Use the Calendar app to keep track of important meetings, events, appointments, and more . To access the Calendar, press the OK key from the Home screen and select Calendar from the App Menu . Using multimode view You can display the Calendar in Day, Week, or Month View . Press the Right Select key to change your Calendar view . -
Page 42: Creating A New Event
Creating a new event 1 . From any Calendar view, press the Left Select key to add new events . 2 . Fill in the event information, such as event name, location, start and end dates, and more . 3 . When finished, press the Right Select key to save . -
Page 43: Myat&T
myAT&T Manage your account, pay your bill online, and more with the myAT&T app . To access myAT&T, press the OK key from the Home screen and select myAT&T from the App Menu . Tools Access the FM Radio, File Manager, Sound Recorder, Calculator, Clock, and Device Unlock from the Tools folder . -
Page 44: Fm Radio
FM Radio 1 . From the Home screen, press the OK key to access the App Menu . 2 . Use the Navigation Ring to select Tools > Clock You must plug in a wired headset (sold separately) into the phone to use the radio . -
Page 45: Sound Recorder
Sound Recorder Use the Sound Recorder app to record audio . Recording audio 1 . From the Home screen, press the OK key to access the App Menu . 2 . Use the Navigation Ring to select Tools > Sound Recorder 3 . -
Page 46: Clock
Clock The Clock app allows you to set alarms, view different world times, use a stopwatch, set a timer, and use your phone as a desk clock . 1 . From the Home screen, press the OK key to access the App Menu . 2 . - Page 47 Alarm Setting an alarm 1 . From the Alarm screen, use the Navigation Ring to select the Alarm 2 . Press the Left Select key to add a new alarm . 3 . Use the Navigation Ring to set the alarm time and press the OK key to confirm .
-
Page 48: Device Unlock
Stopwatch 1 . From the Alarm screen, use the Navigation Ring to select the Stopwatch 2 . Press the OK key to start the stopwatch . Press the OK key to pause the time . Press the OK key again to continue the total time . 3 . -
Page 49: Settings
Settings Adjust phone configurations and learn more about your device with the Settings app . To access Settings, press the OK key from the Home screen and select Settings from the App Menu . Network & Internet Wi-Fi Turn Wi-Fi on whenever you are in range of a wireless network to connect to the internet without using a SIM card . - Page 50 the screen and select Add network . 2 . Enter the required information and select SAVE to continue . • Network name: Enter the network name . • Security: Select a security option and enter your password . • Advanced options: Show advanced options, such as IP settings and Proxy settings .
- Page 51 Private DNS From the Settings screen, select Network & internet > Private DNS to select your desired Private DNS mode . Wireless emergency alerts From the Settings screen, select Network & internet > Wireless Emergency Alerts . • Allow alerts: Enable to receive wireless emergency alert notifications . • Extreme threats: Enable/disable Extreme alerts .
-
Page 52: Connected Devices
Connected devices Bluetooth Wirelessly hear calls, connect speakers, transfer data, and more . From the Settings screen, select Connected devices > Bluetooth . Pair a Bluetooth device 1 . From the Bluetooth screen, use the Navigation Ring to scroll down to select Pair new device . -
Page 53: Apps & Notifications
2 . Use the Navigation Ring to select the incoming file notification . 3 . Press the OK key to open the notification and select ACCEPT button . 4 . To view the file received, go to Settings > Connected devices > Bluetooth > Files received via Bluetooth . -
Page 54: Battery
Battery Monitor your phone’s battery usage and adjust battery settings . From the Settings screen, select Battery . • Battery usage: View battery percentage and consumption . • Battery Saver: • Set a schedule: Drag the slider to the percentage you need . The Battery Saver will turn on automatically when your phone reaches that battery percentage . -
Page 55: Display
• Default alarm sound: Select the default alarm sound . You can customize your own alarm sound by selecting Add alarm . Display Adjust display settings, such as brightness, wallpaper, screen sleep, and more . From the Settings screen, select Display . • Brightness level: Drag the slider to adjust brightness level . -
Page 56: Accessibility
• SD card: • Select SD card to view files stored on your SD card • Select at the right side of the SD card to eject the SD card to allow for safe removal . Accessibility Accessibility services are special features to make the device easier to use for those with certain physical disabilities . -
Page 57: Security & Location
speech to text for the person using the hearing aid and converts outgoing text to a spoken voice for the person on the other end of the conversation . • RTT: Real-Time Text can be used by people with hearing or speech impairments to communicate via text while on a voice call . -
Page 58: System
• Wi-Fi and Bluetooth: • Wi-Fi scanning: Improve location accuracy by allowing system apps and services to detect Wi-Fi networks at any time . • Bluetooth scanning: Improve location accuracy by allowing system apps and services to detect Bluetooth devices at any time . System From the Settings screen, select System . - Page 59 Disable this function to set the lock format manually . • Use 24-hour format: Enable or disable the 24-hour clock format . Reset options • Erase all data (factory reset): Completely erase all data from your phone’s internal storage and reset the device to factory settings . Follow the screen steps to finish the reset .
- Page 60 • Custom build version: View your Custom build version . • Build nubmer: View your build number . Software Update Check for new software updates for your device . Install the latest software updates on your phone to keep it running smoothly . Note: Connect to a secure Wi-Fi access point before searching for updates .
-
Page 61: Specifications
Specifications The following tables list your phone’s and battery’s specifications . Phone specifications Item Description Weight Approx . 130 .65g (4 .61oz) Continuous talk time Up to 7 .2 hours Continuous standby time Up to 181 .2 hours Charging time Up to 2 hours Dimensions (W x H x D) Approx . - Page 62 Licenses microSD Logo is a trademark of SD-3C LLC . The Bluetooth word mark and logos are owned by the Bluetooth SIG, Inc . and any use of such marks by its affiliates is under license . Other trademarks and trade names are those of their respective owners . The Wi-Fi Logo is a certification mark of the Wi-Fi Alliance .
-
Page 63: Safety Information
Safety information The topics in this section will introduce how to use your mobile device safely . Please read before proceeding THE BATTERY IS NOT FULLY CHARGED WHEN YOU TAKE IT OUT OF THE BOX . DO NOT REMOVE THE BATTERY PACK WHEN THE PHONE IS CHARGING . Important health information and safety precautions When using this product, the safety precautions below must be taken to avoid possible legal liabilities and damages . - Page 64 is properly installed and grounded in accordance with all local codes and ordinances . Safety precautions for power supply unit Use the correct external power source A product should be operated only from the type of power source indicated on the electrical ratings label . If you are not sure of the type of power source required, consult your authorized service provider or local power company .
- Page 65 Take extra precautions • Do not disassemble or open, crush, bend or deform, puncture, or shred . • Do not short circuit a battery or allow metallic conductive objects to contact battery terminals . • Only use the USB cable provided with the phone or that bear the USB-IF logo or have completed the USB-IF compliance program .
- Page 66 • Avoid dropping the phone or battery . If the phone or battery is dropped, especially on a hard surface, and the user suspects damage, take it to a service center for inspection . • Improper battery use may result in a fire, explosion, or other hazards . • If the battery leaks: • Do not allow the leaking fluid to come into contact with skin or clothing .
- Page 67 device when on board an aircraft, remember to turn off the RF on your phone by switching to Airplane Mode . Environment restrictions Do not use this product in gas stations, fuel depots, chemical plants or where blasting operations are in progress, or in potentially explosive atmospheres such as fueling areas, fuel storehouses, below deck on boats, chemical plants, fuel or chemical transfer or storage facilities, and areas where the air contains chemicals or particles, such as grain, dust, or metal powders .
- Page 68 Safety precautions for RF exposure • Avoid using your phone near metal structures (for example, the steel frame of a building) . • Avoid using your phone near strong electromagnetic sources, such as microwave ovens, sound speakers, TV and radio . • Use only original manufacturer-approved accessories, or accessories that do not contain any metal .
- Page 69 Use only the supplied integral antenna . Use of unauthorized or modified antennas may impair call quality and damage the phone, causing loss of performance and SAR levels exceeding the recommended limits as well as result in noncompliance with local regulatory requirements in your country . To assure optimal phone performance and ensure human exposure to RF energy is within the guidelines set forth in the relevant standards, always use your device only in its normal-use position .
- Page 70 consequences of its use . You must always switch off your phone wherever the use of a phone is prohibited . Use of your phone is subject to safety measures designed to protect users and their environment . Avoid applying excessive pressure to the device Do not apply excessive pressure on the screen or the device to prevent damage .
- Page 71 phone or its accessories . • Do not paint your phone or its accessories . • Do not attempt to disassemble your phone or its accessories . Only authorized personnel must do so . • Do not expose your phone or its accessories to extreme temperatures, minimum 14°F (-10°C) and maximum 113°F (45°C) .
- Page 72 Avoid using your device after a dramatic change in temperature When you move your device between environments with very different temperature and/or humidity ranges, condensation may form on or within the device . To avoid damaging the device, allow sufficient time for the moisture to evaporate before using the device .
- Page 73 Adjust the volume Turn down the volume before using headphones or other audio devices . Cleaning Unplug the product from the wall outlet before cleaning . Do not use liquid cleaners or aerosol cleaners . Use a damp cloth for cleaning, but NEVER use water to clean the LCD screen .
- Page 74 Loud noise This phone is capable of producing loud noises which may damage your hearing . Emergency calls This phone, like any wireless phone, operates using radio signals, which cannot guarantee connection in all conditions . Therefore, you must never rely solely on any wireless phone for emergency communications .
- Page 75 Changes or modifications not expressly approved by the party responsible for compliance could void the user’s authority to operate the equipment . RF Exposure Information (SAR) This mobile phone meets the government’s requirements for exposure to radio waves . This phone is designed and manufactured not to exceed the emission limits for exposure to radio frequency (RF) energy set by the Federal Communications Commission of the U .S .
- Page 76 For body worn operation, this phone has been tested and meets the FCC RF exposure guidelines for use with an accessory that contains no metal and positions the handset a minimum of 1 .5 cm from the body . Use of other accessories may not ensure compliance with FCC RF exposure guidelines .
-
Page 77: Troubleshooting
Troubleshooting Before contacting the service center, follow the instructions below: • Make sure your phone’s battery is fully charged for optimal operation . • Avoid storing large amounts of data in your phone, as this may affect its performance . • Use Reset and the Software Update to perform phone formatting or software upgrading . - Page 78 My phone cannot charge properly . • Make sure that your battery is not completely discharged; if the battery power is empty for a long time, it may take around 12 minutes to display the battery charger indicator on the screen . • Make sure charging is carried out under normal conditions (0°C (32°F) to 45°C (113°F)) .
- Page 79 • Make sure the service of your SIM card is available . I am unable to make outgoing calls . • Make sure the number you have dialed is correct and valid, and that you have pressed the Call/Answer key . • For international calls, check the country and area codes .
- Page 80 I cannot find my contacts . • Make sure your SIM card is not broken . • Make sure your SIM card is inserted properly . • Import all contacts stored in SIM card to phone . The sound quality of the calls is poor . • You can adjust the volume during a call by pressing up or down on the Volume key .
- Page 81 I cannot access my voicemail . • Make sure your service provider’s voicemail number is correctly entered in “Voicemail number” . • Try later if the network is busy . I am unable to send and receive MMS messages . • Check if your phone memory availability is full .
- Page 82 • Extend the e-mail auto-check interval for as long as possible . • Exit applications running in the background if they have not been used for a long time . • Deactivate Bluetooth, Wi-Fi, or Location when not in use . The phone will become warm following prolonged calls, playing games, using the browser, or running other complex applications .
- Page 83 Warranty With this manufacturer’s warranty (hereinafter: the “Warranty”), Emblem Solutions (hereinafter: the “Manufacturer”) guarantees this product against any material, design and manufacturing defects . The duration of this Warranty is specified in article 1 below . This Warranty does not affect your statutory rights, which cannot be excluded or limited, in particular in relation to the applicable legislation on defective products .
-
Page 84: Warranty
warranty period of the product concerned . However, the repaired or replaced parts are guaranteed in the same manner and for the same defect for a period of ninety days after delivery of the repaired product, even if their initial warranty period has expired . - Page 85 equipment or software not approved by Manufacturer . Some defects may be caused by viruses due to unauthorized access by yourself or by a third party service, computer systems, other accounts or networks . This unauthorized access may take place through hacking, misappropriation of passwords or various other means .