AT&T RADIANT Max User Manual
Hide thumbs
Also See for RADIANT Max:
- User manual (191 pages) ,
- Setup manual (6 pages) ,
- Features manual (2 pages)
Table of Contents
Advertisement
Quick Links
Advertisement
Table of Contents

Related Manuals for AT&T RADIANT Max


Summary of Contents for AT&T RADIANT Max
- Page 1 AT&T RADIANT ™ User Guide DOC20191209...
-
Page 2: Table Of Contents
Contents Getting started . . . . . . . . . . . . . . . . . . . . . . . . . . . . . . . . . . . . . . . . . . . . . . . . . . . . . . . 9 Introduction . - Page 3 Contacts . . . . . . . . . . . . . . . . . . . . . . . . . . . . . . . . . . . . . . . . . . . . . . . . . . . . . . . . . . . . 75 Add a contact .
- Page 4 Settings . . . . . . . . . . . . . . . . . . . . . . . . . . . . . . . . . . . . . . . . . . . . . . . . . . . . . . . . . . . 138 Basic settings .
- Page 5 Battery . . . . . . . . . . . . . . . . . . . . . . . . . . . . . . . . . . . . . . . . . . . . . . . . . . . . . . . . . . . . 159 Battery consumption notification .
- Page 6 Storage . . . . . . . . . . . . . . . . . . . . . . . . . . . . . . . . . . . . . . . . . . . . . . . . . . . . . . . . . . . . 169 Storage manager .
- Page 7 Accounts . . . . . . . . . . . . . . . . . . . . . . . . . . . . . . . . . . . . . . . . . . . . . . . . . . . . . . . . . . 184 Add account .
- Page 8 Licenses . . . . . . . . . . . . . . . . . . . . . . . . . . . . . . . . . . . . . . . . . . . . . . . . . . . . . . . . . . . . 205 Copyright information .
-
Page 9: Getting Started
Getting started The topics in this section will introduce you to your phone, help you get set up with service, provide an overview of the phone screen, and get you started with basic phone operations . -
Page 10: Introduction
Introduction The following topics describe the basics of using this guide and your new phone . About the user guide Thank you for purchasing your new U705AA Smartphone . The following topics explain how best to use this guide to get the most out of your phone . Before using your phone Read the Safety Information Guide that came with your device thoroughly for proper usage . -
Page 11: Set Up Your Phone
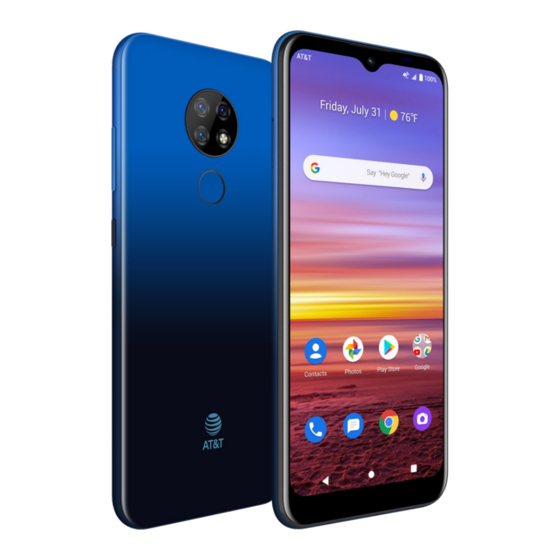
Set up your phone The following topics give you all the information you need to set up your phone and wireless service for the first time . Parts and functions These topics illustrate your phone’s primary parts and key functions . Headset port Proximity and light sensor Receiver... - Page 12 Part Description Fingerprint sensor Unlock your phone with a touch of your finger . • Brighten photos taken indoors or at night . Flash • Use as a flashlight to see in dark areas . Take pictures and record videos while facing the Front camera screen .
- Page 13 Part Description Transmit your voice electronically for a call, Microphone voice recording, or Google Assistant . • Press to turn the screen on or off . • Press and hold to turn the phone on or off . Power key •...
- Page 14 Part Description • View information needed to operate your phone . Touch screen • Access your phone’s features and applications . Connect the USB cable (included) for charging, USB charging port or connect other accessories . Adjust the volume for ringtones, media, Volume keys notifications, and system sounds .
-
Page 15: Battery Use
Battery use The following topics explain how to care for your phone’s non-removable battery . Battery cautions Storage: Avoid storing or leaving the phone with no charge remaining . Saved information and settings may become lost or changed, or the battery may become unusable . - Page 16 2 . Connect the other end to the power adapter . 3 . Connect the power adapter to an electrical outlet to fully charge your phone . • Use the power adapter that comes with your phone; using other adapters may damage your phone .
-
Page 17: Install A Sim/Sd Card
Install a SIM/SD Card Insert a Nano SIM/microSD card 1 . Insert the SIM Card Tray Pin into the card tray slot and remove the SIM card tray . 2 . Place the Nano SIM card and microSD card into the tray . 3 . - Page 18 Unmount an SD card Always unmount an SD card before removing it from your phone to avoid corrupting or damaging the files on the SD card . 1 . From the Home screen, swipe up to access Apps and tap Settings 2 .
- Page 19 Format an SD card When you insert an optional SD card for the first time, it is recommended that you format it on your phone . Note: Formatting your SD card will erase all files on the card . Make sure to back up your files in another location before formatting .
-
Page 20: Turn Your Phone On And Off
Turn your phone on and off The instructions below explain how to turn your phone on and off . Turn your phone on Press and hold the Power key until the device turns on . Turn your phone off 1 . Press and hold the Power key . 2 . -
Page 21: Use The Touch Screen
Use the touch screen Your phone’s touch screen lets you control actions through a variety of touch gestures . Tap or touch Tap or touch with your finger to type characters into the on-screen keyboard, select and open applications and settings, or press on-screen buttons . -
Page 22: Complete The Setup Screens
Rotate Rotate the phone sideways to automatically change the screen orientation from portrait to landscape . When entering text, you can turn the phone sideways to bring up a bigger keyboard . See “Touch screen keyboards” on page 40 for more details . Note: To activate Auto-rotate mode, swipe up from Home screen to access Apps and tap Settings >... -
Page 23: Basic Operations
Basic operations The following topics outline basic features and operations of your phone . -
Page 24: Home Screen And Apps List
Home screen and Apps list Most of your phone’s operations originate from the Home screen or the Apps (applications) list . 1 . From any screen, press the Home button to display the Home screen . 2 . From the Home screen, swipe up to access the Apps list . Home For information about using the Home screen, see “Home screen basics”... - Page 25 Select options and navigate screens Tap icons, on-screen buttons, and other items to open or activate the assigned function . • Tap the Back button to return to the previous screen . Recent applications View your recently used applications by tapping the Recent Apps button Back Recent Apps...
- Page 26 Switch between recently opened apps You can easily switch between the apps you’ve recently opened . Tap the Recent Apps button to see your recently-opened apps . Tap to clear all apps 1 . Swipe right or left through the cards to find an app and tap it . 2 .
-
Page 27: Phone Settings Menu
Phone settings menu You can customize your phone’s settings and options in the Settings menu . There are two ways to access the Settings menu: • From the Home screen, swipe up to access Apps and tap Settings • From any screen, swipe the Status bar down twice and tap Settings For more information, see “Basic settings”... -
Page 28: Portrait And Landscape Screen Orientation
Portrait and landscape screen orientation The default orientation for your phone’s screen is portrait (vertical), but many apps will change to landscape orientation (horizontal or widescreen) when the phone is rotated sideways . Note: Not all screens can be used in landscape orientation . Turn screen rotation on or off •... -
Page 29: Capture Screenshots
Capture screenshots There are two ways to capture a screenshot: • Press and hold the Power key and Volume down key at the same time to capture a screenshot of the current screen . • Touch and hold the Power key from the screen you want to capture, and tap Screenshot in the popup menu . - Page 30 Work with apps App folders 1 . From the Home screen, touch an app folder to open it . Tap an app shortcut to launch the app . 2 . To add more apps to the folder, drag each app over to the folder . See “Add folders to the Home screen”...
- Page 31 App shortcuts Tap and hold an app icon on the Home screen or Apps list to display a shortcut menu that lets you quickly access common app functions . Note: Not all apps support the App shortcuts feature .
- Page 32 Control app permissions The first time you open an app, you’ll be asked to grant permissions to access certain data or features . This ensures that you have full control of which apps have authorized access . If you don’t want to grant access for an app, choose DENY . If you choose DENY in a trusted app, you may not be able to use the app or access all the functions .
- Page 33 Choose default apps Some actions can be performed with more than one app . When performing an action for the first time, you may be prompted to choose an app . You can choose to use an app only this time by tapping JUST ONCE, or tap ALWAYS to set that app as the default .
- Page 34 Disable an app You can disable some default apps which can’t be uninstalled to avoid them running in the background and downloading data . 1 . From the Home screen, swipe up to access Apps, and tap Settings 2 . Tap Apps & notifications >...
- Page 35 Apps list The Apps list expands to include any apps you download and install on your phone . The following table outlines the primary apps that have been preinstalled on your phone . Function/Service Perform basic and advanced mathematical Calculator calculations .
- Page 36 Function/Service Store files on Google servers, synchronize files Drive across devices, and share files with other Google accounts . Make free high-definition video calls to your friends and family . Access all of your documents, pictures, Files videos, and downloads . Send, receive, and manage your email Gmail messages .
- Page 37 Function/Service Place and receive calls, use voicemail, set up Phone and manage contacts, and more . Manage your photos and back them up to Photos your Google account . Buy or rent movies and TV shows, and watch Play Movies & TV them on your TV, smartphone, tablet, etc .
-
Page 38: Phone Number
Phone number Follow the instructions below to view your phone number . 1 . From the Home screen, swipe up to access Apps and tap Settings 2 . Tap About phone 3 . You will see the phone number listed under Phone number . Phone number About phone... -
Page 39: Airplane Mode
Airplane mode Airplane mode turns off all functions that emit or receive signals while leaving your phone on so you can use apps that don’t require a signal or data . To turn on Airplane mode 1 . From the Home screen, swipe up to access Apps and tap Settings 2 . -
Page 40: Enter Text
Enter text You can type on your phone using one of the available touch screen keyboards or Google Voice Typing . Touch screen keyboards Your phone offers Google touch screen keyboards for entering text . The keyboard appears automatically on-screen when you tap a text entry field, and can be used in either portrait or landscape mode . - Page 41 Google keyboard The Google keyboard offers a traditional QWERTY keyboard setup for entering text by tapping keys (like on a computer), along with options that allow you to enter text faster and more accurately, such as continuous key input, personalized usage dictionaries, and more . Access Google keyboard settings 1 .
- Page 42 Tips for editing text Your phone has many options to make entering text easier, including copying, cutting, and pasting text, using voice-to-text input, customizing the user dictionary, using predictive text, and more . To edit text you have already entered 1 .
- Page 43 To insert new text 1 . Touch where you want to type, or touch and hold a blank space . The cursor will blink and the tabs will show . Drag the tab to move the cursor . 2 . Tap the tab to view the pop-up menu, then tap Paste to insert any text you have previously copied .
-
Page 44: Google Account
Google account You will need a Google account to access several phone features, such as Gmail, Google Maps, Duo, and Google Play . Enter your Google account information to access Google apps . These apps sync between your phone and your online Google account . Create a Google account If you do not already have a Google account, you can create one online or using your phone . - Page 45 Create a Google account using your phone 1 . From the Home screen, swipe up to access Apps and tap Settings 2 . Tap Accounts > Add account . 3 . Tap Google and then tap Create account > For myself .
- Page 46 4 . Follow the prompts to set up your account . Tap Next to proceed between steps, which may include: a . Enter your basic information such as first and last name . b . Enter a desired username/Gmail address . c .
- Page 47 Sign in to your Google account If you have a Google account but have not yet signed in with your phone, follow these instructions to sign in to your Google account . 1 . From the Home screen, swipe up to access Apps and tap Settings 2 .
-
Page 48: Lock And Unlock Your Screen
Important: AT&T policies often do not apply to third-party applications . Third-party applications may access your personal information or require us to disclose your customer information to the third-party application provider . To find out how a third-party application will collect, access, use, or disclose your personal information, check the application provider’s policies, which can usually be found on their website . -
Page 49: Home Screen Basics
The following topics describe how to use and customize your phone’s home screen, understand the Status bar, and use the Notification panel . Home screen basics The Home screen is the starting point for your phone’s applications, functions, and menus . You can customize your Home screen by adding application icons, shortcuts, folders, widgets, and more . - Page 50 Item Description Add shortcuts to your favorite apps to the App icons home screen . Back button Tap to return to the previous screen . Home button Tap to display the main Home screen . View notifications for incoming messages, missed calls, application updates, and more .
- Page 51 Extended home screens In addition to the main Home screen, your phone features extended Home screens to provide more space for adding icons, widgets, and more . Press the Home button to display the main Home screen, then swipe to the right to move from the main screen to an extended screen .
-
Page 52: Status Bar And Notification Panel
Status bar and Notification panel Quickly view your phone’s status and notifications at the top of the screen . Status bar The Status bar at the top of the Home screen provides phone and service status information on the right side and notification alerts on the left . To view the Notification panel or access the Quick Settings menu, drag the Status bar down from the top of the screen . - Page 53 Icon Status Headphones Hotspot Mute on Network (full signal) Network (roaming) No Network Speakerphone enabled Vibrate on Wi-Fi enabled ® Wi-Fi Calling enabled ®...
- Page 54 Main notification icons (Left side) Icon Notification Alarm Download Event Keyboard active Missed call New Gmail New text or MMS message New voicemail Software update available Update successful USB connection Warning Wi-Fi Calling ® Note: Additional notification icons may appear . All notifications may be accessed through the Notification panel .
- Page 55 Notification panel Your phone’s notifications appear at the left side of the Status bar . Access the full Notification panel by dragging down the Status bar to check notifications, download updates, open messaging apps, access the Quick Settings menu, and more . Open the Notification panel 1 .
- Page 56 Close the Notification panel Swipe up to close the Notification panel, or tap the Back button Notification panel layout The Notification panel gives you access to both notifications and the Quick Settings menu . To access the Quick Settings menu: 1 .
-
Page 57: Customize The Home Screen
Customize the Home screen Learn how to set the wallpaper and add, move, or remove shortcuts, widgets, and folders from the Home screen . Operations for rearranging the Home screen To move widgets and app shortcuts icons From the Home screen, touch and hold an app or widget and drag it to the desired location . - Page 58 Change the wallpaper 1 . From the Home screen, touch and hold an empty space, then tap Wallpapers on the Home screen menu . Tip: You can also access the Wallpapers menu from the Settings menu . From the Home screen, swipe up to access Apps and tap Settings >...
- Page 59 Add shortcuts to the Home screen Add shortcuts for quick access to favorite apps from the Home screen . 1 . From the Home screen, swipe up to access Apps . 2 . Touch and hold an app icon and drag to move it . 3 .
- Page 60 1 . From the Home screen, touch and hold an empty space, and then tap Widgets in the Home screen menu . Tap Widgets Touch and hold an empty space 2 . Touch and hold a widget, then drag it to an empty location on one of the Home screens .
- Page 61 Add folders to the Home screen You can group Home screen shortcuts into folders for convenient access . 1 . Drag an app icon and release it over another app icon on the Home screen to create a folder . Type folder name Drag an icon over another icon...
- Page 62 Change folder names Once you have added folders, you can change the name easily from the folder display . 1 . Tap the folder to open it . 2 . Tap the folder name, type a new name, and then tap Tap to rename folder...
-
Page 63: Making Connections
Making connections The topics in this section will explain how to help you make connections, from phone calls and maintaining contacts, to text messages, email, Internet, and international services . -
Page 64: Phone
Phone Make a call From the Home screen, tap Phone • If the keypad does not appear on the screen, tap to open it . • Enter a phone number in the keypad to make a call . Tap to make a Voice Call . - Page 65 Make a call with Wi-Fi Calling 1 . From the Home screen, tap Phone 2 . If the keypad does not appear on the screen, tap to open it . Enter a phone number in the keypad to make a call . 3 .
- Page 66 Receive a call The Incoming Call screen is displayed when a call is received, along with the caller’s numbers and other information you’ve entered for that contact . When you receive a phone call from someone who is not stored in Contacts, only the default caller ID icon and phone number appear on the Incoming Call screen .
- Page 67 Reject a call and send a text message You can reject an incoming call and automatically send a quick response text message to the caller . 1 . When a call arrives, tap on the bottom left corner of the screen . The ringtone or vibration will stop, and you will see a list of quick preset responses .
- Page 68 In-call screen layout and operations While you’re on a call, you will see a number of on-screen options . In-call screen layout Tap the on-screen options to activate them during a call . On-screen options...
- Page 69 On-screen options Item Description Tap and select Switch to RTT to send the caller a Overflow Menu Real-time text during a call . Tap to turn the speakerphone on or off . Speaker Warning: Because of higher volume levels, do not place the phone near your ear during speakerphone use .
- Page 70 Swap Swap the calls . Route the phone’s audio through a connected Bluetooth headset . • When the call is routed to a Bluetooth headset, the current call area shows the Bluetooth call icon ( Note: The Headset button is activated to show the current call is routed to the connected Bluetooth headset .
- Page 71 Place a call from Contacts You can place phone calls directly from your Contacts list . 1 . From the Home screen, tap Phone 2 . Tap Contacts to display the Contacts list . Tap Phone Tap Contacts 3 . Tap a contact . 4 .
- Page 72 Call from Recents The Recents list allows you to view recently received, placed, or missed calls . 1 . From the Home screen, tap Phone 2 . Tap Recents to display the Call Log . Tap to call Tap Phone Tap Recent 3 .
-
Page 73: Call Settings
• You can tap a contact in the Call Log to display more options . • Create new contact: Create a new contact from an unknown number . • Add to a contact: Add an unknown number to an existing contact . •... - Page 74 Setting Description Display options Choose how to sort and display your contacts . Adjust call and ringtone volume, change your Sounds and vibration alert tones, activate Do Not Disturb, and more . Edit or create quick response text messages . Quick responses “Reject a call and send a text message”...
-
Page 75: Contacts
Contacts Add a contact You can add contacts from the Phone app . Enter details such as name, phone numbers, email addresses, mailing addresses, and more . 1 . From the Home screen, tap Contacts 2 . Tap to add a contact . Choose where to save contact 3 . - Page 76 • Select your SIM card or SD card name to save the contact to your SIM card or SD card . Your contact will be available on any phone your SIM card or SD card is mounted in . Tap to add photo Add contact information...
- Page 77 Save a phone number You can save a phone number to Contacts directly from the phone keypad . 1 . From the Home screen, tap Phone > Keypad 2 . Enter a phone number and tap Create new contact to add a new contact or tap Add to a contact to add the number to an existing contact .
- Page 78 View contacts View a contact’s details . 1 . From the Home screen, tap Contacts 2 . Tap a contact to view their details .
- Page 79 Contacts screen layout Menu Search Favorites Contact name Contact image Index Add new...
- Page 80 Item Description Add new Add a new contact . Tap to show contact’s details, place a call, send a Contact message, and more . Add a contact as a favorite . You can view your Favorites favorite contacts in the Phone app . Index Browse contacts alphabetically .
-
Page 81: Edit A Contact
Edit a contact Add or edit a contact’s information, assign a photo, customize with a unique ringtone, and more . 1 . From the Home screen, tap Contacts 2 . Tap a contact to view their details 3 . Tap Edit Edit 4 . -
Page 82: Delete A Contact
Delete a contact You can delete a contact from the contacts details page . 1 . From the Home screen, tap Contacts 2 . Tap a contact to view its details . 3 . Tap Menu > Delete . Menu Delete 4 . -
Page 83: Share A Contact
Share a contact You can quickly share contacts using Bluetooth, Gmail, or text messaging . 1 . From the Home screen, tap Contacts 2 . Tap a contact and tap Menu > Share . 3 . Select how you’d like to share the contact information card (vCard) . Share Method to share •... -
Page 84: Messaging
• Gmail: Send the vCard as a Gmail attachment . See “Create and send an email message” on page 88 for more information on sending emails . • Bluetooth: Send the vCard via Bluetooth . See “Bluetooth” on page 98 information on pairing and sending via Bluetooth . - Page 85 • Scroll to find and select the contacts to whom you want to send the message . You can also select Contact Groups as recipients . 4 . Tap the text box and compose your message . Enter a phone number or contact name Select a contact Text message box...
- Page 86 Send a multimedia message (MMS) 1 . From the Home screen, tap Messaging 2 . Tap Compose 3 . Fill in one or more recipients . See “Send a text message (SMS)” on page for more information on entering recipients . 4 .
- Page 87 • Notifications: Enable or disable notification icons when messages are received . • Sound: Choose your messaging audio alert . This can only be accessed when Notifications are enabled . • Vibrate: Enable or disable vibration when receiving messages . This can only be accessed when Notifications are enabled .
-
Page 88: Gmail
Gmail Use Gmail to send, receive, and manage your email messages . Before using Gmail, you must sign into your Google account on your phone . See “Google account” on page 44 for details on signing in or creating an account . Note: You can use the Gmail app to manage email for other accounts, such as Yahoo!, Hotmail, Outlook, and more . - Page 89 Email composition options • Add Cc/Bcc recipients: In the mail composition window, tap in the To bar to add Cc/Bcc recipients . • Attach photos or videos: In the mail composition window, tap > Attach file . Tap the file you want to attach . •...
- Page 90 Open an email message from a notification When a new email is received, you will see in the Status bar . 1 . Swipe the Status bar down to display the Notification panel . 2 . Tap the new message from the Notification panel . If you have two or more new email messages, tapping the notification will open the Gmail app .
- Page 91 Email settings You can access settings for the Gmail app and for your individual email accounts from the Gmail Settings menu . 1 . From the Home screen, swipe up to access Apps, and tap Gmail 2 . Tap Menu >...
-
Page 92: Internet And Social Networking
Internet and social networking The following topics describe how to connect to and use the Internet on your phone and how to access popular social networking sites such as Facebook, Duo, and more . Chrome browser From the Home screen, tap Chrome to browse the Internet, search for information, and bookmark your favorite web pages for convenient access . -
Page 93: Facebook
Facebook Post updates, see what your friends are up to, upload pictures and check-ins, and more with on-the-go Facebook access . Sign in to your Facebook account or create a new account 1 . From the Home screen, swipe up to access Apps and tap Facebook 2 . -
Page 94: Connectivity
Connectivity The following topics address your phone’s connectivity options, including USB file transfer, Wi-Fi, Bluetooth, IR connectivity, and more . Transfer files between your phone and a computer You can use the USB cable to connect your phone directly to your computer and transfer music, photos, and other content files . - Page 95 Transfer files between the phone and a computer 1 . Connect your phone to your computer using the USB charging cable . • Insert the end of the cable to the charger/accessory jack at the bottom of the phone . •...
- Page 96 3 . To transfer files from your phone to your computer: • From the Home screen, swipe up to access Apps and tap Settings • Tap Connected devices > USB . • Tap File Transfer . You can also select other options available . 4 .
-
Page 97: Wi-Fi
Wi-Fi Wi-Fi provides wireless Internet access over distances of up to 300 feet . To use your phone’s Wi-Fi, you need access to a wireless access point or hotspot . Turn Wi-Fi on and connect to a wireless network 1 . From the Home screen, swipe up to access Apps and tap Settings 2 . -
Page 98: Bluetooth
Bluetooth Bluetooth is a short-range communications technology that allows you to connect wirelessly to a number of Bluetooth devices, such as headsets and hands-free car kits, Bluetooth-enabled handhelds, computers, printers, and wireless phones . Bluetooth communication range is approximately 30 feet . The following table describes different options and functions available with certain Bluetooth accessories . - Page 99 Enable Bluetooth To enable Bluetooth 1 . From the Home screen, swipe up to access Apps and tap Settings 2 . Tap Connected devices > Connection preferences > Bluetooth . 3 . Slide the Bluetooth switch to the On position . •...
- Page 100 Pair Bluetooth devices To pair Bluetooth devices 1 . From the Home screen, swipe up to access Apps and tap Settings 2 . Tap Connected devices > Pair new device . Pair new device • Nearby devices will appear under Available devices . •...
- Page 101 To forget a paired device 1 . From the Home screen, swipe up to access Apps and tap Settings 2 . Tap Connected devices 3 . Tap Settings next to the device you wish to forget . 4 . Tap FORGET > FORGET DEVICE . Tap to forget the device Tap Settings icon...
- Page 102 Connect to a paired Bluetooth device 1 . From the Home screen, swipe up to access Apps and tap Settings 2 . Tap Connected devices Tap device name 3 . Tap a paired device to connect . When the device is connected to your phone, the Bluetooth Paired icon will be displayed in the Status bar .
- Page 103 Send information via Bluetooth You can use Bluetooth to transfer files between your phone and another Bluetooth-enabled device, such as a phone or computer . Send photos, videos, calendar events, contacts, and more . Sending contact information via Bluetooth 1 . From the Home screen, tap Contacts 2 .
- Page 104 Receive information via Bluetooth 1 . When another device attempts to send a file to your phone via Bluetooth, you will see a request to accept the file . 2 . Tap ACCEPT to receive the file . • When your phone receives a file, you will see a notification . To download the file immediately, drag the Status bar down to display the Notification panel, and then tap the notification .
-
Page 105: Apps And Entertainment
Apps and entertainment The topics in this section will explore the features that make your phone so much more than a phone, from the camera and productivity apps to music, entertainment, and more . -
Page 106: Camera And Video
Camera and video You can use the camera or video camera to take and share photos and videos . Your phone comes with a 13+5+2 megapixel rear-facing camera and 8 megapixel front-facing camera that lets you capture sharp photos and videos . Camera overview The camera’s viewfinder screen lets you view your subject and access camera controls and options . - Page 107 Icon Function/Service Options Select camera modes and settings options . Photo filters Choose from a variety of photo color filters . Activate or deactivate High Dynamic Range HDR boost Boost mode for clearer, more vivid photos . Picture size ratio Set the photo quality and aspect ratio .
- Page 108 Icon Function/Service Video mode Record videos and access video settings . Photo mode Capture photos and access camera settings . Face beauty Blur imperfections for flawless selfies . Gallery View the last photo or video taken . Capture Capture a photo . Switch Switch between the front and back cameras .
-
Page 109: Take Photos And Record Videos
Take photos and record videos The following topics explain how to take photos and record videos with your phone’s camera . Camera cautions If the lens is dirty: Fingerprints and smudges on the camera lens may result in blurry photos or videos . If this happens, wipe the lens with a soft dry cloth . Avoid exposure to direct sunlight: Do not to expose the lens to direct sunlight for long periods, as this can affect the color filter and distort the color of photos and videos . - Page 110 Record a video 1 . From the Home screen, tap Camera Tip: You can also access the camera in one of the methods described under “Take a photo” on page 109 . 2 . Tap to switch to Video mode (if necessary) . 3 .
-
Page 111: Camera Settings
Camera settings You can adjust your camera’s settings using the icons on the main camera screen and the full camera settings menu . Set camera functions 1 . From the Home screen, tap Camera Tip: You can also access the camera in one of the methods described under “Take a photo”... - Page 112 Menu Function/Service Night Optimize photos in low-light conditions . Slow motion Record videos in slow motion . Picture size ratio Adjust photo size and ratio . Enable or disable the ability to capture photos Touch shot by tapping on the camera screen . Self timer Set a countdown timer .
-
Page 113: View Pictures And Video Using Photos
View pictures and video using Photos Using the Photos app, you can view photos and watch videos that you’ve taken, downloaded, or copied onto your storage card or phone memory . For pictures that are on your storage card or phone memory, you can do basic editing such as rotating and cropping . - Page 114 Review photos and videos After capturing a photo or video, tap the thumbnail image at the bottom left corner of the screen to review it . From there, you can save, share, edit, or delete the photo or video . Options while reviewing photos or videos Zoom in or out on a photo or video: Tap the screen twice or pinch the screen to zoom in or out on a photo or video .
-
Page 115: Edit Photos
Edit photos Rotate and save a picture 1 . From the Home screen, tap Photos 2 . Tap the picture you want to rotate . 3 . Tap to access the Edit screen . 4 . Tap Crop > Rotate , then adjust the slider to rotate the photo . - Page 116 Crop a picture 1 . From the Home screen, tap Photos 2 . Tap the picture you want to crop . 3 . Tap to access the Edit screen . 4 . Tap Crop . A crop box appears on the picture . 5 .
-
Page 117: Share Pictures And Videos
Share pictures and videos The Photos app allows you to send photos and videos using email or MMS messages . You can share photos and videos on your social networks, or send them to another phone or your computer via Bluetooth . 1 . -
Page 118: Calendar
Productivity Use your phone to stay productive and organized with calendar, navigation, alarm, office, and more productivity apps . Calendar Use the Calendar to create and manage events, meetings, and appointments . Your Calendar helps organize your time and reminds you of important events . In order to sync with your Google calendar, you must sign in to a Google account on your phone . See “Google account”... - Page 119 2 . Tap Menu 3 . Select from one of the following calendar views: • Schedule: Display all events . • Day: Display today’s schedule by hour . Slide the screen to the left and right to display the previous and the next day, respectively . •...
- Page 120 Add an event 1 . From the Home screen, swipe up to access Apps and tap Calendar 2 . Tap Add to add an event . 3 . Enter event details, and then tap Save .
- Page 121 View calendar events 1 . From the Home screen, swipe up to access Apps and tap Calendar 2 . Tap a date and an event to view the details . Edit event Tap event Edit an event 1 . From the Home screen, swipe up to access Apps and tap Calendar 2 .
-
Page 122: Navigation Apps
Delete an event 1 . From the Home screen, swipe up to access Apps and tap Calendar 2 . Tap a date and an event to view the details . 3 . Tap Options > Delete to delete the event . Calendar settings 1 . - Page 123 Google Maps Use the Google Maps app to determine your location, get directions, browse local businesses and attractions, rate and review places, and more . Search for destinations Use Google Maps to locate and map a specific address or destination . 1 .
- Page 124 Google Maps operations • View current location: Tap to find your current location on the map . • Explore nearby venue categories: Browse nearby venues by selecting a category such as restaurants, parks, hotels, and more . • Select map types for different views: Tap MAP TYPE and choose your map view, or select to view map details such as traffic, street view, etc .
-
Page 125: Google Search
Google Search Search for information saved on the phone, in apps, and on the Internet . Use Google Search 1 . From the Home screen, tap the Google Search widget . Tip: You can also access Google Search by swiping up on the Home screen to access Apps and tapping Google 2 . - Page 126 Use Google Voice Search Tip: To quickly access Google Voice Search from any screen, press and hold Home 1 . From the Home screen, swipe up to access Apps and tap Google 2 . Tap Google Voice Search 3 . Say your search terms and search results will appear .
-
Page 127: Calculator
Calculator Your phone’s convenient built-in calculator lets you perform basic mathematical equations . 1 . From the Home screen, swipe up to access Apps and tap Calculator 2 . Enter the first number . 3 . Tap a mathematical function key, then enter the second number . 4 . - Page 128 View calculator history 1 . From the Home screen, swipe up to access Apps and tap Calculator 2 . Tap Menu > History, or drag down on the History bar to view the calculator history . 3 . To clear the calculator history, tap Menu >...
-
Page 129: Clock
Clock The Clock app allows you to set alarms, view different world times, use a stopwatch, set a timer, and use your phone as a desk clock . Set the date and time manually Your phone uses the wireless network to automatically receive the current date and time . - Page 130 Create a new alarm 1 . From the Home screen, swipe up to access Apps and tap Clock 2 . Tap Alarm 3 . Tap 4 . Set the time for the alarm and tap OK . You can also tap to enter the time directly .
- Page 131 Feature Description Repeat Select the days to repeat the alarm . Alarm sound Select a sound to play for the alarm . Vibrate Activate alarm vibration . Label Enter a name for the alarm . Add the current alarm to your Google Google Assistant Routine Assistant Routine .
- Page 132 Turn an alarm off Swipe left Swipe right to snooze to dismiss 1 . To turn an alarm off, drag the Alarm Clock to Dismiss 2 . To snooze the alarm for 10 minutes, drag the Alarm Clock to Snooze Delete an alarm 1 .
- Page 133 World clock The World clock lets you keep track of the current time in multiple cities around the globe . 1 . From the Home screen, swipe up to access Apps and tap Clock 2 . Tap Clock if not already selected . Tap to access the World clock screen .
- Page 134 Timer 1 . From the Home screen, swipe up to access Apps and tap Clock 2 . Tap Timer to access the Timer screen . 3 . Enter the amount of time into the Timer . 4 . Tap to begin timing . 5 .
- Page 135 Stopwatch 1 . From the Home screen, swipe up to access Apps, and tap Clock 2 . Tap Stopwatch to access the Stopwatch screen . 3 . Tap to begin the stopwatch . 4 . Tap to stop the stopwatch . •...
-
Page 136: Entertainment And Activities
Entertainment and activities The following topics provide an overview of your phone’s entertainment apps . YouTube View videos uploaded to YouTube and upload your own videos . View YouTube videos Note: You can use the YouTube app to view videos on YouTube even if you aren’t signed in to a YouTube account . - Page 137 3 . The video will play on your phone screen . Tap the screen to pause or resume play while watching . Post a video to YouTube You can post videos to your YouTube account from your phone . Before posting, you must set up a YouTube account and sign in on your phone .
-
Page 138: Settings
Settings The topics in this section will cover your phone’s settings and options . -
Page 139: Basic Settings
Basic settings From the Home screen, swipe up to access Apps and tap Settings access your phone’s Settings menu . You can also access the Settings menu from the Status bar . Swipe the Status bar down twice and tap Settings The table below outlines the Settings categories . - Page 140 Category Description Manage apps permissions, set your account Privacy activity and personal data, etc . Location View and manage apps using your location . Set a screen lock method, password settings, Security and manage fingerprints . Manage all your email, social networking, and Accounts picture and video sharing accounts .
-
Page 141: Network & Internet
Network & internet Manage network and connectivity settings . Wi-Fi Connect your device to a Wi-Fi network 1 . From the Home screen, swipe up to access Apps and tap Settings 2 . Tap Network & internet Slide to turn on/off 3 . - Page 142 4 . Tap the Wi-Fi network you want to connect to, enter the password (if applicable), and tap CONNECT . Your phone will be connected to the selected Wi-Fi network . Wi-Fi Password Scan Wi-Fi QR code • The password, for a household wireless LAN router, is sometimes found on a sticker on the router (WEP , WPA, KEY, etc .) or QR code .
- Page 143 Manually connect to a Wi-Fi network 1 . From the Home screen, swipe up to access Apps and tap Settings 2 . Tap Network & internet > Wi-Fi . 3 . Slide the Use Wi-Fi switch to the On position to turn it on . Add network .
-
Page 144: Wi-Fi Calling
Wi-Fi preferences Create and manage wireless access points . • Turn on Wi-Fi automatically: Wi-Fi will be turned on automatically when you are near high-quality saved networks, like your home network . • Open network notification: Receive notifications about open networks when Wi-Fi is turned on . -
Page 145: Mobile Network
Note: You must have an active Wi-Fi connection to send or receive calls and messages with Wi-Fi Calling . Mobile network 1 . From the Home screen, swipe up to access Apps and tap Settings 2 . Tap Network & internet >... -
Page 146: Hotspot & Tethering
• App data usage: View the mobile data usage of each app . • Data warning & limit: View the following data management options: • App data usage cycle: Set the date the data usage cycle resets . • Set data warning: Slide the switch to the On position to enable alerts when your mobile data usage reaches the amount set . - Page 147 • Security: Turn hotspot security on or off . • Hotspot password: Tap to set a hotspot password . • Turn off hotspot automatically: Slide the switch to the On position to turn off the hotspot automatically if no devices are connected . •...
-
Page 148: Airplane Mode
Bluetooth tethering Share your phone’s internet connection via Bluetooth . 1 . From the Home screen, swipe up to access Apps and tap Settings 2 . Tap Network & internet > Hotspot & tethering > Bluetooth tethering . 3 . Slide the Bluetooth tethering switch to the On position to enable Bluetooth tethering . -
Page 149: Private Dns
Edit and delete a VPN 1 . From the Home screen, swipe up to access Apps and tap Settings 2 . Tap Network & internet > Advanced > VPN . 3 . Tap next to a VPN . 4 . Edit the VPN and tap SAVE, or tap FORGET to delete the VPN . Connect to a VPN 1 . -
Page 150: Connected Devices
Connected devices Manage settings for connected devices . Connect your phone with a computer using a USB cable to transfer data, share network connectivity, or charge your phone . 1 . From the Home screen, swipe up to access Apps and tap Settings 2 . -
Page 151: Pair New Device
• Use USB for: • File Transfer: Select to transfer files between your phone and your computer . • USB tethering: Select to set the USB tethering mode . • MIDI: Select to set this device as MIDI . • PTP: Select to transfer PTP photos . •... - Page 152 Pair a Bluetooth device 1 . From the Home screen, swipe up to access Apps and tap Settings 2 . Tap Connected devices > Connection preferences > Bluetooth . Pair new device . 3 . Tap 4 . Select the device you want to connect with in the Available devices list and follow the prompts to connect .
-
Page 153: Android Beam
Search for other devices 1 . From the Home screen, swipe up to access Apps and tap Settings 2 . Tap Connected devices > Connection preferences > Bluetooth > Pair new device . Receive data via Bluetooth When a device attempts to send a file to your phone using Bluetooth, you will be prompted to accept or decline the request . -
Page 154: Cast
Cast Scan for nearby devices to connect to and set them up . A notification will appear when there are available devices to connect to . 1 . From the Home screen, swipe up to access Apps and tap Settings 2 . -
Page 155: Files Received Via Bluetooth
Files received via Bluetooth 1 . From the Home screen, swipe up to access Apps and tap Settings 2 . Tap Connected devices > Connection preferences > Files received via Bluetooth . 3 . Tap an item to open it . Chromebook 1 . -
Page 156: Apps & Notifications
Apps & notifications View current running applications and manage notifications, permissions, and more . 1 . From the Home screen, swipe up to access Apps and tap Settings 2 . Tap Apps & notifications Recently opened apps 1 . From the Home screen, swipe up to access Apps and tap Settings 2 . -
Page 157: Notifications
Notifications 1 . From the Home screen, swipe up to access Apps and tap Settings 2 . Tap Apps & notifications > Notifications . • See all from last 7 days: Tap to see which applications showed notifications in the last 7 days . •... -
Page 158: Screen Time
Screen time 1 . From the Home screen, swipe up to access Apps and tap Settings 2 . Tap Apps & notifications > Screen time . • You can tap Set timers for your apps to set daily timers for most apps . When the app timer ends, the app is paused for the rest of the day . -
Page 159: Battery
Battery Monitor your phone’s battery usage through the Battery settings menu . Check the battery consumption and percentage . 1 . From the Home screen, swipe up to access Apps and tap Settings 2 . Tap Battery... -
Page 160: Battery Consumption Notification
Battery consumption notification Monitor the amount of battery being used by apps . If battery usage increases too much, your phone will suggest actions you can take . 1 . From the Home screen, swipe up to access Apps and tap Settings 2 . -
Page 161: Battery Manager
• Set a schedule: Tap Based on percentage and drag the slider to the percentage you need . The Battery saver will turn on automatically when your phone reaches that battery percentage . Slide to adjust Battery Manager 1 . From the Home screen, swipe up to access Apps and tap Settings 2 . -
Page 162: Battery Percentage
Battery percentage 1 . From the Home screen, swipe up to access Apps and tap Settings 2 . Tap Battery > Battery percentage . 3 . Slide the switch to the On position to show the battery percentage in the Status bar . Last full charge View the time of the last full charge . -
Page 163: Display
Display Use the phone’s Display settings menu to adjust items such as wallpaper, brightness, screen timeout, and more . 1 . From the Home screen, swipe up to access Apps and tap Settings 2 . Tap Display Brightness level Tap to adjust the screen brightness level . Drag the slider to manually adjust the brightness level . -
Page 164: Night Light
Night Light Tap to set a Night Light schedule and intensity . You can also enable automatic Night Light until sunrise . Adaptive brightness Slide the switch to the On position to enable Adaptive brightness . When turned on, your phone will automatically adjust screen brightness based on the lighting conditions . -
Page 165: Display Size
Display size Drag the slider to adjust the display size . Screen saver Set the screen saver, adjust screen saver settings, and set the time to activate the screen saver . Lock screen display Manage what will show on the lock screen . -
Page 166: Sound
Sound The Sound settings menu lets you control your phone’s audio, from ringtones and alerts to tap tones and notifications . 1 . From the Home screen, swipe up to access Apps and tap Settings 2 . Tap Sound Media volume Drag the slider to adjust the media volume . Call volume Drag the slider to adjust the call volume . -
Page 167: Ring Volume
Ring volume Drag the slider to adjust the ring volume . Alarm volume Drag the slider to adjust the alarm volume . Vibrate for calls Slide the switch to the On position to activate vibration for calls . Do Not Disturb Tap to manage Do Not Disturb settings . -
Page 168: Other Sounds And Vibrations
Other sounds and vibrations • DTS Audio Processing: Enable or disable high resolution audio processing . • Dial pad tones: Enable or disable dial pad tones . • Screen locking sounds: Enable or disable screen locking sounds • Charging sound and vibration: Enable or disable the charging sound and vibration . -
Page 169: Storage
Storage The Storage settings menu allows you to manage internal storage on your phone and provides menu choices for an optional SD card (not included) . 1 . From the Home screen, swipe up to access Apps and tap Settings 2 . -
Page 170: Storage Manager
Storage manager Storage manager removes backed up photos and videos from your device . • Slide the Storage manager switch to the On position to enable the storage manager . SD card Tap SD card to view files stored on your SD card . •... -
Page 171: Privacy
Privacy The Privacy settings will help you to secure your device, protect your data, and keep your privacy . 1 . From the Home screen, swipe up to access Apps and tap Settings 2 . Tap Privacy... -
Page 172: Permission Manager
Permission manager Control permission for apps that use your camera, location, microphone, contacts, storage, etc . Show passwords Display characters briefly as you type passwords . Lock screen Choose to show or hide notification content on the lock screen . Autofill service from Google Autofill your information from your Google account . -
Page 173: Usage & Diagnostics
Usage & diagnostics Share data to help improve Android . 1 . From the Home screen, swipe up to access Apps and tap Settings 2 . Tap Privacy > Advanced > Usage & diagnostics . • Slide the switch to the On position to enable Usage &... -
Page 174: Location
Location The Location settings will help you to secure your device, protect your data, and keep your privacy . 1 . From the Home screen, swipe up to access Apps and tap Settings 2 . Tap Location 3 . Slide the use location switch to the On position to turn location services on . -
Page 175: Recent Location Requests
Recent location requests View a list of apps that have recently requested your location . App permission Tap to view which apps have permission to access location services . Wi-Fi and Bluetooth scanning • Wi-Fi scanning: Improve location accuracy by allowing system apps and services to detect Wi-Fi networks at any time . -
Page 176: Security
Security The Security settings will help you to secure your device, protect your data, and keep your privacy . 1 . From the Home screen, swipe up to access Apps and tap Settings 2 . Tap Security... -
Page 177: Google Play Protect
Google Play Protect Google will regularly check your device and prevent/warn you of potential harm . Only apps from Play Store will be checked . 1 . From the Home screen, swipe up to access Apps and tap Settings 2 . Tap Security >... -
Page 178: Screen Lock
2 . Tap Security > Security update . 3 . Tap Check for update to check for updates . Screen lock 1 . From the Home screen, swipe up to access Apps and tap Settings 2 . Tap Security > Screen lock . •... - Page 179 • PIN: Tap to set a PIN code as the screen unlock method . • Password: Tap to set a password as the screen unlock method . Important: To protect your phone and data from unauthorized access, it is recommended that you use the highest security level available (Password protection) .
-
Page 180: Fingerprint
Fingerprint In addition to unlocking your phone, you can also use your fingerprint to authorize purchases and app access . 1 . From the Home screen, swipe up to access Apps and tap Settings 2 . Tap Security > Fingerprint . Add a fingerprint 1 . -
Page 181: Smart Lock
3 . Enter your pattern, PIN, or password . 4 . Tap Next . Put your finger on the sensor on the back of your phone and lift after you feel a vibration . Keep pressing and lifting your finger to add the different parts of your fingerprint . -
Page 182: Device Admin Apps
2 . Tap Security > Smart Lock . • On-body detection: Tap and slide the switch to the On position to activate . Your device will now be kept unlocked while it is on you . • Trusted places: Tap to add a trusted location where the device can remain unlocked . -
Page 183: Encryption & Credentials
Encryption & credentials 1 . From the Home screen, swipe up to access Apps and tap Settings 2 . Tap Security > Advanced > Encryption & credentials . • Encrypt phone: Your phone is already encrypted . • Storage type: Your phone’s credential storage type is hardware-backed . •... -
Page 184: Accounts
Accounts Set up and manage all of your accounts, including your Google Account and other social networking accounts, through the Accounts settings menu . Add account 1 . From the Home screen, swipe up to access Apps and tap Settings 2 . -
Page 185: Accessibility
Accessibility The Accessibility settings menu allows you to manage accessibility-related apps . Accessibility services are special features to make the device easier to use for those with certain physical disabilities . 1 . From the Home screen, swipe up to access Apps and tap Settings 2 . -
Page 186: Volume Key Shortcut
Volume key shortcut 1 . From the Home screen, swipe up to access Apps and tap Settings 2 . Tap Accessibility > Volume key shortcut . 3 . Slide the switch to the On position to enable the Volume key shortcut . •... -
Page 187: Display
Display • Font size: Drag the slider to adjust the font size . • Display size: Drag the slider to make the items on your screen smaller or larger . • Dark theme: Enable the dark theme . • Magnification: Enable screen magnification . •... -
Page 188: Audio & On-Screen Text
• Time to take action (Accessibility timeout): Choose how long to show messages that ask you to take an action . • Vibration & haptic strength: Enable or disable ring, notification, and touch feedback vibration . Audio & on-screen text •... -
Page 189: Digital Wellbeing & Parental Controls
Digital Wellbeing & parental controls Your Digital Wellbeing tools Use app timers and other tools to keep track of screen time and unplug more easily . 1 . From the Home screen, swipe up to access Apps and tap Settings 2 . -
Page 190: Google
Google Configure your device’s Google settings . Available options depend on your Google account . 1 . From the Home screen, swipe up to access Apps and tap Settings 2 . Tap Google 3 . Select an option to customize your Google account settings . System Manage detailed settings for your phone, including language and input settings, battery and storage, date and time, etc . - Page 191 3 . View your languages . • When more than one language has been added, you can touch and hold the language, then drag it up to the first position to set as the default display language . • To add a language, tap Add a language, then select the language you want to add .
- Page 192 • Show virtual keyboard: Slide the switch to the On or Off position to enable or disable displaying a virtual keyboard while a physical keyboard is active . • Keyboard shortcuts helper: Tap to set keyboard shortcuts . Advanced • Spell checker: Slide the switch to the On or Off position to enable or disable the spell checker .
-
Page 193: Gestures
Gestures Jump to camera Open the Camera app from any screen by quickly pressing the Power key twice . Slide the switch to the On position to enable . System navigation • Gesture navigation: Tap to enable gesture navigation for the following . •... -
Page 194: Date & Time
Date & time 1 . From the Home screen, swipe up to access Apps and tap Settings 2 . Tap System > Date & time . • Use network-provided time: Tap to automatically use the time and date provided by a connected Wi-Fi network . Disable this function to manually enter the date and time . -
Page 195: Backup
Backup Your phone’s Backup settings let you back up your phone’s data and settings to Google servers before resetting your phone to the original factory settings . 1 . From the Home screen, swipe up to access Apps and tap Settings 2 . -
Page 196: Multiple Users
Multiple users You can share this device with other people by creating additional users . Each user has their own space, which they can customize with apps, wallpaper, and so on . Users can also adjust device settings like Wi-Fi that affect everyone . Edit your profile info 1 . - Page 197 Add a new user 1 . From the Home screen, swipe up to access Apps and tap Settings 2 . Tap System > Multiple users . 3 . Tap Add user > OK > SET UP NOW to set up a new user . Switch users 1 .
-
Page 198: About Phone
About phone Access important phone information, search for and apply updates, and view legal and safety information . 1 . From the Home screen, swipe up to access Apps and tap Settings 2 . Tap About phone • Device name: Tap to edit your phone’s display name . •... - Page 199 • Wi-Fi MAC address: View your Wi-Fi MAC address . • Bluetooth address: View your Bluetooth address . • Software version: View your software version . • Build number: View your build number . • Hardware version: View your hardware version .
-
Page 200: Getting Help
Getting help The topics in this section will cover troubleshooting tips and phone specifications . -
Page 201: For Assistance
For assistance Troubleshooting Check below for solutions to common problems you may experience . Problem: The phone freezes or operations are unstable . Solution: Restart the device . Press and hold the Power key, then tap Restart . Note: Data that was being edited will be erased when the device is restarted . Problem: The device starts freezing after installing a new app . - Page 202 Problem: The phone will not make calls, send messages, check email, or connect to the Internet . • Solution 1: The network signal may be too weak or you may be out of the service area . Return to an area with a strong network signal . •...
- Page 203 Problem: An app will not download or install . • Solution 1: Make sure the device has room for the app . Apps may not be installed with minimal free space on the phone or SD card . To check free storage space, see “Storage”...
-
Page 204: Specifications
Specifications The following tables list your phone’s and battery’s specifications . Phone specifications Specification Description Weight Approx . 175g Continuous talk time Up to 12 hours Continuous standby time Up to 730 hours Charging time Approx . 2 hours Dimensions (W x H x D) Approx . -
Page 205: Licenses
. Other trademarks and trade names are those of their respective owners . AT&T Radiant Max Smartphone Bluetooth Declaration ID D047694 ® The Wi-Fi Logo is a certification mark of the Wi-Fi Alliance . -
Page 206: Safety And Use
Safety and use The topics in this section will introduce how to use your mobile device safely . -
Page 207: Important Health Information And Safety Precautions
Please read before proceeding THE DEVICE IS NOT FULLY CHARGED WHEN YOU TAKE IT OUT OF THE BOX . DO NOT ATTEMPT TO REMOVE THE BATTERY PACK . Important health information and safety precautions When using this product, the safety precautions below must be taken to avoid possible legal liabilities and damages . -
Page 208: Safety Precautions For Power Supply Unit
Safety precautions for power supply unit Use the correct external power source A product should be operated only from the type of power source indicated on the electrical ratings label . If you are not sure of the type of power source required, consult your authorized service provider or local power company . - Page 209 Take extra precautions • Do not disassemble or open, crush, bend or deform, puncture or shred . • Do not short circuit a battery or allow metallic conductive objects to contact battery terminals . • Only use the USB cable provided with the phone or that bear the USB-IF logo or have completed the USB-IF compliance program .
- Page 210 • Avoid dropping the phone . If the phone is dropped, especially on a hard surface, and the user suspects damage, take it to a service center for inspection . • Improper battery use may result in a fire, explosion or other hazard . If the battery leaks: •...
- Page 211 Safety in aircraft Due to possible interference caused by this product to an aircraft’s navigation system and its communications network, using this device’s phone function on board an airplane is against the law in most countries . If you want to use this device when on board an aircraft, remember to turn off the RF on your phone by switching to Airplane Mode .
- Page 212 Road safety Full attention must be given to driving at all times in order to reduce the risk of an accident . Using a phone while driving (even with a hands-free kit) causes distraction and can lead to an accident . You must comply with local laws and regulations restricting the use of wireless devices while driving .
- Page 213 Non-ionizing radiation Your device has an internal antenna . This product should be operated in its normal-use position to ensure the radioactive performance and safety of the interference . As with other mobile radio transmitting equipment, users are advised that for satisfactory operation of the equipment and for the safety of personnel, it is recommended that no part of the human body be allowed to come too close to the antenna during operation of the equipment .
- Page 214 Faulty and damaged products • Do not attempt to disassemble the phone or its accessories . • Only qualified personnel must service or repair the phone or its accessories . General precautions You alone are responsible for how you use your phone and any consequences of its use .
-
Page 215: Protect Your Phone
Protect your phone • Always treat your phone and its accessories with care and keep them in a clean and dust-free place . • Do not expose your phone or its accessories to open flames or lit tobacco products . •... - Page 216 • The product has been dropped or damaged . • There are noticeable signs of overheating . • The product does not operate normally when you follow the operating instructions . Avoid hot areas The product should be placed away from heat sources such as radiators, heat registers, stoves, or any device producing heat .
- Page 217 Airbags Do not place a phone in the area over an airbag or in the airbag deployment area . Store the phone safely before driving your vehicle . Mounting accessories Do not use the product on an unstable table, cart, stand, tripod or bracket . Any mounting of the product should follow the manufacturer’s instructions and should use a mounting accessory recommended by the manufacturer .
- Page 218 Repetitive motion injuries To minimize the risk of RSI, when texting or playing games with your phone: • Do not grip the phone too tightly . • Press the buttons lightly . • Make use of the special features in the handset which minimize the number of buttons which have to be pressed, such as message templates and predictive text .
-
Page 219: Fcc Regulations
Regulatory agency identifications FCC Regulations This mobile phone complies with Part 15 of the FCC Rules . Operation is subject to the following two conditions: (1) This device may not cause harmful interference, and (2) this device must accept any interference received, including interference that may cause undesired operation . -
Page 220: Rf Exposure Information (Sar)
RF Exposure Information (SAR) This mobile phone meets the government’s requirements for exposure to radio waves . This phone is designed and manufactured not to exceed the emission limits for exposure to radio frequency (RF) energy set by the Federal Communications Commission of the U .S . -
Page 221: Hearing Aid Compatibility
RF exposure guidelines for use with an accessory that contains no metal and positions the handset a minimum of 1 .5 cm from the body . Use of other accessories may not ensure compliance with FCC RF exposure guidelines . If you do not use a body-worn accessory and are not holding the phone at the ear, position the handset a minimum of 1 .5 cm from your body when the phone is switched on . -
Page 222: Warranty
Warranty With this manufacturer’s warranty (hereinafter: the “Warranty”), Emblem Solutions (hereinafter: the “Manufacturer”) guarantees this product against any material, design and manufacturing defects . The duration of this Warranty is specified in article 1 below . This Warranty does not affect your statutory rights, which cannot be excluded or limited, in particular in relation to the applicable legislation on defective products . - Page 223 Implementation of the Warranty If your product is faulty under normal conditions of use and maintenance, in order to benefit from the present warranty, please contact the Returns Center at 1(800) 801-1101 for assistance . The customer support center will then provide you with instructions on how to return the product for support under warranty .
- Page 224 6 . Defects and damage due to the exposure of the product to humidity, extreme temperatures, corrosion, oxidation, or to any spillage of food or liquids, chemicals and generally any substance likely to alter the product . 7 . Any failure of embedded services and applications that have not been developed by Manufacturer and whose functioning is the exclusive responsibility of their designers .