Table of Contents
Advertisement
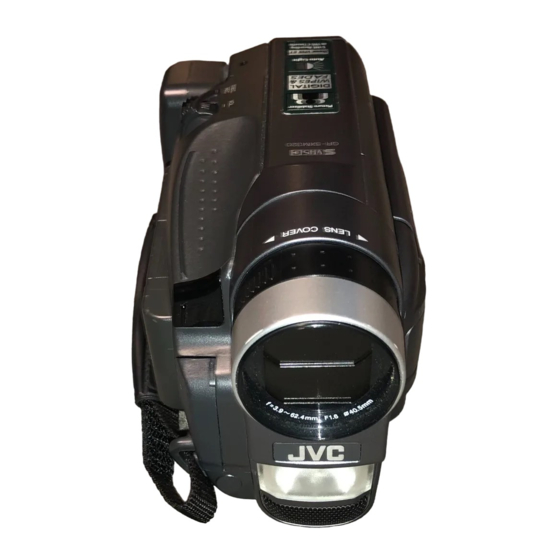
COMPACT
VHS CAMCORDER
GR-SXM320
GR-SX851
GR-AX750
INSTRUCTIONS
For Customer Use:
Enter below the Model No. and Serial No. which is located on the
bottom of cabinet. Retain this information for future reference.
Model No.
Serial No.
Downloaded from:
* GR-SXM320/SX851 only
https://www.usersmanualguide.com/
CONTENTS
Basic Recording .......................... 16
Basic Features ........................... 18
Advanced Features ...................... 21
Basic Playback ........................... 31
Features .................................. 32
Using The Cassette Adapter ........... 33
Connections ............................... 34
(GR-SXM320/SX851 only) 36 - 39
Animation And Time-Lapse ............. 37
Insert Editing ............................. 38
Audio Dubbing ........................... 39
Indications ................................ 44
LYT0465-001A
ENGLISH
2 - 5
6
7
7
8 - 15
16 - 30
31 - 35
40 - 41
42 - 45
46 - 47
48
50
51
52 - 53
55
EN
Advertisement
Table of Contents

Related Manuals for JVC GR-SXM320


Summary of Contents for JVC GR-SXM320
-
Page 1: Table Of Contents
Basic Playback ......31 Features ........32 Using The Cassette Adapter ... 33 Connections ....... 34 USING THE REMOTE CONTROL UNIT (GR-SXM320/SX851 only) 36 – 39 Animation And Time-Lapse ..... 37 Insert Editing ......38 Audio Dubbing ......39 TROUBLESHOOTING 40 – 41 INDEX 42 –... -
Page 2: Safety Precautions
Dear Customer, Thank you for purchasing the JVC Compact VHS camcorder. Before use, please read the safety information and precautions contained in the following pages to ensure safe use of this product. Using This Instruction Manual •All major sections and subsections are listed in the Table Of Contents on the cover. - Page 3 Ni-Cd batteries into the trash or the municipal waste stream, which may be illegal in your area. Please call 1-800-8-BATTERY™ for information on Ni-Cd battery recycling and disposal bans/restrictions in your area. JVC’s involvement in this program is part of our commitment to preserving our environment and conserving our natural resources.
- Page 4 IMPORTANT PRODUCT 5. Ventilation Slots and openings in the cabinet are provided for ventilation. To ensure reliable operation of the product SAFETY INSTRUCTIONS and to protect it from overheating, these openings must not be blocked or covered. • Do not block the openings by placing the product on a Electrical energy can perform many useful functions.
- Page 5 SERVICING 1. Accessories 1. Servicing To avoid personal injury: If your product is not operating correctly or exhibits a •Do not place this product on an unstable cart, marked change in performance and you are unable stand, tripod, bracket or table. It may fall, causing to restore normal operation by following the detailed serious injury to a child or adult, and serious procedure in its operating instructions, do not...
-
Page 6: Quick Operation Guide
Push in. PUSH Button EJECT Switch BATTERY RELEASE Using the battery pack Open the LCD monitor fully (GR-SXM320 Hook its end to the camcorder and push the only). battery pack in until it locks in place Slide EJECT to open the cassette holder. -
Page 7: Major Features
When a tape whose Erase Protection tab is in the position that allows recording is loaded in the camcorder, demonstration is not available. Cassettes marked can be used with this camcorder. * S-VHS recording is possible with GR-SXM320/SX851 only. Downloaded from: https://www.usersmanualguide.com/... -
Page 8: Getting Started
GETTING STARTED Power Battery pack BN-V11U, BN-V12U or BN-V20U This camcorder’s 3-way power supply system lets you Marks choose the most appropriate source of power. Do not use provided power supply units with other equipment. To AC outlet CHARGE CHARGING THE BATTERY PACK indicator Make sure you unplug the camcorder’s DC cord from the AC Power Adapter/Charger. - Page 9 • Zoom or Record-Standby mode is engaged repeatedly. It is impossible to charge the BN-V856U • The LCD monitor is used repeatedly (GR-SXM320 only). battery pack using the provided AC ● Before extended use, it is recommended that you prepare Power Adapter/Charger.
- Page 10 Loading/Unloading A Cassette Open the LCD monitor fully (GR-SXM320 only). Slide EJECT until the cassette holder opens. Do not use force to open. PUSH Button EJECT Switch Insert or remove a cassette.
- Page 11 Date/Time Settings Set the Power Switch to “PRO.”. The power lamp comes on. Press MENU. The Menu Screen appears. Rotate the Select Wheel to move the highlight bar to “NEXT” in Menu Screen 1 and press it to display Select Wheel Menu Screen 2.
- Page 12 GETTING STARTED (cont.) Recording Mode Setting Set depending on your preference. Set the Power Switch to “AUTO” or “PRO.”. Press SP/ EP for more than 1 second. “SP” (Standard Play) provides higher picture and sound quality and is better for dubbing, while “EP” (Extended Play) is more economical, providing three times the recording time.
- Page 13 Recording Format Setting (GR-SXM320/ SX851 only) Set the recording format according to the format of the tape used or type of recording you wish to perform. Set the Power Switch to “PRO.”. Press MENU. If a VHS cassette is loaded . . .
-
Page 14: Recording
— When tapes recorded in S-VHS or S-VHS ET mode are played back on a VCR equipped with the SQPB (S-VHS QUASI PLAYBACK) function, S-VHS picture quality is not available. — Tapes recorded in S-VHS ET mode cannot be played back on some VCRs, including some JVC VCRs (eg: HR-S6600U, HR-SC1000U, etc.). - Page 15 Grip Adjustment Power Zoom Lever Separate the Velcro strip. Recording Pass your right hand through the loop and grasp the Start/Stop Button grip. Adjust so that your thumb and fingers can easily operate the Recording Start/Stop Button and Power Zoom Lever. Refasten the Velcro strip. Viewfinder Adjustment Set the Power Switch to “CAMERA”...
-
Page 16: Basic Recording
Power Switch Make sure the LCD monitor is closed and locked Recording Start/Stop Button (GR-SXM320 only). Turn the LENS COVER Open/ Close Ring to open the lens cover. Set the Power Switch to “CAMERA” (“AUTO” or “PRO.”). The Tape remaining time... - Page 17 ● When the Power Switch is set to CAMERA and the LCD monitor is opened at an angle of 60 degrees or more, the LCD monitor switches on and the viewfinder switches off automatically to save power (GR-SXM320 only). ● The cassette holder cannot be opened unless a power supply is attached.
-
Page 18: Basic Features
RECORDING Basic Features Zooming FEATURE: Zoom in (T: Telephoto) PURPOSE: To produce the zoom in/out effect, or an instantaneous change in image magnification. Digital circuitry extends the maximum magnification offered by optical zoom. This system is called Digital Zoom out (W: Wide angle) Zoom. - Page 19 5 SEC. REC Button Quick Review FEATURE: PURPOSE: To check the end of the last recording. RETAKE OPERATION: (2/3) 1) Set the Power Switch to “CAMERA” (“AUTO” or Button “PRO.”). 2) Press 2 and release quickly during the Record– Standby mode. Tape is rewound for approx.
- Page 20 • While the “Sports” or “High Speed Shutter” mode It is recommended that you consult your pg. 22) is engaged, the light is likely to stay on. nearest JVC dealer for replacing the video • While the “Twilight” mode ( pg. 22) is engaged, light.
- Page 21 RECORDING Advanced Features Fade/Wipe Effects These effects let you make pro-style scene transitions. Fade- or wipe-in works at recording start, and fade- or EFFECT wipe-out works at recording end or when you enter Button Record–Standby mode. Set the Power Switch to “PRO.”. Press EFFECT repeatedly until the desired mode’s name and indication appear.
- Page 22 RECORDING Advanced Features (cont.) Program AE With Special Effects Set the Power Switch to “PRO.”. P.AE Button Press P.AE repeatedly until the desired mode’s name and indication appear. They are displayed for approx. 2 seconds, then the name disappears so that only the indication remains. The mode is activated.
- Page 23 Using Menus For Detailed Adjustment This camcorder is equipped with an easy-to-use, on-screen menu system that simplifies many of the more detailed camcorder settings. Set the Power Switch to “PRO.”. Menu access depends on the function you select. If you select the functions from the “Menu Screen Select Wheel Available Using The Select Wheel”...
- Page 24 Allows you to use the Digital Zoom. By digitally processing and magnifying images, zooming is possible from 16X (the optical zoom limit), to a maximum of 400X (GR-SXM320)/300X (GR-SX851/AX750) digital magnification. Digital Zoom is not available. Only optical zoom (maximum 16x magnification) can function.
- Page 25 S-VHS* Records in S-VHS on a VHS or S-VHS cassette ( pg. 13). (S-VHS ET*) (GR-SXM320/ Records in VHS on a VHS or S-VHS cassette ( pg. 13). SX851 only) Allows you to set the tape length depending on the tape used ( pg.
- Page 26 RECORDING Advanced Features (cont.) Date/Time Insert Set the Power Switch to “PRO.”. Allows you to display the date and time in the camcorder or on a connected color monitor, as Press the Select Wheel to display the Menu Screen. well as to record them manually or automatically.
- Page 27 Animation NOTES: Before performing the following steps, make You can shoot a series of pictures, each slightly different, sure that: of the same object for a brief period of time. ● The Power Switch is set to “PRO.”. ● The camcorder is in the Record-Standby Press MENU.
- Page 28 RECORDING Advanced Features (cont.) Exposure Control This feature automatically adjusts the iris for the best available picture quality, but you can override it and make the adjustment manually. Manual exposure adjustment is recommended in the following situations: • When shooting using reverse lighting or when the background is too bright.
- Page 29 Focusing Focus detection zone AUTO FOCUS The camcorder’s Full Range AF system offers continuous shooting ability from close-up to infinity. However, correct focus may not be obtainable in the situations listed below (in these cases use manual focusing): •When two subjects overlap in the same scene. •When illumination is low.* •When the subject has no contrast (difference in bright- NOTES:...
- Page 30 RECORDING Advanced Features (cont.) White Balance Adjustment Manual White Balance Operation A term that refers to the correctness of color Perform Manual White Balance when shooting under reproduction under various lighting. If the white various types of lighting. balance is correct, all other colors will be accurately Follow steps 1 through 4 of the white balance reproduced.
-
Page 31: Playback
34, 35). *GR-SXM320 only ● You can also view the playback picture on the LCD Fast-Forward (3) Button monitor with it flipped over and retracted (GR-SXM320 only). Play/Pause (4/6) Button ● If a blank portion on the tape is played back, the screen may become black. -
Page 32: Features
PLAYBACK Features Tracking: Eliminates noise bars that appear on-screen P.STABILIZER Button during playback. Factory-preset is Auto Tracking. To activate Manual Tracking: 1) Press P.AE and EFFECT simultaneously. “MT” appears. 2) Press P.AE or EFFECT as many times as necessary until EFFECT Button the noise bars disappear. -
Page 33: Using The Cassette Adapter
VHS VCR. Playback is possible with a VCR equipped with the S-VHS or SQPB (S-VHS Compact video cassette QUASI PLAYBACK) function (GR-SXM320/SX851 only). ● During special-effect playback (slow motion, still frame, etc.), the picture may vibrate or noise bars may appear on the screen. -
Page 34: Connections
These are some basic types of connections. When making connections, refer also to your VCR and TV instruction manuals. A. Connection to a TV or VCR equipped with an S-VIDEO IN and A/V input connectors (GR-SXM320/SX851 only) To Audio Audio cable... - Page 35 VCR using an finished. optional S-Video cable. This can improve the dubbed picture quality (GR-SXM320/SX851 only). ● To monitor the picture and sound from the camcorder without inserting a tape, set the camcorder’s Power Switch to “CAMERA” (“AUTO”...
-
Page 36: Using The Remote Control Unit (Gr-Sxm320/Sx851 Only)
USING THE REMOTE CONTROL UNIT (GR-SXM320/SX851 only) The Full-Function Remote Control Unit can operate this camcorder from a distance as well as the basic operations (Playback, Stop, Pause, Fast-Forward and Rewind) of your VCR. The RM-V700U remote control unit (optional) makes additional recording functions possible. -
Page 37: Animation And Time-Lapse
Animation and Time-Lapse FEATURE: Transmitted beam PURPOSE: effective area The remote control lets you set/release Interval Time and Recording Time without using the Menu Screen. OPERATION: Animation 1) Set Remote sensor Instead of performing steps 1 and 2 on pg. 27 (“Animation”), press REC TIME on the remote control. -
Page 38: Insert Editing
USING THE REMOTE CONTROL UNIT (GR-SXM320/SX851 ony) (cont.) Insert Editing You can record a new scene onto a previously recorded tape, replacing a section of the original recording with minimal picture distortion at the in- and out-points. The original audio remains unchanged. -
Page 39: Audio Dubbing
Audio Dubbing Display Audio dubbing You can record a new soundtrack on a prerecorded tape M – 0 : 0 5 : indicator (normal audio only). The sound is recorded from the built- in microphone. Perform steps 1, 2 and 3 of the Insert Editing procedure pg. -
Page 40: Troubleshooting
TROUBLESHOOTING If, after following the steps in the chart below, the problem still exists, please consult your JVC dealer. The camcorder is a microcomputer-controlled device. External noise and interference (from a TV, a radio, etc.) might prevent it from functioning properly. In such cases, first disconnect its power supply unit (battery pack, AC Power Adapter/Battery Charger, etc.) and clock battery;... - Page 41 ● Turn the camcorder’s power off, then disconnect the power source. After a few minutes, try turning the power on again. If the error number still appears in the viewfinder, consult your nearest JVC dealer. The image is out of focus. ● The diopter needs to be adjusted ( pg.
-
Page 42: Index
INDEX Controls, Connectors And Indicators 3 4 5 6 & Model with LCD monitor Model without LCD monitor Downloaded from: https://www.usersmanualguide.com/... - Page 43 •It is used to connect the camcorder to a device •Picture Stabilizer Button such as a personal computer. [P.STABILIZER] ........pg. 18 For further details consult your nearest JVC •Time Base Corrector Button ....pg. 32 dealer. •JLIP-controlled editing from camcorder to VCR Program AE Button [P.AE] .....
-
Page 44: Indications
• 5 Sec. Rec Mode Indicator ....pg. 19 Program AE with special effects is switched from Bright Level Indicator one mode to another by pressing P.AE., then only (GR-SXM320 only) ....... pg. 16 the indicator remains at Instant Title Display ......pg. 26 Fade/Wipe-Standby Indicator .. - Page 45 These 2 warnings appear alternately every 3 seconds if dirt is detected on the heads during recording. In this case, use an optional cleaning cassette. If the USE CLEANING warning remains after cleaning, consult your nearest JVC dealer. CASSETTE The error indications (E01 — E06) show what type of malfunction has occured.
-
Page 46: Cautions
C73 series type use an AC plug adapter, called a remains extremely hot for some time. “Siemens Plug”, as shown. •When operating, keep a distance of about 30 cm For this AC plug adapter, consult your nearest JVC (11-13/16" ft.) between the video light and people dealer. or object. - Page 47 Battery Packs Cassettes The battery packs are nickel-cadmium To properly use and store your cassettes, be sure to or nickel metal-hydride batteries. read the following cautions: Before using the supplied battery pack 1. During use . . . or an optional battery pack, be sure to ...
- Page 48 ... allow it to become wet. If malfunctioning occurs, stop using the unit ... drop the unit or strike it against hard objects. immediately and consult your local JVC dealer..subject it to shock or excessive vibration during transportation.
-
Page 49: Terms
TERMS AC Power Adapter/Charger ......pg. 8, 9 Manual Focus ..........pg. 29 Animation Recording ......pg. 27, 37 Menu Screen ......... pg. 23 – 25 Audio Dubbing ..........pg. 39 Auto Date Record ......... pg. 26 ND Effect Mode ..........pg. 22 Auto Focus ............ -
Page 50: User Maintenance
Re-attach the eyepiece and turn it clockwise. Remove. PUSH Button EJECT Switch *GR-SXM320 only. NOTES: ● Avoid using strong cleaning agents such as benzine or alcohol. ● Cleaning should be done only after the battery pack has been removed or other power units have been disconnected. -
Page 51: Specifications
40.5 mm Some accessories are not available in some areas. Viewfinder : Electronic viewfinder with Please consult your nearest JVC dealer for details on 0.55" color LCD (GR-SX851) accessories and their availability. Electronic viewfinder with 0.5" black/white CRT... -
Page 52: Español
BN-V856U (opcional) (330) (360) (310) (290) ( ) : Cuando está encendido el Cuando utilice GR-SXM320 Indicador de carga* foco. Cuando utilice GR-SX851 * Se incorpora un indicador Cuando utilice GR-AX750 de carga sobre la batería... - Page 53 GUIA PARA OPERACION RAPIDA Si la unidad comienza a funcionar mal, deje de usarla inmediatamente y consulte a su concesionario local de JVC. ALIMENTACION INSERCION DEL CASSETTE DE VIDEO Enganche. Empuje. Botón PUSH Conmutador EJECT BATTERY RELEASE Utilización de la batería Abra el monitor LCD completamente Enganche el lado extremo de la batería en la...
-
Page 54: For Servicing (Only In U.s.a.)
If you ship the product... Pack your JVC unit in the original carton or one of equivalent size and strength. Enclose, with the unit, a letter stating the problem or symptom that exists and also a copy of the receipt or bill of sale you received when you purchased your JVC unit. -
Page 55: Warranty (Only In U.s.a.)
WHAT WE WILL DO: If this product is found to be defective, JVC will repair or replace defective parts at no charge to the original owner. Such repair and replacement services shall be rendered by JVC during normal business hours at JVC authorized service centers. - Page 56 VICTOR COMPANY OF JAPAN, LIMITED Printed in Japan COPYRIGHT© 2000 VICTOR COMPANY OF JAPAN, LTD. 1299MKV Downloaded from: https://www.usersmanualguide.com/...
- Page 57 This file has been downloaded from: www.UsersManualGuide.com User Manual and User Guide for many equipments like mobile phones, photo cameras, monther board, monitors, software, tv, dvd, and othes.. Manual users, user manuals, user guide manual, owners manual, instruction manual, manual owner, manual owner's, manual guide, manual operation, operating manual, user's manual, operating instructions, manual operators, manual operator, manual product, documentation manual, user maintenance, brochure, user reference, pdf manual Downloaded from:...