Table of Contents

Related Manuals for Pioneer DMH-WT3800NEX


Summary of Contents for Pioneer DMH-WT3800NEX
- Page 1 DMH-WT3800NEX DMH-WT38NEX RDS AV RECEIVER ® Operation Manual Important (Serial number) The serial number is located on the bottom of this unit. For your own security and convenience, be sure to record this number on the enclosed warranty card.
-
Page 2: Table Of Contents
Contents Thank you for buying this Pioneer product. Please read through these instructions so you will know how to operate your model properly. After you have finished reading the instructions, keep this document in a safe place for future reference. - Page 3 ■ Metra Axxess ................81 ■ Settings..................84 Displaying the setting screen ........................84 System settings ..............................84 Theme settings..............................93 Audio settings..............................95 Video settings ..............................99 Communication settings ..........................100 ■ Favorite menu ................ 102 ■ Other functions..............103 ■...
-
Page 4: Precaution
• If you notice smoke, a strange noise or odor from this product, or any other abnormal signs on the LCD screen, turn off the power immediately and consult your dealer or the nearest authorized Pioneer Service Station. Using this product in this condition may result in permanent damage to the system. - Page 5 If your vehicle has a compliant backup camera that displays the backup view through the factory receiver, do not use the Pioneer receiver unless it is connected to and displays the same view as the factory backup camera. Connection to the factory backup camera will require an adaptor, sold separately.
- Page 6 • To prevent data loss and damage to the storage device, never remove it from this product while data is being transferred. • Pioneer cannot guarantee compatibility with all USB mass storage devices and assumes no responsibility for any loss of data on media players, iPhone, smartphone, or other devices while using this product.
- Page 7 • When taking this product to the dealer or authorized Pioneer Service Station, make sure to bring both the unit and LCD display. Visit our website Visit us at the following site: https://www.pioneerelectronics.com/PUSA/ https://www.pioneerelectronics.ca/POCEN/ Register your product. Receive updates on the latest products and technologies.
- Page 8 Meanings of symbols used in this manual This indicates to touch the appropriate soft key on the touch screen. This indicates to touch and hold the appropriate soft key on the touch screen. This indicates to swipe in the direction of the arrow on the touch screen. This indicates to drag in the direction of the arrow on the touch screen.
-
Page 9: Parts And Controls
Parts and controls Main unit Touch to display the home menu screen. Touch and hold to power off. To power back on, touch any button. NOTE When the home menu screen is displayed, touch to display the previously used AV source screen. Touch to activate the voice recognition mode such as Siri when the iPhone is connected to the unit via Bluetooth or USB. -
Page 10: Basic Operation
Basic operation Starting up the unit Start the engine to boot up the system. The [Select Program Language] screen appears. NOTE From the second time on, the screen shown will differ depending on the previous conditions. Select the language. Touch The [Speaker Mode Settings] screen appears. - Page 11 Using the touch panel You can operate this product by touching the keys on the screen directly with your fingers. NOTE To protect the LCD screen from damage, be sure to touch the screen only with your finger gently. Common touch panel keys : Returns to the previous screen.
- Page 12 Operating the time bar You can change the playback point by dragging the key. The playback time corresponding to the position of the key is displayed while dragging the key. Operating the on-screen keyboard Displays the characters that are entered. Enters the characters in the text box.
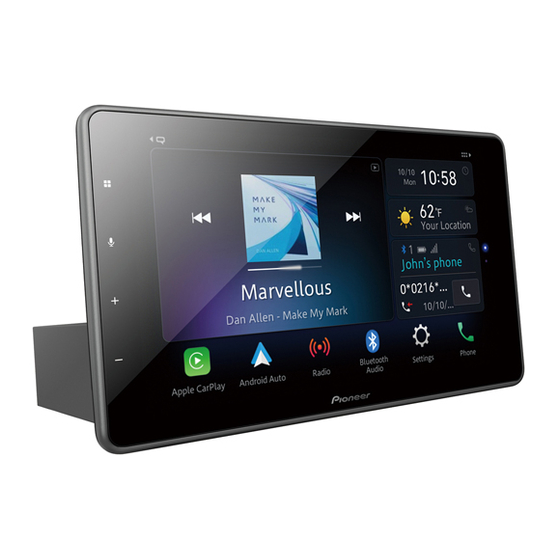
- Page 13 Home menu screen 12:48 6/10 Abcdefgh Your Location Abcdef - Abcdefghi Apple CarPlay Android Auto Phone Settings Widget (page 16) Touch to see the selected source/application. Customizing the widget (page 16) When you finish customizing, touch Favorite source/application area Touch to see the selected source/application. Customizing the home menu screen (page 13) The following items can be customized.
- Page 14 • The [Apple CarPlay] icon and the [Android Auto] icon cannot be removed from the favorite source/ application area. ▶Changing the home menu screen layout Touch and hold the favorite source/application area. Touch Select [Lower Dock Area] or [Upper Dock Area]. ▶Rearranging the icons in the favorite source/application area Touch and hold the favorite source/application area.
- Page 15 Favorite radio stations screen Favorites Abcdefgh Abcdefgh Abcdefgh XX Radio XX Radio XX Radio Favorite radio stations Touch to make changes to the selected radio station. List of favorite radio stations Touch to select the favorite radio station from the list screen (page 15). Updates the favorite radio stations.
- Page 16 Notification Notification displays the notifications from the connected iPhone or smartphone (Android) registered on CarAVAssist. NOTE To enable this function, establish a Bluetooth connection between this product and an iPhone or a smartphone with CarAVAssist installed (page 32). For iPhone, connection is made with Bluetooth Low Energy.
- Page 17 12:48 6/10 Abcdefgh Your Location Abcdef - Abcdefghi Abcdefg Abcdefghijk Abcdefg Widget area To rearrange the widgets, drag them to the desired locations. To remove a widget, drag the widget to Available source/application lists for the widgets Flick left/right to switch between widget lists. Adjusts the size of the widgets Touch a corner of the selected widget and drag it to adjust the size.
-
Page 18: Bluetooth
Bluetooth® Bluetooth connection Turn on the Bluetooth function on the device. Display the connected Bluetooth device list screen on the device. Touch then swipe left on the screen. Touch then Touch [Connection]. Touch The unit starts to search for available devices, then displays them in the device list. Touch in the list. - Page 19 • Two cellular phones can be connected to this product at the same time (page 19). Bluetooth settings Touch then swipe left on the screen. Touch then Touch [Bluetooth Settings]. CAUTION Never turn this product off and disconnect the device while the Bluetooth setting operation is being processed.
- Page 20 registered devices are already connected, you can connect the remaining third device to use the audio function only from the switch devices key on the audio source screen. • The icon for the cellular phone currently being used is displayed on the phone menu screen.
- Page 21 The following items are displayed. • Name of the current cellular phone • List number of the current cellular phone • Reception status of the current cellular phone • Battery status of the current cellular phone If you connect two cellular phones to this product at the same time, you can switch between the cellular phones using the switch devices key.
- Page 22 Using the preset dial lists ▶Registering a phone number You can easily store up to six phone numbers per device as presets. Touch then swipe left on the screen. Touch [Phone]. Touch On the [Phone Book] screen, touch the desired name to display the contact’s phone number.
- Page 23 NOTE When two phones are connected at the same time, if an incoming call is received on the second phone while you are talking on the first phone, the dial confirmation screen for the second phone will be displayed. Voice recognition function (for iPhone) By connecting your iPhone to this product, you can use the voice recognition function (Siri Eyes Free Mode) on this product.
- Page 24 Setting the private mode During a conversation, you can switch to private mode (talk directly on your cellular phone). Touch to turn private mode on or off. NOTES • If two cellular phones are connected to this product and the first phone is set to private mode, you can receive incoming calls on the second phone while maintaining the call in progress on the first phone.
- Page 25 • The registered name will appear if the phone number is already registered in the phone book. When multiple names are registered for the same phone number, the names are displayed in the same order as in the phone book. ▶The received call and dialed number histories •...
- Page 26 Touch [Bluetooth Audio]. The Bluetooth audio playback screen appears. Basic operation Track number indicator Switches between playback and pause. Skips files forward or backward. Sets a repeat play range. Switches between random and normal file playback order. Selects a file or folder from the list to playback. NOTE This function is available only when the AVRCP version of the Bluetooth device is 1.4 or higher.
-
Page 27: Wi-Fi
Wi-Fi® By connecting this unit to a Wi-Fi network, you can display the weather information on the unit and use Apple CarPlay or Android Auto via the wireless connection. See the following chapters for the procedure on how to use Apple CarPlay or Android Auto wirelessly. - Page 28 Touch [Hotspot setting]. Access point setting screen Available network SSIDs Touch to connect selected network. Automatic connection status Touch to switch between the network automatically or manually. Network connection priority Drag the network upward to prioritize the connection by touching Searches for existing networks.
- Page 29 Connects Wi-Fi network. Touch to select desired network then enter the password if required. If you want to connect to a network that is not listed on the screen, touch [Other (Add network)] and enter the required information. Searches again for existing networks. Wi-Fi settings Touch then swipe left on the screen.
- Page 30 Using the CarAVAssist app and wireless data from your connected mobile device, you can use the weather function that require an internet connection. – Compatible Pioneer receiver, compatible mobile device with CarAVAssist app, and wireless services data plan required. – NOTE: This function uses data from the mobile device that you connect to this unit.
- Page 31 Follow the message displayed on the connected iPhone or smartphone to make a Wi-Fi connection with this unit. Receiver Internet Access connection is successfully established. NOTE If Receiver Internet Access connection is not established, try the followings: • Activate the Wi-Fi setting on your mobile device. •...
-
Page 32: Caravassist
CarAVAssist CarAVAssist is an application that allows you to configure and transfer various settings of this unit. You can also update this unit's firmware wirelessly by using this application. Before you start WARNING Do not attempt to operate the application while driving. Make sure to pull off the road and park your vehicle in a safe location before attempting to use the controls on the application. - Page 33 For details, refer to “Help” in the CarAVAssist application. Transferring the data Connect your iPhone or smartphone with CarAVAssist installed on it to this product via Bluetooth (page 18). Touch then swipe left on the screen. Touch Open CarAVAssist on the connected iPhone or smartphone then touch the connection button on the top menu screen of the application.
- Page 34 NOTES • This product will reset automatically after the firmware update is completed if the update is successful. • If an error message appears on the screen, touch the display and perform the above steps again. - 34 -...
-
Page 35: Source/Application
Source/application Supported source and application You can play or use the following sources or application with this product. • Radio (page 38) • USB (page 41) The following sources or applications can be played back or used by connecting an auxiliary device. - Page 36 Source list Touch to see the selected source. Selecting [Power OFF] will turn off most of the functions on this unit. The [Power OFF] mode is released in the following cases: • Footage from the rear view camera is input when the vehicle is in reverse. •...
- Page 37 Settings (page 84) and Favorite menu (page 102) Selects or customizes the equalizer curve (page 97). Hands-free phoning (page 20) Selecting a source/an application NOTE [Source OFF] is only available for AV sources. Source/application selection screen Touch then swipe left on the screen. Touch the source/application icon.
-
Page 38: Radio
Radio Starting procedure Touch then swipe left on the screen. Touch [Radio]. The radio screen appears. Basic operation Radio screen 12 : 48 6/10 Radio Abcdefghi Abcdefghi Abcdefghi 999.9 Recalls the preset channel stored to a key from memory. Stores the current broadcast frequency to a key. Displays the preset channel list. - Page 39 Manual tuning Seek tuning or non stop seek tuning Releasing the key in a few seconds skips to the nearest station from the current frequency. Keep holding the key for long seconds to perform non stop seek tuning. Storing the strongest broadcast frequencies (BSM) The BSM (best stations memory) function automatically stores the six strongest broadcast frequencies under the preset channel keys [1] to [6].
- Page 40 12:48 6/10 XX.XMHz Your Location Apple CarPlay Android Auto Phone Settings Radio settings Touch then swipe left on the screen. Touch then The system setting screen appears. Touch [AV Source Settings]. Touch [Radio settings]. Menu Item Description [Local] Local seek tuning allows you to only tune into [Off] radio stations with sufficiently strong signals.
-
Page 41: Usb
Plugging/unplugging a USB storage device You can play audio, video, or still image files stored in a USB storage device. Plugging a USB storage device Pull out the plug from the USB port of the USB cable. Plug a USB storage device into the USB cable. NOTES •... - Page 42 Touch [USB]. Playback is performed in order of folder numbers. Folders are skipped if they contain no playable files. Basic operation You can set the screen size for the video and image files (page 103). Audio source Audio source screen 1 12 : 48 6/10 Abcdefghijk...
- Page 43 Displays the hidden function bar. You can also display the hidden function bar by flicking the bar from the right to the left. Switches the following media file types. [Music]: Audio files [Video]: Video files [Photo]: Image files Selects a file from the list. Touch a file on the list to playback.
- Page 44 ▶Selecting a file using Music Browse mode You can select files to play back using the category list if the files contain tag information. NOTE This function is available for the USB storage device only. Touch to create a database. Music Browse mode will be available after the database has been created.
- Page 45 Switches between playback and pause. Performs fast reverse or fast forward. Touch again to change the playback speed. Stops playback. Touch again to start from the beginning next time. Performs frame-by-frame playback. Performs slow-motion playback. Sets a repeat play range for all files/the current folder/the current file. Switches the audio language.
- Page 46 Hides the touch panel keys. To display the keys again, touch anywhere on the screen. Switches between playback and pause. Skips files forward or backward. Selects the previous folder or the next folder. Saves the current images as the wallpaper. Touch the following items to overwrite the image.
- Page 47 Selects a file from the list. Touch a file on the list to playback. Touching a folder on the list shows its contents. You can play a file on the list by touching it. - 47 -...
-
Page 48: Iphone
iPhone Connect your iPhone to this product to play music in your iPhone or listen to the radio on Apple Music. NOTE Before connecting your iPhone, make sure that Apple CarPlay is enabled (page 56). Connecting your iPhone When connecting an iPhone to this product, the settings are automatically configured according to the device to be connected. - Page 49 Basic operation Audio source 12 : 48 6/10 Apple CarPlay Abcdefghijk Abcdefghi Abcdef 9999/9999 9999’99” Displays the link search screen. Select a song from the list related to the song currently playing. If you touch the artwork, the list of songs in the album is displayed. NOTE This function is not available while playing Apple Music radio.
- Page 50 Selects a song from the list. Touch the category then the title of the list to playback of the selected list. TIPS • If you use English as the system language, the alphabet search function is available. Touch the initial search bar to use this function. •...
- Page 51 12 : 48 6/10 Apple CarPlay Abcdefghijk Abcdefghi Abcdef 9999’99” Switches between playback and pause. Displays the radio pop-up menu for Apple Music. • Touch [Play More Like This] to play back songs similar to the current song. • Touch [Play Less Like This] to set it not to play back the current song again. •...
-
Page 52: Smartphone (Android™)
Smartphone (Android™) Connect your smartphone to this product to play music in your smartphone. NOTE Before connecting your Android device, make sure that Android Auto is enabled (page 60). Connecting your Android device Wired connection Connect an Android Auto compatible device to this product via USB. Touch then swipe left on the screen. - Page 53 Basic operation 12 : 48 6/10 Android Auto Abcdefghijk Abcdefghi Abcdef Switches between playback and pause. Skips files forward or backward. - 53 -...
-
Page 54: Weblink
Using WebLink Important • Pioneer is not responsible for content or functions accessed via WebLink, which are the responsibility of the application and content providers. • Availability of non-Pioneer content and services, including apps and connectivity, may change or discontinue without notice. - Page 55 For smartphone (Android) users WebLink Supported Smartphone Operating Systems Android 7.0 or higher NOTES • [USB MTP] must be set to [Off] to use WebLink (page 85). • The video playback capability depends on the connected Android device. Unlock your smartphone and connect it to this product via USB. Touch then swipe left on the screen.
-
Page 56: Apple Carplay
• Apple CarPlay allows access to applications other than those listed that are subject to limitations while driving. • PIONEER IS NOT RESPONSIBLE AND DISCLAIMS LIABILITY FOR THIRD PARTY (NON-PIONEER) APPS AND CONTENT, INCLUDING WITHOUT LIMITATION ANY INACCURACIES OR INCOMPLETE INFORMATION. - Page 57 Touch then The communication setting screen appears. Touch [Driving Position]. Select the item. [Left] Select for a left-hand drive vehicle. [Right] Select for a right-hand drive vehicle. Starting procedure Wired connection Connect an Apple CarPlay compatible device to this unit via USB. Touch the Apple CarPlay icon.
- Page 58 The available devices appear on the list. Touch the desired device on the screen. If the device that you want to connect does not appear, touch on the screen again. You can also start Apple CarPlay with the desired device by opening the Bluetooth or Apple CarPlay setting menu while displaying the device search or device list screen.
- Page 59 Touch to mute. Touch again to cancel mute. NOTE The mute function is not available while the enhanced Siri function is used. Touch [+]/[-] to adjust the guidance volume. Displays the main sound volume. To adjust the main sound volume, touch VOL (+/-) on the unit or touch [+]/[-].
-
Page 60: Android Auto
• Android Auto allows access to applications other than those listed that are subject to limitations while driving. • PIONEER IS NOT RESPONSIBLE AND DISCLAIMS LIABILITY FOR THIRD PARTY (NON-PIONEER) APPS AND CONTENT, INCLUDING WITHOUT LIMITATION ANY INACCURACIES OR INCOMPLETE INFORMATION. - Page 61 Setting the driving position To achieve optimum usability of Android Auto, set the driving position setting correctly according to the vehicle. The setting will be applied the next time an Android Auto compatible device is connected to this product. Touch then swipe left on the screen.
- Page 62 The available devices appear on the list. Touch the desired device on the screen. If the device that you want to connect does not appear, touch on the screen again. Touch [Yes] to pair with the device. Perform the pairing operation by operating the device. The unit configures the connection then starts the application.
- Page 63 NOTE The volume menu is displayed for four seconds. If the menu disappears, touch VOL (+/-) again. The menu reappears. Setting the auto-launch function If this function is set to on, the Android Auto screen is displayed automatically when an Android Auto compatible device is connected to this unit.
-
Page 64: Weather
Weather Display the current temperature and daily or hourly forecast in your current location. The weather function uses a location service to determine your current location. Using weather Important • To use the weather function, you need to connect this unit to the Internet via a Wi-Fi network (page 27). •... -
Page 65: Siriusxm® Satellite Radio
SiriusXM® Satellite Radio Only SiriusXM® brings you more of what you love to listen to, all in one place. Get over 140 channels, including commercial-free music plus the best sports, news, talk, comedy, and entertainment. Welcome to the world of satellite radio. A SiriusXM Connect Vehicle Tuner and Subscription are required. - Page 66 Listening to SiriusXM Touch then swipe left on the screen. Touch [SiriusXM]. Basic operation TIPS • On the Featured Favorites™ Band, the current broadcast frequency cannot be stored to a key (page 70). • If fewer than two music channels are stored as presets, you cannot use the TuneMix function. •...
- Page 67 Switches TuneMix to on or off. tune You can use TuneMix from each of the music channels stored as presets on the current band. NOTES • When fewer than two music channels are stored as presets, you cannot use TuneMix. •...
- Page 68 Selects a channel from the list. Select the category name or the list of all channels then touch the desired channel. To switch the display list, touch TIPS • The displayed list switches in the following order. Channel Name—Artist Name—Song Title—Content Info •...
- Page 69 NOTES • When fewer than two music channels are stored as presets, you cannot use TuneScan. • TuneScan may take a few minutes to become available after the product is turned on or the preset band is changed. tune Touch to display the following display.
- Page 70 Using Featured Favorites Band Featured Favorites are groups of channels that are created by the SiriusXM Programming department allowing you to discover new channels. Featured Favorite channels are dynamic and can change often, allowing you to discover new channels. For details, see [Featured Favorites] (page 71) and [Featured Band Update Message] (page 71) in SiriusXM settings.
- Page 71 Menu Item Description [Parental Control] Enter the current passcode then touch to set this function (the default passcode is 0000). • To edit the passcode, touch [Edit Code] then touch followed by entering the new passcode. • To lock the channel, touch the appropriate channel. appears and the channel is locked.
- Page 72 Menu Item Description [SiriusXM Reset] Set to restore to the default SiriusXM settings by touching [Restore]. CAUTION Do not turn off the engine while restoring the settings. NOTE The source is turned off before the process starts. - 72 -...
-
Page 73: Aux
You can display the video image output by the device connected to video input. CAUTION For safety reasons, video images cannot be viewed while your vehicle is in motion. To view video images, stop in a safe place and apply the parking brake. NOTE A Mini-jack AV cable (sold separately) is required for connection. - Page 74 Hides the touch panel keys. To display the keys again, touch anywhere on the screen. You can set the screen size for the video image (page 103). Switches between the video input and audio input. - 74 -...
-
Page 75: External Component
You can display the video image output using the device connected to the back camera input or 2nd camera input.* For details, refer to the Quick start guide. * The 2nd camera input is available only for DMH-WT3800NEX. Starting procedure Touch then swipe left on the screen. -
Page 76: Idatalink
iDatalink® Using iDatalink You can access the satellite radio source provided for the vehicle. The vehicle information and many OEM systems such as steering wheel controls, warning chimes, driver safety systems, and etc. can be displayed on this product by connecting the optional iDatalink adaptor. - Page 77 Access the following website and follow the on-screen instructions to configure the desired firmware. https://www.idatalinkmaestro.com/en NOTE When the serial number input is required, input the device number of this product. Install the vehicle/head unit-specific firmware on your iDatalink Maestro module. Connect this product to the iDatalink Maestro and install this product to the vehicle.
- Page 78 • Operating via USB/iPhone (page 41) (page 48) • Operating via SiriusXM (page 65) • Operating via Bluetooth audio (page 25) • Operating via Hands-free phone (page 20) Using the functions on [Car Features] You can check and use the following screens after selecting [Car Features] in the starting procedure.
- Page 79 Climate screen Parking Assist screen - 79 -...
- Page 80 Speed Radar Detector screen Displaying obstacle detection information CAUTION This function is intended solely to assist the driver’s vision. It does not detect all dangers and obstacles and is not a substitute for your attentiveness, judgement, and care while parking your vehicle. NOTE This function is only available for vehicles equipped with a parking sensor system.
-
Page 81: Metra Axxess
Metra Axxess Using Metra Access the vehicle information and many of the OEM systems such as climate control, driver safety systems, etc. and display them on this product by replacing the Metra parts kit with interface conversion. NOTE Since the type of module varies depending on the vehicle model, search for your vehicle via the following URL to determine which features are available for each module. - Page 82 Displays the Vehicle Information screen. Displays the Climate screen. Displays the Radio ID screen. Vehicle information screen Climate screen Climate Front Rear Outside Temp: 70° F Auto Sync Dual A/C MaxA/C - 82 -...
- Page 83 Radio ID screen - 83 -...
-
Page 84: Settings
Settings You can adjust various settings in the main menu. Displaying the setting screen Touch then swipe left on the screen. Touch Touch one of the following categories, then select the options. System settings (page 84) Theme settings (page 93) Audio settings (page 95) Video settings (page 99) Communication settings (page 100) - Page 85 [Normal] [Reverse] [AUX Input] Set to [On] for AUX source (page 73). [On] [Off] * DMH-WT3800NEX [Camera settings] A separately sold rear view camera (e.g. ND-BC8) is required for utilizing the rear view camera function. (For details, consult your dealer.) ▶Rear view camera...
- Page 86 CAUTION Pioneer recommends the use of a camera which outputs mirror reversed images, otherwise the screen image may appear reversed. • Immediately verify whether the display changes to the rear view camera image when the shift lever is moved to REVERSE (R) from another position.
- Page 87 Menu Item Description [Parking Assist Guide Adjusting the guidelines by dragging or touching Adjust]* on the screen. Touch [Default] to reset the settings. CAUTION • When adjusting the guidelines, park the vehicle in a safe place and apply the parking brake; this setting is available only when the vehicle is parked with the parking brake applied.
- Page 88 [System Language] Menu Item Description [System Language] Select the system language. NOTES • If the embedded language and the selected language setting are not the same, the text information may not display properly. • Some characters may not be displayed properly. [Restore Settings] Menu Item Description...
- Page 89 [Dimmer Settings] NOTE This setting is available only when you stop your vehicle in a safe place and apply the parking brake. Menu Item Description [Dimmer Trigger] Setting the dimmer brightness. When [Dimmer] is selected in the [Appearance] setting (page 95), the Light mode or the Dark mode is switched automatically according to the following settings.
- Page 90 CAUTION For safety reasons, you cannot use some of these functions while your vehicle is in motion. To enable these functions, you must stop in a safe place and apply the parking brake. To adjust following menu, touch to adjust. Menu Item Description [Brightness]...
- Page 91 Menu Item Description [Firmware Update] Update to the latest version of the firmware by using a USB storage device or wireless connection. To update the firmware via wireless connection, CarAVAssist is required. For details on performing the wireless update, refer to Updating the firmware wirelessly (page 33).
- Page 92 Menu Item Description [3D Calibration Status] Check the sensor learning status, such as the degree of learning. You can also check the current sensor values and the total number of speed pulses. To delete the learned results stored in the sensor, follow the below instructions.
-
Page 93: Theme Settings
[OEM Settings] Menu Item Description [OEM Settings] (page 80). [OEM Volume Settings] Menu Item Description [OEM Volume Settings] (page 80). [Terms of Use / Privacy] Menu Item Description [Terms of Use / Privacy] Select to accept or withdraw from the Internet Communication Service the Terms of Use and Privacy Policy. - Page 94 Menu Item Description Preset Display Select the desired preset background display. When the preset background display image with the icon (for the AV operation screen only) is selected, the color changes to match the color of the artwork image. (custom)*1 Displays the background display image imported from the USB storage device.
-
Page 95: Audio Settings
Menu Item Description [Appearance] Switches the screen appearance to Light mode or Dark mode. (This setting is also applied to the screen of Apple CarPlay or Android Auto.) [Dimmer] Switches to the Light mode or the Dark mode automatically according to the [Dimmer Settings] (page 89). - Page 96 Menu Item Description [Loudness] Compensates for deficiencies in the low-frequency and [Off] [Low] [Mid] [High] high-frequency ranges at low volume. [Source Level Adjuster] Adjust the volume level of each source to prevent radical [-4] to [+4] changes in volume when switching between sources other than FM.
- Page 97 Menu Item Description [Balance] Touch to adjust the left/right balance. NOTE This function is available when [Network Mode] is selected as the speaker mode, or when [Standard Mode] is selected as the speaker mode and [Subwoofer] is selected in [Rear Speaker Output]. [Time Alignment] Select or customize the time alignment settings to reflect [On] [Off]...
- Page 98 Menu Item Description [Rear Speaker Output] Select the rear speaker output. [Rear] [Subwoofer] NOTE This function is available when [Standard Mode] is selected as the speaker mode and the source is off. [Mute Level] If an interruption caused by an audio signal occurs while Apple CarPlay or Android Auto is being used, select mute or attenuate the volume of the AV source and iPhone/ smartphone application.
-
Page 99: Video Settings
Touch then Touch [Crossover] or [Subwoofer Settings]. Touch to switch the speaker. Drag the graph line to set the cutoff position. Drag the lowest point of the graph to set the cutoff slope. The following items can also be set. Switches the subwoofer phase between normal and reverse position. -
Page 100: Communication Settings
Description [RSE] Select the suitable video signal setting when you connect [Auto] [PAL] [NTSC] this product to a rear monitor via iDatalink. [PAL-M] [PAL-N] [SECAM] * DMH-WT3800NEX Communication settings [Connection] Menu Item Description [Connection] Displaying a list of mobile devices that have been connected via Bluetooth or USB. - Page 101 [Select Wi-Fi] Menu Item Description [Select Wi-Fi] Select the following Wi-Fi mode. [Smartphone] Enable if you want to use this unit as an access point of the infrastructure mode network to connect your device to the unit wirelessly. [Hotspot] Enable if you want to connect this unit to a Wi-Fi network. [Off] Disable the Wi-Fi function.
-
Page 102: Favorite Menu
Favorite menu Registering your favorite menu items in shortcuts allows you to quickly jump to the registered menu screen by a simple touch on the [Favorites] screen. NOTE Up to 12 menu items can be registered in the favorite menu. Creating a shortcut Touch then swipe left on the screen. -
Page 103: Other Functions
Other functions Setting the clock display You can set the time format, time zone, daylight saving, and the date format. However, the time and date are automatically adjusted by the GPS antenna and cannot be adjusted by the user. Touch the current time on the screen. Set the following items in the settings. - Page 104 Touch the desired mode. [Full] Displays images across the entire screen. NOTE Some images may not be displayed across the entire screen. [Zoom] Displays the images enlarging them vertically. [Normal] Displays images without changing the ratio. [Trimming] An image is displayed across the entire screen with the horizontal-to-vertical ratio left as is.
-
Page 105: Appendix
– Correct the settings. solution to your problem cannot be found here, contact your dealer or the nearest The audio or video skips. authorized Pioneer service facility. This product is not firmly secured. – Secure this product firmly. Common problems No sounds are produced. - Page 106 – Update the iPhone software version. Back image displayed when vehicle is not – Reconnect the iPhone via the Wi-Fi in reverse. connection. The camera polarity is not set properly Cables are not connected correctly. in the Camera settings menu. –...
- Page 107 An error has occurred. the engine is switched off/on, contact – Park your vehicle in a safe place, and your dealer or an authorized Pioneer then turn off the ignition switch (ACC Service Station for assistance. OFF). Subsequently, turn the ignition Product overheat.
- Page 108 this channel. In Canada, visit No Signal www.siriusxm.ca or call 1-888-539- The SiriusXM Connect Vehicle Tuner is 7474. having difficulty receiving the SiriusXM satellite signal. Channel Locked Please Enter the Lock – Verify that your vehicle is outdoors Code with a clear view of the southern sky.
- Page 109 – Follow the USB storage device – Check that the USB connector or USB instructions to disable security. cable is not caught in something or damaged. Skipped The connected USB storage device The connected USB storage device consumes more than maximum contains DRM protected files.
- Page 110 Quick start contact your dealer or an authorized guide. Pioneer Service Station. Please attach the GPS antenna and the Bluetooth pairing failed. The Bluetooth pairing failed for some speed sensor in order to use Apple CarPlay over Wireless.
- Page 111 • There may be a slight delay when starting Detailed information playback of audio files encoded with image data. for playable media • Some USB storage devices connected to this product may generate noise on the radio. Compatibility • Do not connect anything other than the USB storage device.
- Page 112 USB storage device QUANTIZATION BIT RATE 8 bit/16 bit/24 bit/32 bit (int CODEC FORMAT MP3, WMA, only) WAV, AAC, FLAC, DSD, AVI, AAC compatibility MPEG-PS, • This product plays back AAC files MPEG-TS, MP4, encoded by iTunes. 3GP, MKV, MOV, ASF, FLV, SAMPLING FREQUENCY 8 kHz to 48 kHz TRANSMISSION RATE...
- Page 113 Video files compatibility Maximum resolution 720 × 576 • Files may not be played back properly Maximum frame rate 30 fps depending on the environment in which .mp4 the file was created or on the contents of the file. Compatible video codec MPEG4, H.264, •...
- Page 114 Laboratories Licensing Corporation. The Bluetooth® word mark and logos are registered trademarks owned by Bluetooth SIG, Inc. and any use of such marks by Pioneer Corporation is under license. Other trademarks and trade names are those of their respective owners.
- Page 115 Copyright © 2011-2013 Xiph.Org DivX Foundation Redistribution and use in source and binary forms, with or without modification, are permitted provided that the following conditions are met: – Redistributions of source code must retain the above copyright notice, this list DivX®...
- Page 116 Apple, the Apple logo, iPhone, Siri, and Lightning are trademarks of Apple Inc., • Pioneer accepts no responsibility for data registered in the U.S. and other lost from an iPhone, even if that data is countries.
- Page 117 • iPhone 12 product: • iPhone 12 mini • Latest version of the Pioneer compatible • iPhone SE (2nd generation) connected content application(s) for the • iPhone 11 Pro Max smartphone, available from the service •...
- Page 118 Content application(s) or service by its provider. Remember that use of this system for • Pioneer is not liable for any issues that commercial or public viewing purposes may arise from incorrect or flawed app- may constitute an infringement on the based content.
- Page 119 Heat visible. In that case, please consult your from the heater may break the LCD dealer or the nearest authorized Pioneer screen, and cool air from the cooler may Service Station. cause moisture to form inside this product, resulting in possible damage.
- Page 120 Body: Continuous power output: 178 mm × 50 mm × 153 mm (7 in. × 2 22 W × 4 (50 Hz to 15 kHz, 5 %THD, 4 Ω in. × 6 in.) LOAD, Both Channels Driven) Nose: Load impedance: 170 mm ×...
- Page 121 Frequency: AAC decoding format: 25 Hz/31.5 Hz/40 Hz/50 Hz/63 Hz/80 MPEG-4 AAC (iTunes encoded only) (Ver. Hz/100 Hz/125 Hz/160 Hz/200 Hz/250 12.5 and earlier) FLAC decoding format (MSC Mode only): Slope: Ver. 1.3.0 -6 dB/oct, -12 dB/oct, -18 dB/oct, -24 WAV signal format (MSC Mode only): dB/oct Linear PCM...
- Page 122 Bluetooth Wi-Fi Version: Version: Bluetooth 5.2 certified IEEE 802.11 b/g/n (2.4 GHz) Output power: IEEE 802.11 a/n/ac (5 GHz) +4 dBm Max. (Power class 2) Frequency channel: Bluetooth Low Energy output power: 1 to 11 ch (2.4 GHz) +5 dBm Max. 149, 151, 155 ch (5 GHz) Frequency band(s): Security:...
- Page 123 CTA2006 Specifications Power output: < = 14 W RMS × 4 Channels (4 Ω and THD+N) S/N ratio: 90 dB (IHF-A) (reference: 1 W into 4 Ω) NOTE Specifications and design are subject to possible modifications without notice due to improvements.
- Page 124 © 2022 PIONEER CORPORATION <OPM_DMHWT3800NEXUC_EN_A> UC...