Table of Contents
Advertisement
TABLE OF CONTENTS
About this guide ................................................. 2
Product overview ................................................ 3
Getting started ................................................... 7
Batteries ......................................................... 7
AC power adapter .......................................... 7
Change settings ............................................. 7
Clock ................................................................... 8
Alarm ................................................................. 10
Temperature ..................................................... 11
Backlight ........................................................... 11
Projector ........................................................... 11
Reset system .................................................... 12
Safety and care ................................................ 13
Warnings ........................................................... 13
Additional resources ........................................ 14
Troubleshooting ................................................ 15
Specifications ................................................... 16
1
Advertisement
Table of Contents

Summary of Contents for Oregon Scientific Silverstone FAP-101
-
Page 1: Table Of Contents
TABLE OF CONTENTS About this guide ... 2 Product overview ... 3 Getting started ... 7 Batteries ... 7 AC power adapter ... 7 Change settings ... 7 Clock ... 8 Alarm ... 10 Temperature ... 11 Backlight ... 11 Projector ... -
Page 2: About This Guide
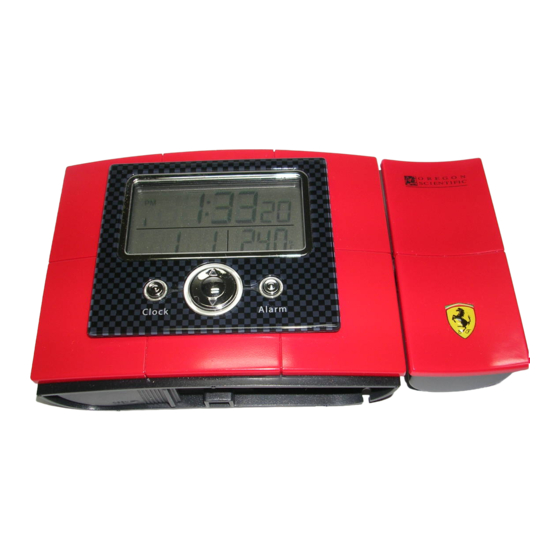
ABOUT THIS GUIDE Congratulations on your selection of the Oregon Scientific Silverstone Radio-Controlled Projection Clock with Indoor Temperature (FAP-101). This powerful device bundles time keeping, alarm, projection, and indoor temperature measurement features. Keep this manual handy as you use your new product. -
Page 3: Product Overview
DESCRIPTIONS PRODUCT OVERVIEW 1. Snooze / Light button ( 10, 11, 12) TOP VIEW 2. Projection lens (... - Page 4 LCD DISPLAY DESCRIPTIONS 1. Clock ( 2. RF Reception Signal ( 3. Date / Alarm ( 9, 10) 4. Alarm Type ( 5. Temperature ( 6. Low battery icon (...
- Page 5 FRONT VIEW BUTTON DESCRIPTIONS 1. Clock – set time / date or view seconds / day of week ( 7, 9, 10) Up / Down – increase / decrease setting or activate / deactivate auto-synchronization 7, 9) 3. Alarm – set / activate / deactivate alarm 4.
- Page 6 BACK VIEW DESCRIPTIONS 1. Projector focus knob ( 2. 180° rotation (flip image) button ( 3. Image rotation button ( 4. Radio signal format switch ( 5. Reset button ( 6. Projector switch ( 7. °C/ °F switch ( power adapter battery compartment not shown.
-
Page 7: Getting Started
GETTING STARTED BATTERIES Batteries are supplied with this product. Replace them whenever the low battery signal ( battery cover is located on the bottom of the unit. Slide to open. Be sure to match the correct polarity, as shown in the battery compartment. After you change the batteries, press the RESET button with the point of a blunt object (such as a ball point pen). -
Page 8: Clock
DOWN to change each setting. Press and hold to enter fast-setting mode. Press CLOCK or ALARM to switch between settings. CLOCK This product can automatically synchronize the date and time with official time-keeping organizations in Frankfurt (Germany) and Rugby (England). When the unit is within 1500 km (932 miles) of a RF signal, the reception icon will blink during reception. - Page 9 For best results, place the unit away from metal or electrical objects, and near a window with a clear view to the sky. TO DISABLE OR ENABLE AUTO- SYNCHRONIZATION Press DOWN for 2 seconds to disable the auto- synchronization. The unit will not respond to radio signals until you reactivate the synchronization.
-
Page 10: Alarm
The language options are (E) English, (F) French, (D) German, (I) Italian, and (S) Spanish. VIEW DAY OF WEEK OR SECONDS Press CLOCK. ALARM When activated, the Beep Alarm starts quietly, then gradually becomes louder until it crescendos at 1 minute. -
Page 11: Temperature
TO TURN THE ALARM OFF OR ON Press CLOCK, UP, or DOWN. To turn the alarm off completely (deactivate it for the next day), press DOWN when the alarm time is displayed. Press UP to activate the alarm again. TEMPERATURE This product measures current indoor temperature. -
Page 12: Reset System
PROJECT THE TIME In a darkened room, press SNOOZE/LIGHT to display the time for 5 seconds. MOVE IMAGE Adjust the projector arm. FLIP IMAGE Press the 180° Rotation button while the projector is on. ROTATE IMAGE The ROTATION knob is located on the back of the projector. -
Page 13: Safety And Care
batteries, or whenever the product is not performing as expected (e.g., unable to establish radio frequency link with automatic clock). This will return all settings to default value, and you will lose any stored information (alarm and clock settings). SAFETY AND CARE Wash the unit with a slightly damp cloth and mild detergent. -
Page 14: Additional Resources
• Do not use rechargeable batteries with this product. • Remove the batteries if storing this product for a long period of time. • Do not scratch the LCD display. • Do not make any changes or modifications to this product. Unauthorized changes may void your right to use the product. -
Page 15: Troubleshooting
TROUBLESHOOTING Check here before contacting our customer service department. Problem Symptom Remedy Temp Shows “LLL” Temperature is out of or “HHH” range. Calendar Strange day Change language ( of week Problem Symptom Clock Cannot auto-synch Cannot change clock Remedy Adjust batteries, press RESET ( 12), and manually activate auto-... -
Page 16: Specifications
SPECIFICATIONS Main unit dimensions L x W x H 168 x 42 x 93 mm (6.61 x 1.65 x 3.66 inches) Weight 272 grams (0.6 lbs) with batteries Temperature Unit °C or °F Range -5 °C to 50 °C (23 °F to 122 °F) Resolution 0.1 °C (0.2 °F) Radio-controlled clock... - Page 17 (appendix II) and carries the respective CE marking. VS-Villingen / Germany August 2001 Gerhard Preis EC Representative of manufacturer N / A ETS 300 683:1997 EN 60950:1997 COUNTRIES RTTE APPROVAL COMPLIED All EC ountries, Switzerland, CH and Norway © 2003 Oregon Scientific. All rights reserved.
- Page 18 Radio-Controlled Projection Clock with Indoor Temperature (Model #: FAP-101 Silverstone) User Manual...


