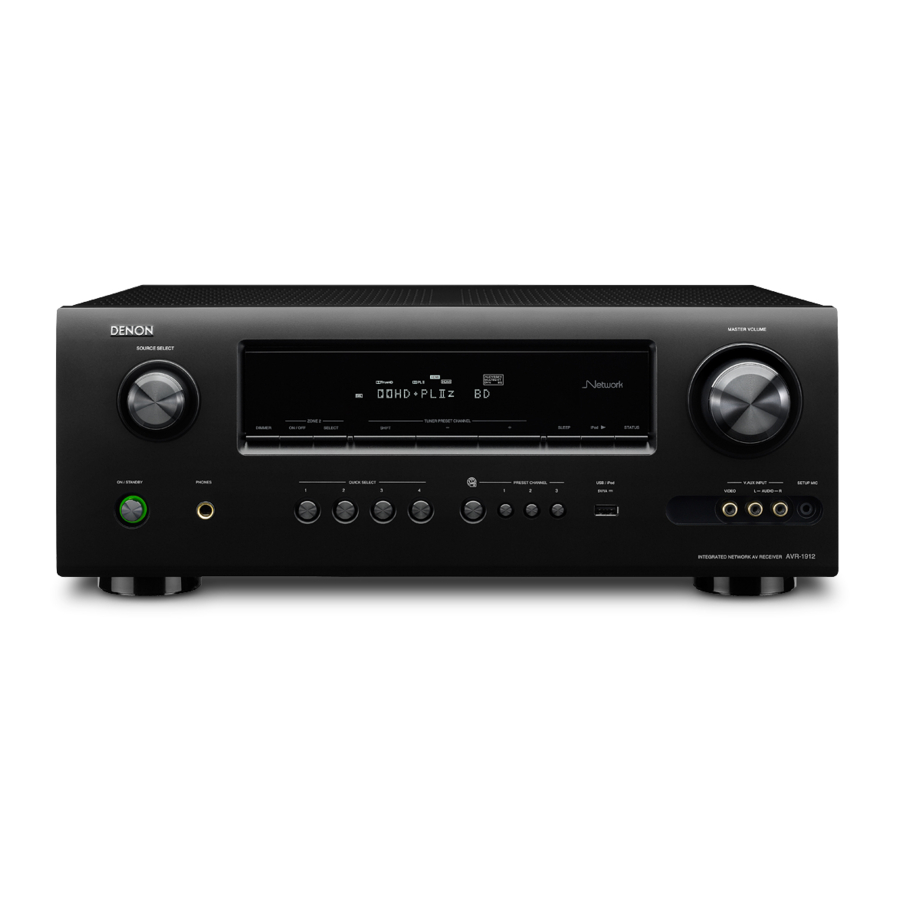
Denon AVR-1912 Integrated Network AV Receiver Getting Started
- Owner's manual (133 pages) ,
- Manual del usuario (133 pages) ,
- User manual (16 pages)
Advertisement
IMPORTANT SAFETY INSTRUCTIONS
- Read these instructions.
- Keep these instructions.
- Heed all warnings.
- Follow all instructions.
- Do not use this apparatus near water.
- Clean only with dry cloth.
- Do not block any ventilation openings. Install in accordance with the manufacturer's instructions.
- Do not install near any heat sources such as radiators, heat registers, stoves, or other apparatus (including amplifiers) that produce heat.
- Do not defeat the safety purpose of the polarized or grounding-type plug. A polarized plug has two blades with one wider than the other. A grounding type plug has two blades and a third grounding prong. The wide blade or the third prong are provided for your safety. If the provided plug does not fit into your outlet, consult an electrician for replacement of the obsolete outlet.
- Protect the power cord from being walked on or pinched particularly at plugs, convenience receptacles, and the point where they exit from the apparatus.
- Only use attachments/accessories specified by the manufacturer.
- Use only with the cart, stand, tripod, bracket, or table specified by the manufacturer, or sold with the apparatus. When a cart is used, use caution when moving the cart/ apparatus combination to avoid injury from tip-over.
![]()
- Unplug this apparatus during lightning storms or when unused for long periods of time.
- Refer all servicing to qualified service personnel. Servicing is required when the apparatus has been damaged in any way, such as power-supply cord or plug is damaged, liquid has been spilled or objects have fallen into the apparatus, the apparatus has been exposed to rain or moisture, does not operate normally, or has been dropped.
- Batteries shall not be exposed to excessive heat such as sunshine, fire or the like.


To completely disconnect this product from the mains, disconnect the plug from the wall socket outlet.
The mains plug is used to completely interrupt the power supply to the unit and must be within easy access by the user.
SAFETY PRECAUTIONS

RISK OF ELECTRIC SHOCK
DO NOT OPEN
TO REDUCE THE RISK OF ELECTRIC SHOCK, DO NOT REMOVE COVER (OR BACK). NO USER-SERVICEABLE PARTS INSIDE. REFER SERVICING TO QUALIFIED SERVICE PERSONNEL.
 The lightning flash with arrowhead symbol, within an equilateral triangle, is intended to alert the user to the presence of uninsulated "dangerous voltage" within the product's enclosure that may be of sufficient magnitude to constitute a risk of electric shock to persons.
 The exclamation point within an equilateral triangle is intended to alert the user to the presence of important operating and maintenance (servicing) instructions in the literature accompanying the appliance.


TO REDUCE THE RISK OF FIRE OR ELECTRIC SHOCK, DO NOT EXPOSE THIS APPLIANCE TO RAIN OR MOISTURE.
FCC INFORMATION
For US customers:
This product has been tested and found to comply with the limits for a Class B digital device, pursuant to Part 15 of the FCC Rules. These limits are designed to provide reasonable protection against harmful interference in a residential installation.
For Canadian customers:
This Class B digital apparatus complies with Canadian ICES-003.
NOTES ON USE
WARNINGS
- Avoid high temperatures. Allow for sufficient heat dispersion when installed in a rack.
- Handle the power cord carefully. Hold the plug when unplugging the cord.
- Keep the unit free from moisture, water, and dust.
- Unplug the power cord when not using the unit for long periods of time.
- Do not obstruct the ventilation holes.
- Do not let foreign objects into the unit.
- Do not let insecticides, benzene, and thinner come in contact with the unit.
- Never disassemble or modify the unit in any way.
- Ventilation should not be impeded by covering the ventilation openings with items, such as newspapers, tablecloths or curtains.
- Naked flame sources such as lighted candles should not be placed on the unit.
- Observe and follow local regulations regarding battery disposal.
- Do not expose the unit to dripping or splashing fluids.
- Do not place objects filled with liquids, such as vases, on the unit.
- Do not handle the mains cord with wet hands.
- When the switch is in the OFF (STANDBY) position, the equipment is not completely switched off from MAINS.
- The equipment shall be installed near the power supply so that the power supply is easily accessible.
CAUTIONS ON INSTALLATION

For proper heat dispersal, do not install this unit in a confined space, such as a bookcase or similar enclosure.
- More than 12 in. (0.3 m) is recommended.
- Do not place any other equipment on this unit.
Read before use
Thank you for purchasing this DENON product.
This manual explains the Setup Wizard that you will need to perform directly after removing the product from its packaging, before you start using the product.
The Setup Wizard displays easy to follow guidance on your television screen that shows you how to connect and configure speakers, various other devices, and network functions for full enjoyment of this unit.
Accessories
Check that the following parts are supplied with the product.
- Getting Started 1
- CD-ROM (Owner's manual) 1
- Warranty (for North America model only) 1
- Service network list 1
- Remote control unit (RC-1156) 1
![]()
- R6/AA batteries 1
- Setup microphone
(DM-A409, Cord length: Approx. 19.7 ft / 6.0 m) 1
![]()
- AM loop antenna 1
![]()
- FM indoor antenna 1
![]()


About this manual
Operation buttons
The operations described in this manual are based mainly on remote control operation.
Symbols
 | This symbol indicates a reference page on which related information is described. |
 | This mark indicates the page of the owner's manual on the CD-ROM provided. |
 | This symbol indicates a supplementary information and tips for operations. |
| NOTE | This symbol indicates points to remember operations or function limitations. |
Illustrations
Note that the illustrations in this manual is for explanation purposes and may differ from the actual unit.
About the CD-ROM

You need to have Adobe Reader ® installed on your computer to view the owner's manuals on the CD-ROM.
Click the Adobe Reader ® banner in the CD-ROM menu to download the latest version of Adobe Reader ®. Your computer must be connected to the Internet in order to download Adobe Reader ®.
Cautions on handling
- Before turning the power on
Check once again that all connections are correct and that there are no problems with the connection cables. - Power is supplied to some of the circuitry even when the unit is set to the standby mode. When going on vacation or leaving home for long periods of time, be sure to unplug the power cord from the power outlet.
- About condensation
If there is a major difference in temperature between the inside of the unit and the surroundings, condensation (dew) may form on the operating parts inside the unit, causing the unit not to operate properly.
If this happens, let the unit sit for an hour or two with the power turned off and wait until there is little difference in temperature before using the unit. - Cautions on using mobile phones
Using a mobile phone near this unit may result in noise. If that occurs, move the mobile phone away from this unit when it is in use. - Moving the unit
Turn off the power and unplug the power cord from the power outlet. Next, disconnect the connection cables to other system units before moving the unit. - About care
- Wipe the cabinet and control panel clean with a soft cloth.
- Follow the instructions when using a chemical cleaner.
- Benzene, paint thinner or other organic solvents as well as insecticide may cause material changes and discoloration if brought into contact with the unit, and should therefore not be used.
Preparing the Setup Wizard
This section describes how to prepare the Setup Wizard before use.
- Do not plug the power plug of the main unit into the wall socket until these preparations are complete.
- Speaker connections are performed using the Setup Wizard. Do not connect the speakers yet.
What you need for this step

Speaker
(sold separately)
*If you wish to enjoy 7.1-channel, prepare a surround back speaker.
Speaker cable
(sold separately)
- Prepare enough for the number of speakers you will use.
Place and layout speakers
Before installing the speakers, connect the speaker cables to the speakers. For details on how to connect the speaker cables, see the speaker instruction manual.
Connect the speaker cables to the main unit using the Setup Wizard.

When 5.1-channel installed

When 7.1-channel (Surround back speaker) installed
| FL | Front speaker (L) |
| FR | Front speaker (R) |
| C | Center speaker |
| SW | Subwoofer |
| SL | Surround speaker (L) |
| SR | Surround speaker (R) |
| SBL | Surround back speaker (L) |
| SBR | Surround back speaker (R) |
- Install the surround speakers in a position 2 to 3 ft (60 to 90 cm) higher than ear level.
![]()

Connect this unit to the television using an HDMI cable (sold separately)
NOTE
If this unit is connected using cables other than the HDMI cable, the Setup Wizard will not be displayed.

Turn the television power on, and switch the video input to this unit (HDMI input)
For details on how to operate the television, see the television instruction manual.

Insert the provided batteries into the remote control unit
- Slide the rear lid in the direction of the arrow and remove it.
![]()
- Load the two batteries properly as indicated by the marks in the battery compartment.
![]()
- Put the rear cover back on.


Setup Wizard
When preparations are complete, start the Setup Wizard.
Use the Setup Wizard to perform connections and settings as shown in the following steps. Perform the operations as described in the instructions on the screen. You can skip or cancel at each section if necessary.
Language Select
Set the language for the instructions on the television screen.

These settings can be changed in the following menu even after setting the Setup Wizard.
"System Setup" – "Language"
NOTE
If your language is not available, select "English".
Speaker Connection
Connect the speakers for surround sound.

NOTE
Connections for speakers other than 5.1 channel or 7.1 channel speakers cannot be set using the Setup Wizard.
Select "Others", and then select "Skip" in "2. Speaker Connection" to proceed to "3. Speaker Calibration".
(For details on the setting method, see "Speaker installation/connection (Advanced connection)".)
Speaker Calibration
Configure the settings for your speakers, and for the optimum surround sound for your room.

These settings can be changed in the following menu even after setting the Setup Wizard.
"Set up speakers (Audyssey ® Auto Setup)"
Source Setup
Set the connecting terminals for each device to be set, and connect to the terminals.

These settings can be changed in the following menu even after setting the Setup Wizard.
"Input Setup" – "Input Assign"
Remote Setup
Configure the settings so that devices connected to this unit can be operated using the provided remote control.

These settings can be changed in the following menu even after setting the Setup Wizard.
"System Setup" – "Option Setup" – "Remote Setup Guide"
Network Setup
Configure to playback audio files saved onto a computer or Internet radio.

These settings can be changed in the following menu even after setting the Setup Wizard.
"System Setup" – "Network Setup"
This completes the Setup Wizard.
Basic operation of Setup Wizard

Move to the item that you want to configure using 


Move to the item that you want to configure using  .
.


Enters the selection.


Returns to the start of each setting.
or
Cancels the Setup Wizard.

Getting Started
- Insert the main unit power plug into the wall socket.
![]()
- Press ZONE SELECT to switch the zone mode to
![]() (MAIN ZONE).
(MAIN ZONE).
![]()


- This remote control can be operated in two separate zones, MAIN ZONE and ZONE2.
- Set the remote control to MAIN ZONE to operate the Setup Wizard.
When power is switched to standby
Press STANDBY (  ).
).
[Power indicator status in standby mode]

- Normal standby: Off
- When "HDMI Control" is set to "ON": Red
NOTE
During power standby, a minimal amount of power is consumed. To totally cut off the power, remove the power cord from the power outlet.
- Press AMP to set the remote control unit to AMP- operation mode.
![]()

- This remote control is a preset remote control that can be used to control connected devices.
- Press ON ( | ) to the this unit.
The power switches on, and the Setup Wizard start screen is displayed on the television screen.
![]()
- Press ENTER
Start the Setup Wizard.

Setup Wizard has started. Please follow the message on screen.
To start the Setup Wizard again after exiting it, select "Setup Wizard" in the menu ( "Menu map").
Connecting the speakers
The speakers are connected in "2. Speaker Connection" of the Setup Wizard but if you did not use or cancelled the Setup Wizard, connect the speakers as shown below. For details, see the included CD-ROM (Owner's manual).
Connect
Carefully check the left (L) and right (R) channels and + (red) and – (black) polarities on the speakers being connected to the this unit, and be sure to interconnect the channels and polarities correctly.
| Connecting the speaker cables |
Peel off about 0.03 ft/10 mm of sheathing from the tip of the speaker cable, then either twist the core wire tightly or terminate it. |
| When using a banana plug |
Tighten the speaker terminal firmly before inserting the banana plug. |
NOTE
- Connect so that the speaker cable core wires do not protrude from the speaker terminal. The protection circuit may be activated if the core wires touch the rear panel or if the + and – sides touch each other (
![]()
![]() "Protection Circuit").
"Protection Circuit"). ![shock hazard]() Never touch the speaker terminals while the power supply is connected. Doing so could result in electric shock. (When the Setup Wizard is running, follow the instructions in the Setup Wizard screen for making connections.)
Never touch the speaker terminals while the power supply is connected. Doing so could result in electric shock. (When the Setup Wizard is running, follow the instructions in the Setup Wizard screen for making connections.) - Use speakers with the speaker impedances shown below.
| Speaker terminals | Speaker impedance |
| FRONT | 6 – 16 Ω |
| CENTER | |
| SURROUND | |
| SURR. BACK / AMP ASSIGN |
5.1-channel

7.1-channel

Playback (Basic operation)
Here, we explain how to perform simple operations.
For details, see the included CD-ROM (Owner's manual).

Before starting playback, make the connections between the different components and the settings on the receiver.
NOTE
Also refer to the operating instructions of the connected components when playing them.
Selecting the input source
Press the input source select button ( BD, SAT/CBL, TV, NET/USB V.AUX, DOCK, TUNER, GAME1 GAME2, CD ) to be played back.
The desired input source can be selected directly.

You can also use the following operation to select an input source.
Using the button on the main unit
Press the input source select button ( TUNER, BD, SAT/CBL, TV, GAME1/2, DVD, DOCK, CD, V.AUX, NET/USB ) to be played back.
- When iPod
![]() on the main unit is pressed, the input source of this unit is switched to "DOCK" or "NET/USB" and the connected iPod is automatically played (
on the main unit is pressed, the input source of this unit is switched to "DOCK" or "NET/USB" and the connected iPod is automatically played (![]()
![]() "iPod play function").
"iPod play function").
 on the main unit is pressed, the input source of this unit is switched to "DOCK" or "NET/USB" and the connected iPod is automatically played (
Using the "Source Select" menu
Switch the remote control unit to the  (MAIN ZONE) mode when performing this operation ( "Operating AV device").
If the remote control unit is in  (ZONE2) mode, the "Source Select" menu will not be displayed when SOURCE SELECT pressed.

- Press SOURCE SELECT.
Display the "Source Select" menu. - Use
![]() to select the input source, then press ENTER .
to select the input source, then press ENTER .
The input source is set and the source selection menu is turned off.
![]()
 to select the input source, then press ENTER .
- When using with an iPod connected directly to the USB port of this unit, select "USB/iPod" for the input source.
- Input sources that are not going to be used can be set ahead of time. Make this setting at "Source Delete".
- To turn off the source selection menu without selecting an input source, press SOURCE SELECT again
- When SOURCE SELECT is pressed, the AMP-operation mode starts automatically.
Adjusting the master volume
Use 

 to adjust the volume.

When the "Volume Display" setting is "Relative"
[Adjustable range]

When the "Volume Display" setting is "Absolute"
[Adjustable range] 
- The variable range differs according to the input signal and channel level setting.
You can also operate via the main unit. In this case, perform the following operations.
Turn MASTER VOLUME to adjust the volume.
Turning off the sound temporarily
Press  .
.
- The power indicator flashes green.
- "MUTE" indicator on the display lights.
![]() appears on a TV screen.
appears on a TV screen.
![]()
 appears on a TV screen.
- The sound is reduced to the level set at "Mute Level".
- To cancel, press
![]() again. Muting can also be canceled by adjusting the master volume.
again. Muting can also be canceled by adjusting the master volume.
 again. Muting can also be canceled by adjusting
 Other operations
See the following items on the included CD-ROM (Owner's manual).
- Playing a Blu-ray Disc player/DVD player
- Playing a CD player
- Playing an iPod ®
- Tuning in radio stations
- Playing a network audio
- Playing a USB memory device
- Selecting a listening mode (Surround mode)
- Convenient functions
- Playback in ZONE2 (Separate room)
- How to make detailed settings
- Operating the connected devices by remote control unit
This completes the basic settings and operations.
For details on how to change settings or detailed explanations of operations, see the included CD-ROM (Owner's manual).

Documents / ResourcesDownload manual
Here you can download full pdf version of manual, it may contain additional safety instructions, warranty information, FCC rules, etc.
Download Denon AVR-1912 Integrated Network AV Receiver Getting Started
Advertisement
Thank you! Your question has been received!


Need Assistance?
Do you have a question about the AVR-1912 that isn't answered in the manual? Leave your question here.