
Related Manuals for NanoEnTek ADAM CellT


Summary of Contents for NanoEnTek ADAM CellT
- Page 1 ADAM A New Standard of Automated Cell Counter Instruction Manual Copyright NanoEntek, Inc. All rights reserved.
- Page 3 Fax: +1-781-790-5649 The information in this manual is described as accurately as possible. Firmware and software changes and updates may change without prior consent or notification. Copyright © 2019 by NanoEntek Inc. All rights reserved. Published in Korea. Documentation: NESMU-ACT-001E Revision history: V.0.0 OCT 2019...
-
Page 5: Table Of Contents
Table of contents Introduction Image General description Save Technology Mail Basic principle of counting Approval Product Contents Setting ADAM-CellT Setting AccuChip kit Wifi Upon receiving the instrument Remote support Update Product Description Auto logout Front view of ADAM-CellT Backup Rear view of ADAM-CellT Recovery Getting Started User... -
Page 6: General Description
Introduction General The ADAM-CellT is a benchtop automated cell counter designed to perform cell counting and viability measurements using AccuStain Solution. Description... -
Page 7: Technology
To address these problems, NanoEntek has developed the ADAM-CellT, which is based on a fluorescent microscopy technique for counting cells. The ADAM-CellT utilizes sensitive fluorescence dye staining, LED optics and CMOS detection technologies to make the cell analysis more accurate and reliable. -
Page 8: Basic Principle Of Counting
Introduction Basic principle ADAM-CellT is an instrument which counts mammalian cell DNA by staining with a fluorescent dye, Propidium Iodide (PI) or Acridine Orange (AO). of counting PI does not enter cells with intact membranes or active metabolism. In contrast, cells with damaged membranes or cells with inactive metabolism are unable to prevent PI entering the cell. -
Page 9: Adam-Cellt
Product Contents Introduction ADAM-CellT The contents of the ADAM-CellT are listed below: Item Quantity Main device Power cord USB hub Adapter User’s manual Support for 21 CFR Part 11 Compliance AccuChip Kit USB Wifi dongle External Hard disk Calibration Bead Labeling Inspection Sheet Printer (optional) -
Page 10: Front View Of Adam-Cellt
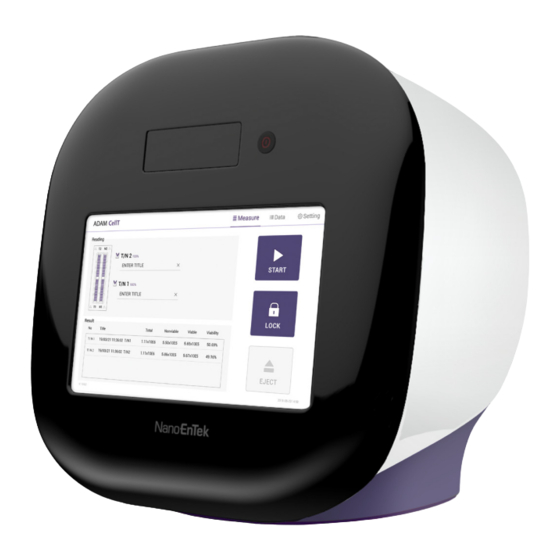
Product Description Introduction Front view of The front view of ADAM-CellT is shown below: ADAM-CellT ① Door ② Power ③ ④ ⑤ ⑥ Control buttons Description ① Door Slide holder is inserted and ejected. ② Power on / off. Power ③... -
Page 11: Rear View Of Adam-Cellt
Product Description Introduction Rear view of The rear view of ADAM-CellT is shown below: ADAM-CellT ① ② ③ USB Port PC Port Power plug Port Description ① Port for software update and save the data. USB Port ② PC port Connects with PC ③... -
Page 12: Environmental Requirements
2. Press the power button for 2~3 seconds. Initial Display If you get an error message, please contact your local distributor or sales@nanoentek.com. If booting is successful and no errors are detected, the home screens will be displayed as below. -
Page 13: Error Messages During Booting
[System State] during booting It appears when booting is not working properly. Turn off main power and restart device. If this message still appears after restarting, contact your local distributor or sales@nanoentek.com. Error code Cause 0x00000C00 Failure of X-axis sensor... -
Page 14: Count Setting
Getting Started Introduction Count setting Set the conditions in the ‘Setting’ tap before counting. [AccuChip] Set the AccuChip according to you are using. Accuchip Accuchip [Cell size] Set the minimum and maximum size of cell. Cell size [Dilution factor] When diluting sample, set the Dilution factor. CAUTION Factor values for the AccuStain Solution is already applied. -
Page 15: Introduction
General Operation Introduction Introduction Instruction is provided in this section for preparing the sample with AccuStain Solution for use with disposable AccuChip for automated cell count using the ADAM-CellT. Please check the procedure of sample preparation and testing below. For more detailed information, please refer to the next page. 1. -
Page 16: Sample Preparation
General Operation Introduction Cultivate the required number of cells. Sample Add an appropriate volume of growth media or PBS to dilute to a final preparation concentration of 5 x 10 cells/mL to 4 x 10 cells/mL (T /N solution). When using T /N solution, prepare to a final concentration of 5 x 10 cells/mL to 2 x 10 cells/mL. - Page 17 General Operation Introduction Counting cell WARNING [Sample loading error] Be cautious of loading the correct volume of the sample into AccuChip. The instrument will not detect low or high sample volumes. Correct volume Low volume CAUTION Avoid bubbles which may negatively affect the result. ADAM-CellT, A New Standard of Automated Cell Counter...
- Page 18 General Operation Introduction Counting cell WARNING [AccuChip insert error] Completely insert AccuChip face up, in the direction of the arrow on the slide. The instrument will not detect if slides are inserted incorrectly. See pictures below for proper insertion. ( O ) ( X ) Correctly inserted Not fully inserted...
-
Page 19: Run Sample
Measure Introduction Run Sample Start counting process by pressing ‘START’ . It may take about 2 minutes longer for auto focus at the initial test. While the test is in progress, you can check the cell images of each channel. ADAM-CellT, A New Standard of Automated Cell Counter... -
Page 20: Result Analysis
Measure Introduction Result Analysis The result will be displayed after being automatically calculated by ADAM- CellT software. * 1.10E6 = 1.10 X 10 cells/mL Number of Number of Title Viability Total cell Non-Viable cell Viability 01 T1 (1.10E6) N1 (5.50E5) Viability 02 T2 (2.20E6) N2 (5.50E5) -
Page 21: Result Analysis -Error Code
Measure Introduction Result Analysis - Error code [Solution T Error code Cause Frames with errors are over 50% of total counting frame. Cells are more than 4X10 cells/mL. Cells are more than 2X10 cells/mL. Cells are less than 4X10 cells/mL. Cells are less than 5X10 cells/mL. -
Page 22: Qc Mode
Introduction QC Mode The QC Mode uses QC Slide (optional) to check equipment QC status by date at a glance. [ Activation of QC mode ] To activate ‘QC’ mode, an activation code must be entered. 1. Select ‘QC’ tab from top menu. 2. -
Page 23: Qc Slide Edit
Introduction QC Slide Edit The QC Mode uses QC Slide (optional) to check equipment QC status by date at a glance. ① ② ③ ④ ⑤ ⑥ ⑦ ⑧ Control buttons Description Selects all QC Slide lot to delete from the QC Slide ①... -
Page 24: Qc Slide Result Edit
Introduction ① ② ③ QC Slide Result Edit ④ ⑤ Control buttons Description ① All Selects all QC result to delete from the QC result List ② QC Result List QC result information list ③ Visible Selects all QC result to display graph from the QC result List. -
Page 25: Qc Slide Result
•Acceptance slide peak size results can be found in the ADAM-CellT Test report. WARNING Contact sales@nanoentek.com or your local distributor if the QC result does not come within the acceptance criteria. ADAM-CellT, A New Standard of Automated Cell Counter... -
Page 26: Data List
Data Introduction Data list ① ② ③ ④ ⑤ ⑥ ⑦ ⑧ Control buttons Description ① Select all data in Data List. ② SEARCH Display the data of the selected date. ③ Allows to view and edit the data EDIT (Multiple data can be edited with the same settings) ④... -
Page 27: Edit
Data Introduction EDIT ① ④ ⑤ ⑥ ② ③ ⑦ Control buttons Description ① Sample Edit the sample name. ② Cell size graph Allows to view the cell size graph each channel (T/N) ③ Cell size table Allows to view the number of cells in each cell size ④... -
Page 28: Image
Data Introduction IMAGE ① ② ③ ④ ⑤ Control buttons Description ① Channel Select a channel. ② Original Check the original image. ③ Counted Check the counted cell image. ④ Frame Select a frame number of the channel. ⑤ Zoom-in/out Zoom in and out to check the cell image. -
Page 29: Save
Data Introduction SAVE ① ② ③ Control buttons Description ① Select Path Selects a save path from the list to send the selected data ② Data Type Selects which data type to save ③ Exports the files to a selected save path Apply Files can be sent to only one save path at a time. -
Page 30: Mail
Data Introduction MAIL ① ② ③ ④ Control buttons Description ① History Selects e-mail address from the list to send data The e-mail address where data has been sent will be saved. ② To send files to new e-mail, enter the applicable e--mail Mail Address address. -
Page 31: Approval
Approval Introduction Approval Requestable: ② ① ③ ④ ⑤ ⑥ Control buttons Description ① Settings tab related to data approval such as Requestable, Approval Status Requesting, Approvable, and Approved. ② List of data that can check status information related to Data List approval. - Page 32 Approval Introduction Approval Requesting: ② ① ③ ④ ⑤ ⑥ Control buttons Description ① Settings tab related to data approval such as Requestable, Approval Status Requesting, Approvable, and Approved. ② List of data that can check status information related to Data List approval.
- Page 33 Approval Introduction Approval Approvable: ② ① ③ ④ ⑤ ⑥ Control buttons Description ① Settings tab related to data approval such as Requestable, Approval Status Requesting, Approvable, and Approved. ② List of data that can check status information related to Data List approval.
- Page 34 Approval Introduction Approval Approved: ② ① ③ ④ ⑤ ⑥ Control buttons Description ① Settings tab related to data approval such as Requestable, Approval Status Requesting, Approvable, and Approved. ② List of data that can check status information related to Data List approval.
-
Page 35: Setting
Setting Introduction Setting ① ⑥ ⑦ ⑧ ② ③ ⑨ ⑩ ④ ⑬ ⑤ ⑪ ⑫ Control buttons Description ① Set the conditions in the setting tap before counting. Count setting Refer to page 14 for more information. ② Wifi Sets the wifi to use the e-mail or remote support function ③... -
Page 36: Wifi
If connection error occurs, please contact a laboratory facility manager. Remote support 1. Connect to wifi. 2. Click ‘Remote support’ button. 3. Share your ID and password to NanoEntek. NOTE The remote support feature is to be used for maintenance only by request of NanoEntek. -
Page 37: Update
• ADAM-CellT can be updated only when the firmware or software file exists in the ‘AdamUpdate’ folder. The ‘ADAM CellT.exe’ file should be in the ‘AdamUpdate’ folder. • Do not rename the ‘AdamUpdate’ folder. The folder name should be ‘AdamUpdate’ . -
Page 38: Recovery
Setting Introduction Recovery Auto logout • Restore counted data to the point of the last automatic backup (Sync). • Manual recovery restores manually backup counted data. NOTE The automatic backup function is turned off after recovery, please re- enable the automatic backup function. CAUTION Please be careful with manual recovery, because counted data that is not manually backed up will be lost. -
Page 39: User
User Introduction User ① ② ③ ④ ⑤ Control buttons Description ① Logout To logout ② User manage To register user ③ Log manage Tracks user access records ④ Document manage Tracks management document records ⑤ Deleted list Tracks deleted data records •... -
Page 40: User Manage
User Introduction User manage ① ② ③ ④ ⑤ ⑥ Control buttons Description ① User Name To view the registered user list ② Permission To view the user access authority ③ New Registration To register new user ④ Privilege Option for permission setting ⑤... -
Page 41: Privilege
User Introduction Privilege The Admin can grant or release access to functions when creating or editing new users (Supervisor, User) ① ② ③ ④ Control buttons Description ① User Type&Default Selects account level and sets default permissions ② Tab for permission Settings ③... -
Page 42: Password Option
User Introduction Password Option ① ② ③ ④ ⑤ ⑥ Control buttons Description ① Change cycles Set password change interval (30, 90, 180 days). Number of incorrect passwords in account lockout ② Account lock (≤ 3, 5, 10, 15). ③ Minimum length Minimum length of password (≤3, 5, 10, 15). -
Page 43: Log Manage
User Introduction Log manage ① ② ③ ④ ⑤ Control buttons Description ① Select all data in Data List. ② SEARCH Display the data of the selected date. ③ SAVE Save the selected data to USB. ④ DELETE Delete the selected data. ⑤... -
Page 44: Document Manage
User Introduction Document ① manage ② ③ ④ ⑤ Control buttons Description ① Select all data in Data List. ② SEARCH Display the data of the selected date. ③ SAVE Save the selected data to USB. ④ DELETE Delete the selected data. ⑤... -
Page 45: Deleted List
User Introduction Deleted ① list ② ③ ④ ⑤ Control buttons Description ① Select all data in Data List. ② SEARCH Display the data of the selected date. ③ SAVE Save the selected data to USB. ④ DELETE Delete the selected data. ⑤... -
Page 46: Lock
Introduction Power off Lock Press LOCK before turning off the device. If there is no operation for 3 minutes, the lock function will be activated automatically. When the device is locked, the screen will be changed as shown below. Power off If you press the power button for 2~3 seconds, then ‘Slide to shut down your PC’... -
Page 47: Maintenance And Cleaning
Maintenance and cleaning Introduction Maintenance 1. ADAM-CellT does not need regular maintenance. 2. ADAM-CellT has no replacement of consumable materials. and cleaning 3. Please clean the exposed surface of ADAM-CellT frequently or before testing, using a soft cloth and isopropyl alcohol or deionized water. CAUTION Dispose of wipes in an appropriately labeled solvent contaminated waste container. -
Page 48: Trouble Shooting
Trouble shooting Introduction Trouble Problem Description Solution shooting ADAM-CellT does • • No power from outlet Check power source. not power up • • Bad power cord. Replace. Inaccurate result • • Cell number may be out of Adjust the number of cells range. -
Page 49: Warranty
2. Repair or modification done by anyone other than NanoEntek or an authorized agent. 3. Damage caused by substituting alternative parts. 4. Use of fittings or spare parts supplied by anyone other than NanoEntek. 5. Damage caused by accident or misuse. 6. Damage caused by disaster. -
Page 50: Technical Specifications
Technical Specifications Introduction Technical ADAM-CellT Specifications Measuring range 5x10 ~ 4x10 cells/mL (PI) 5x10 ~ 2x10 cells/mL (AO/PI) Optimal range 4x10 ~ 2x10 cells/mL (PI) 4x10 ~ 1x10 cells/mL (AO/PI) Analysis time < 25~50 sec/test : For initial test, max 2 min/test Voltage DC12V Current... -
Page 51: Product List
Product List Introduction Product List Cat. No. Product Contents Quan- tity 200 pcs AccuChip 2X 12.5 mL AccuStain Solution T AD2K-200 AccuChip2X Kit* 12.5 mL AccuStain Solution N 200 pcs AccuChip 4X Accuchip 4x Kit 12.5 mL AccuStain Solution T (T AD4K-200 (PI) 12.5 mL AccuStain Solution N... -
Page 52: Safety Precautions
Safety Precautions Introduction Safety Review and follow the safety instructions below : Precautions Always ensure that the power supply input voltage matches the voltage • available at your location. To avoid the danger of electric shock, install the instrument per the •... -
Page 53: Safety Symbols
For more detailed information about disposal of your old appliance, please contact your city office, waste disposal service or visit our web-site, www.nanoentek.com. This product conforms to UL 61010-1, CAN/CSA C22.2 No.61010-1 “Safety Requirements for Electrical Equipment for Measurement, Control, and Laboratory Use, Part 1: General Requirements.”... -
Page 54: Warnings
Warnings Introduction Warnings 1. After using device, please turn off main power. If not, it may cause malfunction or may reduce product life. 2. When turn off the device, be sure to lock the device with Lock button. If not, it may cause mechanical problem or error message when device is booting. -
Page 55: Technical Support
Technical Support Introduction Technical Visit the our Website at www.nanoentek.com for : Support Technical resources, including manuals, FAQs, etc. • Technical support contact information • Additional product information and special offers. • For more information or technical assistance, please call or email. - Page 57 NESMU-ACT-001E (V.0.6) NanoEntek, Inc. 851-14, Seohae-ro, Paltan-myeon, Hwaseong-si, Gyeonggi-do, 18531, Korea Tel: +82-2-6220-7940 Fax:+82-2-6220-7999 NanoEntek America, Inc. 220 Bear Hill Road, Suite 102, Waltham, MA 02451, USA Tel: +1-781-472-2558 Fax:+1-781-790-5649 EC Representative MT Promedt Consulting GmbH Ernst-Heckel-Straße 7, 66386 St. Ingbert Germany Email sales@nanoentek.com...