Table of Contents
Advertisement
Quick Links
Advertisement
Table of Contents

Related Manuals for Asko DSD565.U


Summary of Contents for Asko DSD565.U
- Page 1 USER MANUAL DSD565.U Dishwasher...
-
Page 2: Table Of Contents
Select program mode ........Items excluded from warranty ..... Select option ..........Disclaimer ............ Start/Stop ............. ASKO Customer Care ........Status light ........... Service after expiration of limited warranty ... If you want to load more dishes ....Number of cycles ........ -
Page 3: Your Dishwasher
Install the dishwasher; see the chapter Installation instructions. Then open the door and press "Welcome to your ASKO. First time setup." is shown on the display the first time the dishwasher is switched on. It is important that you choose the right settings to ensure good dishwashing results. -
Page 4: Important Safety Instructions
Important safety instructions SAVE THESE INSTRUCTIONS FOR FUTURE REFERENCE WARNING! When using your dishwasher, follow basic precautions, including the following: • Read all instructions before using the dishwasher. • Use the dishwasher only for its intended purpose. • Use only detergents or rinse agents recommended for use in a dishwasher and keep them out of the reach of children. -
Page 5: Child Safety
Important safety instructions WARNING! PROPOSITION 65 FOR CALIFORNIA RESIDENTS Cancer and Reproductive Harm www.P65Warnings.ca.gov Child safety • Always keep small children away from the machine when it is open. There may be some detergent residue left inside the machine. • Always close the door and start the dishwasher as soon as you put in the detergent. -
Page 6: Disposal
Important safety instructions can take the packaging for recycling or direct you to the nearest recycling center. The packaging is comprised of: • Corrugated cardboard made from up to 100% recycled material. • Expanded polystyrene (EPS) with no added chlorine or fluorine. •... -
Page 7: Before Washing For The First Time
In general, more rinse aid and detergent are needed for hard water. Basic settings Open the door. Press "Welcome to your ASKO. First time setup." is shown on the display. It is important that you choose the right settings to ensure good dishwashing results. Select setting with . -
Page 8: Add Rinse Aid
Before washing for the first time Add rinse aid Fill up the rinse aid compartment with rinse aid if you have selected Rinse aid 1 - 5. Lift up to open Press to close 1. Open the rinse aid compartment lid. 2. -
Page 9: Greener Dishwashing
Greener dishwashing Save energy and water When using a dishwasher in a residential setting, less energy and water are generally used compared to washing the dishes by hand. Do not rinse under running water Do not rinse the dishes under running water as this will lead to increased energy and water consumption. -
Page 10: Loading The Dishwasher
Loading the dishwasher Fragile dishes Some cookware is not dishwasher safe. This can be for several reasons. Some materials cannot withstand high temperatures, others can be damaged by dishwasher detergent. Use caution with, for example, handmade items, China, crystal/glassware, silver, copper, tin, aluminum, wood, and plastic. -
Page 11: The Dishwasher's Baskets
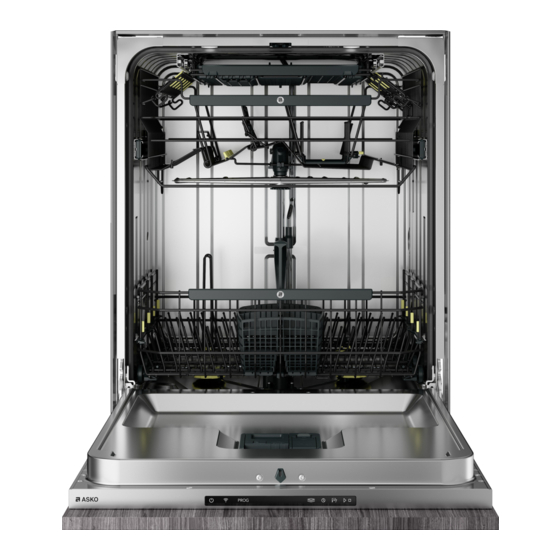
Loading the dishwasher The dishwasher's baskets The dishwasher includes a top cutlery tray, an upper basket, and a lower basket with a cutlery basket. The basket appearance may differ depending on the configuration. Top cutlery tray The top cutlery tray accommodates cutlery, ladles, whisks, and other utensils. Avoid placing tall objects in the top cutlery tray. -
Page 12: Upper Basket
Loading the dishwasher Upper basket Place glasses, cups, bowls, side plates, and saucers in the upper basket. Place all soiled surfaces face down. Place wine glasses on the wine glass shelf. Place knives in the knife stand on the right. Knife stand Extra supports for wine glasses can be fitted. - Page 13 Loading the dishwasher Raising the upper basket 1. Pull out the upper basket. 2. Grab the sides of the upper basket with both hands and lift it up. Lowering the upper basket 1. Pull out the upper basket. 2. Grab the sides of the upper basket with both hands and push in the two locking handles to lower the upper basket.
-
Page 14: Lower Basket
Loading the dishwasher Lower basket Place plates, side plates, serving dishes, pots, and cutlery (in the cutlery basket) in the lower basket. Adjustable plate supports The adjustable plate supports can be adjusted to suit the dishes. Release the plate supports by pushing them inward before repositioning them. - Page 15 Loading the dishwasher Vase and bottle holder Adaptable power zones The dishwasher's two adaptable power zones can be opened in two different positions or turned off. For vases and bottles For pots and pans For higher spray pressure in the lower spray arm Default: Off Leave the power zones open if you want an increased water flow where, for example, you have...
-
Page 16: Cutlery Basket
Loading the dishwasher Cutlery basket Place cutlery with the handles facing down, except for knives, and spread them out as much as possible. Ensure that spoons do not stack inside each other. The cutlery basket is best placed in the middle at the front of the lower basket to best utilize dishwashing performance from the unique spray zone intended for the cutlery basket. -
Page 17: Typical Load
Loading the dishwasher Typical load Recommended for daily, regular, or typical use. Upper basket NOTE! Ensure the upper basket is set to its lowest position. Lower basket... -
Page 18: Using The Dishwasher
Using the dishwasher Add detergent Follow the instructions on the detergent packaging. Too much detergent can result in less effective dishwashing and lead to greater environmental impact. Detergent compartment The detergent compartment must be dry when adding detergent. If powder or liquid dishwasher detergent is used, add a small amount of the detergent to the compartment for prewash detergent. -
Page 19: On/Off
Using the dishwasher On/Off Start/Stop Select program Select program mode Select option On/Off Open the door and press . Also turn on the water supply valve if it is turned off. Select program To select a program, press until the desired program is shown on the display. Select a program to suit the type of dishes and how dirty they are. -
Page 20: Select Program Mode
Using the dishwasher Time The program adapts to the specified running time or finish time. With this program, it is important to choose a time suited to how dirty the dishes are. Press to set the desired program time. 0:15-0:45 Lightly soiled dishes 1:00-1:30 Normally soiled dishes... -
Page 21: Select Option
Using the dishwasher Select option Available options are dimly lit. Select the options ( ) to activate them. The options glow brighter when activated. (The options you can select vary between programs.) Auto door open The dishwasher door opens automatically, which shortens the program time and improves the drying results. -
Page 22: Status Light
Using the dishwasher Time remaining Once you have chosen a program, program mode, and options, the time the program took when last used is displayed. Status light The status light at the bottom on the dishwasher provides information by means of 3 different colors. Status light Blue - Load more The program has started, but you can still load more dishes. -
Page 23: Power Failure
Using the dishwasher Power failure If the dishwasher is turned off due to a power failure when a dishwashing program is running, the program continues when power is restored. If the power is lost during drying, the program is interrupted. If the dishwashing program was remote started and has not ended, the program will continue once the power is restored. -
Page 24: Program Chart
Program chart... -
Page 25: Wifi Connection
WiFi connection Connect Life You can remote control this dishwasher with your smartphone/tablet. Connect the dishwasher to your wireless network to be able to remote control and start the dishwasher using the Connect Life app. The app can be used to find information, change settings, start a program, and monitor the dishwasher. -
Page 26: Remote Control The Dishwasher
WiFi connection Flashing 1.0 sec on/off The dishwasher is connected to your wireless network. Glows The dishwasher is connected to your wireless network and the cloud. Remote control the dishwasher The dishwasher's network symbol is shown on the display when the dishwasher is paired with a smartphone/tablet. -
Page 27: Settings
Settings Open the door and press To open the dishwasher's Settings menu, press until Settings menu is shown on the display and confirm your selection with To exit the dishwasher's Settings menu, select Exit and confirm your selection with Select setting Confirm current setting Settings Alternatives... - Page 28 Settings Settings Alternatives Automatic child lock On/Off You can activate the Automatic child lock setting to prevent children from starting the dishwasher. To temporarily deactivate or activate the Automatic child lock setting, press and hold for three seconds. Display Logotype On/Off Setting to hide the logo shown on the display.
- Page 29 Settings Settings Alternatives Super rinse On/Off The Super rinse function rinses the dishes an extra two times. The program time is extended and the dishwasher uses more energy and water. Activated in the following programs: Normal Intensive Quick pro Sanitize Interior light at On/Off Select whether the interior light is to be...
-
Page 30: Care And Maintenance Instructions
Care and maintenance instructions Add rinse aid When the rinse aid needs filling up, the above symbol lights on the display. Lift up to open Press to close 1. Open the rinse aid compartment lid. 2. Carefully fill up with rinse aid to the level marked MAX. 3. -
Page 31: Cleaning The Spray Arms
Care and maintenance instructions Fine filter 1. Turn the lock ring counterclockwise and lift the fine filter straight up. 2. Clean the fine filter. 3. Refit the fine filter and turn the lock ring clockwise to its stop position. Check that the edges seal properly. -
Page 32: Clean The Outside Of The Dishwasher
Care and maintenance instructions Top spray arm • Pull out the top cutlery tray. Push up on the top spray arm while turning it counterclockwise to release it. Upper spray arm • Pull out the upper basket. • Unscrew the spray arm bearings counterclockwise to remove the spray arm from the upper basket. -
Page 33: Run Self-Cleaning
Care and maintenance instructions Control panel Keep the control panel clean. If necessary, wipe it with a dry or slightly damp cloth. Never use cleaning products they may scratch the surface. Run Self-cleaning Dishwasher tub The dishwasher tub is made of stainless steel and is kept clean through normal use (when used regularly). -
Page 34: Troubleshooting
Troubleshooting Error messages Action Overfilling water 1 Unblocking the drain pump. See the chapter Care and maintenance instructions. If the problem persists, contact your nearest Customer Care Center. Water outlet fault See "Water remains in the dishwasher above the filters" under "Problem"... -
Page 35: General
Troubleshooting General Problem Possible causes Action The control panel does not react You have pressed the control Wait a moment then try again. when pressed. panel too soon after opening the door. Child lock or Automatic child See the chapter Important safety lock is activated. - Page 36 Troubleshooting Problem Possible causes Action The dishwasher does not start. has not been pressed. Press until the display shows "Program started, close door in 4 sec". The door is not closed properly Close the door within four or was not closed immediately seconds, otherwise the dishwasher will not start.
- Page 37 Troubleshooting Problem Possible causes Action The dishes are not clean. The spray arms do not rotate. Check that the dishes are not blocking the spray arms. Spray arm holes or bearings Clean the spray arms. See the blocked. chapter Care and maintenance instructions.
- Page 38 Troubleshooting Problem Possible causes Action Spots or films on the dishes. Incorrect rinse aid dosage See the chapter Settings. setting. The TAB setting is activated and Switch all-in-one detergents or all-in-one detergent with deactivate the TAB setting and insufficient drying effect is being fill up with separate rinse aid.
- Page 39 Troubleshooting Problem Possible causes Action Water remains in the dishwasher The filters are clogged. Clean the coarse and fine filters. above the filters. The filters are not fitted correctly. Check that the filters are fitted correctly. See the chapter Care and maintenance instructions.
- Page 40 Troubleshooting Problem Possible causes Action The dishes are not dry enough. The Auto door open option is not Activate the Auto door open activated. option. The dishwasher is not fully Fully load the dishwasher. loaded. Rinse aid needs filling up or Fill up the rinse aid compartment dosage is set too low.
-
Page 41: Wifi
Troubleshooting WiFi Problem Possible causes Action The dishwasher's network The dishwasher is not Connect the dishwasher to your connected to your wireless wireless network. See the symbol does not appear on network. chapter WiFi connection. the display. WiFi connection is deactivated. Activate WiFi connection. - Page 42 Troubleshooting Problem Possible causes Action Software update failed. The network connection was lost Make sure that the power supply or the dishwasher lost power is not interrupted and that the due to a power failure. network connection is stable before trying again. If the problem persists, contact your nearest Customer Care Center.
-
Page 43: Installation Instructions
Installation instructions It is important that you read through and follow the instructions and directions below. Conduct installation and connection in accordance with the separate installation instructions. *Remove lock nuts for an installed height of 32 1/4'' (819 mm). Integrated door panel length. Integrated door panel with slide function installed, which means the integrated door panel slides upward/outward when the dishwasher is opened. -
Page 44: Setup
Installation instructions Setup • The recess and connection dimensions are included in the separate installation instructions. Check that all dimensions are correct before starting the installation. Note that the height of the integrated door panel can be adjusted to match other fittings. •... -
Page 45: Connection To Water Supply
Installation instructions The drain hose can also be connected to a connection nipple on the sink unit's water trap. The connection nipple must have an internal diameter of at least 1/2'' (14 mm). The drain hose may be extended by a maximum of 87" (2.2 m) (the total length of the drain hose must not exceed 177"... - Page 46 Installation instructions Grounding instructions This appliance must be grounded. In the event of a malfunction or breakdown, grounding will reduce the risk of electric shock by providing a path of least resistance for electric current. This appliance is equipped with a power cord fitted with an equipment grounding conductor and a grounding plug. The plug must be plugged into an appropriate power outlet that is installed and grounded in accordance with all local codes and ordinances.
-
Page 47: Service And Warranty
2. Service calls to correct the installation of the ASKO Product, to instruct you on how to use the ASKO Product, to replace or repair house fuses, or to correct house wiring or plumbing. -
Page 48: Asko Customer Care
THAN ACTUAL DAMAGES AND IN NO EVENT FOR DAMAGES IN EXCESS OF THE PRICE PAID FOR THE ASKO PRODUCT AS TO WHICH A CLAIM IS MADE. Some jurisdictions do not allow the exclusion or limitation of incidental, consequential or other damages, so these limitations and exclusions may not apply to you. -
Page 49: Technical Information
Technical information Technical data Height: 32 1/4 - 34 1/3" (819-872 mm) Width: 23 1/2'' (596 mm) Depth: 21 13/16'' (554 mm) Weight: 100 lb (45 kg) Water pressure: 4.2-140 psi (0.03-1.0 MPa) Electrical connection: See serial number plate Rated power: See serial number plate 24'' (609 mm) with the trim kit. - Page 50 US.ASKO.COM • CA.ASKO.COM • ASKO.COM/MX 878505 We reserve the right to make changes.