
Related Manuals for Vax SLIMVAC Pro


Summary of Contents for Vax SLIMVAC Pro
- Page 1 SLIMVAC Pro CORDLESS VACUUM POWERFUL LIGHTWEIGHT EFFORTLESS USER GUIDE LET’S GET STARTED. VSV21W VSV21X vax.com.au VSV21Y vax.co.nz VSV21Z...
- Page 2 Let’s talk safety This vacuum cleaner is intended for household use only and NOT for commercial or industrial use. READ ALL THE INSTRUCTIONS BEFORE USING THIS APPLIANCE. • This appliance is battery-operated, and the battery is charged whilst inside the Basic appliance.
- Page 3 • Do not use charger with damaged cord or plug. If appliance or charger is not working as it should, has been dropped, damaged, left outdoors or dropped into water, take it to a Vax authorised repair agent prior to continuing use. Please contact our Customer Care Line on: AU: 1300 829 287 / NZ: 0800 829 695 or visit www.vax.com.au / vax.co.nz for your nearest Vax authorised repair agent.
- Page 4 Thank you for purchasing the SLIMVAC Pro The SLIMVAC Pro series is designed to make vacuuming carpets and hard floors as easy and convenient as possible, this user guide will help you get the most out of your machine. Maintaining your carpets and hard floors will not only keep them clean but will ensure that they keep their appearance for longer.
- Page 5 Included with your machine Let’s talk safety SLIMVAC Pro VSV21W Getting to know your machine 3-in-1 Tool Getting started SLIMVAC Pro Plus VSV21X Using your machine Taking care of your machine 3-in-1 Tool Long Crevice Tool What to do if it goes wrong...
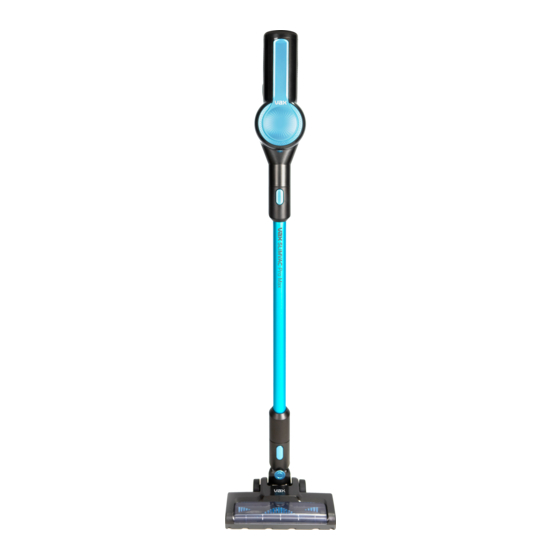
- Page 6 Run Time: Up to 37 minutes VSV21W - VAX SLIMVAC Pro Weight: 2.3kg SLIMVAC Pro/SLIMVAC Pro Plus/ VSV21X - VAX SLIMVAC Pro Plus SLIMVAC Pro Pet/SLIMVAC Pro Max Dust Bin Capacity: 400ml VSV21Y - VAX SLIMVAC Pro Pet Charge Time: 5 Hours Battery Voltage: 21.6V Li-ion...
- Page 7 Getting started PLEASE READ ‘LET’S TALK SAFETY’ AT THE BEGINNING BEFORE USE Before you begin CAUTION: Always switch off the vacuum cleaner before connecting or disconnecting the handheld/attachments or removing and emptying the dust bin. IMPORTANT: The vacuum cleaner is equipped with overheat protection. If for any reason the vacuum cleaner does overheat the thermostat will automatically turn the vacuum cleaner off.
- Page 8 Getting started Installing the wall mount NOTE: The wall mount should be installed near a power supply where the charger cord can extend from the vacuum down to the plug in the wall. IMPORTANT: The wall mount is not designed to hold the full weight of the vacuum. The floor head should be positioned flat on the surface of the floor to support the weight of the vacuum while the wall mount positions the vacuum in the upright position.
- Page 9 Getting started PLEASE READ ‘LET’S TALK SAFETY’ BEFORE USE CAUTION: The battery used in this device may present a risk of fire or chemical burn if mistreated. risk of fire and burns. Do not disassemble, crush, incinerate or expose to high temperatures above 38°C. The battery is not a replaceable part.
- Page 10 Getting started Charging the battery WARNING: Do not attempt to use the vacuum cleaner when the machine is plugged in and charging. WARNING: For best performance the charging port must be clean and free from dust and dirt. The life expectancy of the battery will vary depending on the usage of the vacuum cleaner.
- Page 11 Using your machine CAUTION: This vacuum cleaner has a constantly rotating brushbar, which is activated when the vacuum is switched on. Never leave the vacuum cleaner in one spot for an extended period of time as this may damage the floor surface. CAUTION: Ensure that the vacuum is switched off before performing maintenance or troubleshooting checks.
- Page 12 Using your machine Using as a handheld vacuum cleaner CAUTION: Always take extra care when using the vacuum cleaner on the stairs. Ensure that the vacuum is switched off before fitting or removing accessories. NOTE: Accessories vary dependant on model purchased. Press the Handheld Choose an accessory The 3-in-1 Tool easily...
- Page 13 Using your machine Emptying the dust bin WARNING: Don’t over fill the dust bin to avoid blocking the air flow through the vacuum cleaner. Do not exceed the MAX line indicated on the side of the dust bin. Press the Handheld Hold the handheld over Release Button.
- Page 14 Taking care of your machine Cleaning and replacing the filter CAUTION: Ensure that the vacuum is switched off before performing maintenance or troubleshooting checks. For continuous best performance, the filter should be tapped over a bin every 4-6 uses, to remove dirt and debris, and replaced every 6-9 months, depending upon use.
- Page 15 Taking care of your machine IMPORTANT: If the brushbar has been obstructed, the Motor Protection Sensor may have been activated and the brushbar will stop. Remove the floor head from the machine and clear any obstruction. Refit the floor head, switch on the vacuum cleaner by pressing the trigger.
- Page 16 Taking care of your machine Removing and replacing the microfibre hard floor head brushbar IMPORTANT: For best performance, regularly remove any threads or hair from around the brushbar. Switch off the vacuum Using scissors, carefully When re-fitting the and press the Floor remove any threads or brushbar fit the right Head Release Button to...
- Page 17 Taking care of your machine Removing blockages from floor heads and mini motorised tool Remove the brushbar from the floor head and mini motorised tool and check for any blockages. Use a blunt object to remove the blockage. NOTE: Contents vary dependant on model purchased.
- Page 18 What to do if it goes wrong Problem Solution • Check the contents panel on the box to make sure the part is included with your vacuum cleaner. Is there an accessory missing? • The machine, floor head and reach wand may not be correctly fitted. Go to ‘Getting Started’.
- Page 19 Notes...
- Page 20 Distributed By: Techtronic Industries Australia Pty Ltd 31 Gilby Road, Mount Waverley, VIC 3149, Melbourne, Australia Careline AU: 1300 VAX AUS (1300 829 287) www.vax.com.au Techtronic Industries N.Z. Limited Unit C, 70 Business Parade South, Highbrook, Auckland, 2013, New Zealand...