Table of Contents
Advertisement
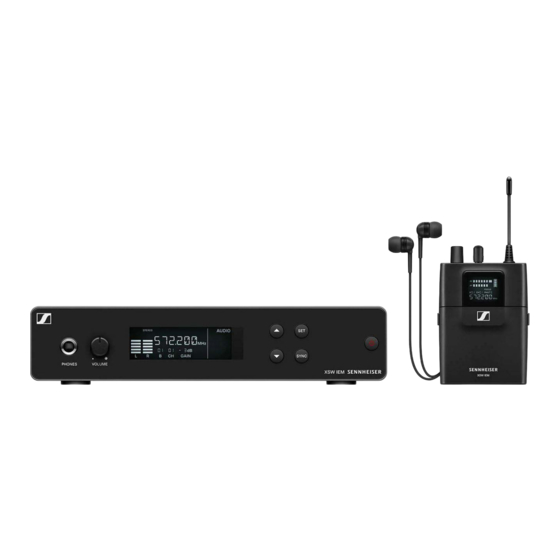
XS Wireless IEM
Instruction Manual
(PDF export of the original HTML manual)
This PDF document is a PDF export of an interactive manual in HTML format.
When displayed in PDF format, it is possible that not all content and interactive
elements in the HTML instructions are included, as these cannot be displayed in
PDF format.
We recommend using the complete and interactive HTML instructions.
You can find these in the Sennheiser Documentation App, which is available free of
charge for iOS and Android. Alternatively, the HTML instructions are also available
in the download area of the product page:
www.sennheiser.com/xsw-iem
Sennheiser electronic GmbH & Co. KG
Am Labor 1, 30900 Wedemark, Germany, www.sennheiser.com
XS Wireless IEM - v1.0, 02/2022
Advertisement
Table of Contents

Related Manuals for Sennheiser XSW IEM Series


Summary of Contents for Sennheiser XSW IEM Series
- Page 1 PDF format. We recommend using the complete and interactive HTML instructions. You can find these in the Sennheiser Documentation App, which is available free of charge for iOS and Android. Alternatively, the HTML instructions are also available in the download area of the product page: www.sennheiser.com/xsw-iem...
-
Page 2: Product Information
PRODUCT INFORMATION This manual contains information on the individual products in the XSW IEM series, the available accessories and the fre- quency bank system. XSW IEM series products Accessories The frequency bank system... - Page 3 XSW IEM series products XSW IEM series products The XSW IEM series of products includes the rack-mounted XSW IEM SR transmitter in a sturdy metal housing, the light- weight XSW IEM EK bodypack receiver, and the IE 4 in-ear monitoring headphones with natural sound and excellent pro- tection against background noise.
- Page 4 XSW IEM EK – bodypack receiver XSW IEM EK – bodypack receiver FOCUS 548.100 The XSW IEM EK is a sturdy bodypack receiver for in-ear mon- itoring with reliable IE 4 in-ear monitoring earphones. The re- ceiver has an infrared connection for easy and versatile synchronization with the XSW IEM transmitter.
- Page 5 Accessories Accessories A variety of accessories are available for the XSW IEM series. Earphones IE 4 Art. no. 500432 Earphones for use with wireless monitor systems. The IE 4 feature excellent sound and dynamic range. They have inter- changeable earpieces to fit different sized ear canals. This provides good insulation against background noise and excep- tionally good bass response for this type of receiver.
- Page 6 Earphones Other compatible earphones IE 100 PRO For the demanding requirements of the live stage: With a new- ly developed dynamic driver, the IE 100 PRO guarantees pre- cise acoustic reproduction for live sessions and sets. The innovative new membrane delivers powerful, warm and detail- rich sound.
- Page 7 Earphones IE 400 PRO The warm sound and rich punch of the IE 400 PRO in-ear mon- itors make them the right choice for professionals who want studio-quality sound on the stage. The IE 400 PRO delivers warm sound without artifacts or distortion even at high sound pressure levels.
- Page 8 Earphones IE 500 PRO High-resolution sound down to the finest details and precise imaging, even at extreme sound pressure levels: the low im- pedance IE 500 PRO combines enormous power with un- matched clarity for any venue or stage in the world. The double-stranded cable allows it to handle extremely high vol- umes.
- Page 9 Earphones noise • Stage-proof cable concept with innovative new sheath (pat- ent pending)
-
Page 10: Power Supply Unit
Antennas Antennas BNC antenna Art. no. 522419 Power supply unit NT 12-5-CW Art. no. 507352 Power supply unit for the XSW 1, XSW 2, XSW IEM and ew G4 100 series. All adapters included (EU, US, UK, Korea, Australia, China). -
Page 11: Mounting Hardware
Mounting hardware Mounting hardware XSW Rack Mount Kit Art. no. 507351 Rack mount kit for XSW IEM and XSW 2 Antenna front mount kit for XSW IEM Art. no. 507468 Antenna front mount kit for installing antenna connectors on the front of the rack when using an XSW IEM together with the XSW rack mount kit... -
Page 12: Receiver Accessories
Receiver accessories Receiver accessories XSW IEM belt clip Art. no. 592582 Belt clip for the XSW IEM EK receiver with two plastic fasten- ers. -
Page 13: The Frequency Bank System
Please note the country-specif i c fr equency r anges o f pub - lic and private TV stations. - Page 14 The frequency bank system BRAZIL 476- 572-596 662- 823.2- 925.2- 831.8 937.3 CHINA 476- 572-596 662- 823.2- 925.2- 831.8 937.3 SINGAPORE 476- 572-596 662- 823.2- 925.2- 831.8 937.3 PHILIPPINES 476- 572-596 662- 823.2- 925.2- 831.8 937.3 MALAYSIA 476- 572-596 662- 823.2- 925.2- 831.8...
-
Page 15: United Arab Emirates
The frequency bank system ISRAEL 476- 572-596 662- 823.2- 925.2- 831.8 937.3 QATAR 476- 572-596 662- 823.2- 925.2- 831.8 937.3 UNITED ARAB EMIRATES 476- 572-596 662- 823.2- 925.2- 831.8 937.3 SAUDI ARABIA 476- 572-596 662- 823.2- 925.2- 831.8 937.3 AUSTRALIA 476- 572-596 662-... -
Page 16: South Korea
The frequency bank system NEW ZEALAND 476- 572-596 662- 823.2- 925.2- 831.8 937.3 RUSSIA 476- 572-596 662- 823.2- 925.2- 831.8 937.3 INDONESIA 476- 572-596 662- 823.2- 925.2- 831.8 937.3 VIETNAM 476- 572-596 662- 823.2- 925.2- 831.8 937.3 SOUTH KOREA 476-500 572-596 662-686 823.2-... - Page 17 INSTRUCTION MANUAL Starting up and using the devices Starting up the devices Using the devices Establishing a radio link Synchronizing devices Cleaning and maintaining the devices...
- Page 18 Starting up the devices Starting up the devices You can find information about installing and connecting XSW IEM series devices in the following sections. MONO STEREO AUDIO PEAK PEAK 572.200 PRESET TUNE 00 00 -00 GAIN SYNC SYNC PHONE VOLUME...
- Page 19 Starting up the devices Starting up the XSW IEM SR Connectors on the rear of the device XSW IEM SR rear side product overview Strain relief for the connection cable of the power supply unit • See Connecting/disconnecting the XSW IEM SR with/ from the power supply DC In socket •...
- Page 20 Starting up the devices Connecting/disconnecting the XSW IEM SR with/from the power supply Only use the supplied power supply unit. It is designed for your transmitter and ensures safe operation. You can f i nd the suitable power supply unit under Accessories. To connect the XSW IEM SR transmitter to the power sup- ply: Insert the plug of the power supply unit into the DC IN sock-...
-
Page 21: Connecting Audio Signals
Starting up the devices Connecting audio signals You can connect two mixed mono signals using the two input jacks Left/Mono and Right Input. To do so, the XSW IEM SR must be configured for Mono or Stereo operation in the AUDIO menu. See Configuring the au- dio transmission mode (mono/stereo) In stereo mode, you can receive the two input signals ei- ther as a mixed mono signal or as a stereo signal. - Page 22 Starting up the devices Stereo 6.3 mm XLR-3 Connect the output of an external device (e.g. a mixing con- ▷ sole or another XSW IEM SR) to the audio input sockets BAL AF In Left/Mono and BAL AF In Right Input using suitable cables.
-
Page 23: Connecting Rod Antennas
Here, the original HTML instructions include an animated illus- tration which is not supported by the PDF format. Open the HTML instructions in the Sennheiser Documentation App or on the Sennheiser website to display the animation: https://www.sennheiser-sites.com/responsive-manuals/ XSW_IEM/EN/index.html For more information on mounting antennas on a rack... - Page 24 Starting up the devices Installing the XSW IEM SR in a rack Caution! Rack mounting poses risks When installing the device in a closed 19" rack or multi-rack assembly, please consider that, during operation, the ambient temperature, the mechanical load and the electrical potentials will be different from those of devices which are not mounted into a rack.
- Page 25 Here, the original HTML instructions include an animated illus- tration which is not supported by the PDF format. Open the HTML instructions in the Sennheiser Documentation App or on the Sennheiser website to display the animation: https://www.sennheiser-sites.com/responsive-manuals/ XSW_IEM/EN/index.html To attach the blanking plate to one of the mounting brack-...
- Page 26 Here, the original HTML instructions include an animated illus- tration which is not supported by the PDF format. Open the HTML instructions in the Sennheiser Documentation App or on the Sennheiser website to display the animation: https://www.sennheiser-sites.com/responsive-manuals/ XSW_IEM/EN/index.html Slide the transmitter with the mounted blanking plate into ▷...
- Page 27 Starting up the devices Starting up the XSW IEM EK Inserting and removing the batteries/re- chargeable batteries You can use the receiver with batteries (AA, 1.5 V). Press the two catches and open the battery compartment ▷ cover. Insert the batteries or the rechargeable battery as shown ▷...
- Page 28 Animation: “Connecting earphones” Here, the original HTML instructions include an animated illus- tration which is not supported by the PDF format. Open the HTML instructions in the Sennheiser Documentation App or on the Sennheiser website to display the animation: https://www.sennheiser-sites.com/responsive-manuals/ XSW_IEM/EN/index.html...
-
Page 29: Replacing The Belt Clip
Starting up the devices Attaching the receiver to your clothing You can use the belt clip to attach the receiver to your waist- band or on a guitar strap. The belt clip is secured so that it can- not slide out of its fixing points accidentally. Replacing the belt clip To replace the belt clip, you will need the following materi- als:... - Page 30 Here, the original HTML instructions include an animated illus- tration which is not supported by the PDF format. Open the HTML instructions in the Sennheiser Documentation App or on the Sennheiser website to display the animation: https://www.sennheiser-sites.com/responsive-manuals/ XSW_IEM/EN/index.html During disassembly, press one side of the clip firmly against...
- Page 31 Here, the original HTML instructions include an animated illus- tration which is not supported by the PDF format. Open the HTML instructions in the Sennheiser Documentation App or on the Sennheiser website to display the animation: https://www.sennheiser-sites.com/responsive-manuals/ XSW_IEM/EN/index.html Installing the belt clip...
-
Page 32: Using The Devices
Using the devices Using the devices You can find information about installing and connecting XSW IEM series devices in the following sections. MONO STEREO AUDIO PEAK PEAK 572.200 PRESET TUNE 00 00 -00 SYNC SYNC GAIN PHONE VOLUME XSW IEM... - Page 33 Using the devices Using the XSW IEM SR Controls on the XSW IEM SR transmitter MONO STEREO AUDIO PEAK PEAK 572.200 PRESET TUNE 00 00 -00 SYNC SYNC GAIN PHONE VOLUME XSW IEM Headphone socket • See Using the headphone output Volume control for the headphone socket •...
- Page 34 Using the devices Switching the XSW IEM SR on and off To switch on the transmitter: Short-press the STANDBY button. ▷ The transmitter switches on and the standard display ap- pears. To switch the transmitter to standby mode: Press and hold the STANDBY button until OFF appears on ▷...
-
Page 35: Using The Headphone Output
Animation: “Connecting headphones” Here, the original HTML instructions include an animated illus- tration which is not supported by the PDF format. Open the HTML instructions in the Sennheiser Documentation App or on the Sennheiser website to display the animation: https://www.sennheiser-sites.com/responsive-manuals/ XSW_IEM/EN/index.html... - Page 36 Using the devices Displays on the XSW IEM SR transmitter MONO STEREO AUDIO 572.200 PRESET TUNE 01 01 SYNC GAIN ► ► Mono/stereo settings • See Configuring the audio transmission mode (mono/ stereo) Menu settings Audio sensitivity (GAIN) • See Setting the input sensitivity (GAIN) Frequency bank (CH) •...
- Page 37 Using the devices Buttons for navigating the XSW IEM SR menu DOWN SYNC SYNC STANDBY To open the menu: Press the UP or DOWN button to navigate through the ▷ menu. Press the SET button to open the menu. ▷ The setting for the selected menu flashes.
-
Page 38: Setting Options In The Menu
Using the devices Setting options in the menu AUDIO Configuring the audio transmission mode (mono/stereo) Setting the input sensitivity (GAIN) PRESET Selecting the frequency bank on the transmitter Selecting the frequency channel on the transmitter TUNE Setting the frequency on the transmitter Configuring the audio transmission mode (mono/stereo) Under audio transmission mode, you can adjust the assign-... - Page 39 Using the devices To set the audio transmission mode to stereo/mono: Press the UP or DOWN button to access the AUDIO menu. ▷ Press the SET button to open the Stereo/Mono menu. ▷ The setting for the selected menu flashes. Press the UP or DOWN button to change the set values.
- Page 40 Using the devices Possible settings: MONO Only the transmitter’s left audio input is transmitted. The re- ceiver receives the signal as a mixed mono signal in both the left and right channels and reproduces it the same for both ears. The FOCUS setting has no function in the mono configuration.
- Page 41 Using the devices You can use the Focus (Setting the FOCUS) and Panorama (see Panorama setting) functions to control the volume distribution on individual channels. Example: There are two artists on stage. You set the audio transmission mode to “Stereo” and assign the audio inputs as follows: •...
- Page 42 Using the devices Setting the input sensitivity (GAIN) In this menu item, you can set the input sensitivity. Setting range: • 0 dB to 21 dB in 3 dB steps Set the input sensitivity (GAIN) on the transmitter so that the level shown on the display does not reach the maximum de- flection (PEAK).
- Page 43 Using the devices Selecting the frequency bank on the trans- mitter In this menu item, you can select the frequency bank. Please note the country-specific frequency ranges of public and private TV stations. Depending on where the transmitter is used, you are likely to find free frequencies within the fol- lowing channel banks: •...
- Page 44 Using the devices Selecting the frequency channel on the trans- mitter In this menu item, you can select the transmission channel. Before using the device, check whether there are interfer- ing frequencies in your area (Finding an interference-free frequency (frequency test)) and then carry out a sound- check (Performing a soundcheck).
- Page 45 Using the devices Setting the frequency on the transmitter Under the frequency menu item, you can manually set the transmission frequency. Before using the device, check whether there are interfering frequencies in your area (Finding an interference-free fre- quency (frequency test)) and then carry out a soundcheck (Performing a soundcheck).
- Page 46 Using the devices Using the XSW IEM EK Controls on the XSW IEM EK receiver UP/DOWN buttons • See Buttons for navigating through the menu SET button • Buttons for navigating through the menu Volume control with on/off switch • Switch the receiver on/off See Switching the XSW IEM EK on and off PHONES 3.5 mm jack socket •...
- Page 47 Using the devices Switching the XSW IEM EK on and off CAUTION! Danger due to high volume levels! Subjecting your ears to sudden, loud volumes can permanent- ly damage your hearing. Turn down the volume of the receiver before inserting the ▷...
- Page 48 Using the devices To switch the receiver off: Turn the volume control counterclockwise until it clicks. ▷ The red LED will go out. The receiver shows the status OFF on the display panel and switches off.
- Page 49 Using the devices LED indicators on the XSW IEM EK The LED indicators on the receiver show the current operating status, battery status and wireless reception status. The fol- lowing statuses are possible: Red [flashing steadily]: critical battery status Red [constant light]: no wireless reception Green [constant light]: wireless reception OK Yellow [pulsing]: audio level Yellow [constant light]: audio level too high...
- Page 50 Using the devices Displays on the XSW IEM EK display panel ► FOCUS 548.100 Frequency • Current receiving frequency • See Setting the frequency on the transmitter Frequency bank (B) • See Finding an interference-free frequency (frequency test) Limiter (LIM) •...
- Page 51 Using the devices Battery indicators on the XSW IEM EK You can see the current charging status of the batteries on the receiver’s display panel. Charging status of the batteries: Charging status is critical (LOW BATT) When the battery charge reaches a critical level, the battery icon flashes on the display panel and a red LED indicator flash- es on the receiver.
-
Page 52: Buttons For Navigating Through The Menu
Using the devices Buttons for navigating through the menu The following buttons are located on the XSW IEM EK receiv- DOWN • You can use the UP and DOWN buttons to adjust the set values. • Press the SET button to open each menu item in succes- sion. - Page 53 Using the devices Finding an interference-free frequency (fre- quency test) You can perform a frequency test to check whether there are interfering frequencies in your area, without the help of anoth- er person. Caution! Danger due to high volume levels! Subjecting your ears to sudden, loud volumes can permanent- ly damage your hearing.
- Page 54 Using the devices The receiver shows no deflection in the RF signal level: There is no interference at the selected frequency. This fre- quency is interference free. Make sure that no AF audio level is displayed. ▷ Synchronize the selected frequency with the transmitter ▷...
- Page 55 (frequency test)) and then carry out a soundcheck (Performing a soundcheck). Frequency tables for all available frequency ranges can be found on the download page of the Sennheiser website at www.sennheiser.com/download. To set the frequency bank: Press the SET button repeatedly until the B display flashes.
- Page 56 (frequency test)) and then carry out a soundcheck (Performing a soundcheck). Frequency tables for all available frequency ranges can be found on the download page of the Sennheiser website at www.sennheiser.com/download. To set the frequency channel: Press the SET button repeatedly until the CH display flash- ▷...
- Page 57 Using the devices Setting the frequency on the receiver You can set the receiving frequency manually under the fre- quency menu item. Before using the device, check whether there are interfering frequencies in your area (Finding an interference-free fre- quency (frequency test)) and then carry out a soundcheck (Performing a soundcheck).
- Page 58 Using the devices Performing a soundcheck A soundcheck lets you test whether the transmission quality is sufficient over the entire area where you want to use the re- ceiver, without the help of another person. CAUTION! Danger due to high volume levels! Subjecting your ears to sudden, loud volumes can permanent- ly damage your hearing.
- Page 59 Using the devices Check that the antennas and the antenna cables are cor- ▷ rectly connected to the transmitter Move the transmitter to a better location ▷ If necessary, use an antenna booster ▷ AF audio level (audio frequency) • Displays the audio level of the received transmitter •...
- Page 60 Using the devices Setting the limiter (LIM) Under the limiter menu item, you can adjust the volume of the PHONES headphones output. When set to ON, the volume is reduced by 10 dB. Setting range: • ON (-10 dB) • OFF ►...
- Page 61 Using the devices Setting the high boost / equalizer Under the equalizer menu item, you can adjust the treble boost of the output signal. Setting range: • 10 dB at 13 kHz Values: • ON • OFF To switch the equalizer on or off: Press the SET button repeatedly until the EQ display flash- ▷...
-
Page 62: Setting The Focus
Using the devices Setting the FOCUS In stereo mode, the FOCUS function controls the signal re- ceived from the transmitter at the receiver. The FOCUS setting has no function in the mono conf i gu - ration. The signals at the receiver are reproduced either as mixed mono signals (FOCUS ON) or as mixed stereo signals (FOCUS OFF). - Page 63 Using the devices Possible settings: FOCUS ON With the FOCUS ON setting, the two audio channels are added and arrive at the listener’s left and right ears as mixed mono signals. The PAN function lets you adjust the mixing of the in- coming mono signals.
- Page 64 Using the devices • Artist B (vocals) changes the panorama value on her receiv- er and shifts the mixed mono signal to the right channel (PAN R9). With this setting, artist B hears only herself in both ears. STEREO PANORAMA FOCUS FOCUS FOCUS...
- Page 65 Using the devices FOCUS OFF With the FOCUS OFF setting, the two audio channels arrive at the listener as mixed stereo signals. You can use the panorama function (PAN) to adjust the rela- tive mixing of the stereo signals (comparable to controlling the volume of the right and left channels of the headphones).
- Page 66 Using the devices • Artist B (vocals) changes the panorama value to R9 and thus shifts the volume to the right (PAN R9). With this setting, artist B hears all artists but only in her right ear. STEREO PANORAMA FOCUS L IM FOCUS FOCUS...
- Page 67 Using the devices Panorama setting In the PAN menu item, you can control the volume distribution of an audio signal over two channels. In stereo mode, the FOCUS function controls the signal re- ceived from the transmitter at the receiver. In the mono conf i gur ati on , FOCUS has no function.
- Page 68 Using the devices Panorama function in stereo mode: FOCUS ON With the FOCUS ON setting, the two audio channels are added and arrive at the listener’s left and right ears as mixed mono signals. The PAN function lets you adjust the mixing of the incoming mono signals.
- Page 69 Using the devices FOCUS OFF With the FOCUS OFF setting, the two audio channels arrive at the listener as mixed stereo signals. You can use the PAN function to adjust the relative mixing of the stereo signals (comparable to controlling the volume of the right and left channels of the headphones).
-
Page 70: Establishing A Radio Link
Establishing a radio link Establishing a radio link To establish a radio link between the transmitter and receiver, the same frequency must be set in both devices. Before using the device, check whether there are interfering frequencies in your area (Finding an interference-free frequency (frequency test)) and then carry out a soundcheck (Performing a sound- check). -
Page 71: Synchronizing Devices
Synchronizing devices Synchronizing devices You can synchronize the XSW IEM transmitter and receiver using the infrared interfaces. The channel selected on the transmitter is transmitted to the receiver. To synchronize the devices, ensure that no menu is selected on the transmitter (no values flashing). Before using the de- vice, check whether there are interfering frequencies in your area (Finding an interference-free frequency (frequency test)). - Page 72 Synchronizing devices ≤ 10 cm ≤ 4" SYNC 0.2s 0.1s To cancel synchronization: Press either the SET button, the UP button or the DOWN ▷ button on the transmitter. The transmitter reverts to the default display.
- Page 73 Cleaning and maintaining the devices Cleaning and maintaining the devices Note the following information when cleaning and maintaining XSW IEM series products. CAUTION! Liquids can damage the products’ electronics. Liquids entering the product housing can cause a short-circuit and damage the electronics.
-
Page 74: Frequently Asked Questions
FREQUENTLY ASKED QUESTIONS This section contains answers to frequently asked questions and further information about the following topics: Radio and frequencies Audio Usability Accessories... - Page 75 Radio and frequencies Radio and frequencies Why won’t my transmitter synchronize with my receiver? • To synchronize the devices, ensure that no menu is selected on the transmitter (no values flashing). • The receiver’s battery compartment must be open. • The distance between the transmitter and receiver should be approx.
- Page 76 Radio and frequencies The display on the receiver shows radio levels even though the paired transmitter is not switched on • The selected frequency has interference. This means that this frequency or a nearby frequency is already in use in your area.
- Page 77 Audio Audio What other in-ear earphones can I use with my receiver? • See https://www.sennheiser.com/in-ear-monitoring What other devices can I use with my XSW IEM? • Multiple receivers (XSW IEM EK) can be paired to one trans- mitter (XSW IEM SR) and used simultaneously.
- Page 78 Usability Usability Why won’t my transmitter synchronize with my receiver? • To synchronize the devices, ensure that no menu is selected on the transmitter (no values flashing). • The receiver’s battery compartment must be open. • The distance between the transmitter and receiver should be approx.
- Page 79 WSM or Control Cockpit? • No, that is not possible. Is there an app for the XSW IEM series? • No, there is no app for this series. • There is, however, a documentation app. This app lets you download all available instruction manuals and use them of- fline (details at https://www.sennheiser.com/documenta-...
- Page 80 Usability What is the best way to wear the bodypack transmitter? • Do not kink, bend or cover the antenna • Avoid skin contact with the antenna • If possible, attach it to your clothing with the belt clip...
- Page 81 • Antenna combiner Which antennas can I use with my transmitter? • In principle, you can use all antennas with a BNC connector that cover the frequency ranges of the XSW IEM series (see The frequency bank system) • Recommended Antennas What does the XSW rack mount kit include? •...
- Page 82 Can I use the rack mount kit from my XS Wireless 1 or 2? • Yes, the XS Wireless 1 and 2 rack mount kits (XSW Rack Mount Kit) are compatible with the XSW IEM series and vice versa. Can I replace the belt clip? •...
-
Page 83: Specifications
SPECIFICATIONS In the sections below, you can find information about the dif- ferent variants of the products in the XSW IEM series as well as technical data for the individual products. Variants Frequency tables Specifications Pin assignment... - Page 84 Variants Variants The following sections list the variants of the various products along with the approved frequencies. MONO STEREO AUDIO PEAK PEAK PRESET 572.200 TUNE 00 00 -00 GAIN SYNC SYNC PHONE VOLUME XSW IEM XSW IEM SR variants FOCUS 548.100 XSW IEM EK variants...
- Page 85 Variants XSW IEM SR variants MONO STEREO AUDIO PEAK PEAK 572.200 PRESET TUNE 00 00 -00 SYNC SYNC GAIN PHONE VOLUME XSW IEM XSW IEM SR-A | 476 – 500 MHz | Art. no. 509151 XSW IEM SR-B | 572 – 596 MHz | Art. no. 509152 XSW IEM SR-C | 662 –...
- Page 86 Variants XSW IEM EK variants FOCUS 548.100 XSW IEM EK-A | 476 – 500 MHz | Art. no. 509156 XSW IEM EK-B | 572 – 596 MHz | Art. no. 509157 XSW IEM EK-C | 662 – 686 MHz | Art. no. 509158 XSW IEM EK-E | 823.2 –...
- Page 87 Specifications Specifications You can find the cross-system and product-specific technical data in the sections below. MONO STEREO AUDIO PEAK PEAK 572.200 PRESET TUNE 00 00 -00 SYNC SYNC GAIN PHONE VOLUME XSW IEM Specifications of XSW IEM SR FOCUS 548.100 Specifications of XSW IEM EK...
- Page 88 Specifications Specifications of XSW IEM SR MONO STEREO AUDIO PEAK PEAK 572.200 PRESET TUNE 00 00 -00 SYNC SYNC GAIN PHONE VOLUME XSW IEM RF characteristics Modulation type FM broadband stereo Reception frequency ranges: A: 476 – 500 MHz B: 572 – 596 MHz C: 662 –...
- Page 89 Specifications AF input BAL AF In L (I) + MONO/ BAL AF In R (II)2x XLR-3/6.3 mm jack combo socket (1/4"), electronically balanced Total harmonic distortion (at 1 kHz and nominal deviation) < 0.9% Signal-to-noise ratio at nominal load and peak deviation ≥...
- Page 90 Specifications Specifications of XSW IEM EK FOCUS 548.100 RF characteristics Modulation type Wideband FM Reception frequency ranges A: 476 – 500 MHz B: 572 – 596 MHz C: 662 – 686 MHz E: 823.2 – 831.8 MHz K: 925.2 – 937.3 MHz Switching bandwidth up to 24 MHz Nominal/peak deviation...
- Page 91 Specifications AF characteristics Signal-to-noise ratio (1 mV, peak deviation) ≥ 88 dB Audio THD ≤ 1% Output power 2 x 1.25 Veff at 16 Ω High boost +10 dB at 13 kHz Limiter -10 dB Frequency response 45 Hz to 15 kHz Cross talk (50 Hz –...
- Page 92 Specifications Nominal voltage Battery: 3 V Rechargeable battery: 2.4 V Operating time approx. 6 hours (depending on volume) Dimensionsapprox. 95 × 70 × 26 mm (1 3/4" x 3 7/8" x 7 3/16") Weight (with batteries) Approx. 110 g...
-
Page 93: Frequency Tables
Frequency tables Frequency tables Frequency tables for all available frequency ranges can be found on the download page of the Sennheiser website at www.sennheiser.com/download. Enter XSW IEM in the search bar to show the frequency tables. There may be special conditions and restrictions for using fre- quencies in your country. -
Page 94: Pin Assignment
Pin assignment Pin assignment 3.5 mm stereo jack plug • Plug for headphone and earphone cables, e.g. IE 4 • Connect to: XSW IEM EK 6.3 mm stereo jack plug, balanced (audio in/loop out) Connect to: • XSW IEM SR Audio In •... - Page 95 Pin assignment XLR-3 plug, balanced Hollow jack plug for power supply...